Engineering Principles and Applications Welcome to ENGINEERING PRINCIPLES




- Slides: 76

Engineering Principles and Applications Welcome to ENGINEERING PRINCIPLES AND APPLICATIONS. Upon entering the class please have a seat towards front of the class (Do not move chairs from one table to another).

AND PROCEDURES WHILE IN THE TECHNOLOGY/ ENGINEERING LAB. Upon entering class, sit at attendance seat and start daily drill. At end of class please return tools, clean work area and return to attendance seat. Always practice SAFETY FIRST. Refrain from Horseplay No food or drink in Technology Lab / Engineering class This is an ‘upper level’ Technology class, Students are expected to act in a mature and responsible manner. All work is to be turned on at due date.

In your notes please put today’s date then copy the following four terms (be sure to skip two lines between each term). Math – Science – Technology – ENGINEERING – Write a brief one line definition for each term.

Math – use of numbers as tools to solve problems Science – Study of how and why things occur. Technology – use of accumulated knowledge (math and science) to make tools that make work easier and improve life ENGINEERING – Design of technical system.

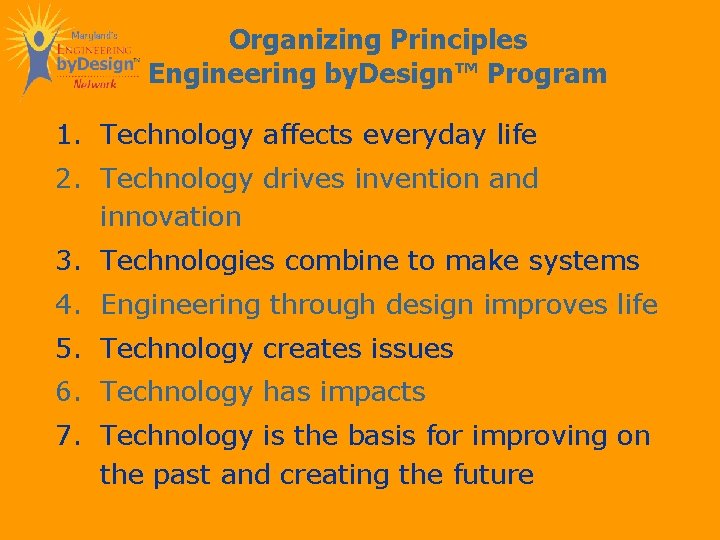
Organizing Principles Engineering by. Design™ Program 1. Technology affects everyday life 2. Technology drives invention and innovation 3. Technologies combine to make systems 4. Engineering through design improves life 5. Technology creates issues 6. Technology has impacts 7. Technology is the basis for improving on the past and creating the future

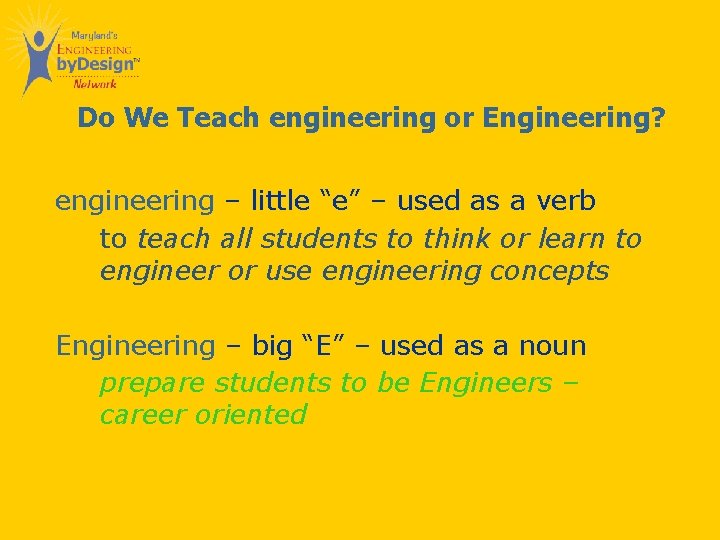
Do We Teach engineering or Engineering? engineering – little “e” – used as a verb to teach all students to think or learn to engineer or use engineering concepts Engineering – big “E” – used as a noun prepare students to be Engineers – career oriented

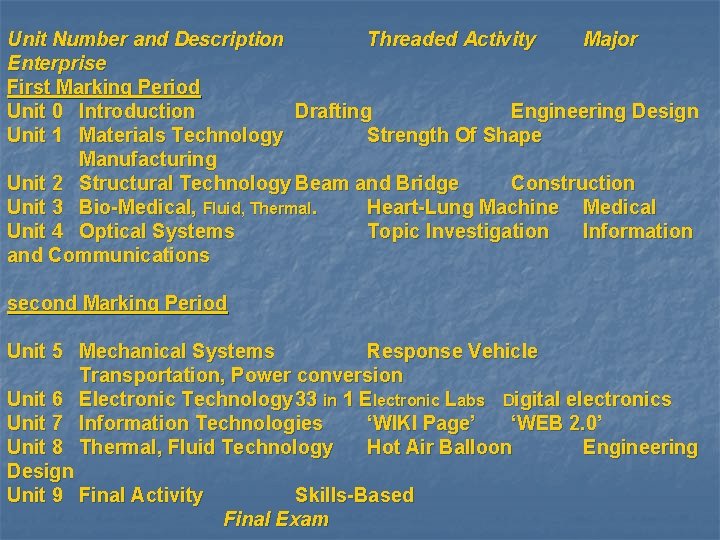
Unit Number and Description Threaded Activity Major Enterprise First Marking Period Unit 0 Introduction Drafting Engineering Design Unit 1 Materials Technology Strength Of Shape Manufacturing Unit 2 Structural Technology Beam and Bridge Construction Unit 3 Bio-Medical, Fluid, Thermal. Heart-Lung Machine Medical Unit 4 Optical Systems Topic Investigation Information and Communications second Marking Period Unit 5 Mechanical Systems Response Vehicle Transportation, Power conversion Unit 6 Electronic Technology 33 in 1 Electronic Labs Digital electronics Unit 7 Information Technologies ‘WIKI Page’ ‘WEB 2. 0’ Unit 8 Thermal, Fluid Technology Hot Air Balloon Engineering Design Unit 9 Final Activity Skills-Based Final Exam

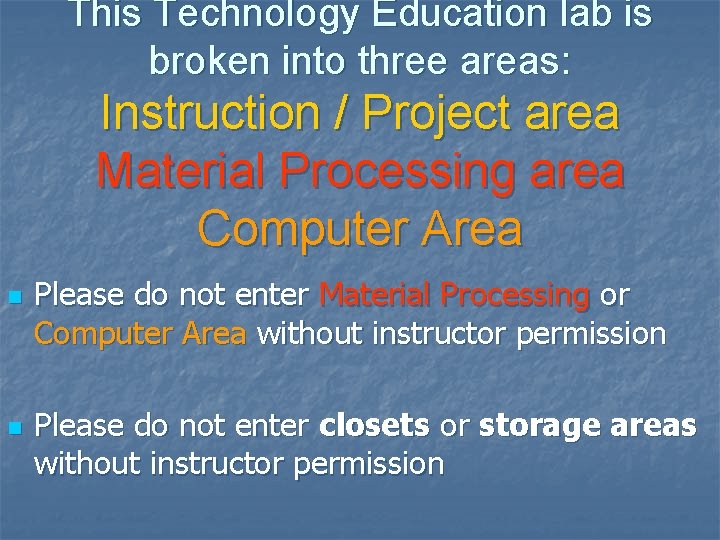
This Technology Education lab is broken into three areas: Instruction / Project area Material Processing area Computer Area n n Please do not enter Material Processing or Computer Area without instructor permission Please do not enter closets or storage areas without instructor permission

Engineering will be a project oriented class. n Projects, called Engineering Challenges, are designed to apply concepts covered in Math (Algebra, Geometry and Calculus) and Science (Physics). n n Class will be structured as follows: Ø Lesson introduction Ø Background Information, research, instruction Ø Design and prototype model development Ø Documentation and data collection Ø Lab clean-up and review

n First Marking Period areas of study will include Ø Drafting and Design Ø Materials and Manufacturing Ø Structural Technology Ø Bio-Medical Systems Ø Optics (Topic Investigation Presentation)

procedures and practices students should follow whenever students are in the Technology Lab : - Upon entering class immediately have a seat and complete daily drill. - Never touch class tools equipment without teacher permission. - Only use equipment that teacher has demonstrated. - Use tools / equipment as directed and for purpose tool is intended. - If you have a question on how to use equipment, tools or how to do a procedure ask for teacher instruction. - Report all damaged/ broken/ malfunctioning equipment to teacher. - Wear safety glasses.

TALL BALL MINI CHALLENGE 3 minutes to discuss challenge 3 minutes thumbnail sketches / brain storming 4 minutes – choose partner – discuss ideas – plan 12 minutes – assemble prototype – test - modify

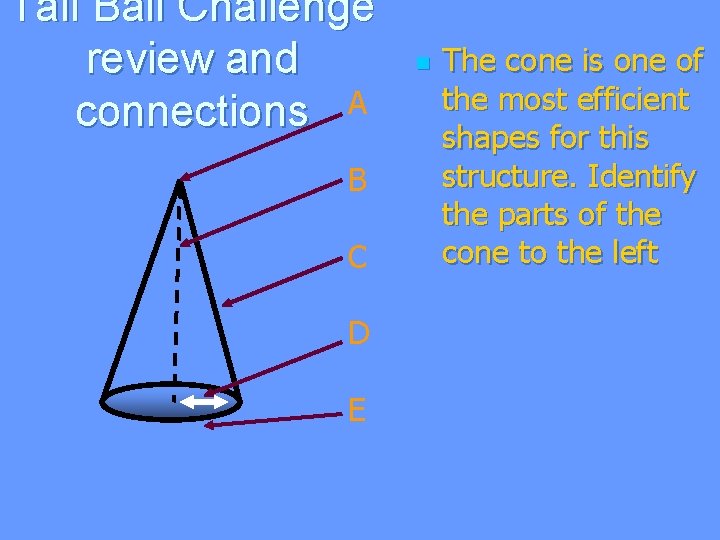
Tall Ball Challenge review and connections A B C D E n The cone is one of the most efficient shapes for this structure. Identify the parts of the cone to the left

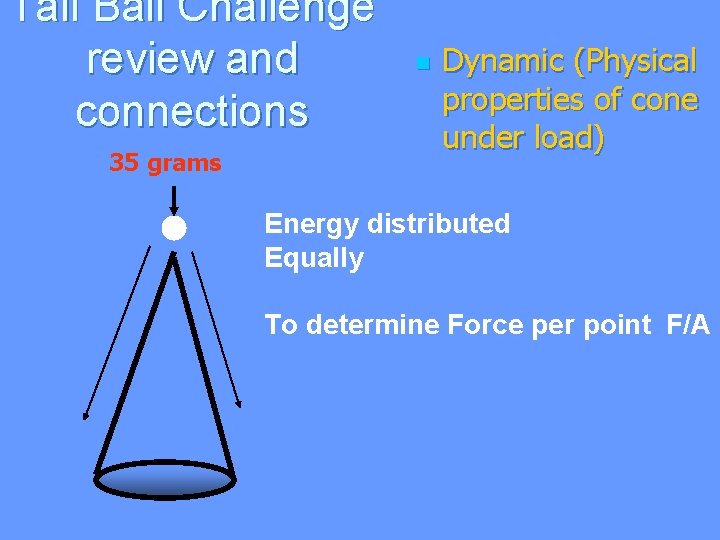
Tall Ball Challenge review and connections 35 grams n Dynamic (Physical properties of cone under load) Energy distributed Equally To determine Force per point F/A

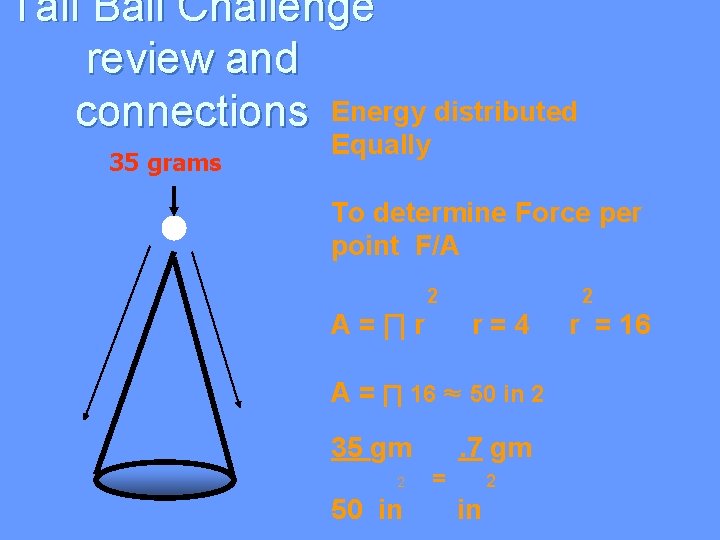
Tall Ball Challenge review and connections Energy distributed 35 grams Equally To determine Force per point F/A 2 A=∏r 2 r=4 A = ∏ 16 ≈ 50 in 2 35 gm 2 50 in . 7 gm = 2 in r = 16

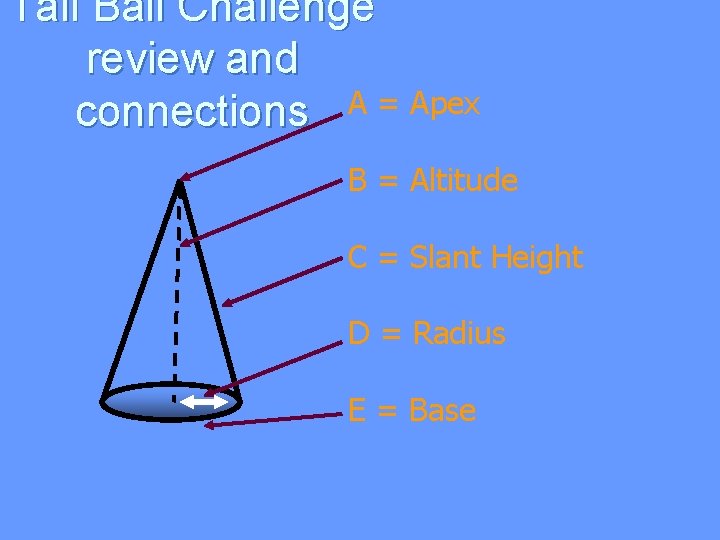
Tall Ball Challenge review and connections A = Apex B = Altitude C = Slant Height D = Radius E = Base

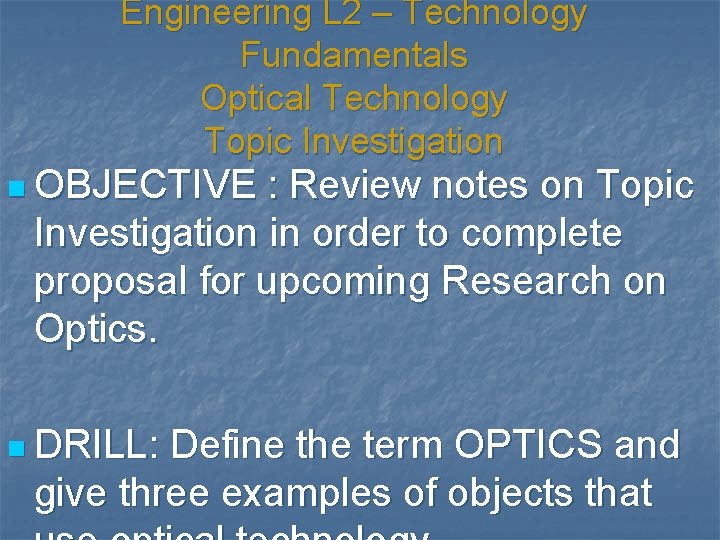
Engineering L 2 – Technology Fundamentals Optical Technology Topic Investigation n OBJECTIVE : Review notes on Topic Investigation in order to complete proposal for upcoming Research on Optics. n DRILL: Define the term OPTICS and give three examples of objects that

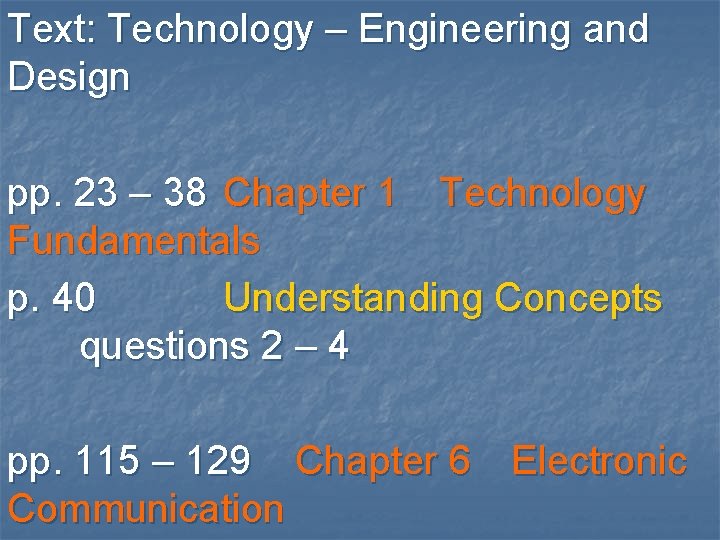
Text: Technology – Engineering and Design pp. 23 – 38 Chapter 1 Technology Fundamentals p. 40 Understanding Concepts questions 2 – 4 pp. 115 – 129 Chapter 6 Electronic Communication

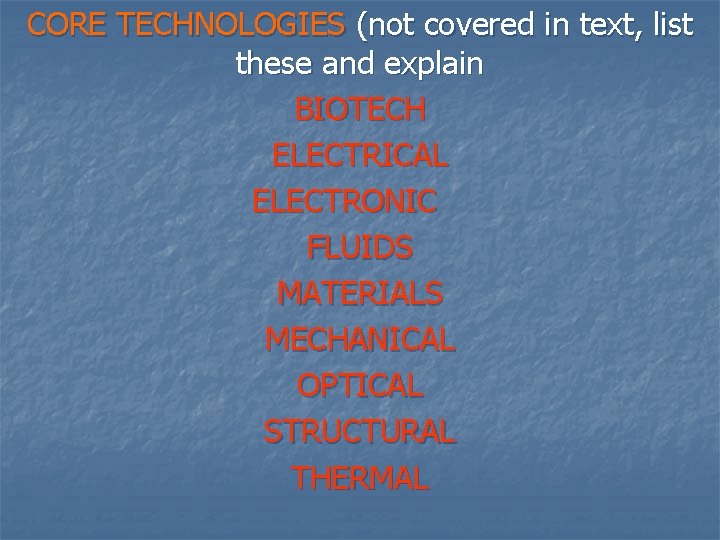
CORE TECHNOLOGIES (not covered in text, list these and explain BIOTECH ELECTRICAL ELECTRONIC FLUIDS MATERIALS MECHANICAL OPTICAL STRUCTURAL THERMAL

Please review information Presented in TOPIC INVESTIGATION PACKET. The packet is designed to help guide you in the process of determining a subject / technological area for your Topic Investigation. You Are to read through the packet then we will go through the packet as a class

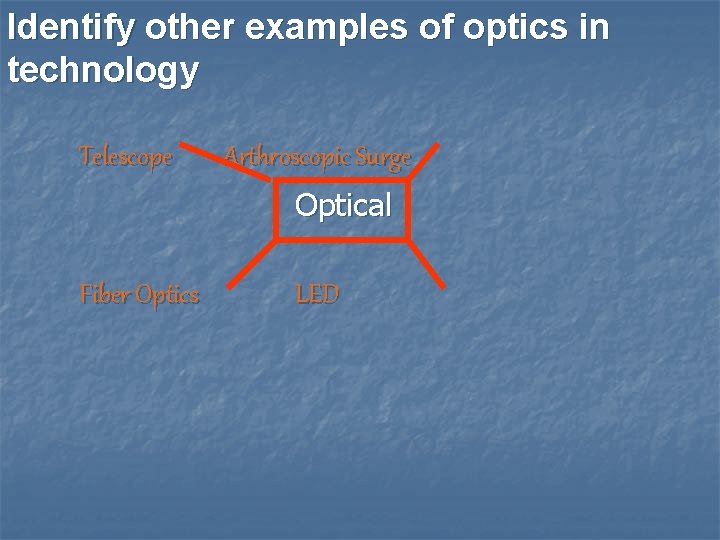
Identify other examples of optics in technology Telescope Arthroscopic Surge Optical Fiber Optics LED

Use the terms / examples created for OPTICAL TECHNOLOGIES to create a TOPIC INVESTIGATION proposal. You are expected to work on the Topic Investigation on your own (as there is very little formal ‘homework’ in this class). We may have days in which we spend a little time working on Topic Investigation, but they will be few and far between. You will be expected to complete your Topic Investigation proposal during today and tomorrow and turn it in at the beginning of class two days from now.

contain (will be grade in) the following: Introduction of topic Introduce points / facts (at least three) Body (Discuss in depth three facts) Summary of report Concluding statement (at

You topic investigation should contain (will be grade in) the following: 3 – 4 pages hand written 6 – 8 double spaced typed Cover page (does not count in page total) Bibliography (not in page total) sketches / pictures (not in

Topic Investigation Timeline milestones (important dates): - Topic Investigation Proposal = Tomorrow - Rough Draft for review = 3 weeks from Friday - Power Point Turned in = 5 weeks from today -Topic Investigation report = 5 weeks from today

You topic investigation should contain the following: Introduction of topic Introduce three key points / facts Discuss each of three facts (Body) Summary of report Concluding statement

Engineering L 3 – Measurement systems and tools Optical Technology Topic Investigation n OBJECTIVE : Identify common measuring tools to measure linear distance as we review text to prepare to set up first drafting drawing n DRILL: How has technological advancement of the last twenty years

Text: Technology (PURPLE TEXT BOOK) pp. 156 – 171 Chapter 1 Technology Fundamentals p. 172 Key Terms Volume, Area p. 172 Test Your Knowledge questions 1, 2, 6

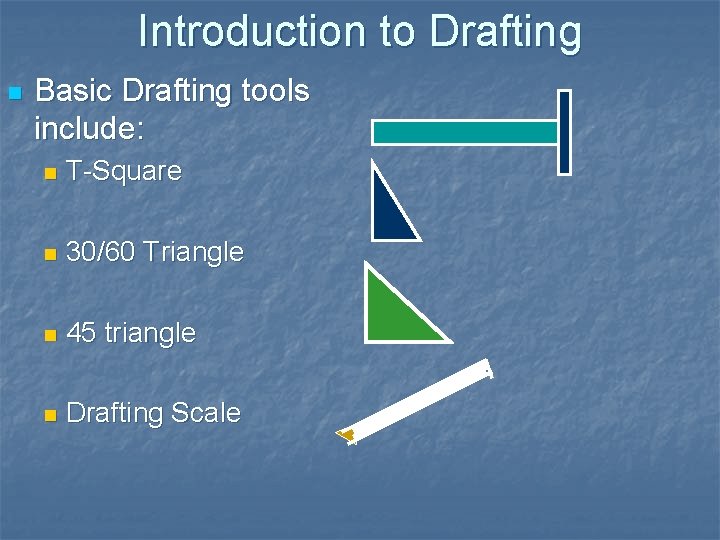
Introduction to Drafting n Basic Drafting tools include: n T-Square n 30/60 Triangle n 45 triangle n Drafting Scale

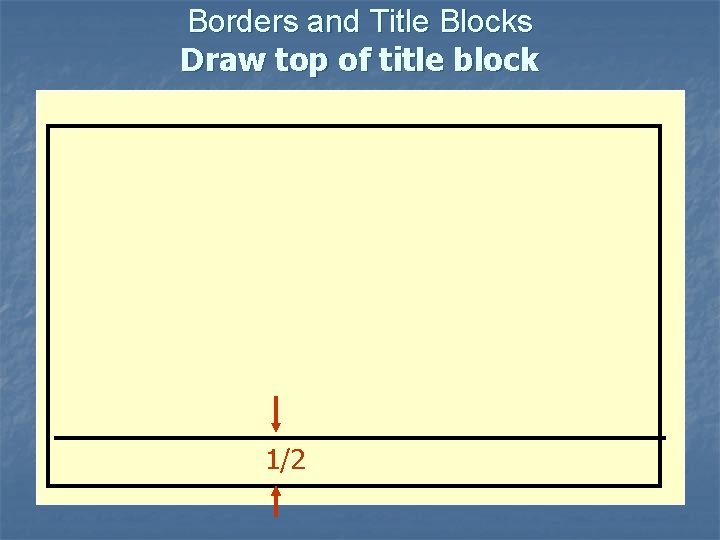
Borders and Title Blocks Draw top of title block 1/2

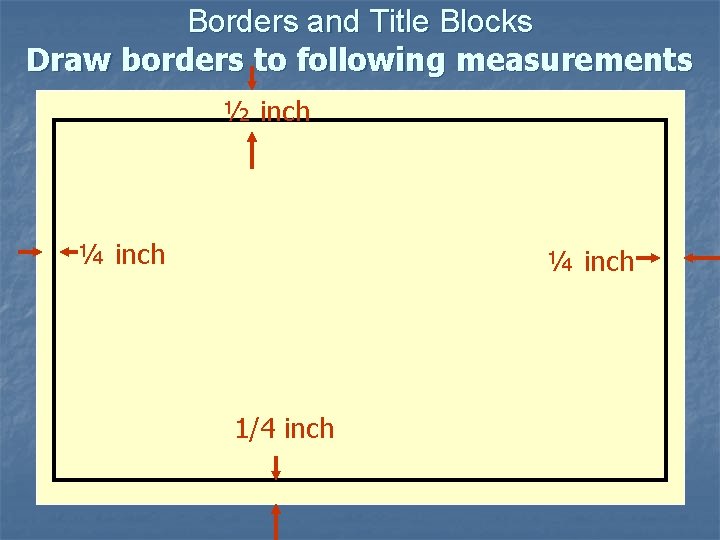
Borders and Title Blocks Draw borders to following measurements ½ inch ¼ inch 1/4 inch

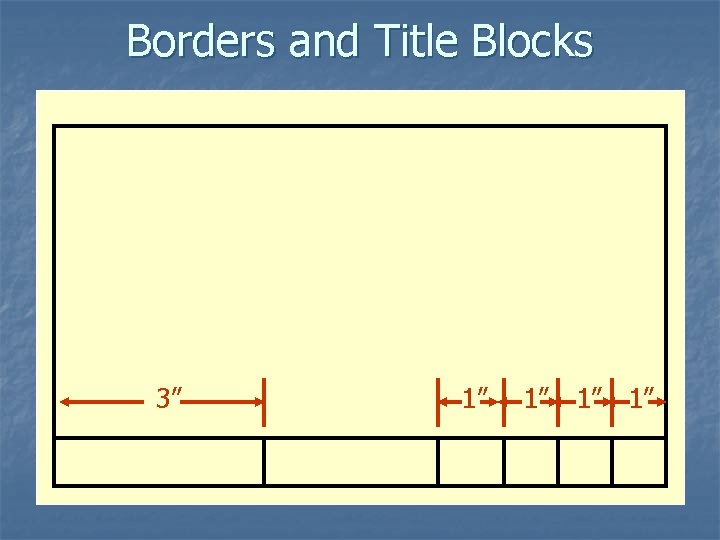
Borders and Title Blocks 3” 1” 1”

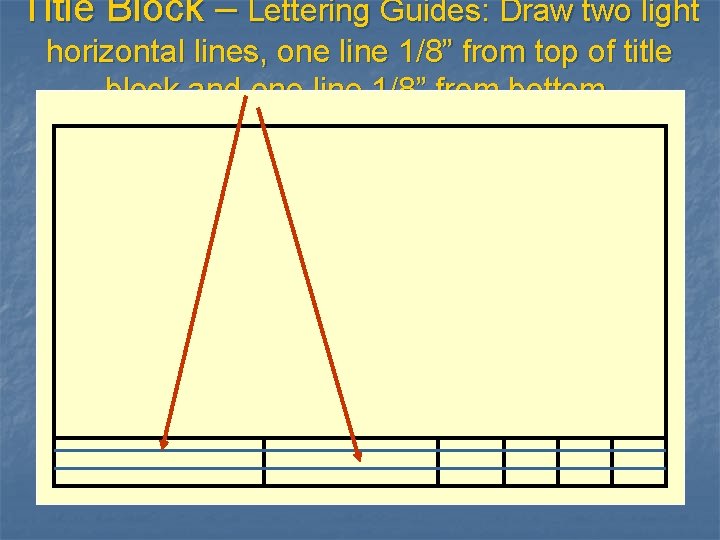
Title Block – Lettering Guides: Draw two light horizontal lines, one line 1/8” from top of title block and one line 1/8” from bottom.

Engineering L 4 – Safety Review Safety Video Safety test n OBJECTIVE n DRILL: : Safety Identify three important safety rules to follow while working in the Technology Lab

Before we begin to study drafting it is important to spend a little more time on General Lab Safety n Last class we discussed the following important safety items: - Upon entering class immediately have a seat and complete daily drill. - Never touch class tools equipment without teacher permission. - Only use equipment that teacher has demonstrated. - Use tools / equipment as directed and for purpose tool is intended. - If you have a question on how to use equipment, tools or how to do a procedure ask for teacher instruction.

How many of the following rules did we get? n n When working around machines with moving and/or spinning parts be sure to secure dangling jewelry, long hair, loose clothing, and remove accessories that might get caught. When working with equipment focus on what you are doing. Do not speak to people operating machines. Stay out of machines ‘Safety Zone’(3 foot perimeter) if you are not directly involved in operation. Immediately report all accidents/ injuries to

A few more important safety items n n n n Tools for cutting should be sharp…Dull tools cause injuries Wear safety glasses Return tools and equipment to proper location as soon as you are finished using it! Do not carry long stock by balancing it in center. Wear an apron to protect / secure clothing Do not put sharp tools or hot items near neighbors, face, or handle carelessly. Do not use electrical tools or items in such a

SAFETY VIDEO The following video deals with safety in the Tech Ed lab, as well as general safety rules to follow outside of class. As there is so much information presented in video you will not be asked to take notes. You are expected to pay attention

SAFETY QUIZ Please be sure to immediately fill in name, period and date. Do not write on question sheet.

Engineering L 5 –Design and Drawing for Engineering Definitions of Lines Orthographic Drawing n OBJECTIVE : Review text on Line Definitions in order to prepare to complete first drafting drawing. n Discuss rules of orthographic drawing in order to prepare to complete first drafting drawing.

Text: Technology Engineering and Design pp. 586 – 594 Design and Drawing for Engineering *how to use drafting scale Definitions DRAWING TO SCALE Draw and explain use of the lines below VISIBLE LINE HIDDEN LINE CENTER LINE EXTENSION LINE DIMENSION LINE

n n n n n Definitions p. 591 DRAWING TO SCALE – drawing an object smaller or larger than actual size but in correct proportion *how to use drafting scale Students should define in notes VISIBLE LINE HIDDEN LINE CENTER LINE EXTENSION LINE DIMENSION LINE p. 596 review LINEAR MEASUREMENT & FRACTIONS

Borders and Title Blocks Draw borders to following measurements ½ inch ¼ inch 1/4 inch

Borders and Title Blocks Draw top of title block 1/2

Borders and Title Blocks 3” 1” 1”

Title Block – Lettering Guides: Draw two light horizontal lines, one line 1/8” from top of title block and one line 1/8” from bottom.

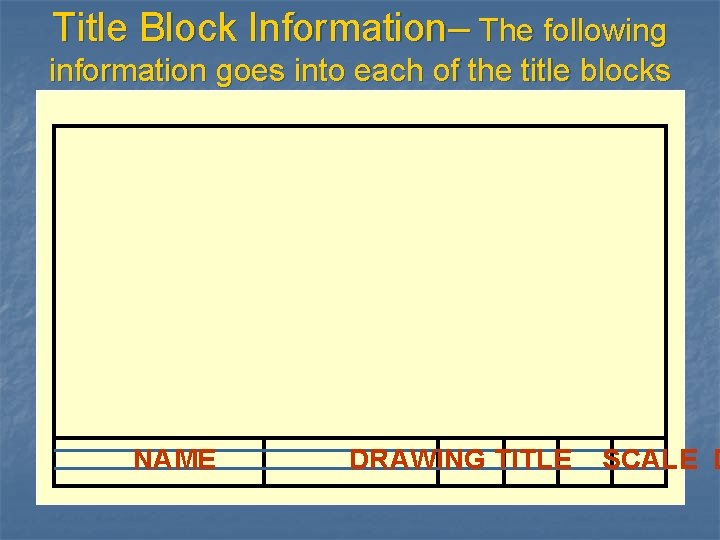
Title Block Information– The following information goes into each of the title blocks NAME DRAWING TITLE SCALE D

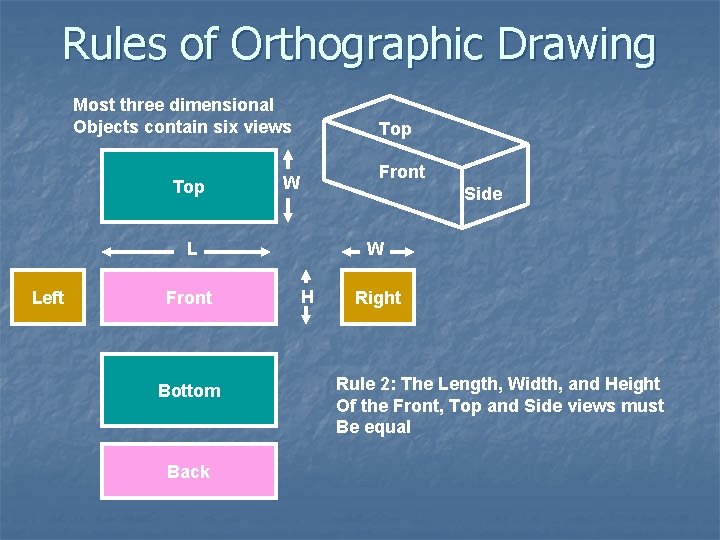
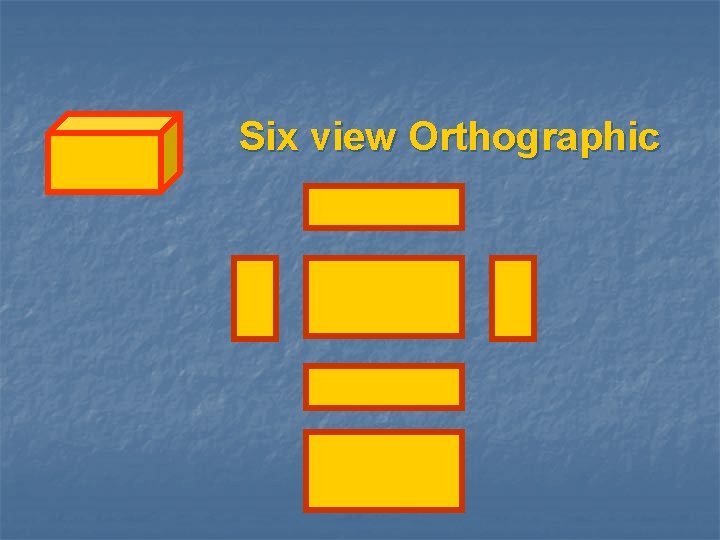
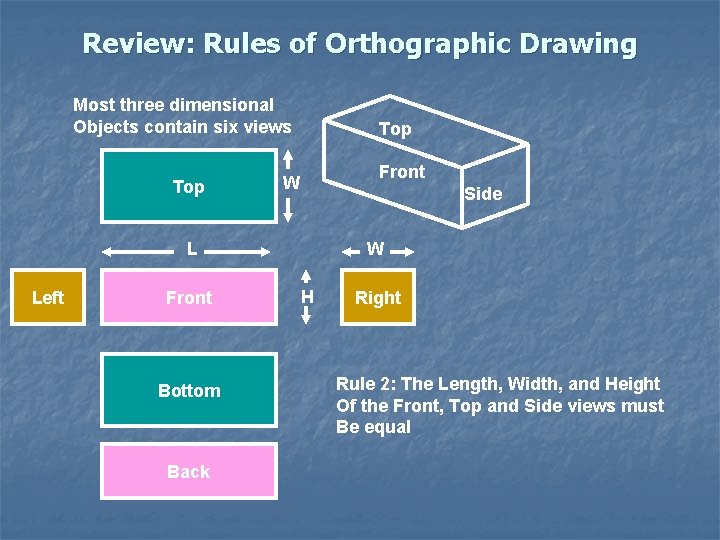
Rules of Orthographic Drawing Most three dimensional Objects contain six views Top Front W Side L Left Front Bottom Back W H Right Rule 2: The Length, Width, and Height Of the Front, Top and Side views must Be equal

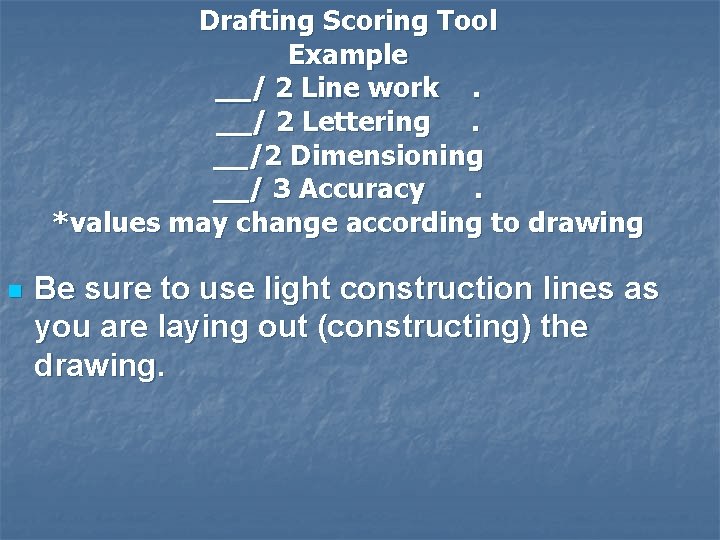
Drafting Scoring Tool Example __/ 2 Line work. __/ 2 Lettering. __/2 Dimensioning __/ 3 Accuracy. *values may change according to drawing n Be sure to use light construction lines as you are laying out (constructing) the drawing.

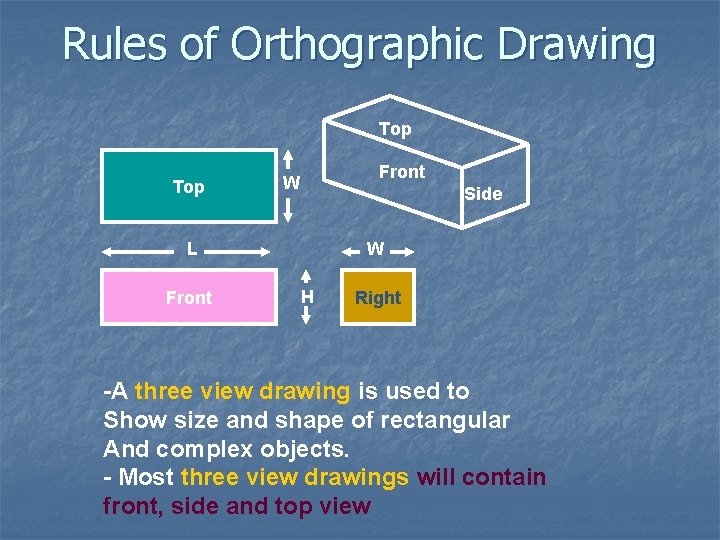
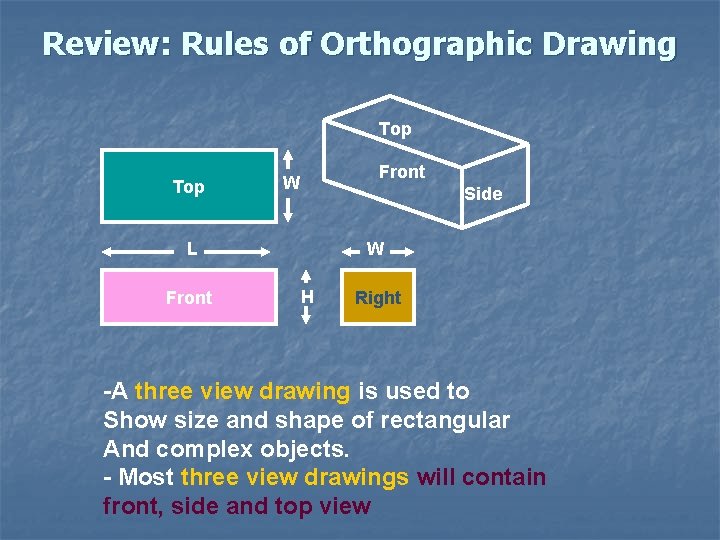
Rules of Orthographic Drawing Top Front W Side L Front W H Right -A three view drawing is used to Show size and shape of rectangular And complex objects. - Most three view drawings will contain front, side and top view

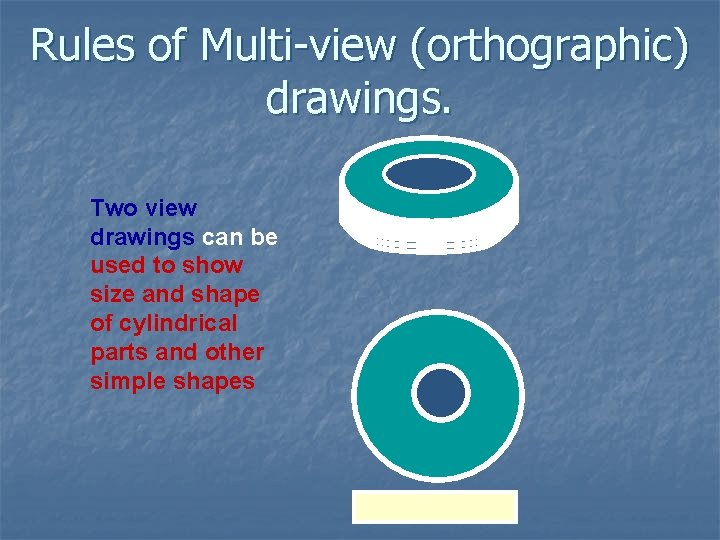
Rules of Multi-view (orthographic) drawings. Two view drawings can be used to show size and shape of cylindrical parts and other simple shapes

Refer to the Drawing exercise sheet. Consider your skill level and choose two drawings to convert to ORTHOGRAPHIC views. Start with Front view Position lower left corner of front view One inch from title block and 1 inch from left border. Use 1 inch spacing between front and side views.

Refer to pages 62 -68 of Mechanical Drawing textbook for information pertaining to Orthographic Projection

Areas to note for Orthographic Drawing ALL LETTERING IN CAPITAL Construction lines are light. Lettering, dimensioning, Borders and Visible Lines are dark. See pages 14, 33 -35, 134 -136 of ‘Mechanical Drawing’ Text. Use drawing tools correctly (see pages 16 – 29) Theory of shape description (see pages 62 – 68) Orthographic Projection (see Pages 87 – 90)

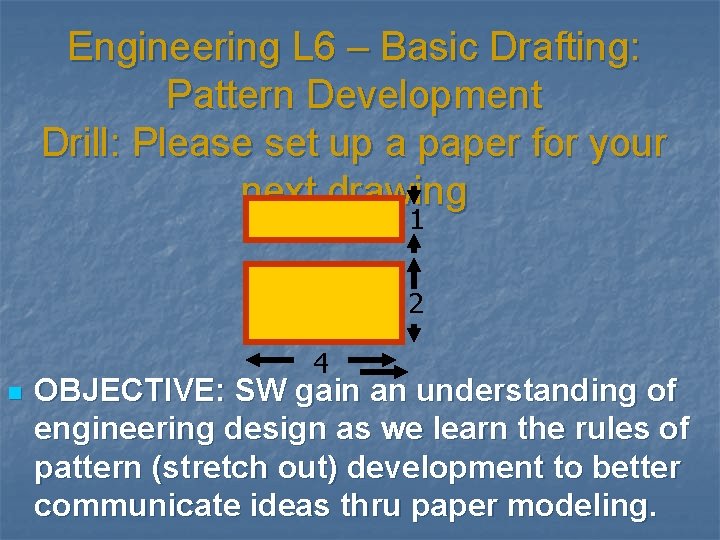
Engineering L 6 – Basic Drafting: Pattern Development Drill: Please set up a paper for your next drawing 1 2 4 n OBJECTIVE: SW gain an understanding of engineering design as we learn the rules of pattern (stretch out) development to better communicate ideas thru paper modeling.

Areas to note from Orthographic Drawing ALL LETTERING IN CAPITAL Construction lines are light. Lettering, dimensioning, Borders and Visible Lines are dark. See pages 14, 33 -35, 134 -136 of ‘Mechanical Drawing’ Text. Use drawing tools correctly (see pages 16 – 29) Theory of shape description (see pages 62 – 68) Orthographic Projection (see Pages 87 – 90)

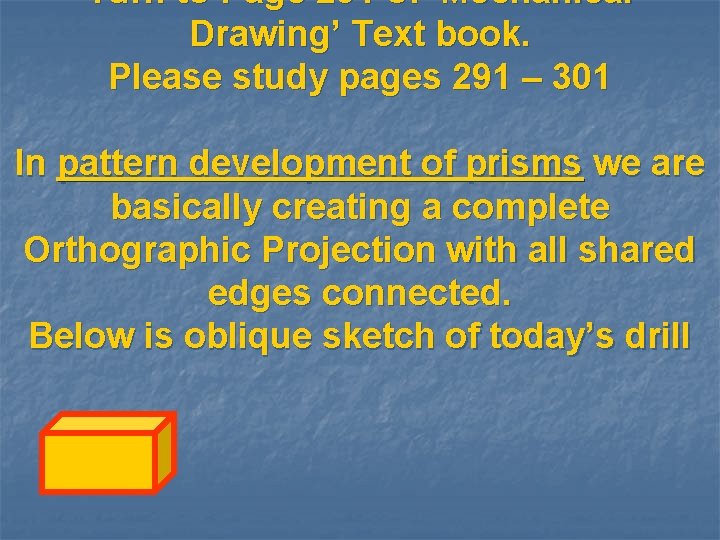
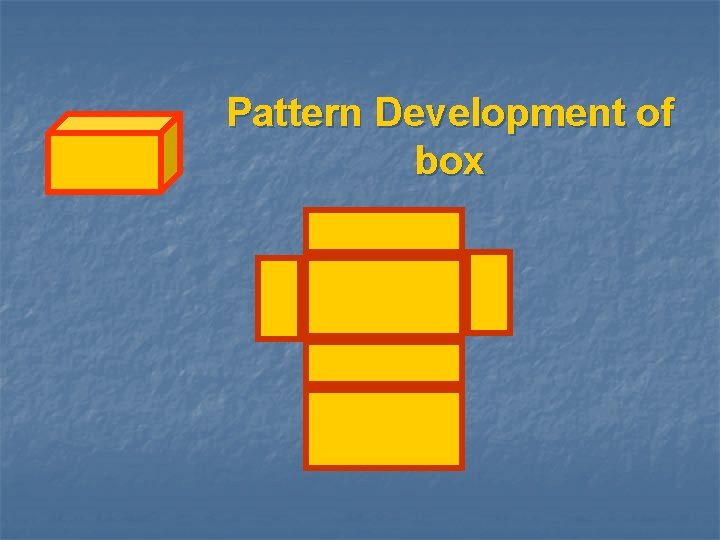
Turn to Page 291 of ‘Mechanical Drawing’ Text book. Please study pages 291 – 301 In pattern development of prisms we are basically creating a complete Orthographic Projection with all shared edges connected. Below is oblique sketch of today’s drill

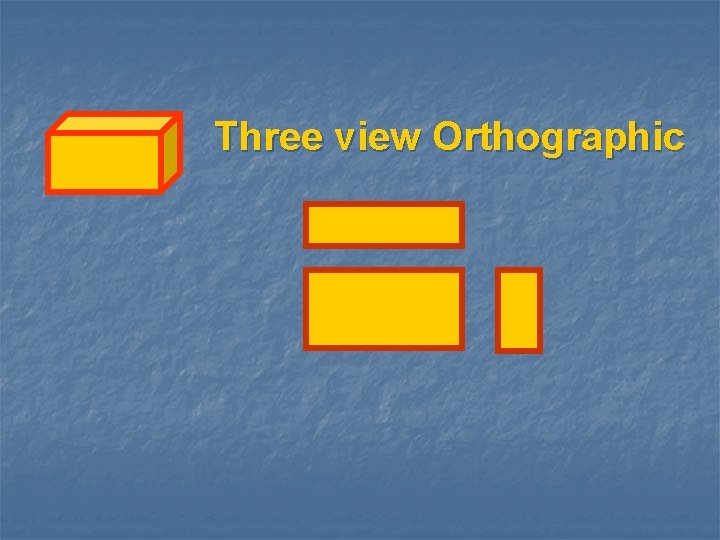
Three view Orthographic

Six view Orthographic

Pattern Development of box

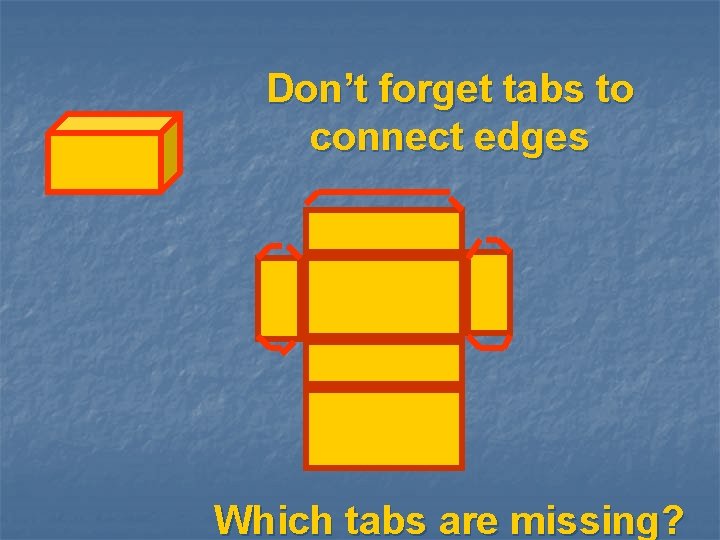
Don’t forget tabs to connect edges Which tabs are missing?

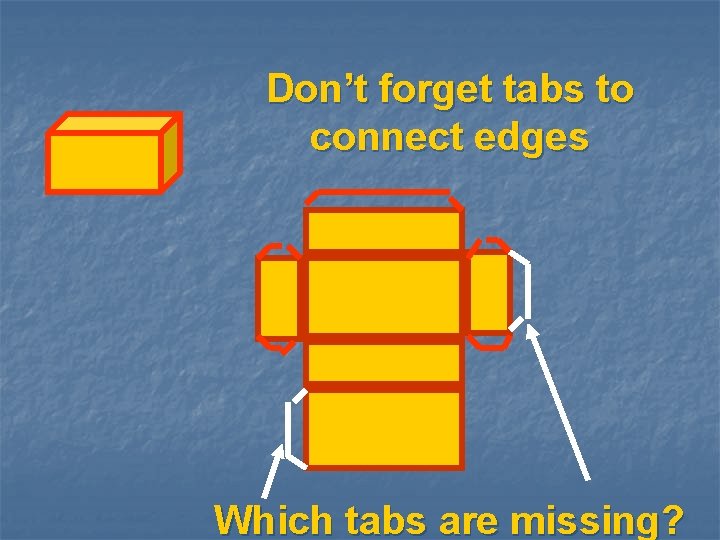
Don’t forget tabs to connect edges Which tabs are missing?

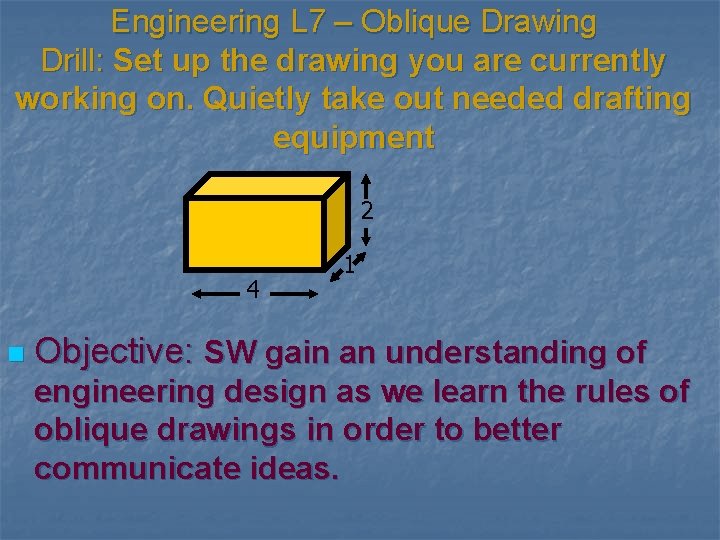
Engineering L 7 – Oblique Drawing Drill: Set up the drawing you are currently working on. Quietly take out needed drafting equipment 2 4 n 1 Objective: SW gain an understanding of engineering design as we learn the rules of oblique drawings in order to better communicate ideas.

Drawing textbook for information pertaining to Orthographic Projection Refer to pages 130 - 135 of Mechanical Drawing textbook for information on dimensioning. P. 130 Dimensioning 11. 2 P. 130 Lines and symbols 11. 3 P. 130 Dimension lines 11. 4 P. 130 Arrowheads 11. 5 p. 130 Extension Lines P. 133 Placing dimensions… 11. 2

Review: Rules of Orthographic Drawing Most three dimensional Objects contain six views Top Front W Side L Left Front Bottom Back W H Right Rule 2: The Length, Width, and Height Of the Front, Top and Side views must Be equal

Review: Rules of Orthographic Drawing Top Front W Side L Front W H Right -A three view drawing is used to Show size and shape of rectangular And complex objects. - Most three view drawings will contain front, side and top view

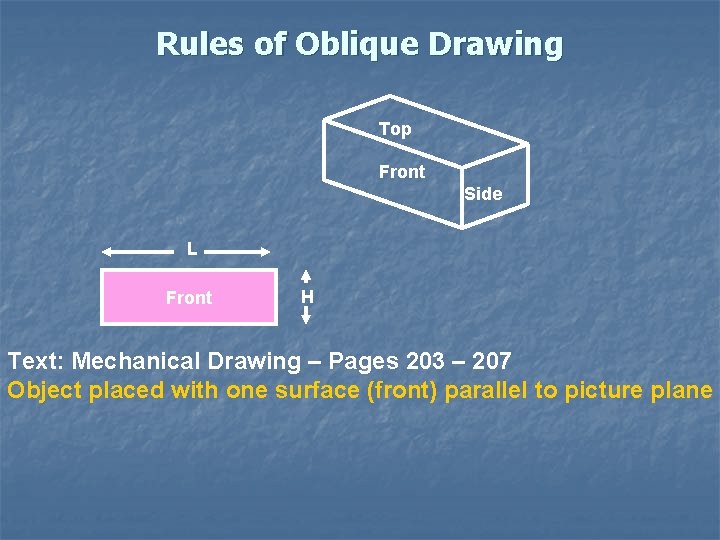
Rules of Oblique Drawing Top Front Side L Front H Text: Mechanical Drawing – Pages 203 – 207 Object placed with one surface (front) parallel to picture plane

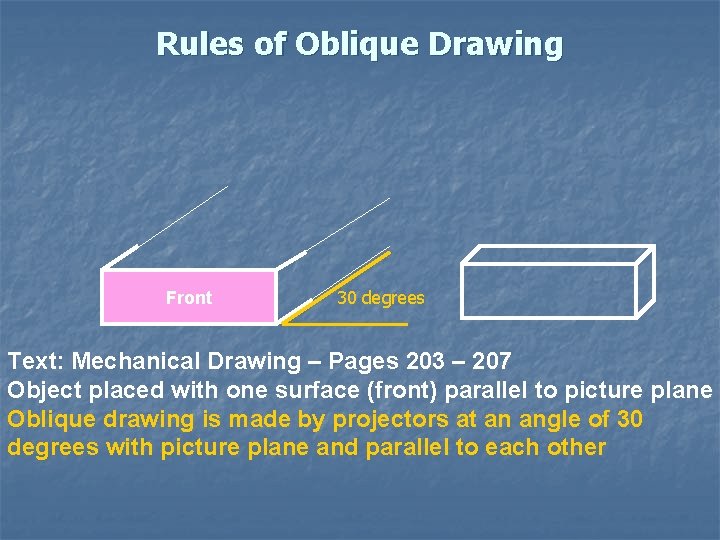
Rules of Oblique Drawing Front 30 degrees Text: Mechanical Drawing – Pages 203 – 207 Object placed with one surface (front) parallel to picture plane Oblique drawing is made by projectors at an angle of 30 degrees with picture plane and parallel to each other

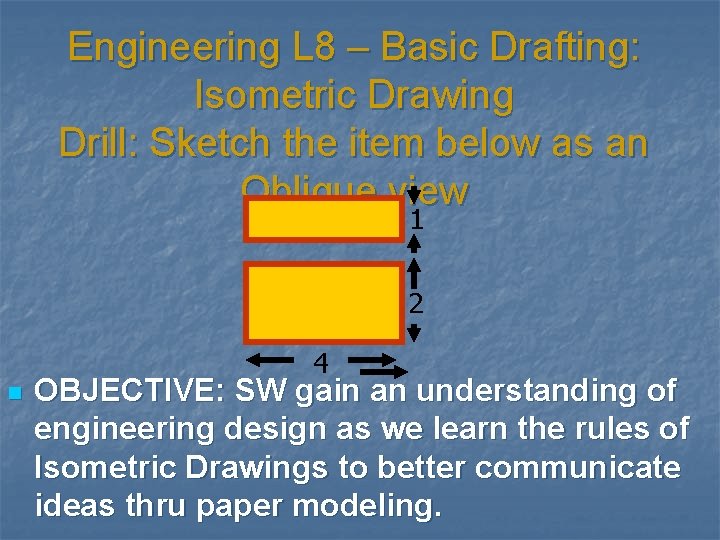
Engineering L 8 – Basic Drafting: Isometric Drawing Drill: Sketch the item below as an Oblique view 1 2 4 n OBJECTIVE: SW gain an understanding of engineering design as we learn the rules of Isometric Drawings to better communicate ideas thru paper modeling.

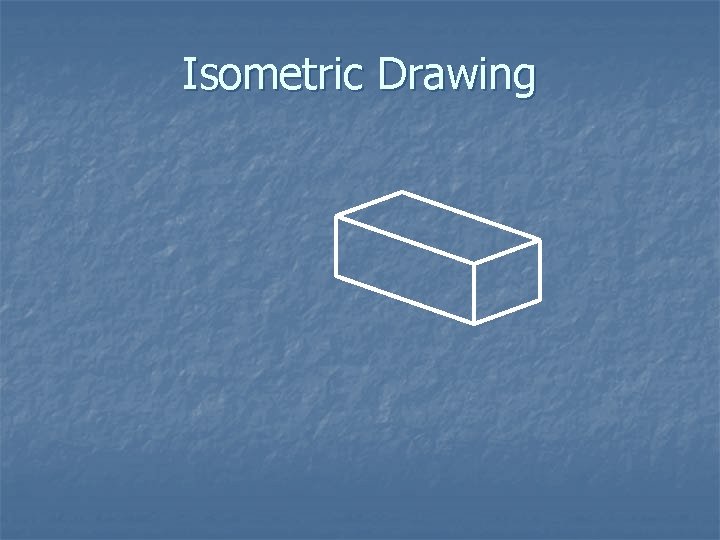
Isometric Drawing

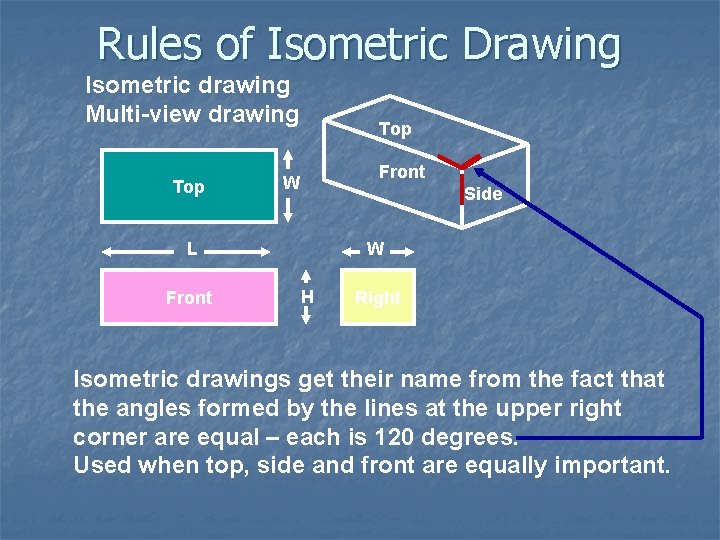
Rules of Isometric Drawing Isometric drawing Multi-view drawing Top Front W Side L Front W H Right Isometric drawings get their name from the fact that the angles formed by the lines at the upper right corner are equal – each is 120 degrees. Used when top, side and front are equally important.

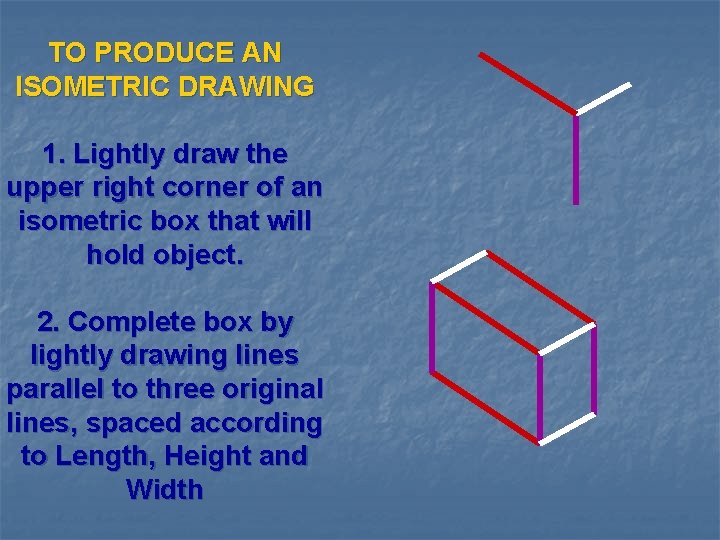
TO PRODUCE AN ISOMETRIC DRAWING 1. Lightly draw the upper right corner of an isometric box that will hold object. 2. Complete box by lightly drawing lines parallel to three original lines, spaced according to Length, Height and Width

Engineering L 9 – Intro to CAD –Using Google Sketch-up Drill: What does the acronym CAD stand for? n Objective: Experiment with various ’Sketch-up’ tools as we complete a set of tutorials in order to gain Fundamental understanding of CAD

Engineering L 10 –Intro to CAD –Using Google Sketch-up Drill: Identify the term for two cad tools you used yesterday and the function of each tool n Objective: Synthesize the various drawing tools of Google sketch-up in order to draw assessment block using CAD

Engineering L 11 – Basic Drafting Assessment Drill: Set up a paper with drafting borders (you will have ten minutes to complete the set-up). n Objective: Follow rules of orthographic and isometric drawing as we complete a set of assessment exercises to demonstrate our mastery of basic drafting skills

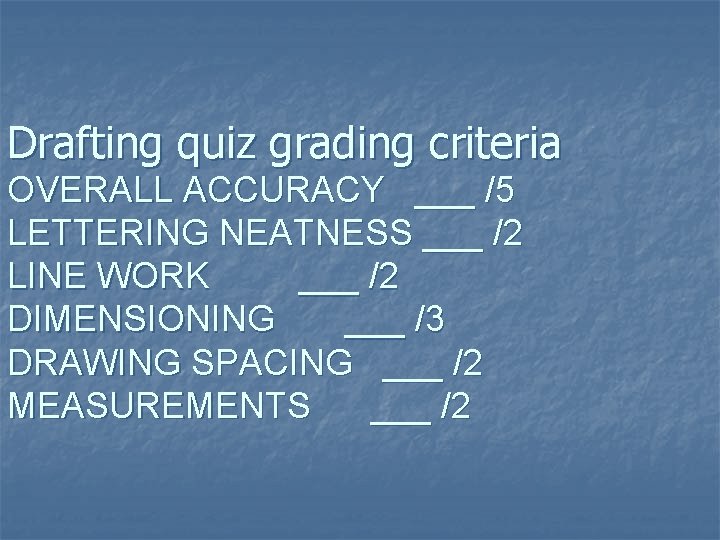
Drafting quiz grading criteria OVERALL ACCURACY ___ /5 LETTERING NEATNESS ___ /2 LINE WORK ___ /2 DIMENSIONING ___ /3 DRAWING SPACING ___ /2 MEASUREMENTS ___ /2