ENGINEERING MEASUREMENTS Prof Emin Korkut 1 Measurement Error
- Slides: 7

ENGINEERING MEASUREMENTS Prof. Emin Korkut 1

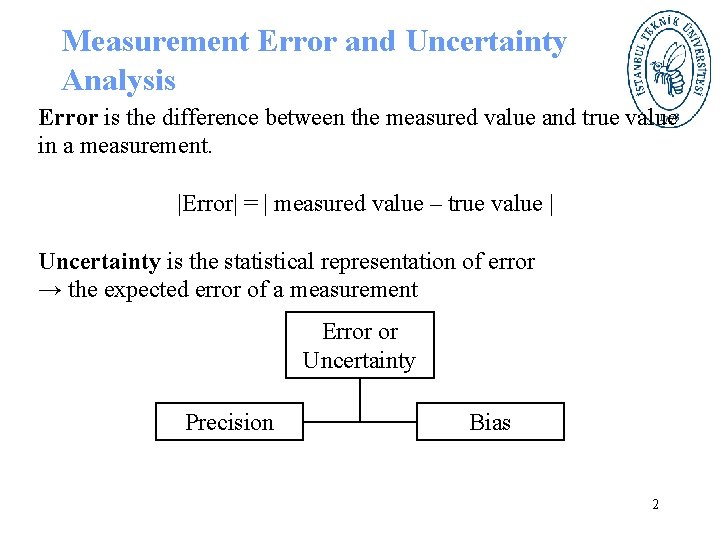
Measurement Error and Uncertainty Analysis Error is the difference between the measured value and true value in a measurement. |Error| = | measured value – true value | Uncertainty is the statistical representation of error → the expected error of a measurement Error or Uncertainty Precision Bias 2

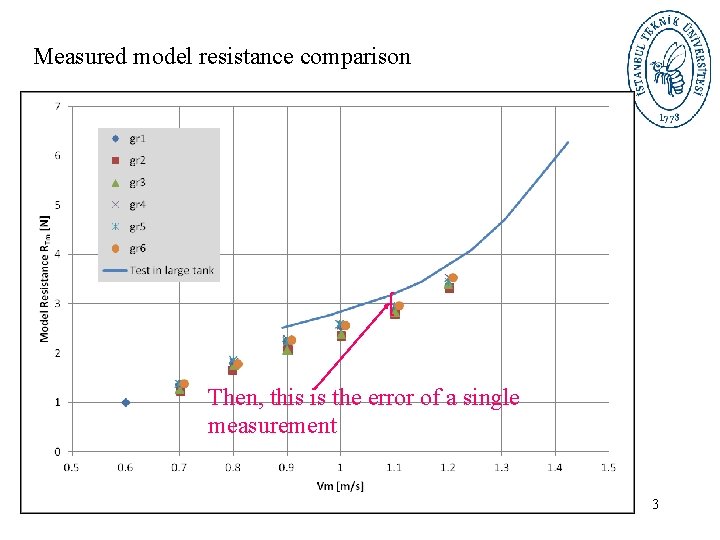
Measured model resistance comparison Then, this is the error of a single measurement 3

Bias and Precision Error Precision error: ”scatter” in the experimental results found from repeated measurements Bias error: Systematic errors, not found from repeated measurements Replication level: How much of an experimental set-up that is repeated when finding the precision error Example of different repetition levels of a resistance test: 1. Only the test itself (running the same speed twice) 2. Repeat also the connection to the carriage 3. Repeat also the ballasting of the model 4. Making a new model, testing in the same tank 5. Making a new model at another towing tank, testing in a different tank (facility bias) 4

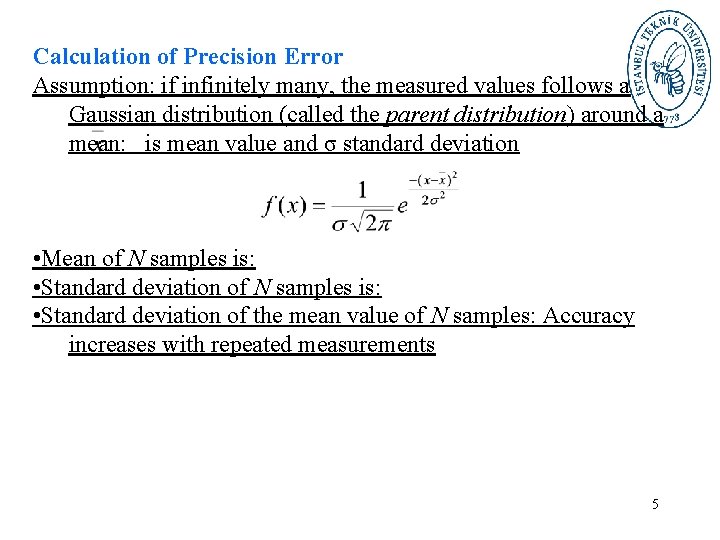
Calculation of Precision Error Assumption: if infinitely many, the measured values follows a Gaussian distribution (called the parent distribution) around a mean: is mean value and σ standard deviation • Mean of N samples is: • Standard deviation of the mean value of N samples: Accuracy increases with repeated measurements 5

Repeated Tests in Practice Repeat all test conditions to reduce the uncertainty of the results Too time consuming (and expensive) to be done in practice (in marine hydrodynamics), except on some special research projects Repeat one (or a few carefully selected) test conditions to calculate the precision error Recommended practice in all research projects Typically not done in routine commercial verification tests Do a thorough uncertainty analysis, including repeated tests, of a typical standard tests (for instance resistance), and use the results as being representative for all standard tests of the same type Recommended practice in standardized commercial testing 6

Estimating Bias Errors • Can not be found from repeated tests • No standard way of calculating bias errors. That’s why we say ”estimating” • Examples of bias errors: Calibration factors of the sensors. The bias error can be estimated from the precision error of the calibration factor Geometrical accuracy of a ship model Find the geometrical accuracy (for instance by control measurements) Estimate the sensitivity of the measurement results from the geometrical deviations (that is the hard part!) Inaccurate calibration of (wave) environment Tank wall effects Blockage (it is a pure bias error) 7 Wave reflections (can give both bias and precision)