Engineering H 191 Drafting CAD Orthographic Projection Lecture
- Slides: 17

Engineering H 191 - Drafting / CAD Orthographic Projection Lecture 3 Autumn Quarter Gateway Engineering Education Coalition 1

Engineering H 191 - Drafting / CAD Today’s Activities • Today – More On Multi-view Orthographic Drawings • BTG Chap 4 – Orthographic Projection – Teamwork Workshop • Tomorrow – Learn how to do isometric drawings – First Auto. CAD Lesson Autumn Quarter Gateway Engineering Education Coalition 2

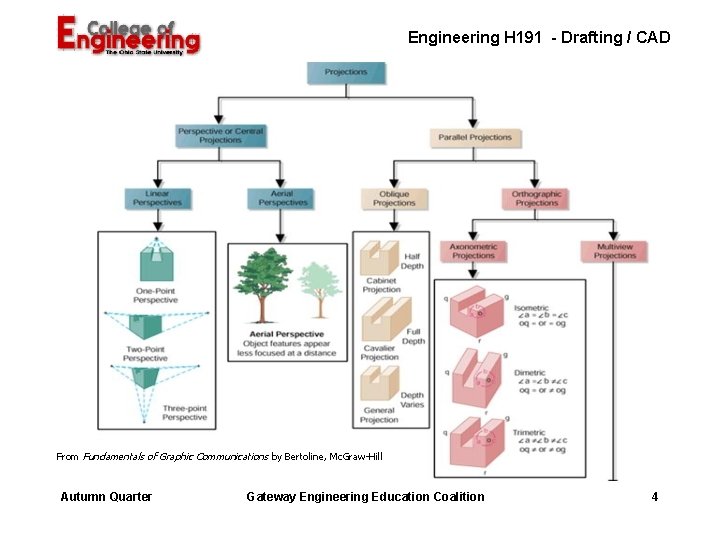
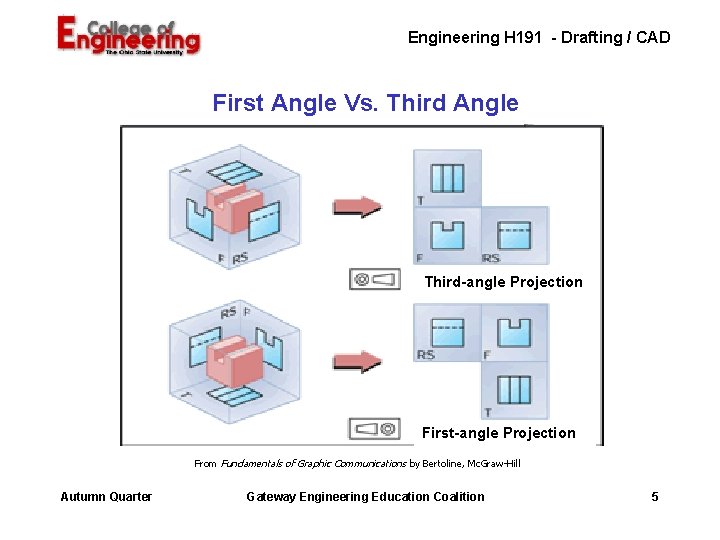
Engineering H 191 - Drafting / CAD Projection Methods (BTG pg 123) • Perspective projections – Linear 1, 2, or 3 Vanishing points – Aerial • Parallel projections – Oblique projection: cavalier, cabinet, or general – Orthographic projection • Axonometric – Isometric, dimetric, or trimetric • Multi-view – First-angle or third-angle Autumn Quarter Gateway Engineering Education Coalition 3

Engineering H 191 - Drafting / CAD From Fundamentals of Graphic Communications by Bertoline, Mc. Graw-Hill Autumn Quarter Gateway Engineering Education Coalition 4

Engineering H 191 - Drafting / CAD First Angle Vs. Third Angle Third-angle Projection First-angle Projection From Fundamentals of Graphic Communications by Bertoline, Mc. Graw-Hill Autumn Quarter Gateway Engineering Education Coalition 5

Engineering H 191 - Drafting / CAD Review - Why Multi-view? Give 3 reasons • Most accurate description of 3 -D objects for engineering, manufacturing, and construction • Dimensions of features are presented in true size in one or more views • Easy transition to 3 -D database and computer modeling Autumn Quarter Gateway Engineering Education Coalition 6

Engineering H 191 - Drafting / CAD Principals Of Orthographic Projection • Every point or feature must be aligned on a parallel projector in any adjacent view. • Distances between any two points in a related view must be equal. • Features are true length or true size when the lines of sight are perpendicular to the feature. Autumn Quarter Gateway Engineering Education Coalition 7

Engineering H 191 - Drafting / CAD Principals Of Orthographic Projection • Features are foreshortened when lines of sight are not perpendicular to the feature. • Areas that are the same feature will always be similar in configuration from one view to the next, except when viewed on the edge. - Example: Triangular surface always has three sides in all views • Parallel features will always appear parallel in all views. Autumn Quarter Gateway Engineering Education Coalition 8

Engineering H 191 - Drafting / CAD Principals Of Orthographic Projection • Surfaces that are parallel to the lines of sight will appear as lines or edge views. • No two contiguous (adjacent) areas can lie in the same plane. Autumn Quarter Gateway Engineering Education Coalition 9

Engineering H 191 - Drafting / CAD Hints For Multiview Sketching • Identify the major features and overall dimensions of the object • Do not use your scale as a pencil guide when sketching by hand • Start by drawing bounding boxes with light construction lines. • Keep views aligned while sketching Autumn Quarter Gateway Engineering Education Coalition 10

Engineering H 191 - Drafting / CAD Hints For Multiview Sketching • Only measure along the primary axes fi you are working from a pictorial. • Map inclined and oblique faces among all three views • Follow the precedence of lines • Darken all visible, hidden, and center lines Autumn Quarter Gateway Engineering Education Coalition 11

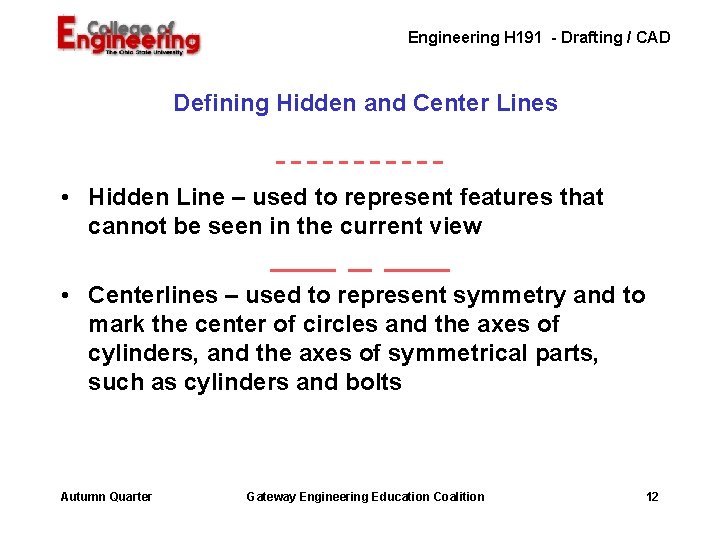
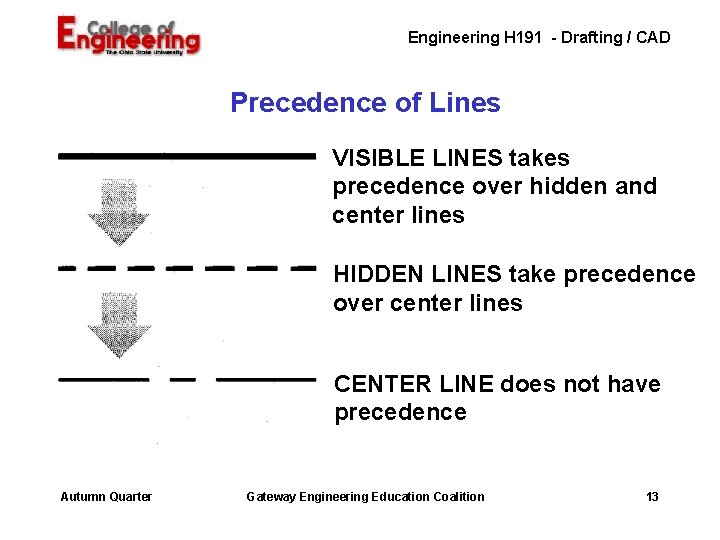
Engineering H 191 - Drafting / CAD Defining Hidden and Center Lines • Hidden Line – used to represent features that cannot be seen in the current view • Centerlines – used to represent symmetry and to mark the center of circles and the axes of cylinders, and the axes of symmetrical parts, such as cylinders and bolts Autumn Quarter Gateway Engineering Education Coalition 12

Engineering H 191 - Drafting / CAD Precedence of Lines VISIBLE LINES takes precedence over hidden and center lines HIDDEN LINES take precedence over center lines CENTER LINE does not have precedence Autumn Quarter Gateway Engineering Education Coalition 13

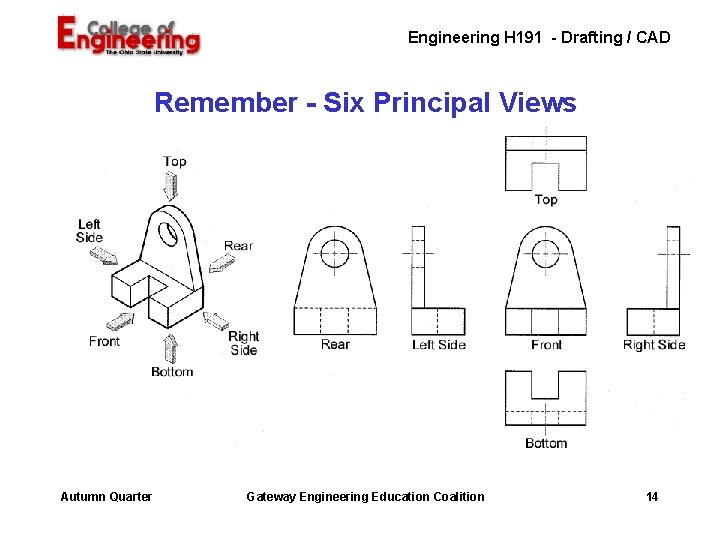
Engineering H 191 - Drafting / CAD Remember - Six Principal Views Autumn Quarter Gateway Engineering Education Coalition 14

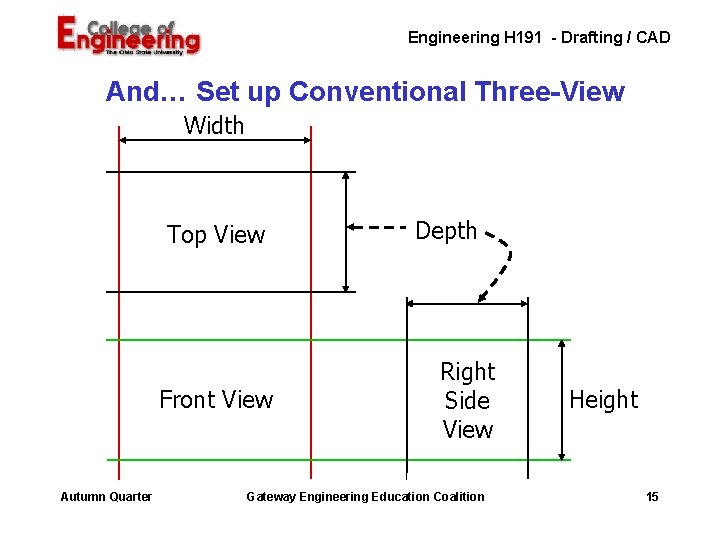
Engineering H 191 - Drafting / CAD And… Set up Conventional Three-View Width Top View Front View Autumn Quarter Depth Right Side View Gateway Engineering Education Coalition Height 15

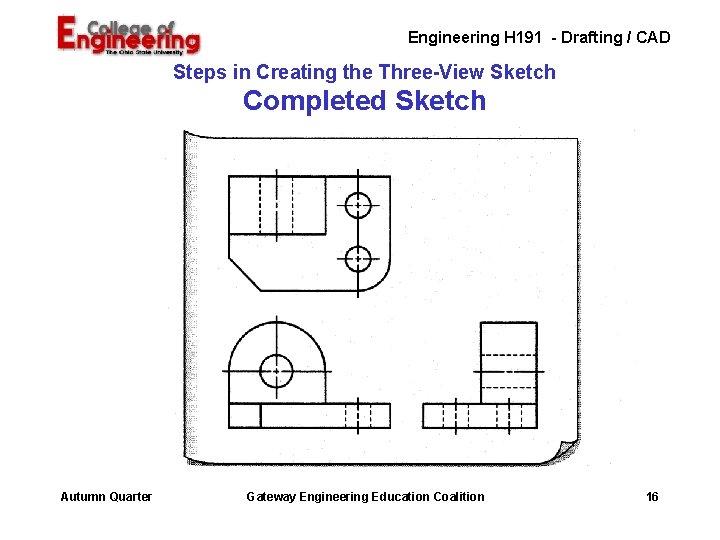
Engineering H 191 - Drafting / CAD Steps in Creating the Three-View Sketch Completed Sketch Autumn Quarter Gateway Engineering Education Coalition 16

Engineering H 191 - Drafting / CAD Assignments • Dwg 5 – A 11 – Orthographic Sketches from an Isometric – Due tomorrow morning • Dwg 6 – Team Agreement – Due tomorrow morning Autumn Quarter Gateway Engineering Education Coalition 17