Engineering H 191 Drafting CAD Dimensioning Lecture 16
- Slides: 22

Engineering H 191 - Drafting / CAD Dimensioning Lecture 16 Autumn Quarter Gateway Engineering Education Coalition 1

Engineering H 191 - Drafting / CAD Dimensioning • Goals • Understand the principles of good dimensioning practice • Apply the standard dimensioning practices for engineering drawings • Reference • BTG Chapter 7 – Dimensions and Tolerances Autumn Quarter Gateway Engineering Education Coalition 2

Engineering H 191 - Drafting / CAD Geometrics • The science of specifying and tolerancing shapes and locations of features of on objects Autumn Quarter Gateway Engineering Education Coalition 3

Engineering H 191 - Drafting / CAD Geometrics • It is important that all persons reading a drawing interpret it exactly the same way. • Parts are dimensioned based on two criteria: – Basic size and locations of the features – Details of construction for manufacturing • Standards from ANSI (American National Standards Institute) Autumn Quarter Gateway Engineering Education Coalition 4

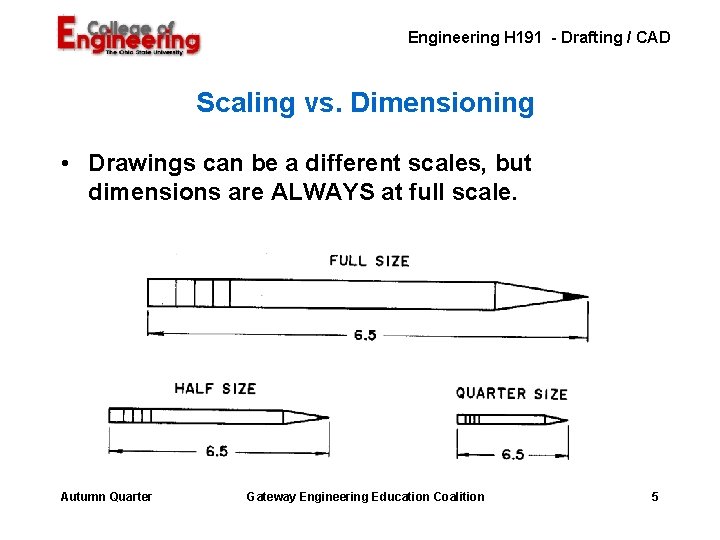
Engineering H 191 - Drafting / CAD Scaling vs. Dimensioning • Drawings can be a different scales, but dimensions are ALWAYS at full scale. Autumn Quarter Gateway Engineering Education Coalition 5

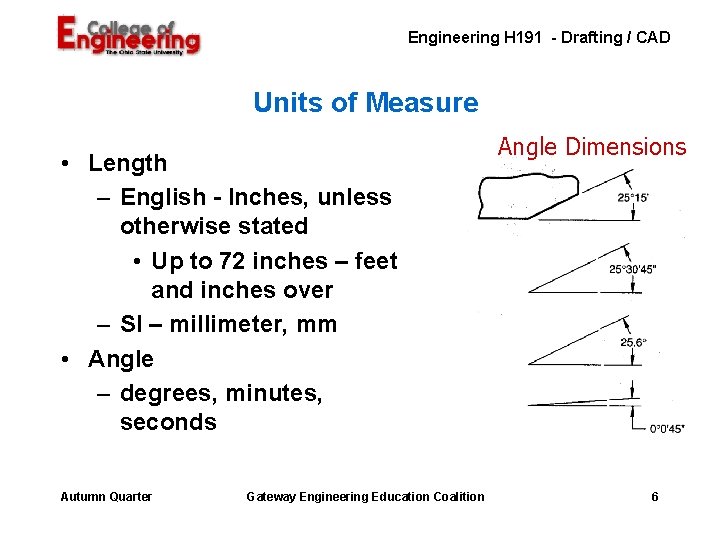
Engineering H 191 - Drafting / CAD Units of Measure • Length – English - Inches, unless otherwise stated • Up to 72 inches – feet and inches over – SI – millimeter, mm • Angle – degrees, minutes, seconds Autumn Quarter Gateway Engineering Education Coalition Angle Dimensions 6

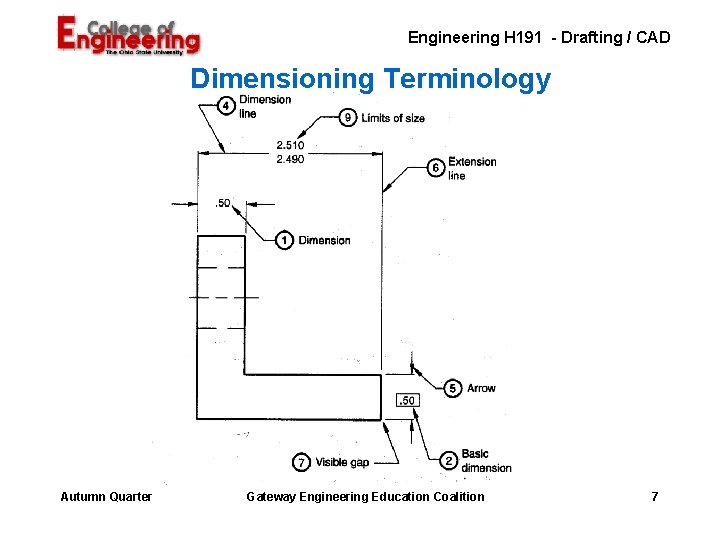
Engineering H 191 - Drafting / CAD Dimensioning Terminology Autumn Quarter Gateway Engineering Education Coalition 7

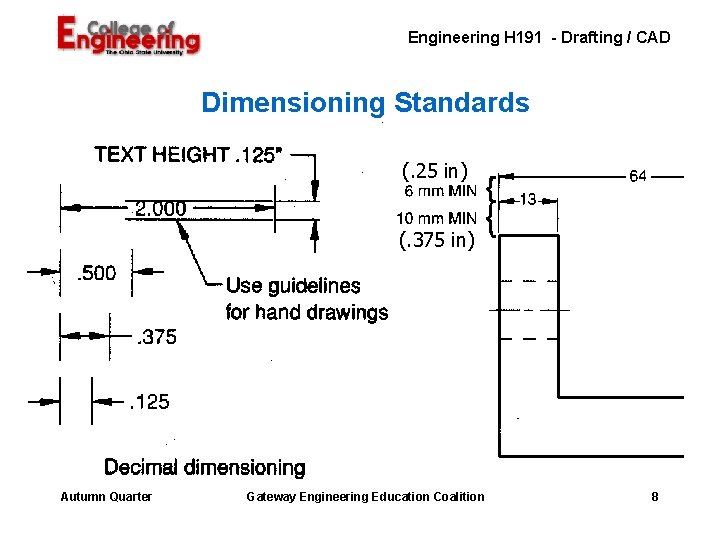
Engineering H 191 - Drafting / CAD Dimensioning Standards (. 25 in) (. 375 in) Autumn Quarter Gateway Engineering Education Coalition 8

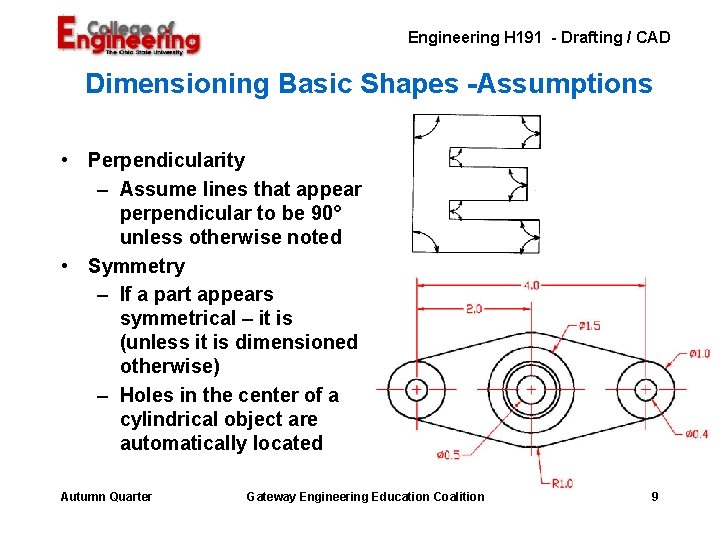
Engineering H 191 - Drafting / CAD Dimensioning Basic Shapes -Assumptions • Perpendicularity – Assume lines that appear perpendicular to be 90° unless otherwise noted • Symmetry – If a part appears symmetrical – it is (unless it is dimensioned otherwise) – Holes in the center of a cylindrical object are automatically located Autumn Quarter Gateway Engineering Education Coalition 9

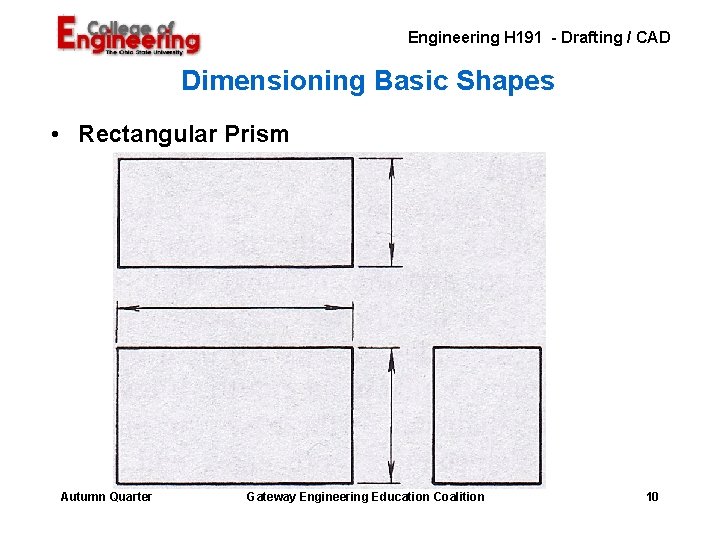
Engineering H 191 - Drafting / CAD Dimensioning Basic Shapes • Rectangular Prism Autumn Quarter Gateway Engineering Education Coalition 10

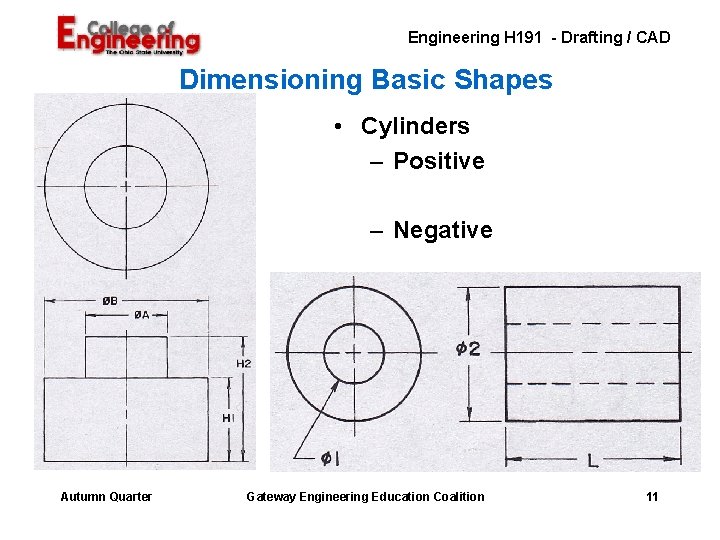
Engineering H 191 - Drafting / CAD Dimensioning Basic Shapes • Cylinders – Positive – Negative Autumn Quarter Gateway Engineering Education Coalition 11

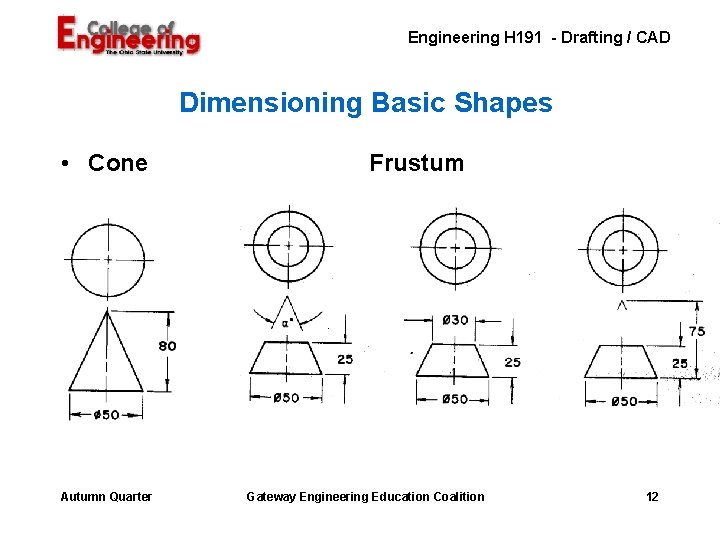
Engineering H 191 - Drafting / CAD Dimensioning Basic Shapes • Cone Autumn Quarter Frustum Gateway Engineering Education Coalition 12

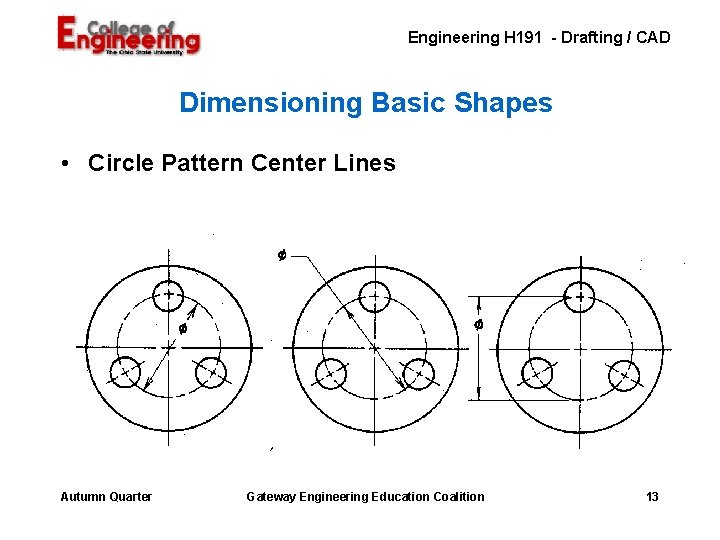
Engineering H 191 - Drafting / CAD Dimensioning Basic Shapes • Circle Pattern Center Lines Autumn Quarter Gateway Engineering Education Coalition 13

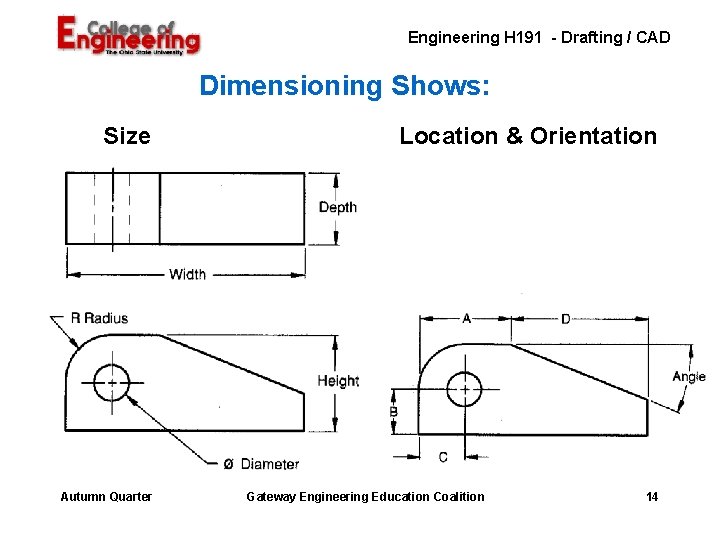
Engineering H 191 - Drafting / CAD Dimensioning Shows: Size Autumn Quarter Location & Orientation Gateway Engineering Education Coalition 14

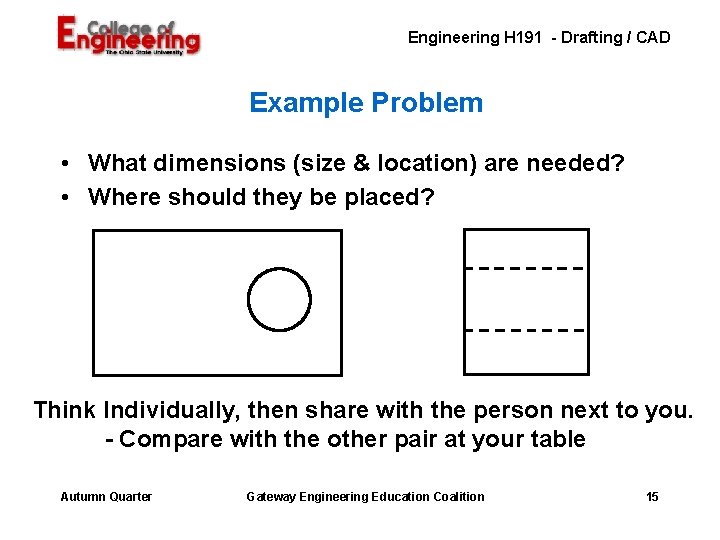
Engineering H 191 - Drafting / CAD Example Problem • What dimensions (size & location) are needed? • Where should they be placed? Think Individually, then share with the person next to you. - Compare with the other pair at your table Autumn Quarter Gateway Engineering Education Coalition 15

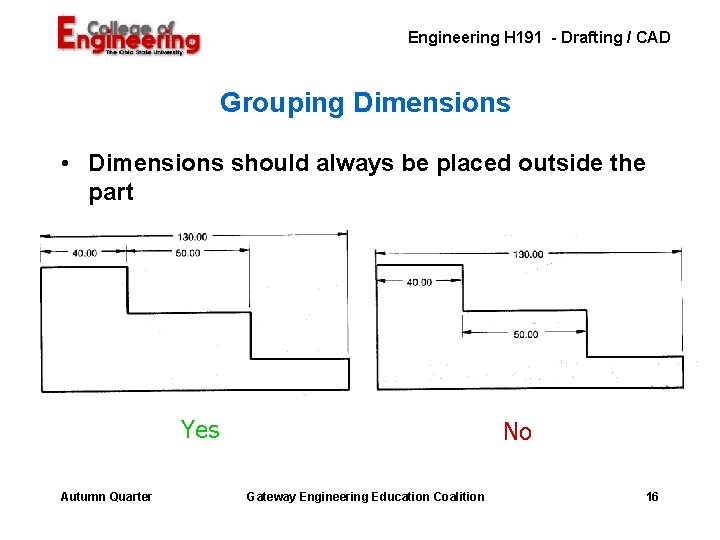
Engineering H 191 - Drafting / CAD Grouping Dimensions • Dimensions should always be placed outside the part Yes Autumn Quarter No Gateway Engineering Education Coalition 16

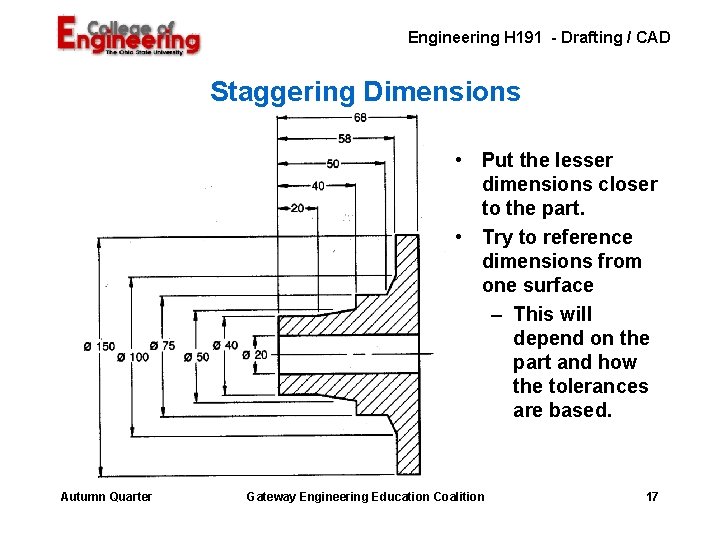
Engineering H 191 - Drafting / CAD Staggering Dimensions • Put the lesser dimensions closer to the part. • Try to reference dimensions from one surface – This will depend on the part and how the tolerances are based. Autumn Quarter Gateway Engineering Education Coalition 17

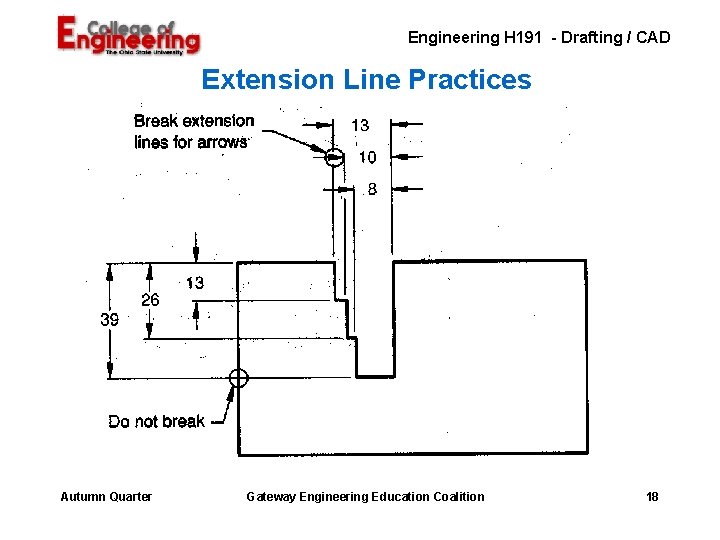
Engineering H 191 - Drafting / CAD Extension Line Practices Autumn Quarter Gateway Engineering Education Coalition 18

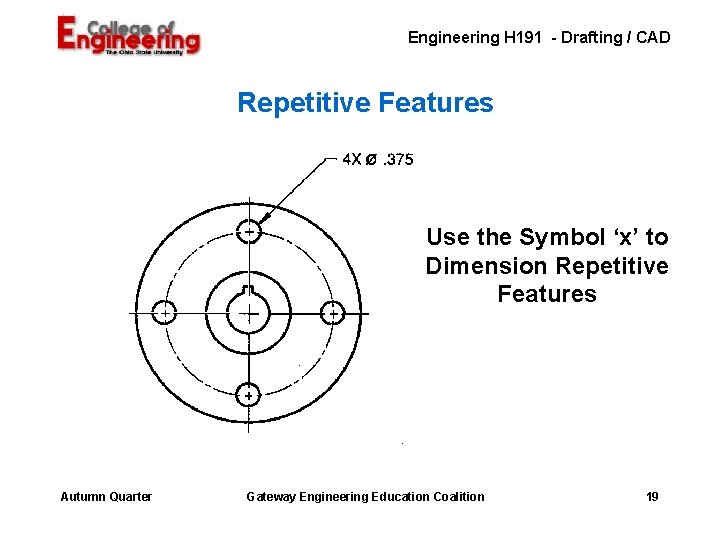
Engineering H 191 - Drafting / CAD Repetitive Features Use the Symbol ‘x’ to Dimension Repetitive Features Autumn Quarter Gateway Engineering Education Coalition 19

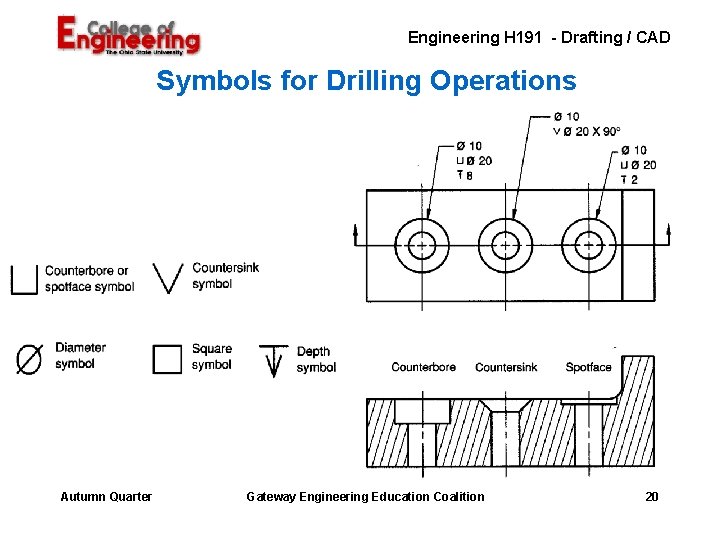
Engineering H 191 - Drafting / CAD Symbols for Drilling Operations Autumn Quarter Gateway Engineering Education Coalition 20

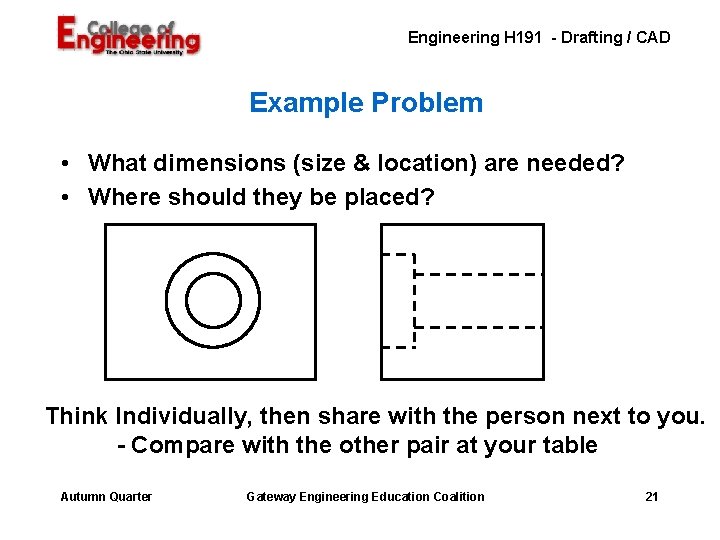
Engineering H 191 - Drafting / CAD Example Problem • What dimensions (size & location) are needed? • Where should they be placed? Think Individually, then share with the person next to you. - Compare with the other pair at your table Autumn Quarter Gateway Engineering Education Coalition 21

Engineering H 191 - Drafting / CAD Assignments • Dwg 31 – DIM-1 – Fully dimension the objects shown using correct dimensioning practices. (part is fully dimensioned if it is possible to machine it from the dimensions provided) – Use Inch Dimensions to the second place (x. xx) • Dwg 32 – DIM-2 – Fully dimension the objects shown using correct dimensioning practices. – Use one-place metric dimensions (x. x) • Bring your Auto. CAD 2 D Book Tomorrow Autumn Quarter Gateway Engineering Education Coalition 22