Engineering 1182 Dimensioning with Solid Works Demo Although
- Slides: 15

• Engineering 1182 Dimensioning with Solid. Works - Demo Although most demos are implemented with word documents, this demo employs slides so that more details can be shown to the students as the drawing is constructed. Part 1 College of Engineering Education Innovation Center Rev: 2014 -07 -13 - RCB Dimensioning in Solid. Works 1

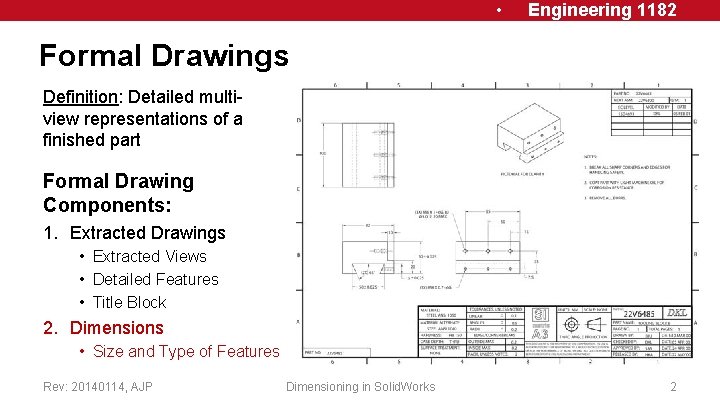
• Engineering 1182 Formal Drawings Definition: Detailed multiview representations of a finished part Formal Drawing Components: 1. Extracted Drawings • Extracted Views • Detailed Features • Title Block 2. Dimensions • Size and Type of Features Rev: 20140114, AJP Dimensioning in Solid. Works 2

• Engineering 1182 Basic Dimensioning is used to define an object so that it could be manufactured and must: • Define the overall size of the part in all 3 dimensions. • Define the size and location of the features of the part in all 3 dimensions. Rev: 20140114, AJP Dimensioning in Solid. Works 3

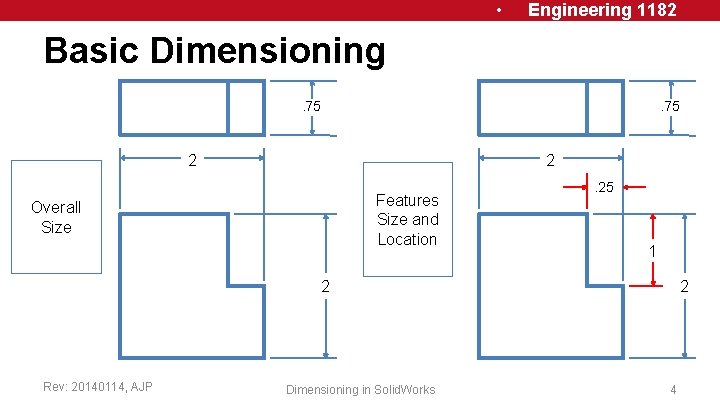
• Engineering 1182 Basic Dimensioning. 75 2 2 Features Size and Location Overall Size . 25 1 2 Rev: 20140114, AJP Dimensioning in Solid. Works 2 4

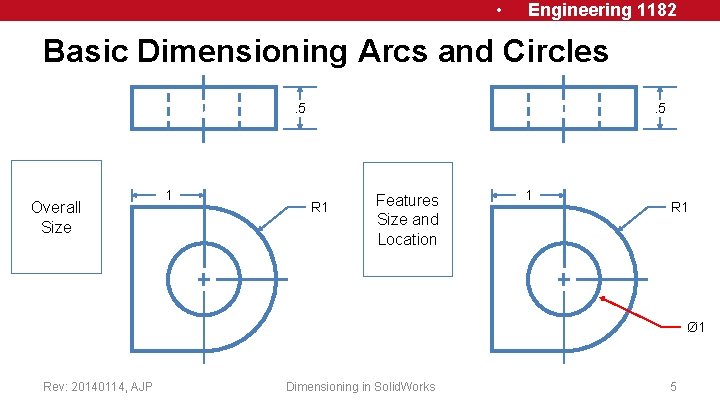
• Engineering 1182 Basic Dimensioning Arcs and Circles. 5 Overall Size 1 . 5 R 1 Features Size and Location 1 R 1 Ø 1 Rev: 20140114, AJP Dimensioning in Solid. Works 5

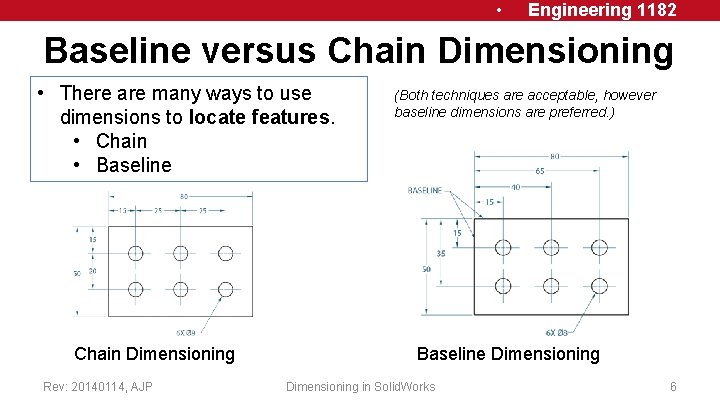
• Engineering 1182 Baseline versus Chain Dimensioning • There are many ways to use dimensions to locate features. • Chain • Baseline Chain Dimensioning Rev: 20140114, AJP (Both techniques are acceptable, however baseline dimensions are preferred. ) Baseline Dimensioning in Solid. Works 6

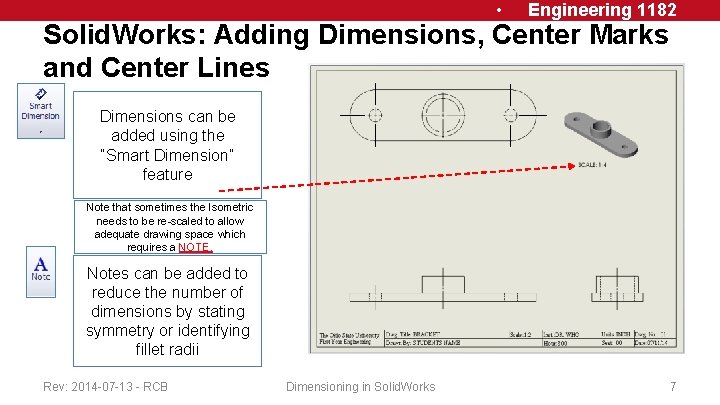
• Engineering 1182 Solid. Works: Adding Dimensions, Center Marks and Center Lines Dimensions can be added using the “Smart Dimension” feature Note that sometimes the Isometric needs to be re-scaled to allow adequate drawing space which requires a NOTE. Notes can be added to reduce the number of dimensions by stating symmetry or identifying fillet radii Rev: 2014 -07 -13 - RCB Dimensioning in Solid. Works 7

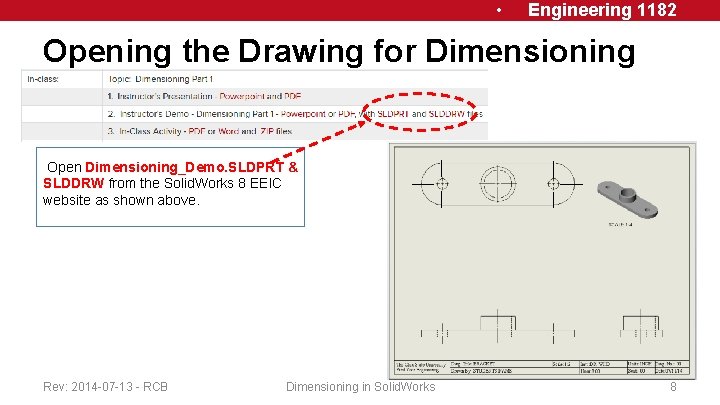
• Engineering 1182 Opening the Drawing for Dimensioning Open Dimensioning_Demo. SLDPRT & SLDDRW from the Solid. Works 8 EEIC website as shown above. bsit. Solid. Work-7 EEIC Rev: 2014 -07 -13 - RCB Dimensioning in Solid. Works 8

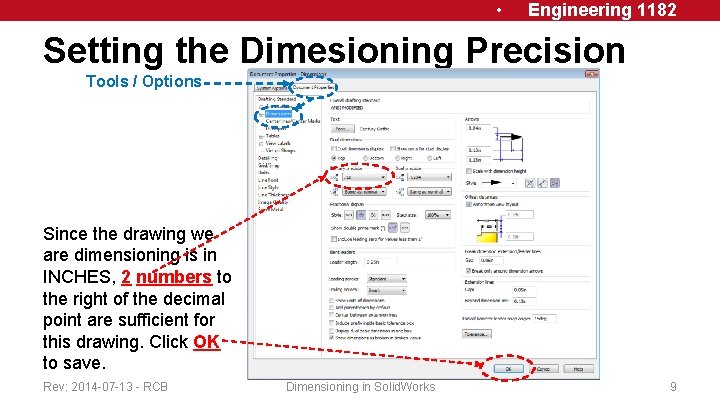
• Engineering 1182 Setting the Dimesioning Precision Tools / Options Since the drawing we are dimensioning is in INCHES, 2 numbers to the right of the decimal point are sufficient for this drawing. Click OK to save. Rev: 2014 -07 -13 - RCB Dimensioning in Solid. Works 9

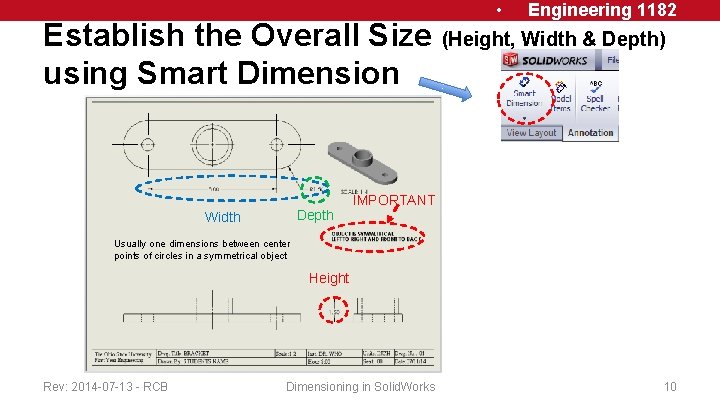
• Engineering 1182 Establish the Overall Size (Height, Width & Depth) using Smart Dimension Depth Width IMPORTANT Usually one dimensions between center points of circles in a symmetrical object Height Rev: 2014 -07 -13 - RCB Dimensioning in Solid. Works 10

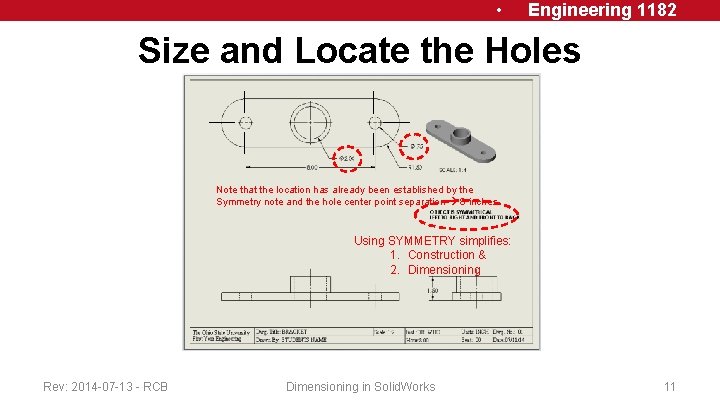
• Engineering 1182 Size and Locate the Holes Note that the location has already been established by the Symmetry note and the hole center point separation 8 inches Using SYMMETRY simplifies: 1. Construction & 2. Dimensioning Rev: 2014 -07 -13 - RCB Dimensioning in Solid. Works 11

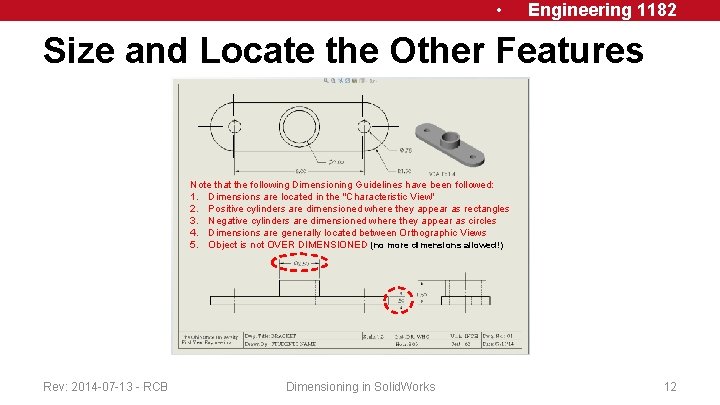
• Engineering 1182 Size and Locate the Other Features Note that the following Dimensioning Guidelines have been followed: 1. Dimensions are located in the "Characteristic View" 2. Positive cylinders are dimensioned where they appear as rectangles 3. Negative cylinders are dimensioned where they appear as circles 4. Dimensions are generally located between Orthographic Views 5. Object is not OVER DIMENSIONED (no more dimensions allowed!) Rev: 2014 -07 -13 - RCB Dimensioning in Solid. Works 12

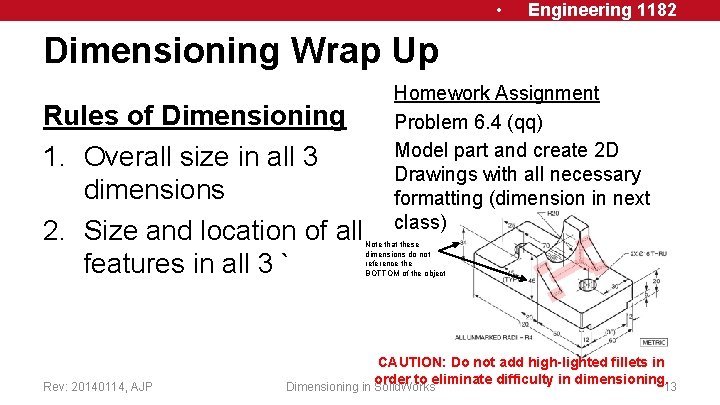
• Engineering 1182 Dimensioning Wrap Up Rules of Dimensioning 1. Overall size in all 3 dimensions 2. Size and location of all features in all 3 ` Rev: 20140114, AJP Homework Assignment Problem 6. 4 (qq) Model part and create 2 D Drawings with all necessary formatting (dimension in next class) Note that these dimensions do not reference the BOTTOM of the object CAUTION: Do not add high-lighted fillets in order to eliminate difficulty in dimensioning. 13 Dimensioning in Solid. Works

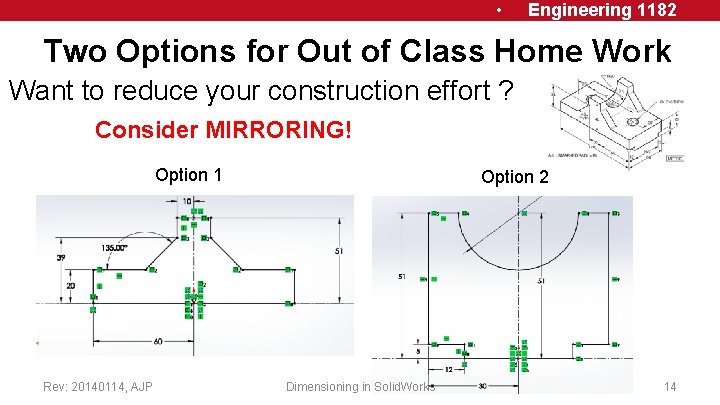
• Engineering 1182 Two Options for Out of Class Home Work Want to reduce your construction effort ? Consider MIRRORING! Option 1 Rev: 20140114, AJP Option 2 Dimensioning in Solid. Works 14

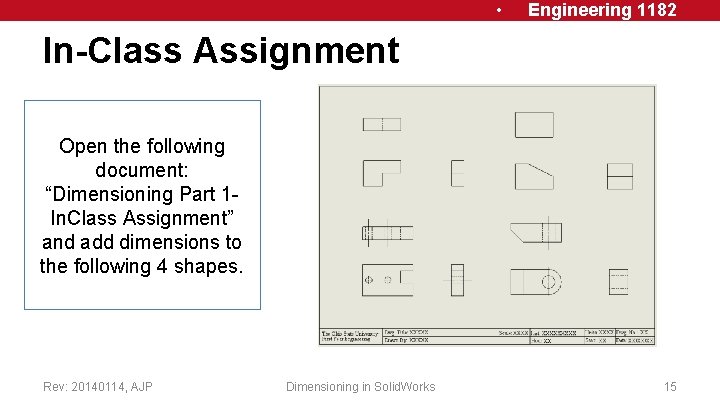
• Engineering 1182 In-Class Assignment Open the following document: “Dimensioning Part 1 In. Class Assignment” and add dimensions to the following 4 shapes. Rev: 20140114, AJP Dimensioning in Solid. Works 15