End Zone Positioning End Zone Positioning Proper end
- Slides: 12

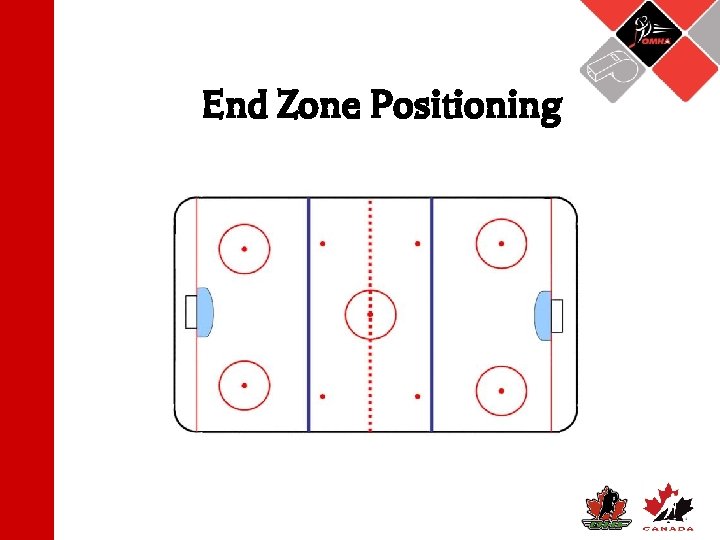
End Zone Positioning

End Zone Positioning • Proper end zone positioning: – Gives a better overall view of the play – Gives an improved view of the goal and goal line – Lessens the chance of a referee being caught behind the play on a fast break – Keeps the official safe from deflections on a shot on goal – Keeps the referee in a predictable spot for players, • There are 3 positions and 2 maneuvers for the Referee in the end zone and together are referred to as the “Piston”

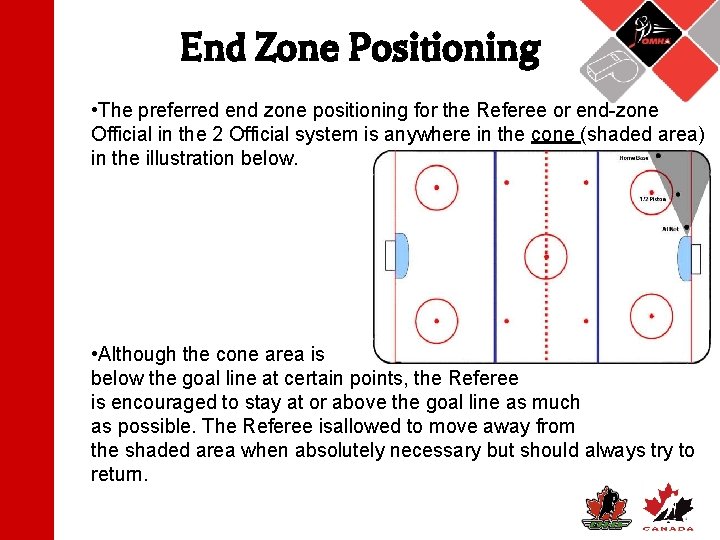
End Zone Positioning • The preferred end zone positioning for the Referee or end-zone Official in the 2 Official system is anywhere in the cone (shaded area) in the illustration below. • Although the cone area is below the goal line at certain points, the Referee is encouraged to stay at or above the goal line as much as possible. The Referee isallowed to move away from the shaded area when absolutely necessary but should always try to return.

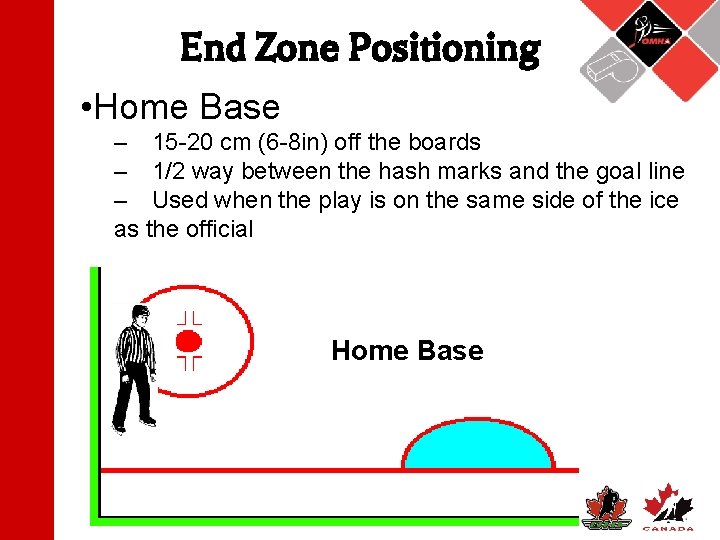
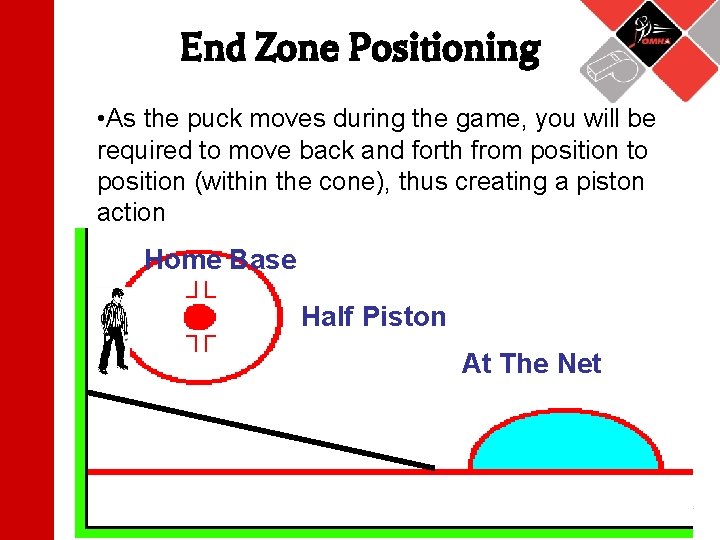
End Zone Positioning • Home Base – 15 -20 cm (6 -8 in) off the boards – 1/2 way between the hash marks and the goal line – Used when the play is on the same side of the ice as the official Home Base

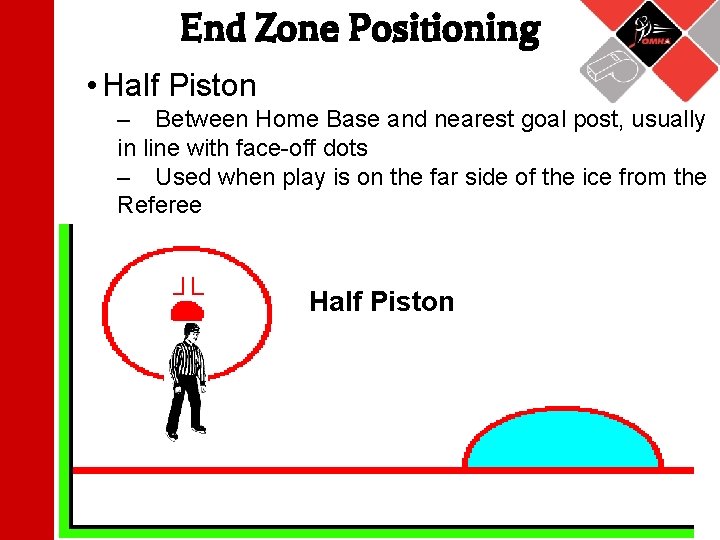
End Zone Positioning • Half Piston – Between Home Base and nearest goal post, usually in line with face-off dots – Used when play is on the far side of the ice from the Referee Half Piston

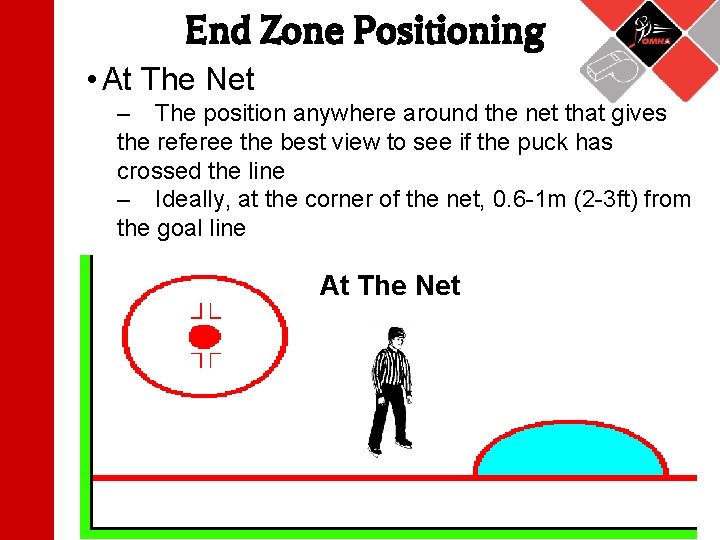
End Zone Positioning • At The Net – The position anywhere around the net that gives the referee the best view to see if the puck has crossed the line – Ideally, at the corner of the net, 0. 6 -1 m (2 -3 ft) from the goal line At The Net

End Zone Positioning • As the puck moves during the game, you will be required to move back and forth from position to position (within the cone), thus creating a piston action Home Base Half Piston At The Net

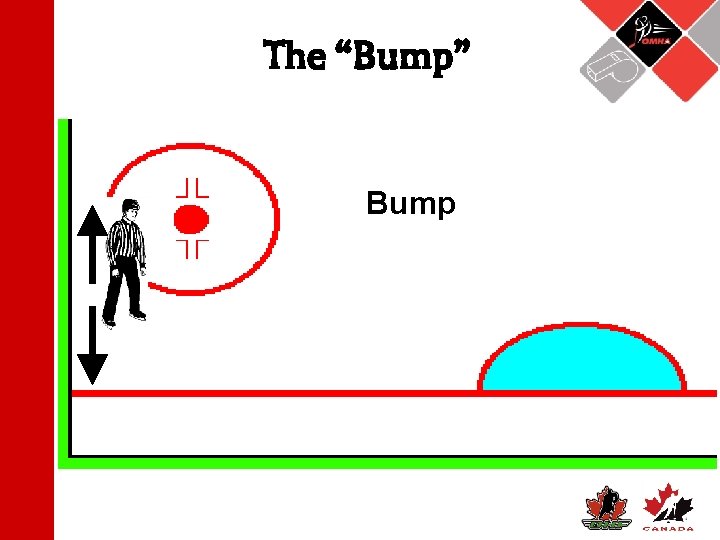
The 2 Maneuvers • Bump – Used when play comes around the boards in the direction of the Referee standing at Home Base – The Referee “bumps” up or down from his/her position, until they reach the hash marks or goal line.

The “Bump” Bump

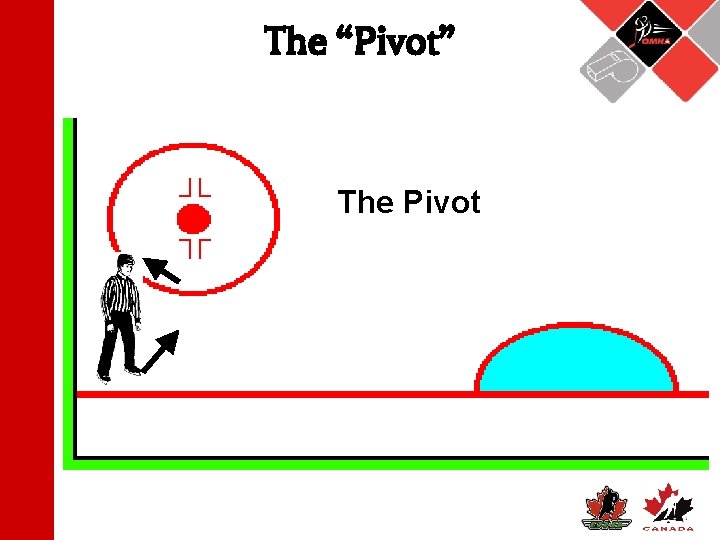
The 2 Maneuvers • Pivot – When you have bumped to the goal line or hash marks and the play continues toward you, you must perform the pivot – Take a stride out from the boards – Then cross under, and skate backwards to Home Base

The “Pivot” The Pivot

Faults and Tips • Try to stay above the goal line as much as possible • Do not cross behind the net • Anticipation is key – Relax, anticipate the play, and move only when you need to.