Embedded System Lab 8 8 Embedded System Lab

Embedded System Lab. 8. 임베디드 시스템 개발 환경 8주차 강의 자료 Embedded System Lab. Copyright © Wilson Learning Corporation 2001


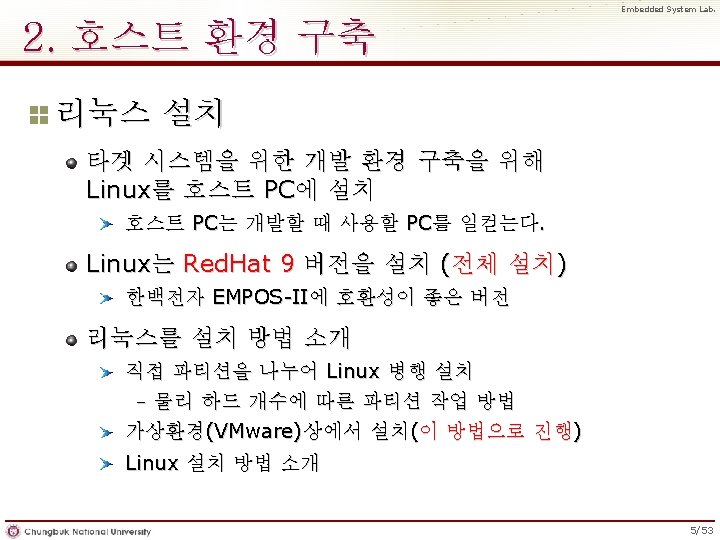
Embedded System Lab. 1. 소개 호스트 - Host 임베디드 시스템을 개발하기 위한 컴퓨터 시스템 유형 Linux workstation (이 유형 사용) Unix workstation Windows workstation 타겟 - Target 개발하려는 임베디드 시스템 한백전자 EMPOS-II Copyright © Wilson Learning Corporation 2001 4/53

Embedded System Lab. 2. 호스트 환경 구축 리눅스 설치 방법 1. 직접 파티션을 나누어 Linux 병행 설치 물리 하드 개수에 따른 파티션 작업 방법 HDD 1 1개의 HDD partition Windows Linux C D HDD 1 Windows partition 다수의 HDD C HDD 2 Linux partition D Copyright © Wilson Learning Corporation 2001 6/53

Embedded System Lab. 2. 호스트 환경 구축 1. 직접 파티션을 나누어 Linux 병행 설치 (계속) Grub를 이용한 멀티 부팅 Power On 멀티 부팅 GRUB Windows - C: Linux - D: Copyright © Wilson Learning Corporation 2001 7/53
 상에서 설치 VMware를 이용하여")
Embedded System Lab. 2. 호스트 환경 구축 2. 가상 환경(VMware) 상에서 설치 VMware를 이용하여 리눅스 설치 VMware (Application) Linux (OS) Windows (OS) Copyright © Wilson Learning Corporation 2001 8/53
 상에서 설치 (계속) VMware")
Embedded System Lab. 2. 호스트 환경 구축 2. 가상 환경(VMware) 상에서 설치 (계속) VMware 다운로드 – http: //www. vmware. com/ 에서 회원 가입 – E-mail로 30일 이용 가능한 license key 획득 – VMware Workstation for Windows 다운로드 VMware를 설치 – 다운 받은 설치 파일 실행하여 설치 – 설치 종료 후 E-mail로 받은 license key 입력 » 30일 이후에는 VMware Player를 다운하여 사용 1 2 클릭 5 클릭 6 클릭 3 4 클릭 7 license key 클릭 8 클릭 클릭 Copyright © Wilson Learning Corporation 2001 9/53
 상에서 설치 (계속) VMware")
Embedded System Lab. 2. 호스트 환경 구축 2. 가상 환경(VMware) 상에서 설치 (계속) VMware 실행 – 시작 프로그램 VMware Workstation – License 동의 VMware에 Linux Red. Hat 9을 위한 VM 이미지 생성 – 새로운 Virtual Machine 이미지 생성하기 클릭 Copyright © Wilson Learning Corporation 2001 10/53
 상에서 설치 (계속) VMware에")
Embedded System Lab. 2. 호스트 환경 구축 2. 가상 환경(VMware) 상에서 설치 (계속) VMware에 Linux Red. Hat 9을 위한 VM 이미지 생성 1 2 (계속) 3 Linux 설정 클릭 클릭 클릭 4 5 Red. Hat Linux 설정 Bridged 설정 클릭 6 용량 15 G 조절 클릭 클릭 만약 Fedora 8을 8을 설치할 경우에는 Other Linux 2. 6. x kernel 선택 7 클릭 Copyright © Wilson Learning Corporation 2001 11/53
 상에서 설치 (계속) Embedded")
Embedded System Lab. 2. 호스트 환경 구축 2. 가상 환경(VMware) 상에서 설치 (계속) Embedded Linux Red. Hat 9을 위한 VM 환경 설정 1 3 Serial, Parallel Port 추가 2 클릭 4 5 클릭 클릭 클릭 Copyright © Wilson Learning Corporation 2001 12/53
 상에서 설치 (계속) Embedded")
Embedded System Lab. 2. 호스트 환경 구축 2. 가상 환경(VMware) 상에서 설치 (계속) Embedded Linux Red. Hat 9을 위한 VM 환경 설정 (계속) 1 2 메인 메모리의 절반을 할당 Red. Hat 9 DVD 이미지 삽입 (이미지 교체 없이 Install 가능) 이미지 다운로드 주소 인터넷 주소창에 복사 후 엔터 ftp: //ftp. sayclub. com/pub/Linux/redhat / archive. redhat. com/redhat/linux/9/en/ iso/i 386/shrike-i 386 -dvd 1. iso Copyright © Wilson Learning Corporation 2001 13/53
 상에서 설치 (계속) VMware에")
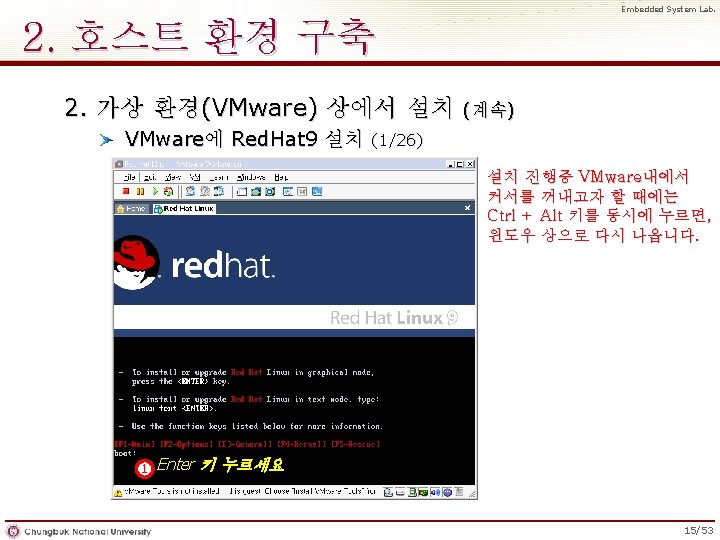
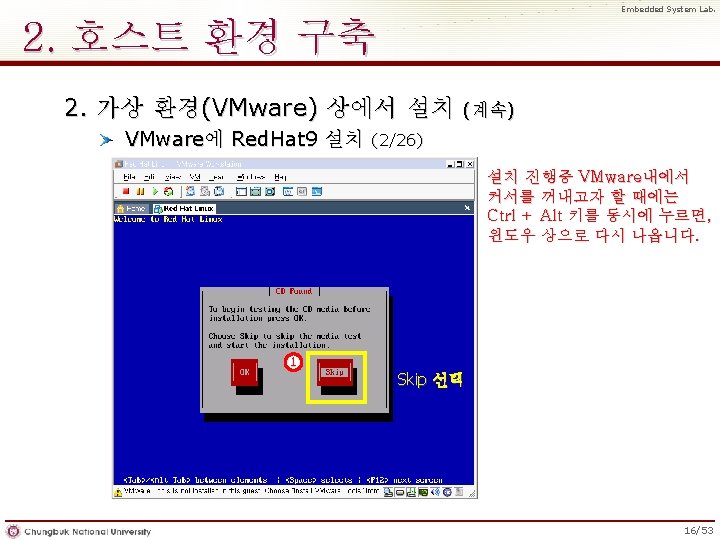
Embedded System Lab. 2. 호스트 환경 구축 2. 가상 환경(VMware) 상에서 설치 (계속) VMware에 Red. Hat 9 설치 시작 1 시작 Copyright © Wilson Learning Corporation 2001 14/53
 상에서 설치 VMware에 Red.")
Embedded System Lab. 2. 호스트 환경 구축 2. 가상 환경(VMware) 상에서 설치 VMware에 Red. Hat 9 설치 (계속) (3/26) 1 클릭 Copyright © Wilson Learning Corporation 2001 17/53
 상에서 설치 VMware에 Red.")
Embedded System Lab. 2. 호스트 환경 구축 2. 가상 환경(VMware) 상에서 설치 VMware에 Red. Hat 9 설치 (계속) (4/26) 한국어 선택 1 2 클릭 Copyright © Wilson Learning Corporation 2001 18/53
 상에서 설치 VMware에 Red.")
Embedded System Lab. 2. 호스트 환경 구축 2. 가상 환경(VMware) 상에서 설치 VMware에 Red. Hat 9 설치 (계속) (5/26) 영문자판 선택 1 2 클릭 Copyright © Wilson Learning Corporation 2001 19/53
 상에서 설치 VMware에 Red.")
Embedded System Lab. 2. 호스트 환경 구축 2. 가상 환경(VMware) 상에서 설치 VMware에 Red. Hat 9 설치 (계속) (6/26) 기본 설정 유지 1 2 클릭 Copyright © Wilson Learning Corporation 2001 20/53
 상에서 설치 VMware에 Red.")
Embedded System Lab. 2. 호스트 환경 구축 2. 가상 환경(VMware) 상에서 설치 VMware에 Red. Hat 9 설치 (계속) (7/26) 1 사용자 설치 2 클릭 Copyright © Wilson Learning Corporation 2001 21/53
 상에서 설치 VMware에 Red.")
Embedded System Lab. 2. 호스트 환경 구축 2. 가상 환경(VMware) 상에서 설치 VMware에 Red. Hat 9 설치 (계속) (8/26) 1 자동 파티션 분할 진행 2 클릭 Copyright © Wilson Learning Corporation 2001 22/53
 상에서 설치 VMware에 Red.")
Embedded System Lab. 2. 호스트 환경 구축 2. 가상 환경(VMware) 상에서 설치 VMware에 Red. Hat 9 설치 1 (계속) (9/26) 클릭 Copyright © Wilson Learning Corporation 2001 23/53
 상에서 설치 VMware에 Red.")
Embedded System Lab. 2. 호스트 환경 구축 2. 가상 환경(VMware) 상에서 설치 VMware에 Red. Hat 9 설치 1 (계속) (10/26) 기본 설정 2 클릭 Copyright © Wilson Learning Corporation 2001 24/53
 상에서 설치 VMware에 Red.")
Embedded System Lab. 2. 호스트 환경 구축 2. 가상 환경(VMware) 상에서 설치 VMware에 Red. Hat 9 설치 1 (계속) (11/26) 클릭 Copyright © Wilson Learning Corporation 2001 25/53
 상에서 설치 VMware에 Red.")
Embedded System Lab. 2. 호스트 환경 구축 2. 가상 환경(VMware) 상에서 설치 VMware에 Red. Hat 9 설치 (계속) (12/26) 자동 설정 상태 1 클릭 Copyright © Wilson Learning Corporation 2001 26/53
 상에서 설치 VMware에 Red.")
Embedded System Lab. 2. 호스트 환경 구축 2. 가상 환경(VMware) 상에서 설치 VMware에 Red. Hat 9 설치 (계속) (13/26) 1 클릭 Copyright © Wilson Learning Corporation 2001 27/53
 상에서 설치 VMware에 Red.")
Embedded System Lab. 2. 호스트 환경 구축 2. 가상 환경(VMware) 상에서 설치 VMware에 Red. Hat 9 설치 1 (계속) (14/26) 호스트 PC 이름을 기재 (스스로 정함) 2 클릭 Copyright © Wilson Learning Corporation 2001 28/53
 상에서 설치 VMware에 Red.")
Embedded System Lab. 2. 호스트 환경 구축 2. 가상 환경(VMware) 상에서 설치 VMware에 Red. Hat 9 설치 (계속) (15/26) 1 [방화벽을 사용하지 않음] 선택 2 클릭 Copyright © Wilson Learning Corporation 2001 29/53
 상에서 설치 VMware에 Red.")
Embedded System Lab. 2. 호스트 환경 구축 2. 가상 환경(VMware) 상에서 설치 VMware에 Red. Hat 9 설치 (계속) (16/26) 1 클릭 Copyright © Wilson Learning Corporation 2001 30/53
 상에서 설치 VMware에 Red.")
Embedded System Lab. 2. 호스트 환경 구축 2. 가상 환경(VMware) 상에서 설치 VMware에 Red. Hat 9 설치 (계속) (17/26) 1 클릭 Copyright © Wilson Learning Corporation 2001 31/53
 상에서 설치 VMware에 Red.")
Embedded System Lab. 2. 호스트 환경 구축 2. 가상 환경(VMware) 상에서 설치 VMware에 Red. Hat 9 설치 (계속) (18/26) 1 암호 입력 2 클릭 Copyright © Wilson Learning Corporation 2001 32/53
 상에서 설치 VMware에 Red.")
Embedded System Lab. 2. 호스트 환경 구축 2. 가상 환경(VMware) 상에서 설치 VMware에 Red. Hat 9 설치 (계속) (19/26) 1 클릭 Copyright © Wilson Learning Corporation 2001 33/53
 상에서 설치 VMware에 Red.")
Embedded System Lab. 2. 호스트 환경 구축 2. 가상 환경(VMware) 상에서 설치 VMware에 Red. Hat 9 설치 (계속) (20/26) 1 2 스크롤 바 최하단으로 내리기 전부 설치 선택 3 클릭 Copyright © Wilson Learning Corporation 2001 34/53
 상에서 설치 VMware에 Red.")
Embedded System Lab. 2. 호스트 환경 구축 2. 가상 환경(VMware) 상에서 설치 VMware에 Red. Hat 9 설치 (계속) (21/26) 1 클릭 Copyright © Wilson Learning Corporation 2001 35/53
 상에서 설치 VMware에 Red.")
Embedded System Lab. 2. 호스트 환경 구축 2. 가상 환경(VMware) 상에서 설치 VMware에 Red. Hat 9 설치 1 (계속) (22/26) 클릭 2 클릭 Copyright © Wilson Learning Corporation 2001 36/53
 상에서 설치 VMware에 Red.")
Embedded System Lab. 2. 호스트 환경 구축 2. 가상 환경(VMware) 상에서 설치 VMware에 Red. Hat 9 설치 (계속) (23/26) 1 클릭 Copyright © Wilson Learning Corporation 2001 37/53
 상에서 설치 VMware에 Red.")
Embedded System Lab. 2. 호스트 환경 구축 2. 가상 환경(VMware) 상에서 설치 VMware에 Red. Hat 9 설치 (계속) (24/26) 1 클릭 Copyright © Wilson Learning Corporation 2001 38/53
 상에서 설치 VMware에 Red.")
Embedded System Lab. 2. 호스트 환경 구축 2. 가상 환경(VMware) 상에서 설치 VMware에 Red. Hat 9 설치 (계속) (25/26) 1 클릭 Copyright © Wilson Learning Corporation 2001 39/53
 상에서 설치 VMware에 Red.")
Embedded System Lab. 2. 호스트 환경 구축 2. 가상 환경(VMware) 상에서 설치 VMware에 Red. Hat 9 설치 (계속) (26/26) 1 클릭 Copyright © Wilson Learning Corporation 2001 40/53

Embedded System Lab. 2. 호스트 환경 구축 리눅스 시작 부트로더 - GRUB 1 Enter Copyright © Wilson Learning Corporation 2001 41/53

Embedded System Lab. 2. 호스트 환경 구축 초기 설정 2 1 클릭 클릭 1 1 클릭 클릭 2 Copyright © Wilson Learning Corporation 2001 42/53

Embedded System Lab. 2. 호스트 환경 구축 설정 완료 1 클릭 Copyright © Wilson Learning Corporation 2001 43/53

Embedded System Lab. 2. 호스트 환경 구축 리눅스 시작 로그인 1 사용자 이름으로 root 입력 2 비밀번호 입력 Copyright © Wilson Learning Corporation 2001 44/53

Embedded System Lab. 2. 호스트 환경 구축 리눅스 설치 완료 Copyright © Wilson Learning Corporation 2001 45/53

Embedded System Lab. 3. 타겟 시스템 소개 한백전자 EMPOS-II Board 소개 CPU : Intel Xscale PAX 255 (over 400 MHz) LCD : LG-Philips의 LB 064 V 02 640× 480 TFT LCD Memory : 128 Mbyte SDRAM과 32 MByte Flash Memory TEXT LCD : 20× 2 DATA IMAGEd의 CM 2020 S 1 LY-K 2 Character LCD LED : 8개의 SMD Type의 LED 7 -Segment : 각각 8개의 LED 엘리먼트로 구성되어 총 4개 있음 Network Interface : LAN 91 C 111 Ethernet Push Button : HBE-EMPOS-II의 데이터 버스에 연결된 8개 버튼 Full UART : 시리얼 통신을 위해 두 개가 존재(UART, Bluetooth) Audio CODEC : Cirrus Logic의 Crystal CS 4202 탑재 Jtag : Flash 메모리 프로그램밍 할 수 있는 Joint Test Action Group 제공 Copyright © Wilson Learning Corporation 2001 47/53

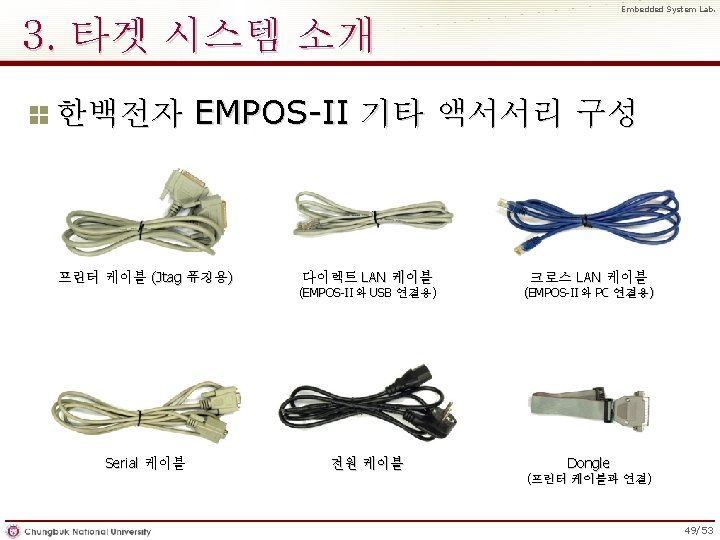
Embedded System Lab. 3. 타겟 시스템 소개 한백전자 EMPOS-II Board 구성 3 5 4 2 1 6 9 10 8 7 11 9 15 16 12 13 14 18 17 20 19 21 22 28 25 23 26 29 24 27 30 1. Touch-screen panel controllers 2. Graphic Display / Touch Screen 3. 20 x 2 TEXT LCD * 1 EA 4. 7 -Segment 5. LED 6. Push Button Switch 7. SD or MMC Slot 1 EA 8. I 2 C to 24 C 16 EEPROM 9. Expansion Port 10. Network Interface 2 11. Network Interface 1 12. USB Interface 13. Real Time clock 14. CPU 15. Reset Switch 16. VDD Fault Button 17. GPIO Led 18. Batt Fault Button 19. GPIO Button 20. Mouse Controller 21. PS 2 Keyboard Controller 22. Full UART 1 Port 23. Bluetooth UART 1 Port 24. Ir. DA (infrared) transceiver 1 Port 25. 128 Mbyte SDRAM 26. 32 Mbytes Flash memory 27. Jtag Port 28. Audio CODEC : Cirrus CS 4202 29. PCMCIA slot 1 EA 30. Compact slot 1 EA Copyright © Wilson Learning Corporation 2001 48/53

Embedded System Lab. 3. 타겟 시스템 소개 연결 방법 Target 파워 케이블 연결 rt와 po l ria Se 결 연 t와 연결 ort와 Parallel p Host 시리얼 케이블 연결 프린터 케이블 + Dongle 연결 Ethern et Car d와 연 결 크로스 LAN 케이블 Copyright © Wilson Learning Corporation 2001 50/53

Embedded System Lab. 4. 요약 및 Quiz 참고자료 리눅스 기본 명령어 http: //www. superuser. co. kr/home/lecture/index. php? cate. No=1&sec. No=28&the. No= vi 에디터 사용법 http: //wiki. kldp. org/wiki. php/Docbook. Sgml/Vim-KLDP 리눅스 프로그래밍 http: //wiki. kldp. org/wiki. php/%B 0%B 3%B 9%DF%C 0 %DA%C 4%DA%B 3%CA Virtual Machine http: //wiki. kldp. org/wiki. php/Virtual. Machine#s-1. 1 Copyright © Wilson Learning Corporation 2001 52/53
- Slides: 55