DRAWING PROJECT PROJECT TITLE Various Symbols And Special

DRAWING PROJECT
PROJECT TITLE Various Symbols And Special Lines Used In Civil Engineering Drawing
Submitted To: Engr. FAWAD AHMED NAJAM SUBMITTED BY: 2 K 9 -SCET-29 2 K 9 -SCET-30 2 K 9 -SCET-31 2 K 9 -SCET-33 2 K 9 -SCET-34
v. SPECIAL LINES �Standard engineering drawing line types v Visible v Hidden v center v cutting plane v Break lines v Dimension and extension lines
v. LINES v Visible lines: continuous lines used to depict edges directly visible from a particular angle. v Hidden lines: are short-dashed lines that may be used to represent edges that are not directly visible. v Center lines are alternately long- and short-dashed lines that may be used to represent the axes of circular features.
v. LINES v Cutting Plane: are thin, medium-dashed lines, or thick alternately long- and double short-dashed that may be used to define sections for section views. v Break lines: v Dimension And Extension Lines:
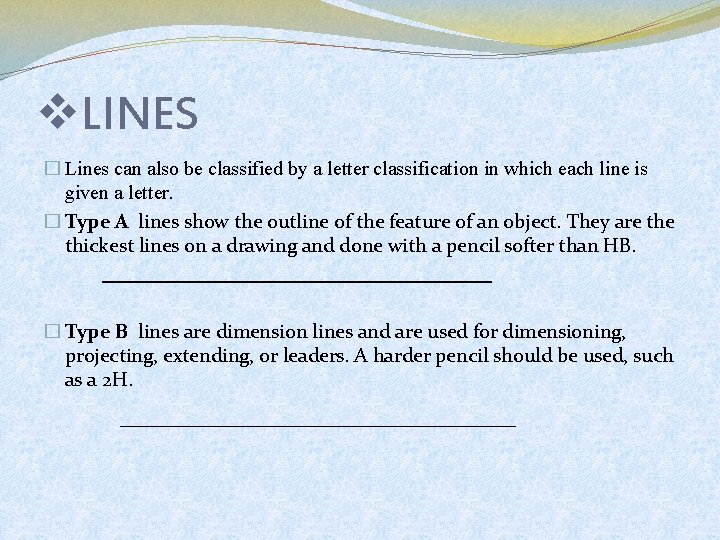
v. LINES � Lines can also be classified by a letter classification in which each line is given a letter. � Type A lines show the outline of the feature of an object. They are thickest lines on a drawing and done with a pencil softer than HB. � Type B lines are dimension lines and are used for dimensioning, projecting, extending, or leaders. A harder pencil should be used, such as a 2 H.
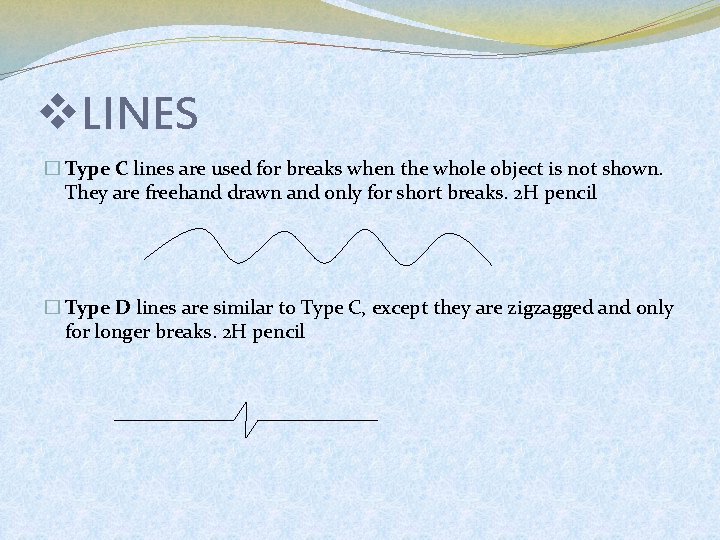
v. LINES � Type C lines are used for breaks when the whole object is not shown. They are freehand drawn and only for short breaks. 2 H pencil � Type D lines are similar to Type C, except they are zigzagged and only for longer breaks. 2 H pencil
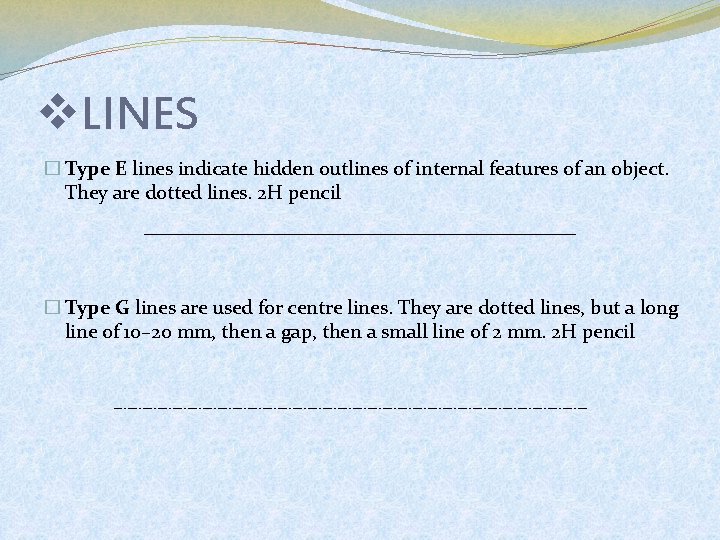
v. LINES � Type E lines indicate hidden outlines of internal features of an object. They are dotted lines. 2 H pencil � Type G lines are used for centre lines. They are dotted lines, but a long line of 10– 20 mm, then a gap, then a small line of 2 mm. 2 H pencil
v. LINES � Type H lines are the same as Type G, except that every second long line is thicker. They indicate the cutting plane of an object. 2 H pencil � Type K lines indicate the alternate positions of an object and the line taken by that object. They are drawn with a long line of 10– 20 mm, then a small gap, then a small line of 2 mm, then a gap, then another small line. 2 H pencil.
v. SYMBOLS Definition Shared understandings about the meaning of certain words, attributes, or objects. � Characteristics Displacement Our ability to understand that a certain symbol means a certain thing. Arbitrary A symbol has no direct connection with the thing it refers to. Meaning is a construction of the human mind. Openness Our ability to create and use symbols as we see fit. �
v. SYMBOLS � DRAWING SYMBOLS: Because of the small scale used in most drawings, standard graphic symbols are used to present complete information concerning construction items and materials. These typical symbols are used so frequently in construction drawings that their meanings must be familiar not only to the preparer, but to the user as well.
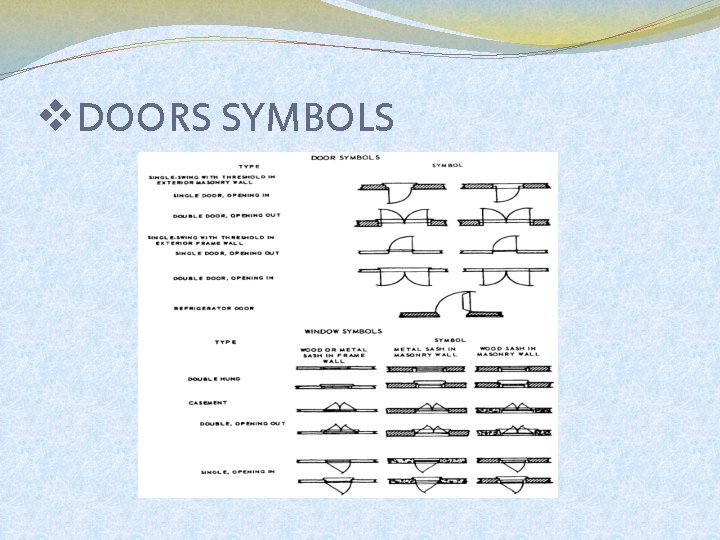
v. DOORS SYMBOLS
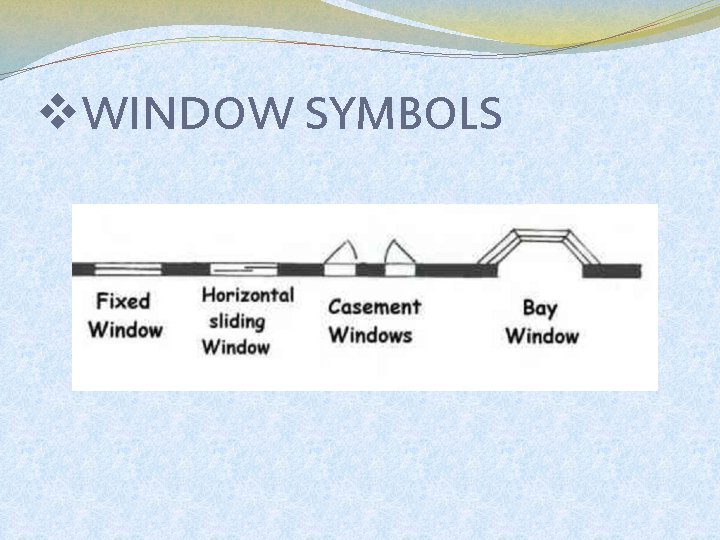
v. WINDOW SYMBOLS
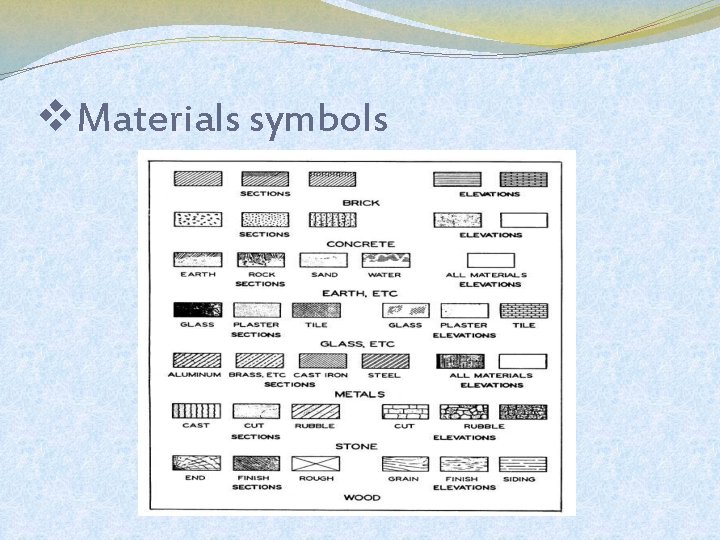
v. Materials symbols
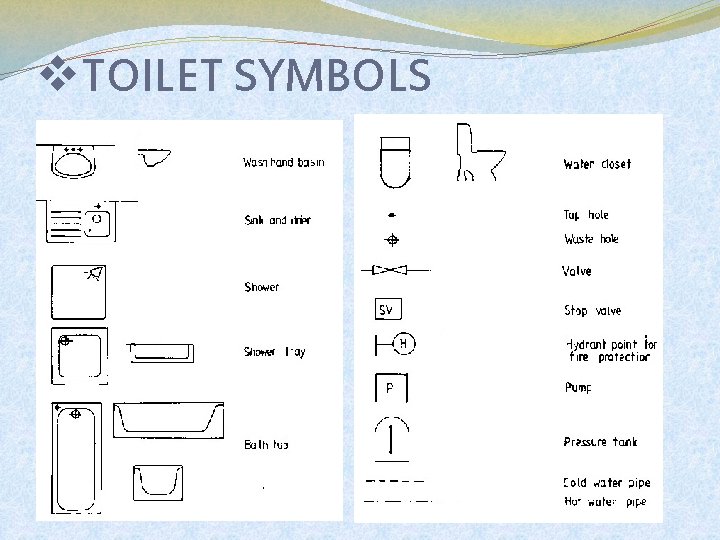
v. TOILET SYMBOLS
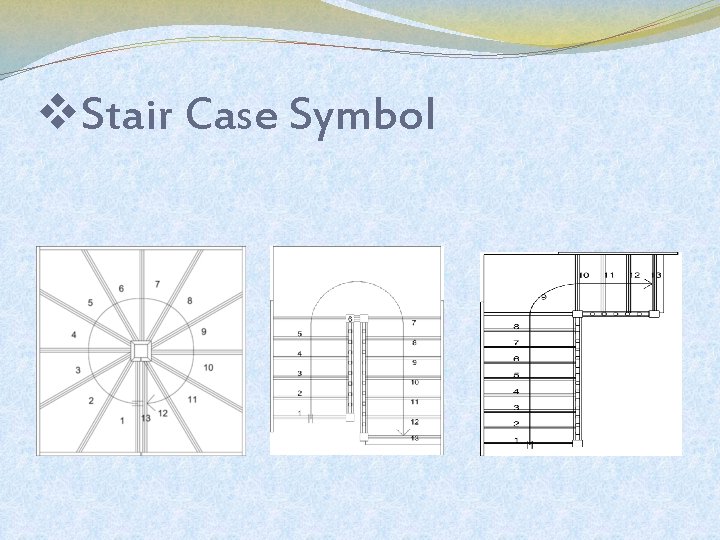
v. Stair Case Symbol
- Slides: 17