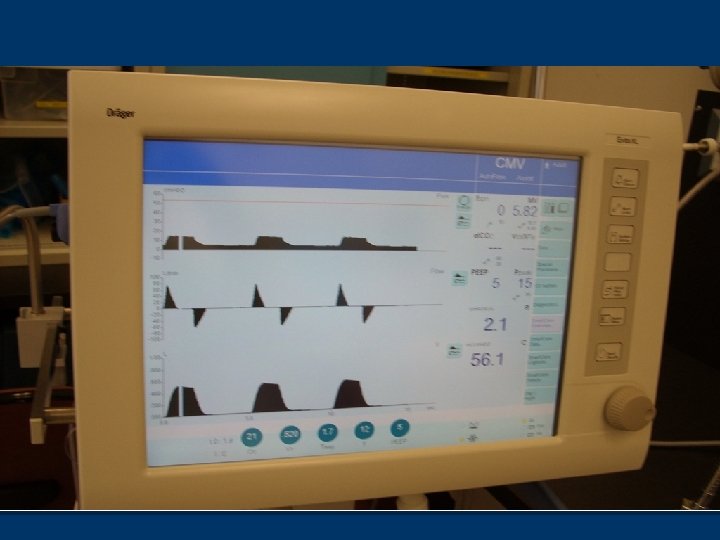
Drager Evita Mechanical Ventilators Evita 4 Reading n


 n APRV n SIMV (Volume with or")


 n Caution (Medium")


 n Link Pinsp and")


 can be ‘slaved’ n Via analog")
 n Don’t forget to")


- Slides: 49
Drager Evita Mechanical Ventilators
Evita 4 Reading n Read pages 447 - 464 in Cairo n Complete the review questions on pages 463 - 464 n Website below on Web CT as a link http: //www. draeger-medical. com/MT/internet/EN/us/lib/Demos/int_lib_demo_evita. jsp You should also be familiar with the Drager Evita 2 ventilator This is used clinically at some sites in CHA n The Evita 2 will NOT be tested in this course n Page 447 n
Basics of Evita XL n Microprocessor-controlled, electrically and pneumatically -driven n Flow and time are manually triggered
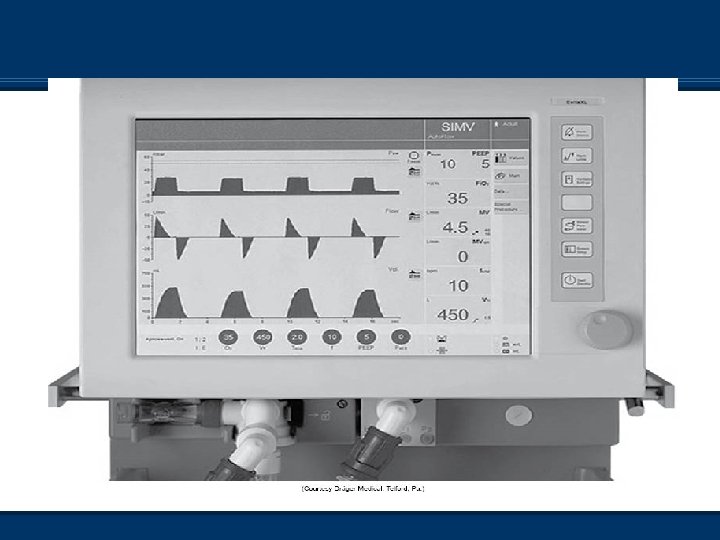
Modes of Ventilation n CMV (A/C volume) n APRV n SIMV (Volume with or n Neoflow n n without PS) PCV + (SIMV PC) PCV + Assist (PC A/C) PSV or CPAP MMV (With or without PS) n ILV n PPS (Not approved in Canada)
External Flow Transducer n Heated wire transducer n DO NOT poke pencils, fingers, etc into the sensor! n Must be changed with each change in pt n Must be recalibrated with each change using “device check”
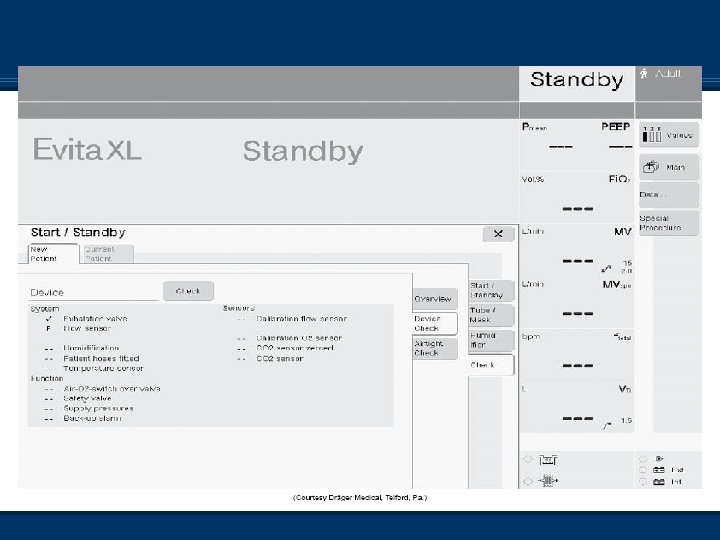
Ventilator Checkout n Device does a series of self-tests when turned on n Still requires “device check” to be done in-between pts, and any time the circuit or flow transducer has been changed n Once ventilator is in ‘stand-by’, choose ‘check’ from the tabs and then do the device check
Ventilator Checkout n Follow the instructions on the screen n Pay attention to these instructions! n Instructions are found on the top of the screen n If Neoflow sensor is NOT attached, this section will fail and you will be required to redo the procedure, so be sure to choose ‘next test’ n Don’t forget to do both sections – Device and airtight check n There is a ‘cork’ built into the stand of the Evita when doing the pressure-testing sections of the device check
Alarms n Three levels of alarm conditions n Warning (High priority) n Caution (Medium priority) n Advisory (Low priority) n Tonal quality of the alarms change depending on the level n Unable to pre-silence critical alarms Follows ISO: 9000 protocols n EXCEPTION – Suction procedure in the XL n
Alarms n Medium- and low-priority alarms do not need to be acknowledged by operator n High-priority alarms require the operator to press “alarm reset” on the screen and then hit the dial to verify that the problem is resolved
Available Controls n Only controls active in the selected mode are active n To change modes, select tab-adjust settings and then hit the dial button to apply n To access other modes, select the ‘More’ tab and choose the other mode that you would like
Autoflow n Autoflow is similar to PRVC on the Servo Vents and VC+ on PB 840 n “Target” volume ventilation with a pressure breath n Alters function of insp/exp valves, allowing pt to receive whatever inspiratory flow they want (up to 180 L/min) n Pt can breathe spont. at any time of Ti and Te due to active inhalation and exhalation valves n Available in all volume modes n Allows for ‘active inhale and exhalation valve’ n If pt coughs or breathes during set inspiration, expiration valve allows pt to inhale/exhale while maintaining inspiratory/expiratory pressure
Autoflow n When pt does more work, ventilator does less work n Same concerns as with Servo 300 n Pages 473 and 474 Mosby’s Equipment
Autoflow n To access, touch ‘additional settings’ button once your basic settings are entered n Then touch ‘autoflow on’ button n Press rotary knob to confirm this is what you want to do n When initiated, vent delivers volume-targeted breath with a pause n Plateau pressure is measured
Autoflow n Unit uses plateau pressure as baseline to start from n After first test breath (volume), vent delivers pressure breath at plateau pressure n Volume delivered is measured n Adjustments to ventilating pressure +/- 3 cm. H 20 to ‘guarantee volume’ delivered n High pressure limit 5 cm. H 20 below high pressure alarm n Alarms ‘volume not constant’
Pmax - Auto-flow off n Pages 474 - 475 Mosby’s Equipment n Also known as Pressure Limit Ventilation n Biggest difference is that the exhalation valve is closed in this setup where with autoflow, it is open n Not difficult to discern which the manufacturer (and probably the patient!) recommends!
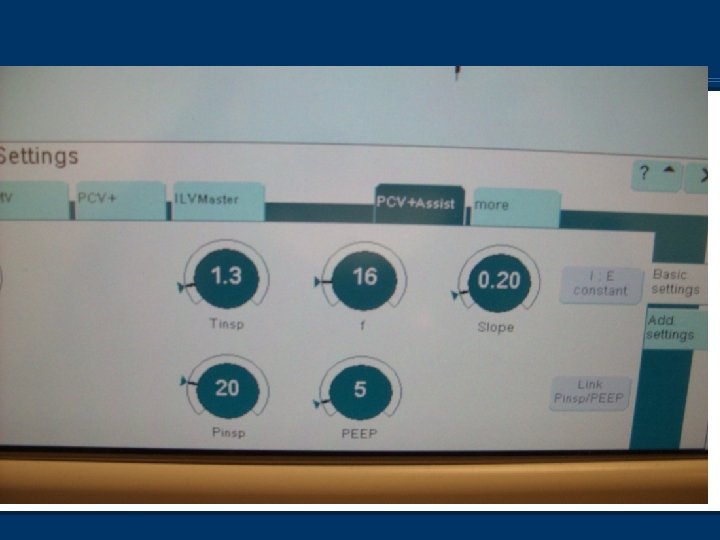
PCV+Assist vs. PCV+ n Pressure-control ventilation in the Evita is termed PCV Assist n SIMV pressure control in the Evita is termed PCV+ n Spontaneous breaths can be pressure-supported
PCV+Assist vs. PCV+ n Ventilating pressure is equal to set inspiratory pressure (not above PEEP) for PC mandatory breaths n In this case, increasing PEEP without increasing ventilating pressure will decrease tidal volume. n Pressure-supported breaths are set with pressure above PEEP n Increasing PEEP in PS breaths will not affect tidal volume (assuming CL stays the same)
PCV+Assist vs. PCV+ n Rise time used to adjust flow for pt comfort n It affects both mandatory and PS breath delivery n Pressure rise represents amount of time it takes the ventilator to achieve set pressure n Adjustable from 0 to 2. 0 seconds n Apnea ventilation can be on during PCV+ as there are spont. breaths, but not during PCV+ assist
PCV + Assist ‘Quirks’ n Two options available (See video) n Link Pinsp and PEEP n Press either Press button and then press Link Pinsp and PEEP n Keeps delta P the same n I: E constant – Can lock in I: E ratio n Press Ti or RR and then press I: E constant n Then Ti or RR will change accordingly depending on which needs to be changed
Pressure Support Can set PS levels as desired Or set PS to 0 to achieve just CPAP PS levels are above PEEP Rise Time Control becomes active Flow cycle is 25% of peak flow for adults and pediatrics (6% in neonates) or an insp. time exceeding 4 sec. n Remember to set apnea parameters in this mode n n n
APRV n Settings similar to other ventilators offering APRV n Peep high n Peep low n Time high n Time low n Rates are based on time high and low n No PS can be set, but can set TC n Slope also available
Automatic Tube Compensation n Software update; not a mode but an adjunct n Compensates for Raw associated with artificial airways n Can be used with all modes of ventilation and airway sizes for neo/ped/adults
Automatic Tube Compensation Found in ‘additional settings’ during vent setup n Tube size – n ETT or Trach type – n Comp% n Comp on/off
Automatic Tube Compensation n Pressure is during insp and during exp to n n n overcome resistance Expiratory portion can be disabled *Caution for COPD pts – The exp portion may need to be disabled as their small airways may be kept open due to ETT resistance *Caution – Adding ATC to another mode may result in over assist *Caution – ATC will not compensate for secretions in artificial airway Mathematical equation for calc of tracheal P to allow this adjunct to function – pg 479 Box 12 -30 Mosby’s
MMV Mandatory Minute Ventilation n Set Vt, Ti, RR, Slope, PS, Fi. O 2, PEEP n ATC, trigger, and autoflow available n Pt can breathe using user-set PS or just CPAP n Set minute volume is guaranteed by monitoring the pt’s spont. minute volume; ventilator will add supplemental breaths as needed to achieve set minute volume n Important to set high RR alarm to stop rapid shallow breathing that might meet goal MV
PPS: Proportional Pressure Support n Similar theory but not as sophisticated as PAV+ on n n the PB 840 The more the patient inspires, the more support the ventilator provides Pt must have adequate ventilatory drive Circuit (incl. pt!) must not have any leaks! User sets flow assist, which overcomes resistance; and volume assist, which overcomes elastic lung properties Still on some ventilators, but the approval certificate lapsed in Canada therefore it is illegal to use
Apnea Ventilation n Supplies volume ventilation with set rate and tidal volume if pt becomes apneic in any of the following modes n n n SIMV PCV+ CPAP APRV PPS n To set apnea parameters, touch ‘additional settings’, then ‘apnea vent’’ n Set Vt and RR n Apnea time interval is set under normal alarm settings
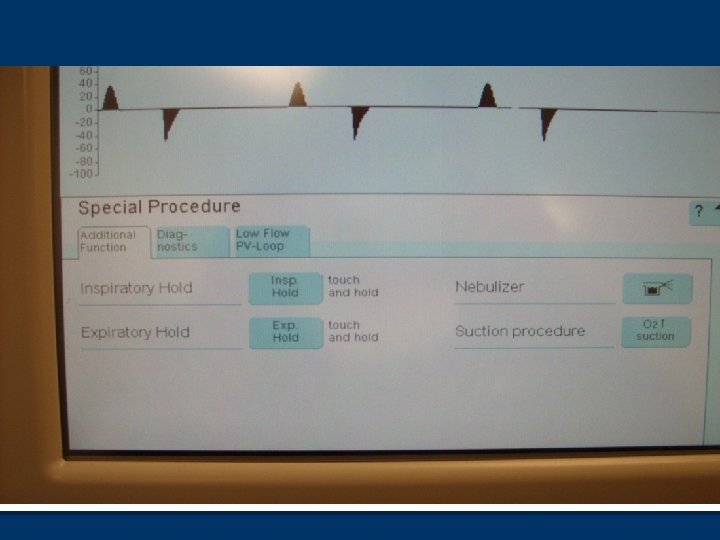
Special Procedures n Three tabs n Additional functions Insp. hold and Exp hold n Nebulizer n Suction procedure n
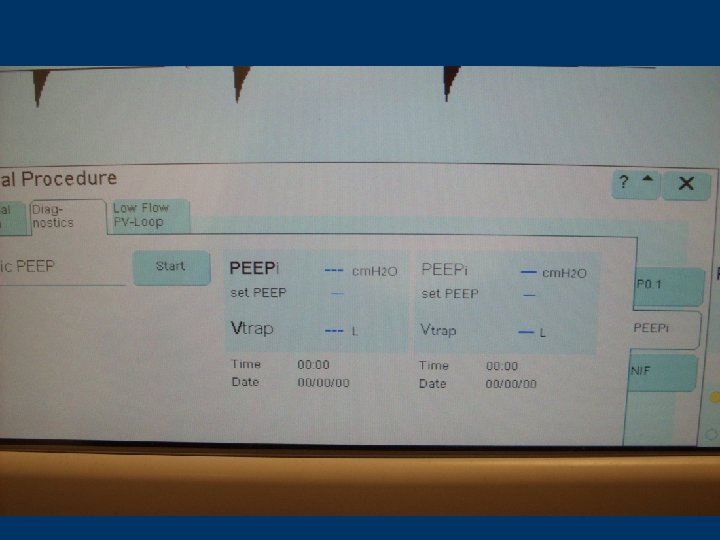
Special Procedures n Diagnostics P 0. 1 n Peepi n NIF n Negative Inspiratory Force n Used to assess muscle function n Considered a ‘weaning number’ n
Auto. PEEP measurements n Pt must NOT have any inspiratory efforts during this time n Select ‘Diagnostics’, then PEEPi and start n Procedure performed automatically n Screen will display PEEP(set), PEEPi, trapped volume AND previous numbers n This is an ‘estimate’…
Occlusion Pressure n P 0. 1 n Used to evaluate patient’s neuromuscular drive for weaning n Will be explored more in Critical Care II next semester n Know how to access
Odds and Ends n Nebulizer Built-in n Press soft pad until light stops flashing and becomes solid (About 3 seconds) n Neb runs for 30 minutes n May affect measured volumes as flow transducer is ‘hot wire’, and may cool with exhaled aerosol n
100% Suction n Must be pressed for > 3 seconds n Lasts for 180 seconds (Counts down at top of screen) n Low exhaled minute volume alarm is disabled during this time n After this period, oxygen is delivered at 100% for 2 more minutes and alarms are reactivated in Adult Mode
Automatic Leak Compensation n Logic circuit allows for compensation in loss of volume due to leaks in circuit n Can cause you grief if trying to measure cuff leak volume before extubation! Cuff leak volume will be further explored next semester in Critical Care II n To access, press configuration-ventilation-enter 3032 more settings n
Flow & Oxygen Monitoring n May have to turn off due to problems with sensors n Always replace with external monitoring device n To access, press alarm limits and then monitoring
ILV n Two ventilators (both same Drager variety) can be ‘slaved’ n Via analog interface to ventilate one lung independently from the other n For pts with severe unilateral lung disease n Bronchopleural fistula n Bronchopulmonary hemorrhage n Unilateral pulmonary surgery
Trigger Sensitivity n Flow sensitivity (Unless flow monitoring shut off) n Don’t forget to set sensitivity – So do not leave @ default setting n Only one mode trigger sens can be shut off in (CMV) n Pt cannot trigger mandatory breaths (no backup pressure sensitivity) n Pt can breathe spont in-between mandatory breaths n Essentially control mode
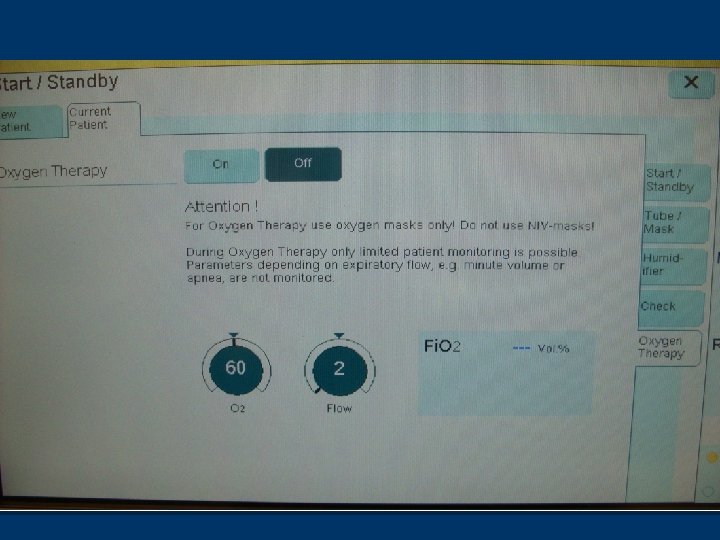
n O 2 therapy n n n Evita XL stuff Non-invasive For use with the Opti-flow system Set Fi. O 2 and flow Access from ‘Stand-by’ Must disconnect the exhalation limb of the circuit
End Tidal CO 2 n Calibration depends on device used n Reusable – Calibrate on the CO 2 attachment on the XL machine n Disposable – Calibrate with device attached
End Tidal CO 2
Sigh Procedure n Essentially a mini-recruitment procedure n Set the PEEP that you wish to increase to for 2 consecutive breaths every three minutes n Operates only in CMV modes n Found under ‘additional settings’
Suction Procedure n Different than 100% suction button n Similar to the Servo i n Allows for open suction procedure n 180 seconds of pre-oxygenation n Disconnection allowed for 120 seconds n Once reconnected, post-oxygenation is for 120 seconds