DOCTYPE html body p styleborderstyle nonenone p p

경계선 스타일 <!DOCTYPE html> <body> <p style="border-style: none">none. </p> <p style="border-style: dotted">dotted</p> <p style="border-style: dashed">dashed</p> <p style="border-style: solid">solid</p> <p style="border-style: double">double</p> <p style="border-style: groove">groove</p> <p style="border-style: ridge">ridge</p> <p style="border-style: inset">inset</p> <p style="border-style: outset">outset</p> </body> </html> 5

경계선의 폭. . . <head> <style> p. thick { border-style: solid; border-width: thick; } p. medium { border-style: solid; border-width: medium; } p. thin { border-style: solid; border-width: 1 px; } </style> </head> <body> <p class="thick">경계선이 thick으로 설정되었음</p> <p class="medium">경계선이 medium으로 설정되었음</p> <p class="thin">경계선이 1 px으로 설정되었음</p> </body> </html> 6

경계선의 색상 <!DOCTYPE html> <head> <style> p. green { border-style: solid; border-color: green; } </style> </head> <body> <p class="green">경계선의 색상: green</p> </body> </html> 7

동근 경계선 <!DOCTYPE html> <head> <style> div { border: 2 px solid red; border-radius: 25 px; } </style> </head> <body> <div>border-radius 속성을 사용하면 둥근 경계선을 만들 수 있습니다. </div> </body> </html> 8

경계선 그림자 <!DOCTYPE html> <head> <style> div { width: 300 px; height: 50 px; background-color: green; box-shadow: 20 px 10 px 5 px #666666; } </style> </head> <body> <div></div> </body> </html> 9
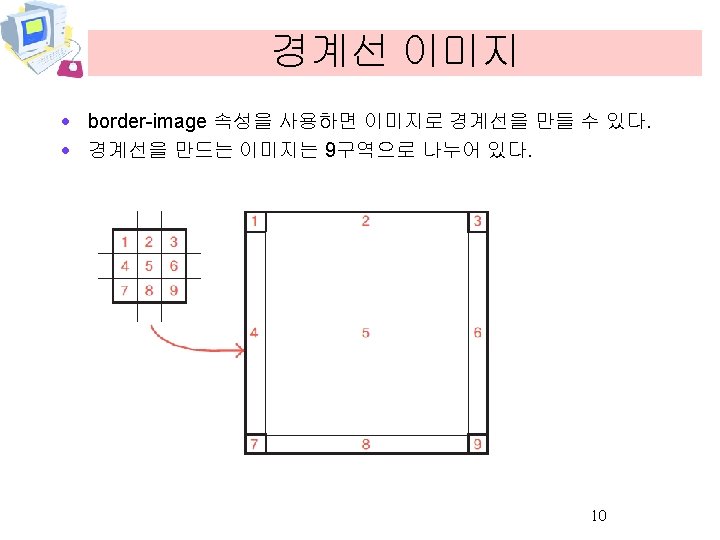

경계선 이미지 <!DOCTYPE html> <head> <style> div { border: 30 px solid transparent; width: 300 px; height: 50 px; -webkit-border-image: url(border. png) 30 30 round; /* Safari 5+ */ -o-border-image: url(border. png) 30 30 round; /* Opera */ border-image: url(border. png) 30 30 round; /* Chrome */ } </style> </head> <body> <div>경계 이미지가 반복되면서 그려진다. </div> </body> </html> 11

요소 크기 설정 <!DOCTYPE html> <head> <style> #target 1 { width: 100 px; height: 50 px; background-color: yellow; } #target 2 { width: 100 px; height: 50 px; background-color: lightgreen; } </style> </head> <body> <p id="target 1">이것은 p요소입니다. </p> <div id="target 2">이것은 div요소입니다. </div> </body> </html> 12
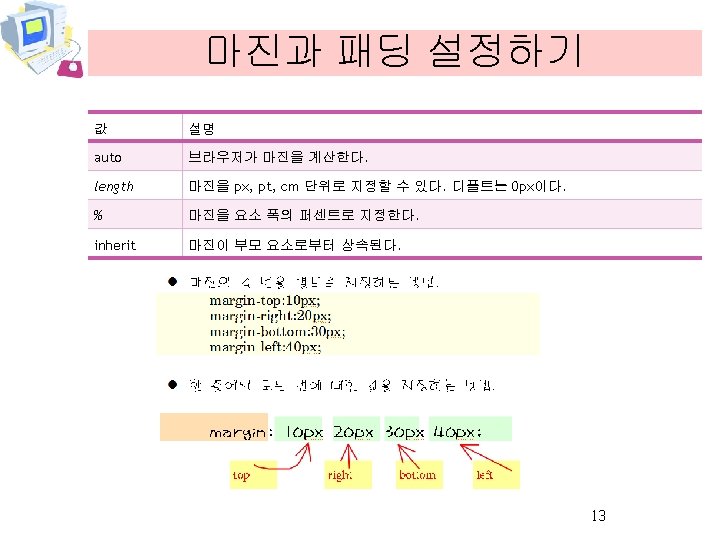

마진과 패딩 예제. . . <style> body { margin: 0 px; padding: 0 px; } p{ margin: 0 px; padding: 0 px; background-color: yellow; border: 1 px solid red; } #target { margin: 10 px; padding: 20 px; background-color: lightgreen; border: 1 px solid red; } </style> </head> <body> <p>margin: 0 px, padding: 0 px인 단락입니다. </p> <p id="target">margin: 10 px, padding: 20 px인 단락입니다. </p> </body> </html> 14
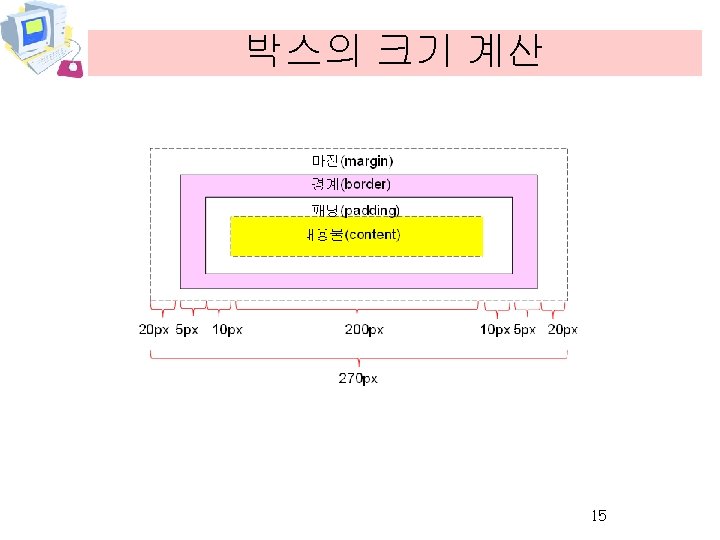

예제 <!DOCTYPE html> <head> <style> div. test { background-color: yellow; width: 200 px; padding: 10 px; border: 5 px solid red; margin: 20 px; } </style> </head> <body> <div class="test">이것은 div 요소로서 전체 폭은 270픽셀이다. </div> </body> </html> 16
 <!DOCTYPE html> <head> <style> p, em, strong, div { border: dotted 3")
수평정렬(인라인 요소) <!DOCTYPE html> <head> <style> p, em, strong, div { border: dotted 3 px red; } </style> </head> <body> <p style="text-align: center"> <em>My Text </em> </p> </body> </html> 17
 <!DOCTYPE html> <head> <style> p, h 1 { border: dotted 3 px")
수평정렬(블록 요소) <!DOCTYPE html> <head> <style> p, h 1 { border: dotted 3 px red; } </style> </head> <body> <p style="margin-left: auto; margin-right: auto; width: 50%"> My Text </p> </body> </html> 18
; background-repeat:")
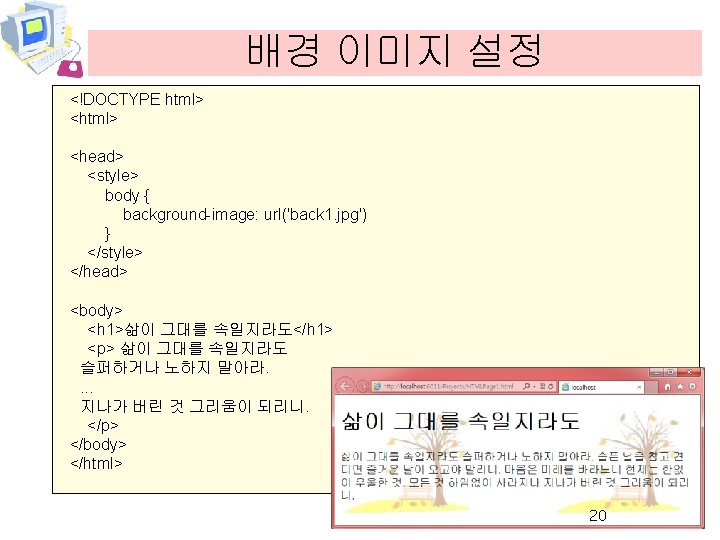
고정된 배경 이미지 <!DOCTYPE html> <head> <style> body { background-image: url('back 1. jpg'); background-repeat: no-repeat; background-attachment: fixed; } </style> </head> <body> <p>이미지는 한번만 표시되고 위치가 고정되어 있다. </p> </body> </html> 21

배경 이미지 크기 <!DOCTYPE html> <head> <style> div { width: 500 px; height: 100 px; background: url(back. jpg); background-repeat: no-repeat; background-size: 100 px; } </style> </head> <body> <div> 지금 그 사람의 이름은 잊었지만 그의 눈동자 입술은 내 가슴에 있네. . . 내 가슴에 있네 </div> </body> </html> 22

링크 예제 <!DOCTYPE html> <head> <style> a: link { color: red; } a: visited { color: green; } a: hover { color: blue; } a: active { color: yellow; } </style> </head> <body> <p><a href="" target="_blank">여기가 링크입니다. </a> </p> </body> </html> 24

링크 예제 <!DOCTYPE html> <head> <style> a. style 1: link { a. style 1: visited { a. style 1: hover { a. style 2: link { a. style 2: visited { a. style 2: hover { </style> </head> color: #ff 0000; } color: #0000 ff; font-size: 150%; color: #ff 0000; } color: #0000 ff; } } } background: #66 ff 66; } <body> <p>마우스를 올려놓으면 스타일이 변경됩니다. </p> <p><a class="style 1" href="index. html" target="_blank"> 폰트크기를 변경하는 링크</a></p> <p><a class="style 2" href="index. html" target="_blank"> 배경색을 변경하는 링크</a></p> </body> </html> 25
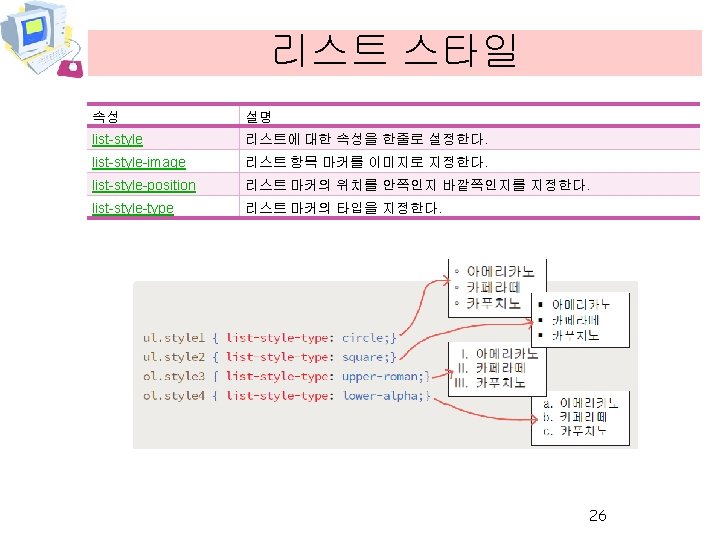

리스트 예제 <!DOCTYPE html> <head> <style> ul. a { list-style-type: circle; } ul. b { list-style-type: disc; } ul. c { list-style-type: square; } </style> </head> <body> <ul class="a"> <li>HTML 5</li> <li>CSS 3</li> <li>JAVASCRIPT</li> </ul> <ul class="b"> <li>HTML 5</li> <li>CSS 3</li> <li>JAVASCRIPT</li> </ul> <ul class="c"> <li>HTML 5</li> <li>CSS 3</li> <li>JAVASCRIPT</li> </ul> </body> </html> 27

수평 리스트 예제 <!DOCTYPE html> <head> <style> ul { list-style: none; text-align: center; border-top: 1 px solid red; border-bottom: 1 px solid red; padding: 10 px 0; } ul li { display: inline; text-transform: uppercase; padding: 0 10 px; letter-spacing: 10 px; } ul li a { text-decoration: none; color: black; } ul li a: hover { text-decoration: underline; } </style> </head> 28

수평 리스트 예제 <body> <ul> <li><a href="#">Home</a></li> <li><a href="#">Blog</a></li> <li><a href="#">About</a></li> <li><a href="#">Contact</a></li> </ul> </body> </html> 29

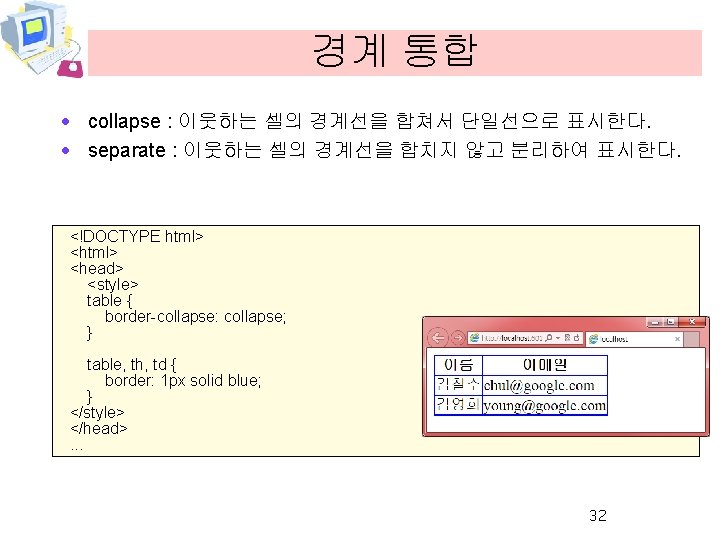
테이블의 경계 <!DOCTYPE html> <head> <style> table, td, th { border: 1 px solid blue; } </style> </head> <body> <table> <tr> <th>이름</th> <th>이메일</th> </tr> <td>김철수</td> <td>chul@google. com</td> </tr> <td>김영희</td> <td>young@google. com</td> </tr> </table> </body> </html> 31

테이블 배경색 <!DOCTYPE html> <head> <style> td, th { color: white; background-color: green; } </style> </head> <body> <table> <tr> <th>이름</th> <th>이메일</th> </tr> <td>김철수</td> <td>chul@google. com</td> </tr> <td>김영희</td> <td>young@google. com</td> </tr> </table> </body> </html> 33

헤더와 데이터의 분리 <!DOCTYPE html> <head> <style> table, td, th { border: 1 px solid green; } th { background-color: green; color: white; } </style> </head>. . . 34

테이블 텍스트 정렬 <!DOCTYPE html> <head> <style> table, td, th { border: 1 px solid blue; table { width: 100%; } td { text-align: center; } </style> </head> <body> <table> <tr> <th>이름</th> <th>이메일</th> </tr> <td>김철수</td> <td>chul@google. com</td> </tr> <td>김영희</td> <td>young@google. com</td> </tr> </table> </body> </html> } 35

테이블 캡션 <!DOCTYPE html> <head> <style> caption { caption-side: bottom; } </style> </head> <body> <table border="1"> <caption>VIP 고객 리스트</caption> <tr> <th>이름</th> <th>이메일</th> </tr> <td>김철수</td> <td>chul@google. com</td> </tr> <td>김영희</td> <td>young@google. com</td> </tr> </table> </body> </html> 36

짝수행과 홀수행 다르게 하기 <!DOCTYPE html> <head> <style> #list { font-family: "Trebuchet MS", sans-serif; width: 100%; } #list td, #list th { border: 1 px dotted gray; text-align: center; } #list th { color: white; background-color: blue; } #list tr. alt td { background-color: yellow; } </style> </head> 37

짝수행과 홀수행 다르게 하기 <body> <table id="list"> <tr> <th>이름</th> <th>이메일</th> </tr> <td>김철수</td> <td>chul@google. com</td> </tr> <tr class="alt"> <td>김영희</td> <td>young@google. com</td> </tr> <td>홍길동</td> <td>hong@google. com</td> </tr> <tr class="alt"> <td>김수진</td> <td>sujin@google. com</td> </tr> </table> </body> </html> 38

Q&A 39
- Slides: 39