DNT 123 COMPUTER AIDED DRAFTING CREATING 2 D
- Slides: 18

DNT 123 COMPUTER AIDED DRAFTING CREATING 2 D SECTION VIEWS. (Orthographic Projection)

CONTENT 1. INTRODUCTION 2. SECTION VIEWS BASIC 3. FULL SECTIONS 4. BATCH COMMAND 5. EXERCISE

INTRODUCTION Section views are used in Mechanical and Architectural drafting Slicing the object(s) along a cutting plane in order to view its interior details Adding hatch patterns to drawing for special effects

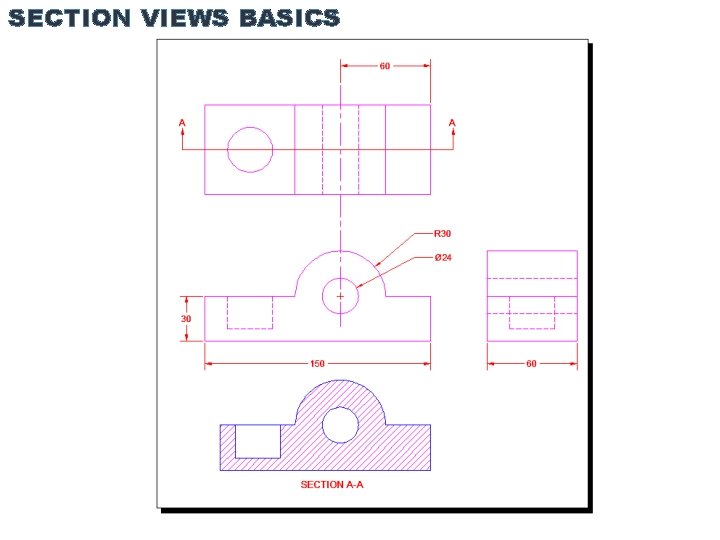
SECTION VIEWS BASICS Orthographic projections remain the key method for the production of engineering drawings Purpose of section views is to expose the interior features Front or Side views can be difficult to understand because of numerous hidden lines

SECTION VIEWS BASICS Creating a section view slices the object in such way as to expose what used to be hidden features and convert them to visible features Slicing operation can be compared to that using a glass plate or cutting plane to perform the section view Section view can give a better understanding

SECTION VIEWS BASICS

SECTION VIEWS BASICS Two important lines in section views: Cutting plane line – performs the cutting operation Section lines – shows the surfaces that were cut Hidden lines usually not displayed in the section views The arrows of the cutting plane line tell the designer to view section in the direction of the arrows and discard the other half

SECTION VIEWS BASICS Cutting plane line consists of a very thick line with a series of dashes The arrow points in the direction of sight used to create the section with the other half generally discarded Section line is a very thin line The line identifies the surfaces being cut by the cutting plane line

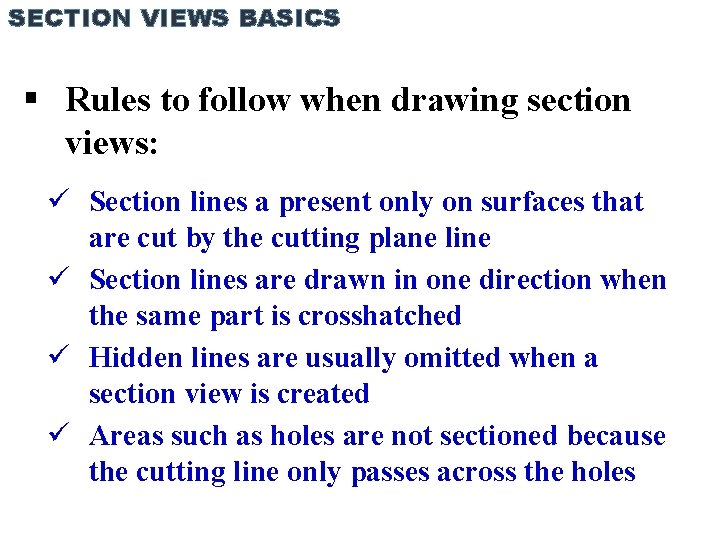
SECTION VIEWS BASICS Rules to follow when drawing section views: Section lines a present only on surfaces that are cut by the cutting plane line Section lines are drawn in one direction when the same part is crosshatched Hidden lines are usually omitted when a section view is created Areas such as holes are not sectioned because the cutting line only passes across the holes

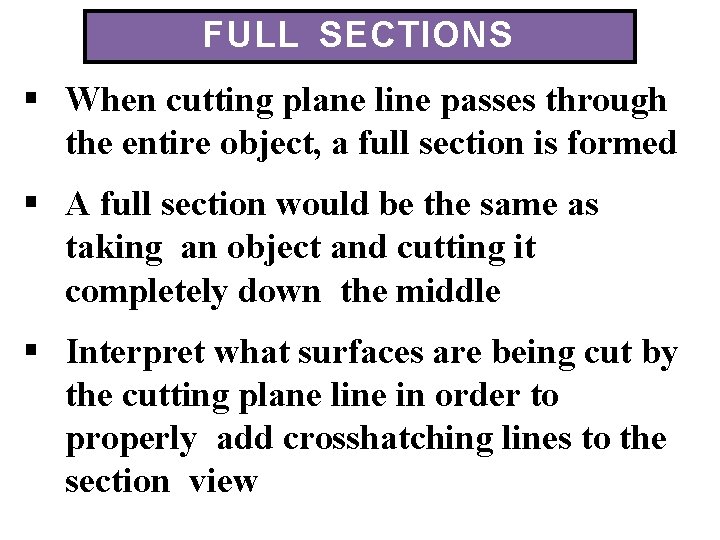
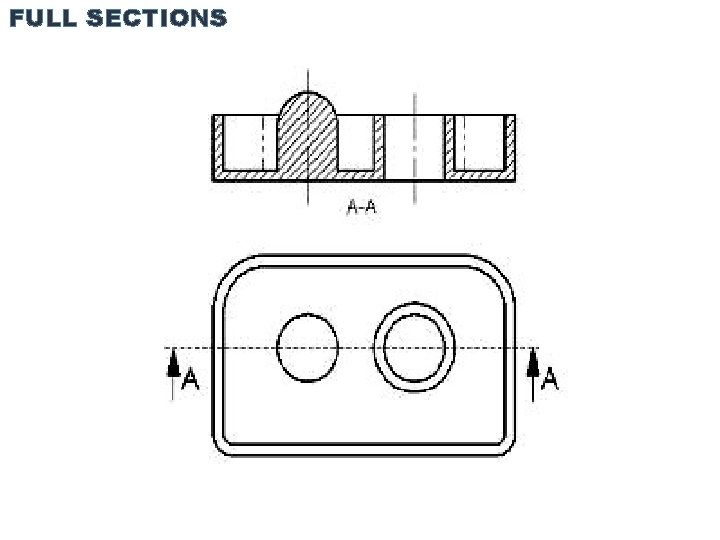
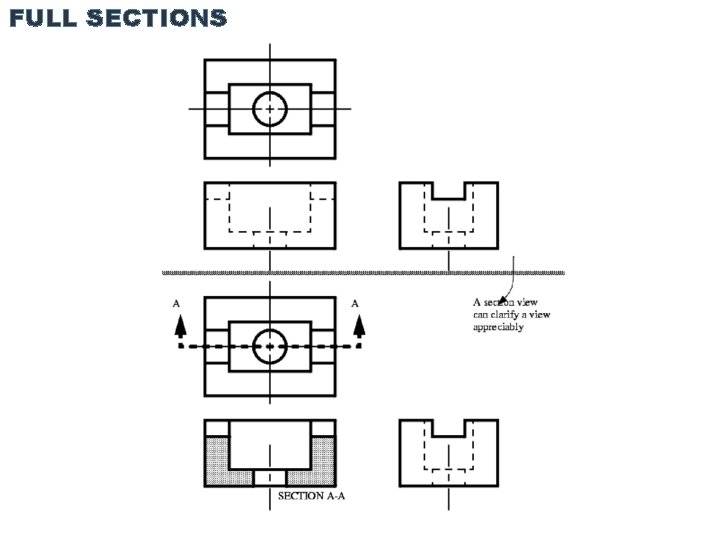
FULL SECTIONS When cutting plane line passes through the entire object, a full section is formed A full section would be the same as taking an object and cutting it completely down the middle Interpret what surfaces are being cut by the cutting plane line in order to properly add crosshatching lines to the section view

FULL SECTIONS

FULL SECTIONS

HATCH COMMAND HATCH command is used to generate section lines HATCH command is a very efficient method used for automatically highlighting area(s) to be crosshatched Pick on the single spot or multiple areas at the same time so that the hatch for all areas will look the same

HATCH COMMAND Three items needed to be aware when doing hatching: I. Pattern: The pattern should indicate what material is used in the area that is hatched II. Angle: Most of the time this will be 0 degrees, but sometimes you want to change it III. Scale: This is the one that gets changed a lot. If your hatch pattern 'looks solid' - then you usually have to increase the scale because the lines are too close together. If the hatch pattern 'looks empty' - then you might have to scale it down because the lines are too far apart. The scale will vary depending upon what size your drawing is

HATCH COMMAND Put hatch on a separate layer can help a lot in more complex drawings Section views are not usually very difficult to draw Draw the section views last and try to base them off of existing drawings first (orthographic projections)

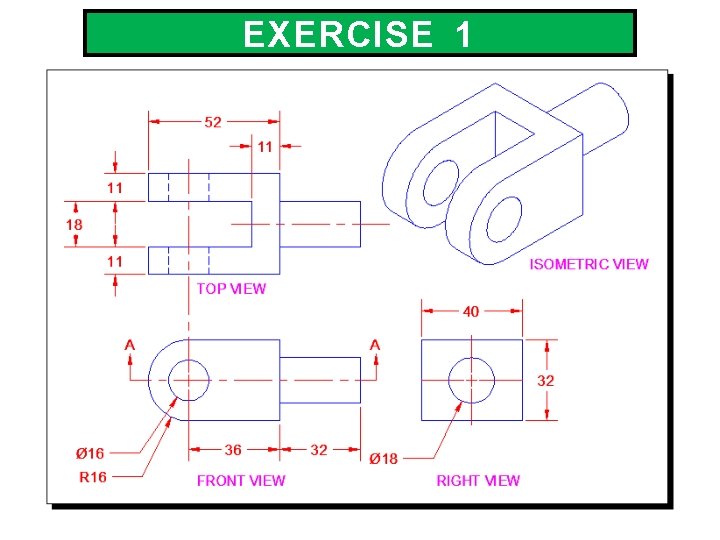
EXERCISE 1

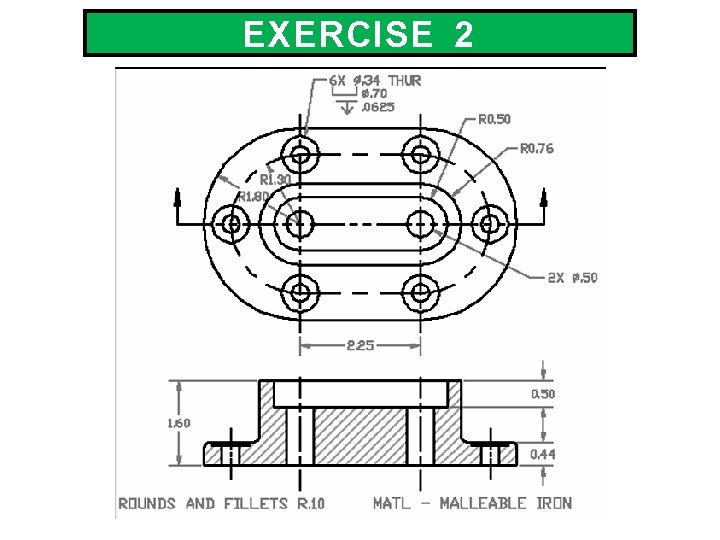
EXERCISE 2

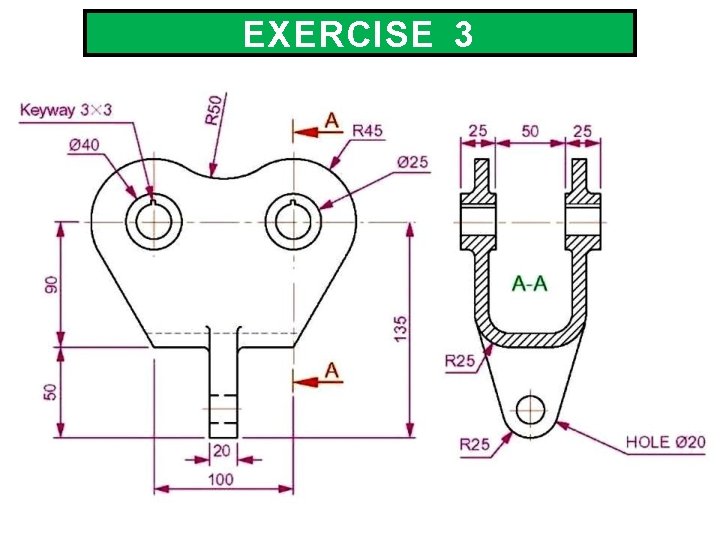
EXERCISE 3