DIMENSIONS TOLERANCES AND SURFACES 1 Dimensions Tolerances and
- Slides: 31

DIMENSIONS, TOLERANCES, AND SURFACES 1. Dimensions, Tolerances, and Related Attributes 2. Surfaces 3. Effect of Manufacturing Processes © 2007 John Wiley & Sons, Inc. M P Groover, Fundamentals of Modern Manufacturing 3/e

Dimensions and Tolerances § Factors that determine the performance of a manufactured product, other than mechanical and physical properties, include : § Dimensions - linear or angular sizes of a component specified on the part drawing § Tolerances - allowable variations from the specified part dimensions that are permitted in manufacturing © 2007 John Wiley & Sons, Inc. M P Groover, Fundamentals of Modern Manufacturing 3/e

Dimensions (ANSI Y 14. 5 M‑ 1982): A dimension is "a numerical value expressed in appropriate units of measure and indicated on a drawing and in other documents along with lines, symbols, and notes to define the size or geometric characteristic, or both, of a part or part feature" § Dimensions on part drawings represent nominal or basic sizes of the part and its features § The dimension indicates the part size desired by the designer, if the part could be made with no errors or variations in the fabrication process © 2007 John Wiley & Sons, Inc. M P Groover, Fundamentals of Modern Manufacturing 3/e

Tolerances (ANSI Y 14. 5 M‑ 1982): A tolerance is "the total amount by which a specific dimension is permitted to vary. The tolerance is the difference between the maximum and minimum limits" § Variations occur in any manufacturing process, which are manifested as variations in part size § Tolerances are used to define the limits of the allowed variation © 2007 John Wiley & Sons, Inc. M P Groover, Fundamentals of Modern Manufacturing 3/e

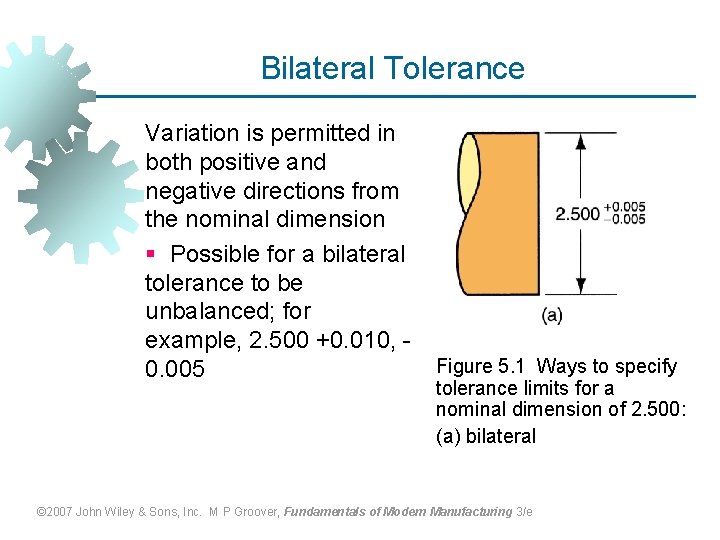
Bilateral Tolerance Variation is permitted in both positive and negative directions from the nominal dimension § Possible for a bilateral tolerance to be unbalanced; for example, 2. 500 +0. 010, 0. 005 Figure 5. 1 Ways to specify tolerance limits for a nominal dimension of 2. 500: (a) bilateral © 2007 John Wiley & Sons, Inc. M P Groover, Fundamentals of Modern Manufacturing 3/e

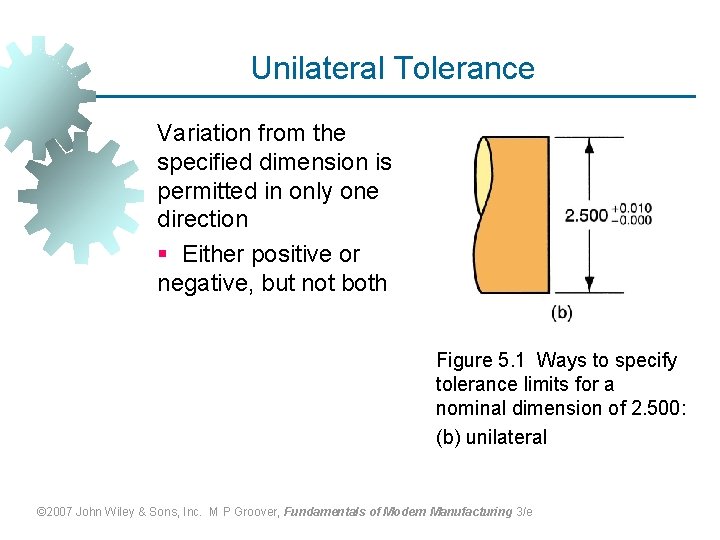
Unilateral Tolerance Variation from the specified dimension is permitted in only one direction § Either positive or negative, but not both Figure 5. 1 Ways to specify tolerance limits for a nominal dimension of 2. 500: (b) unilateral © 2007 John Wiley & Sons, Inc. M P Groover, Fundamentals of Modern Manufacturing 3/e

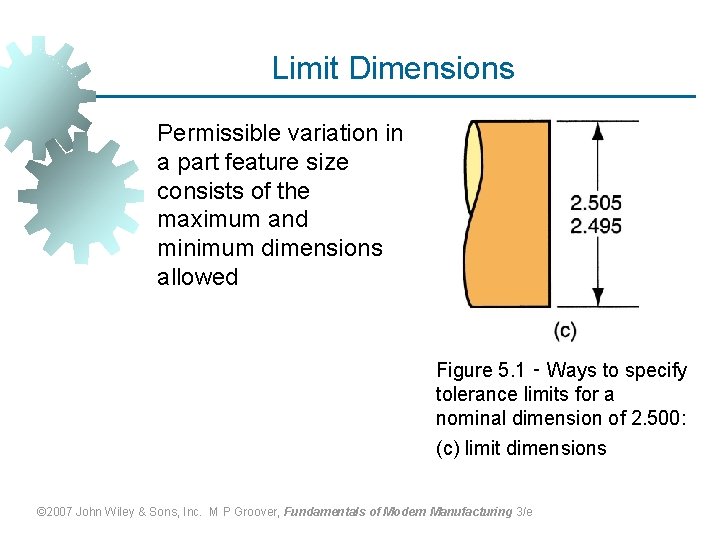
Limit Dimensions Permissible variation in a part feature size consists of the maximum and minimum dimensions allowed Figure 5. 1 ‑ Ways to specify tolerance limits for a nominal dimension of 2. 500: (c) limit dimensions © 2007 John Wiley & Sons, Inc. M P Groover, Fundamentals of Modern Manufacturing 3/e

Surfaces Nominal surface – designer’s intended surface contour of part, defined by lines in the engineering drawing § The nominal surfaces appear as absolutely straight lines, ideal circles, round holes, and other edges and surfaces that are geometrically perfect § Actual surfaces of a part are determined by the manufacturing processes used to make it § Variety of processes result in wide variations in surface characteristics © 2007 John Wiley & Sons, Inc. M P Groover, Fundamentals of Modern Manufacturing 3/e

Why Surfaces are Important § Aesthetic reasons § Surfaces affect safety § Friction and wear depend on surface characteristics § Surfaces affect mechanical and physical properties § Assembly of parts is affected by their surfaces § Smooth surfaces make better electrical contacts © 2007 John Wiley & Sons, Inc. M P Groover, Fundamentals of Modern Manufacturing 3/e

Surface Technology § Concerned with: § Defining the characteristics of a surface § Surface texture § Surface integrity § Relationship between manufacturing processes and characteristics of resulting surface © 2007 John Wiley & Sons, Inc. M P Groover, Fundamentals of Modern Manufacturing 3/e

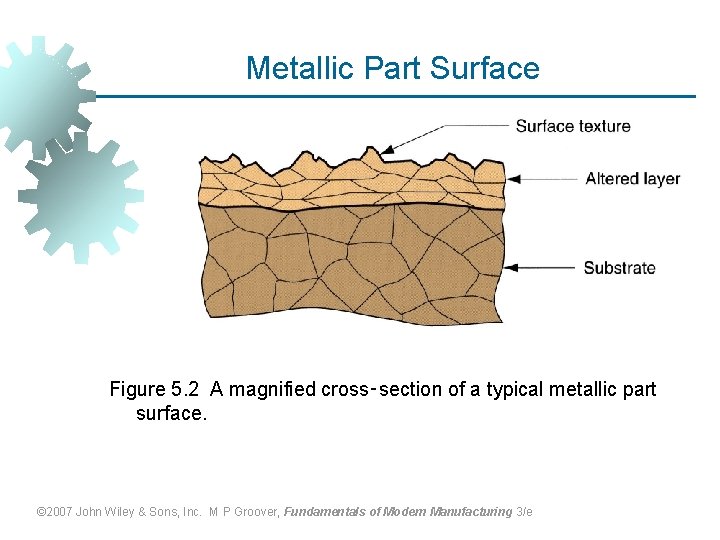
Metallic Part Surface Figure 5. 2 A magnified cross‑section of a typical metallic part surface. © 2007 John Wiley & Sons, Inc. M P Groover, Fundamentals of Modern Manufacturing 3/e

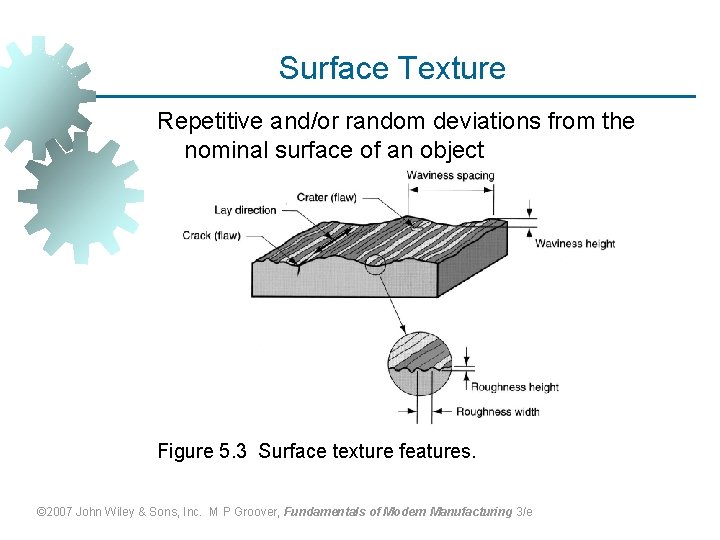
Surface Texture The topography and geometric features of the surface § When highly magnified, the surface is anything but straight and smooth § It has roughness, waviness, and flaws § It also possesses a pattern and/or direction resulting from the mechanical process that produced it © 2007 John Wiley & Sons, Inc. M P Groover, Fundamentals of Modern Manufacturing 3/e

Surface Texture Repetitive and/or random deviations from the nominal surface of an object Figure 5. 3 Surface texture features. © 2007 John Wiley & Sons, Inc. M P Groover, Fundamentals of Modern Manufacturing 3/e

Four Elements of Surface Texture 1. Roughness - small, finely‑spaced deviations from nominal surface § Determined by material characteristics and processes that formed the surface 2. Waviness - deviations of much larger spacing § Waviness deviations occur due to work deflection, vibration, heat treatment, and similar factors § Roughness is superimposed on waviness © 2007 John Wiley & Sons, Inc. M P Groover, Fundamentals of Modern Manufacturing 3/e

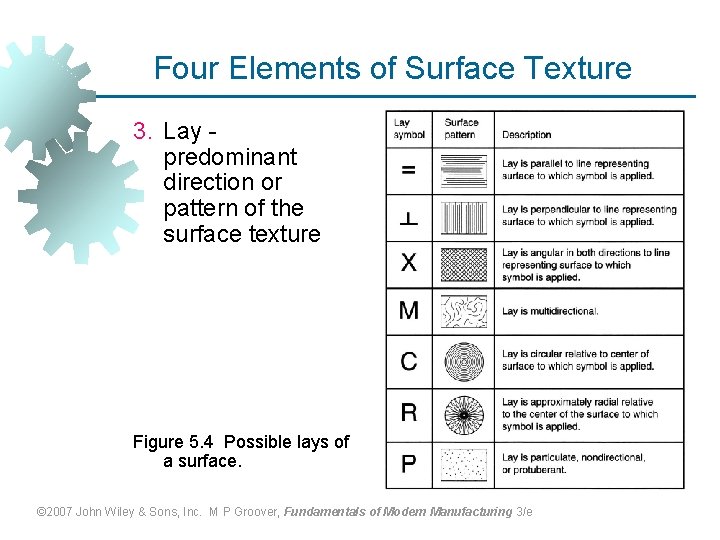
Four Elements of Surface Texture 3. Lay predominant direction or pattern of the surface texture Figure 5. 4 Possible lays of a surface. © 2007 John Wiley & Sons, Inc. M P Groover, Fundamentals of Modern Manufacturing 3/e

Four Elements of Surface Texture 4. Flaws - irregularities that occur occasionally on the surface § Includes cracks, scratches, inclusions, and similar defects in the surface § Although some flaws relate to surface texture, they also affect surface integrity © 2007 John Wiley & Sons, Inc. M P Groover, Fundamentals of Modern Manufacturing 3/e

Surface Roughness and Surface Finish § Surface roughness - a measurable characteristic based on roughness deviations § Surface finish - a more subjective term denoting smoothness and general quality of a surface § In popular usage, surface finish is often used as a synonym for surface roughness § Both terms are within the scope of surface texture © 2007 John Wiley & Sons, Inc. M P Groover, Fundamentals of Modern Manufacturing 3/e

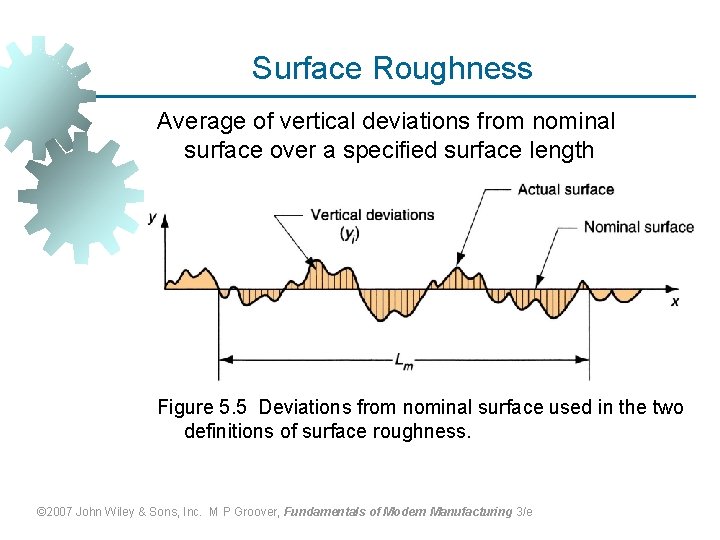
Surface Roughness Average of vertical deviations from nominal surface over a specified surface length Figure 5. 5 Deviations from nominal surface used in the two definitions of surface roughness. © 2007 John Wiley & Sons, Inc. M P Groover, Fundamentals of Modern Manufacturing 3/e

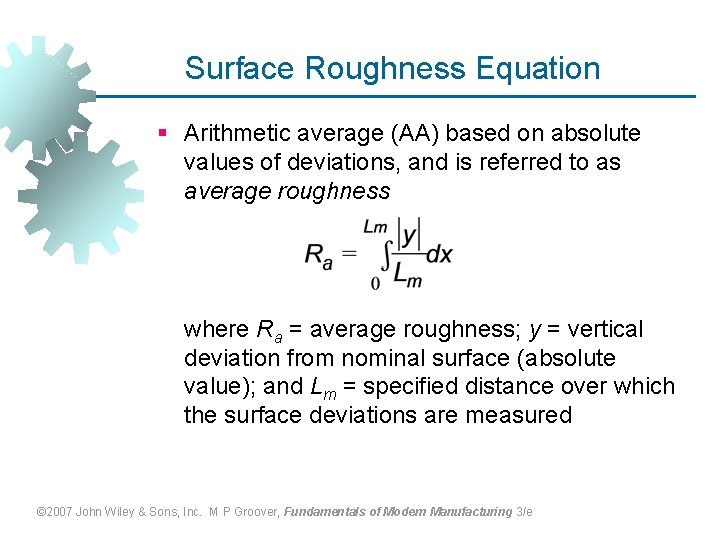
Surface Roughness Equation § Arithmetic average (AA) based on absolute values of deviations, and is referred to as average roughness where Ra = average roughness; y = vertical deviation from nominal surface (absolute value); and Lm = specified distance over which the surface deviations are measured © 2007 John Wiley & Sons, Inc. M P Groover, Fundamentals of Modern Manufacturing 3/e

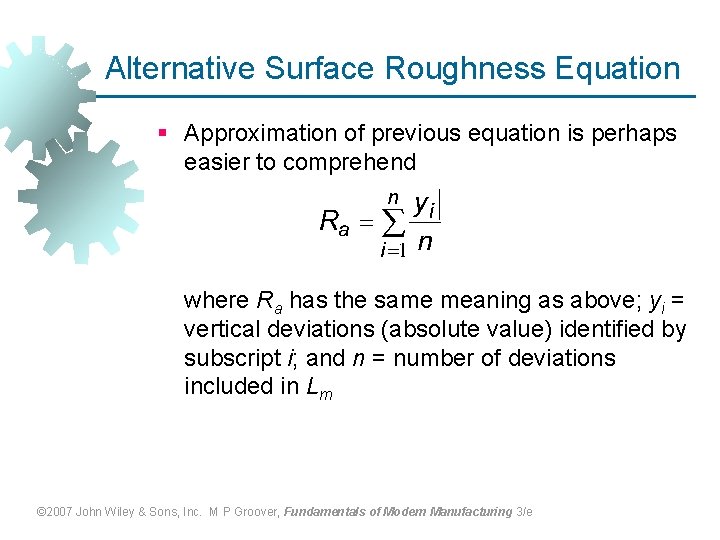
Alternative Surface Roughness Equation § Approximation of previous equation is perhaps easier to comprehend where Ra has the same meaning as above; yi = vertical deviations (absolute value) identified by subscript i; and n = number of deviations included in Lm © 2007 John Wiley & Sons, Inc. M P Groover, Fundamentals of Modern Manufacturing 3/e

Cutoff Length § A problem with the Ra computation is that waviness may get included § To deal with this problem, a parameter called the cutoff length is used as a filter to separate waviness from roughness deviations § Cutoff length is a sampling distance along the surface § A sampling distance shorter than the waviness eliminates waviness deviations and only includes roughness deviations © 2007 John Wiley & Sons, Inc. M P Groover, Fundamentals of Modern Manufacturing 3/e

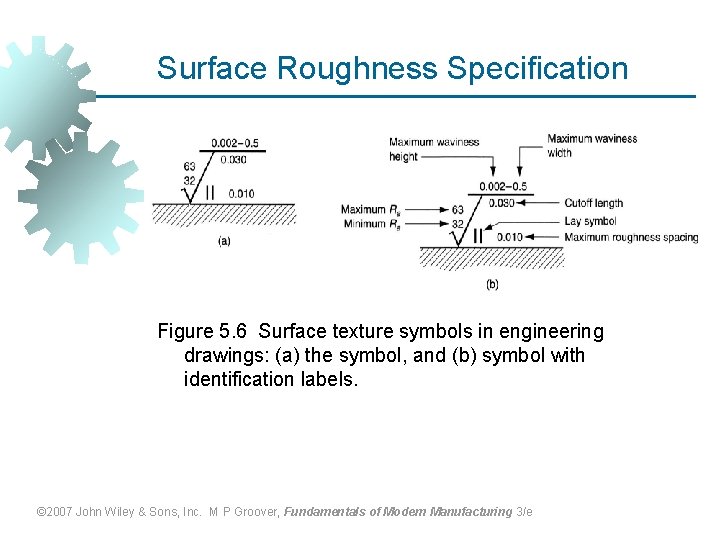
Surface Roughness Specification Figure 5. 6 Surface texture symbols in engineering drawings: (a) the symbol, and (b) symbol with identification labels. © 2007 John Wiley & Sons, Inc. M P Groover, Fundamentals of Modern Manufacturing 3/e

Surface Integrity § Surface texture alone does not completely describe a surface § There may be metallurgical changes in the altered layer beneath the surface that can have a significant effect on a material's mechanical properties Surface integrity is the study and control of this subsurface layer and the changes in it that occur during processing which may influence the performance of the finished part or product © 2007 John Wiley & Sons, Inc. M P Groover, Fundamentals of Modern Manufacturing 3/e

Surface Changes Caused by Processing § Surface changes are caused by the application of various forms of energy during processing § Example: Mechanical energy is the most common form in manufacturing § Processes include forging, extrusion, and machining § Although its primary function is to change geometry of workpart, mechanical energy can also cause residual stresses, work hardening, and cracks in the surface layers © 2007 John Wiley & Sons, Inc. M P Groover, Fundamentals of Modern Manufacturing 3/e

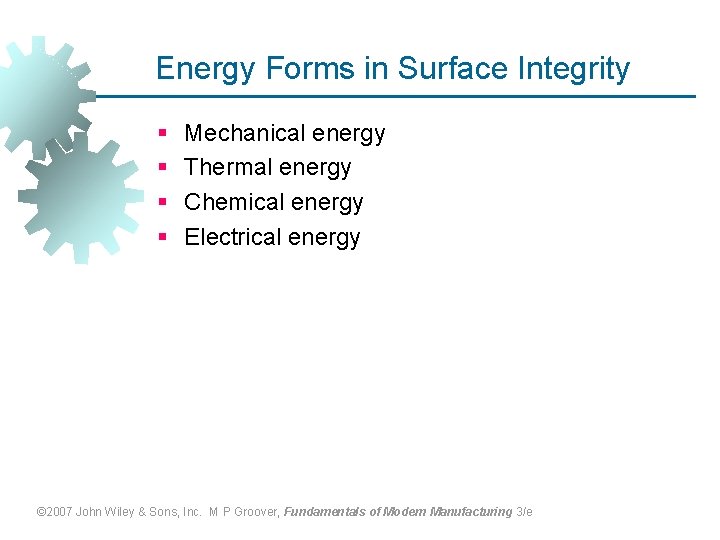
Energy Forms in Surface Integrity § § Mechanical energy Thermal energy Chemical energy Electrical energy © 2007 John Wiley & Sons, Inc. M P Groover, Fundamentals of Modern Manufacturing 3/e

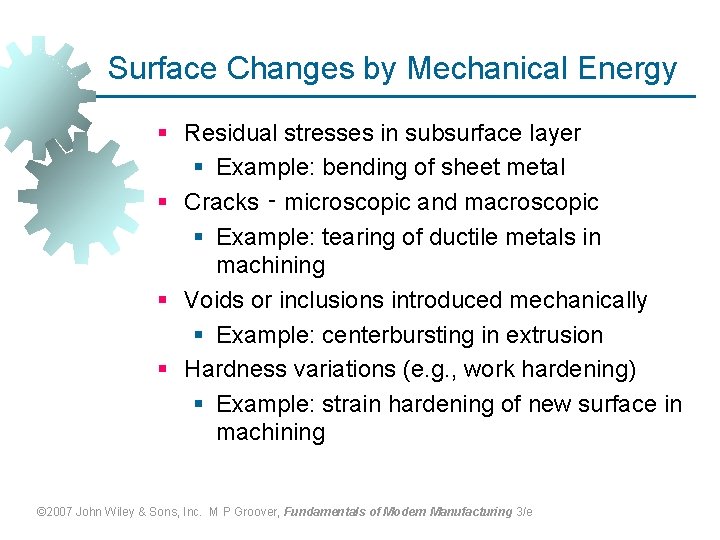
Surface Changes by Mechanical Energy § Residual stresses in subsurface layer § Example: bending of sheet metal § Cracks ‑ microscopic and macroscopic § Example: tearing of ductile metals in machining § Voids or inclusions introduced mechanically § Example: centerbursting in extrusion § Hardness variations (e. g. , work hardening) § Example: strain hardening of new surface in machining © 2007 John Wiley & Sons, Inc. M P Groover, Fundamentals of Modern Manufacturing 3/e

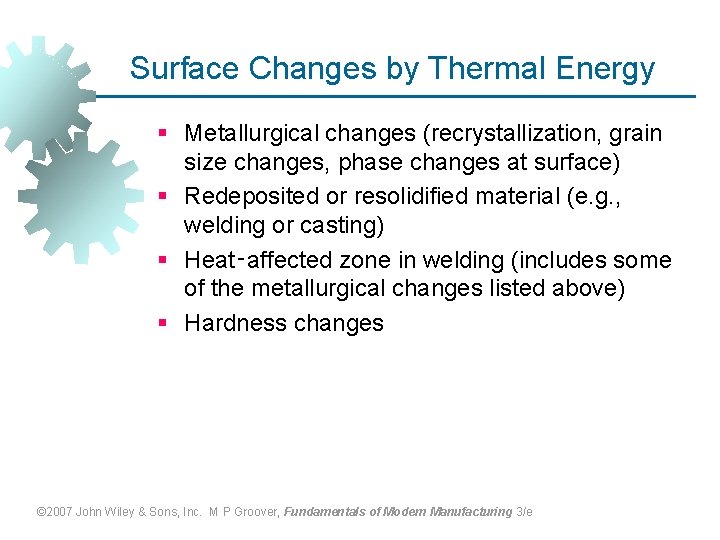
Surface Changes by Thermal Energy § Metallurgical changes (recrystallization, grain size changes, phase changes at surface) § Redeposited or resolidified material (e. g. , welding or casting) § Heat‑affected zone in welding (includes some of the metallurgical changes listed above) § Hardness changes © 2007 John Wiley & Sons, Inc. M P Groover, Fundamentals of Modern Manufacturing 3/e

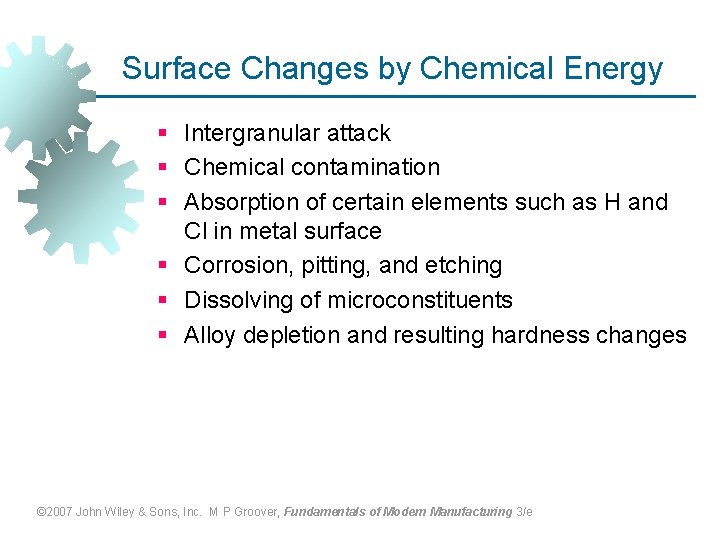
Surface Changes by Chemical Energy § Intergranular attack § Chemical contamination § Absorption of certain elements such as H and Cl in metal surface § Corrosion, pitting, and etching § Dissolving of microconstituents § Alloy depletion and resulting hardness changes © 2007 John Wiley & Sons, Inc. M P Groover, Fundamentals of Modern Manufacturing 3/e

Surface Changes by Electrical Energy § Changes in conductivity and/or magnetism § Craters resulting from short circuits during certain electrical processing techniques such as arc welding © 2007 John Wiley & Sons, Inc. M P Groover, Fundamentals of Modern Manufacturing 3/e

Tolerances and Manufacturing Processes § Some manufacturing processes are inherently more accurate than others § Examples: § Most machining processes are quite accurate, capable of tolerances = 0. 05 mm ( 0. 002 in. ) or better § Sand castings are generally inaccurate, and tolerances of 10 to 20 times those used for machined parts must be specified © 2007 John Wiley & Sons, Inc. M P Groover, Fundamentals of Modern Manufacturing 3/e

Surfaces and Manufacturing Processes § Some processes are inherently capable of producing better surfaces than others § In general, processing cost increases with improvement in surface finish because additional operations and more time are usually required to obtain increasingly better surfaces § Processes noted for providing superior finishes include honing, lapping, polishing, and superfinishing © 2007 John Wiley & Sons, Inc. M P Groover, Fundamentals of Modern Manufacturing 3/e