Dimensions and Relations Chapter 1 Dr Simin Nasseri
- Slides: 22

Dimensions and Relations Chapter 1 Dr Simin Nasseri, SPSU Copyright of Howard and Musto, 2009 Dr Simin Nasseri, SPSU

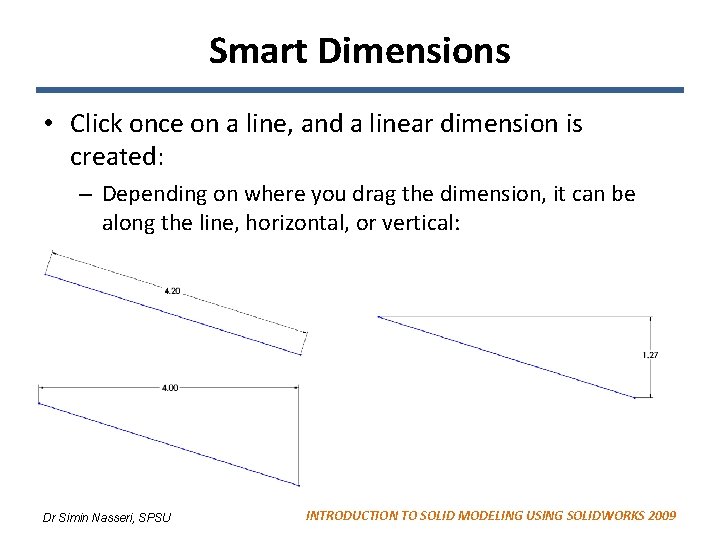
Smart Dimensions • Click once on a line, and a linear dimension is created: – Depending on where you drag the dimension, it can be along the line, horizontal, or vertical: Dr Simin Nasseri, SPSU INTRODUCTION TO SOLID MODELING USING SOLIDWORKS 2009

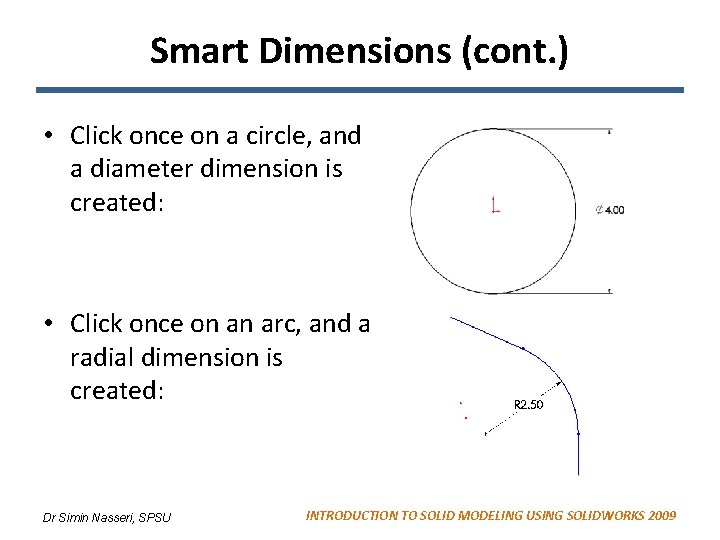
Smart Dimensions (cont. ) • Click once on a circle, and a diameter dimension is created: • Click once on an arc, and a radial dimension is created: Dr Simin Nasseri, SPSU INTRODUCTION TO SOLID MODELING USING SOLIDWORKS 2009

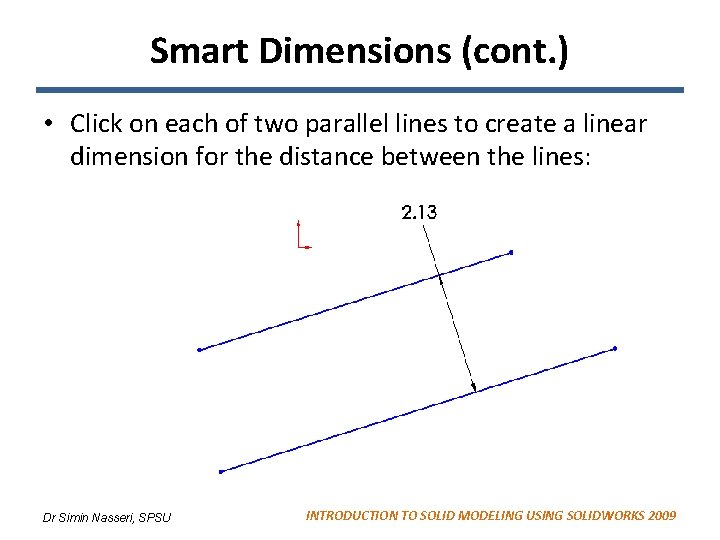
Smart Dimensions (cont. ) • Click on each of two parallel lines to create a linear dimension for the distance between the lines: Dr Simin Nasseri, SPSU INTRODUCTION TO SOLID MODELING USING SOLIDWORKS 2009

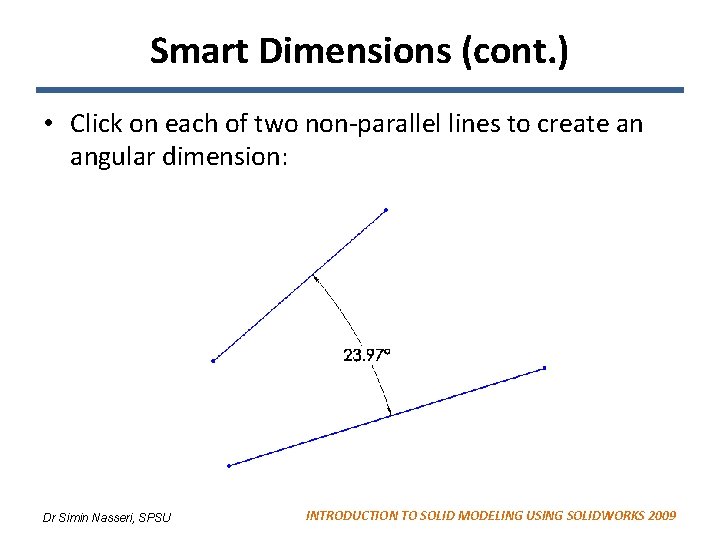
Smart Dimensions (cont. ) • Click on each of two non-parallel lines to create an angular dimension: Dr Simin Nasseri, SPSU INTRODUCTION TO SOLID MODELING USING SOLIDWORKS 2009

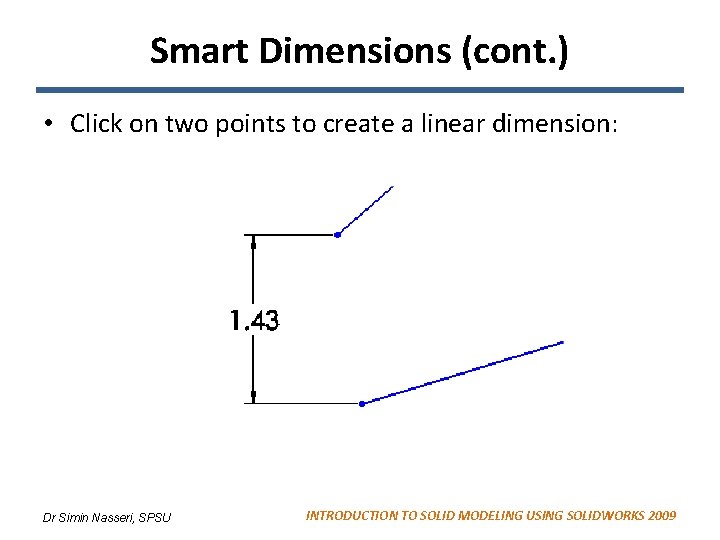
Smart Dimensions (cont. ) • Click on two points to create a linear dimension: Dr Simin Nasseri, SPSU INTRODUCTION TO SOLID MODELING USING SOLIDWORKS 2009

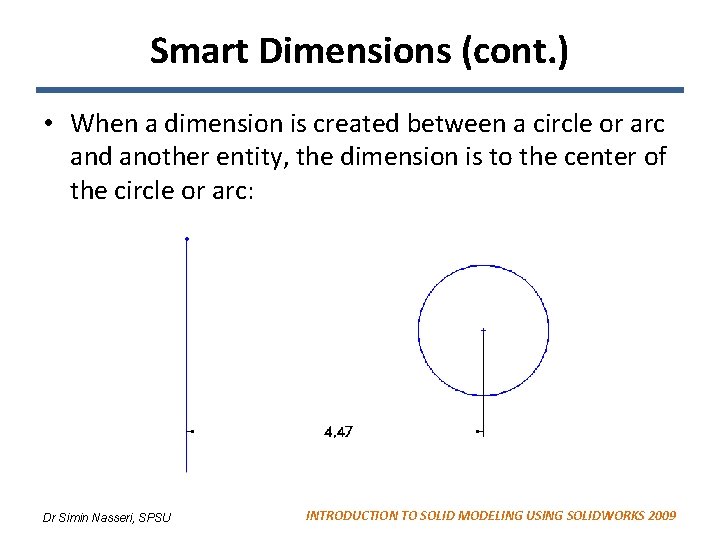
Smart Dimensions (cont. ) • When a dimension is created between a circle or arc and another entity, the dimension is to the center of the circle or arc: Dr Simin Nasseri, SPSU INTRODUCTION TO SOLID MODELING USING SOLIDWORKS 2009

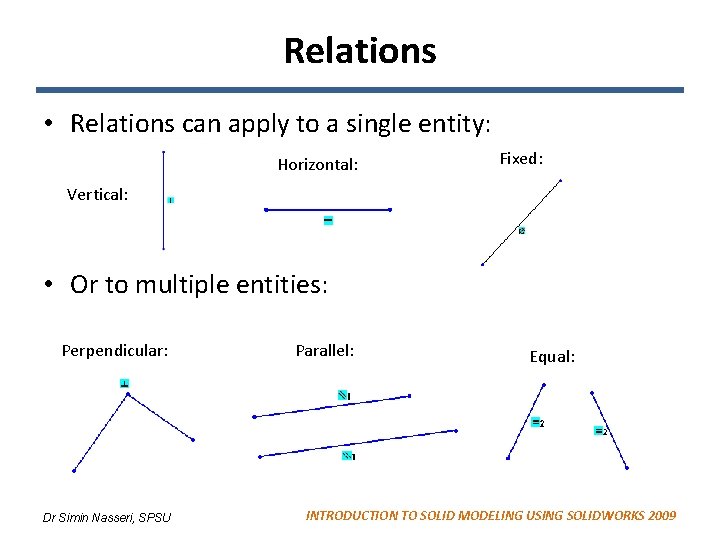
Relations • Relations can apply to a single entity: Horizontal: Fixed: Vertical: • Or to multiple entities: Perpendicular: Dr Simin Nasseri, SPSU Parallel: Equal: INTRODUCTION TO SOLID MODELING USING SOLIDWORKS 2009

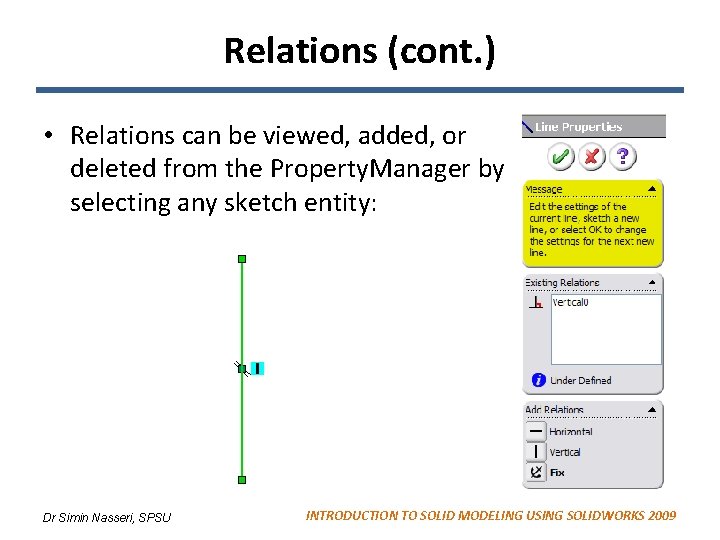
Relations (cont. ) • Relations can be viewed, added, or deleted from the Property. Manager by selecting any sketch entity: Dr Simin Nasseri, SPSU INTRODUCTION TO SOLID MODELING USING SOLIDWORKS 2009

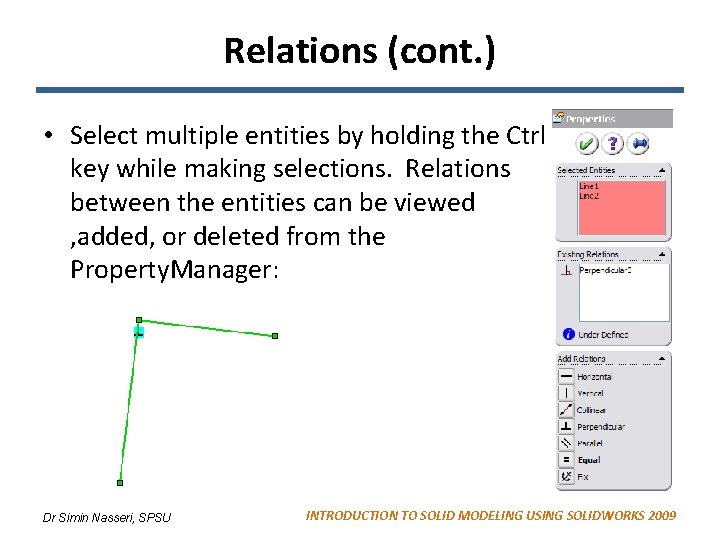
Relations (cont. ) • Select multiple entities by holding the Ctrl key while making selections. Relations between the entities can be viewed , added, or deleted from the Property. Manager: Dr Simin Nasseri, SPSU INTRODUCTION TO SOLID MODELING USING SOLIDWORKS 2009

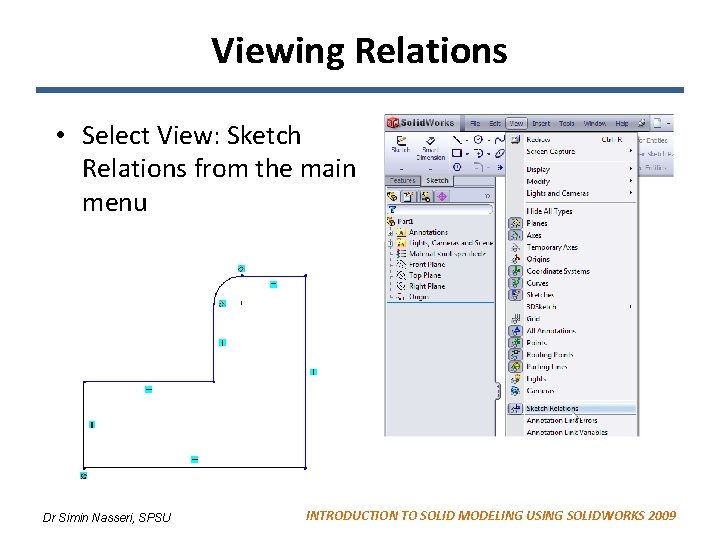
Viewing Relations • Select View: Sketch Relations from the main menu Dr Simin Nasseri, SPSU INTRODUCTION TO SOLID MODELING USING SOLIDWORKS 2009

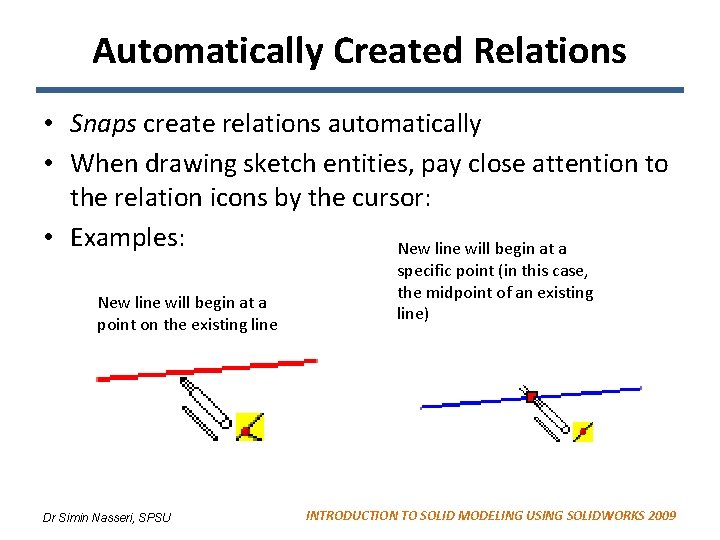
Automatically Created Relations • Snaps create relations automatically • When drawing sketch entities, pay close attention to the relation icons by the cursor: • Examples: New line will begin at a point on the existing line Dr Simin Nasseri, SPSU specific point (in this case, the midpoint of an existing line) INTRODUCTION TO SOLID MODELING USING SOLIDWORKS 2009

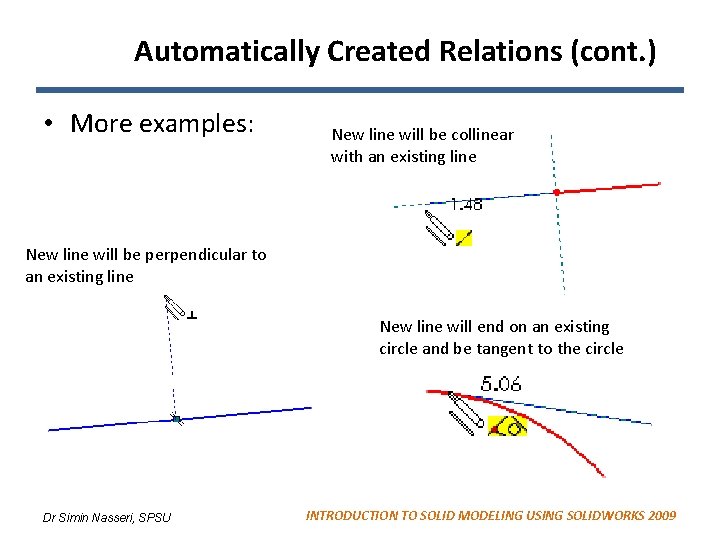
Automatically Created Relations (cont. ) • More examples: New line will be collinear with an existing line New line will be perpendicular to an existing line New line will end on an existing circle and be tangent to the circle Dr Simin Nasseri, SPSU INTRODUCTION TO SOLID MODELING USING SOLIDWORKS 2009

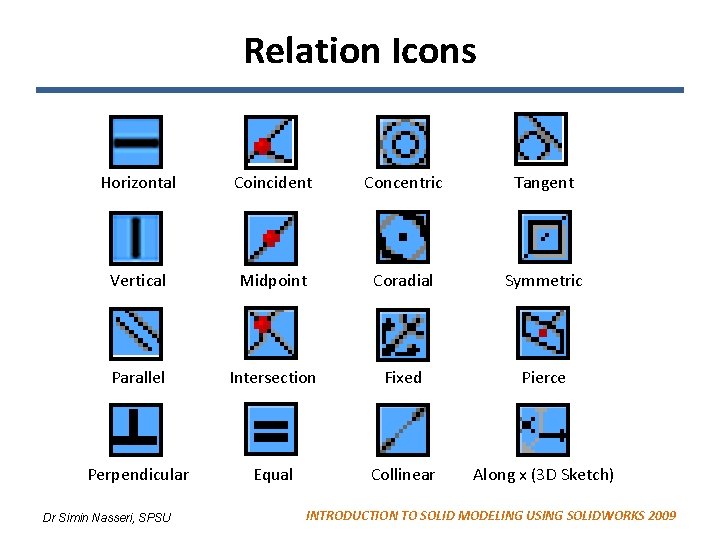
Relation Icons Horizontal Coincident Concentric Tangent Vertical Midpoint Coradial Symmetric Parallel Intersection Fixed Pierce Perpendicular Equal Collinear Along x (3 D Sketch) Dr Simin Nasseri, SPSU INTRODUCTION TO SOLID MODELING USING SOLIDWORKS 2009

Fully Defined Sketches • A sketch is fully defined if: – The size and shape of every sketch entity is defined and – The position of the sketch in 3 -D space is defined • Fully defined sketches are not required, but represent good design practice Dr Simin Nasseri, SPSU INTRODUCTION TO SOLID MODELING USING SOLIDWORKS 2009

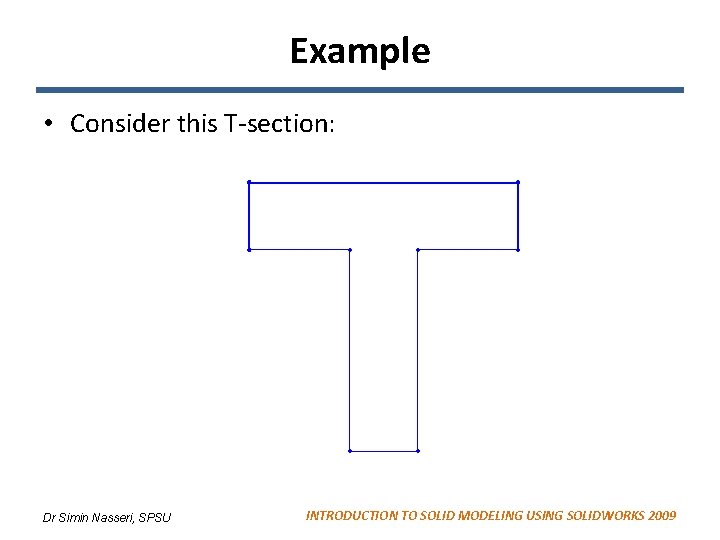
Example • Consider this T-section: Dr Simin Nasseri, SPSU INTRODUCTION TO SOLID MODELING USING SOLIDWORKS 2009

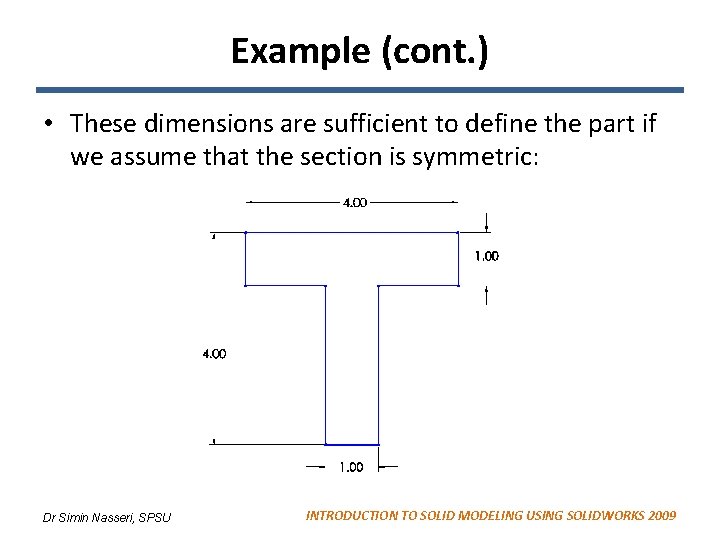
Example (cont. ) • These dimensions are sufficient to define the part if we assume that the section is symmetric: Dr Simin Nasseri, SPSU INTRODUCTION TO SOLID MODELING USING SOLIDWORKS 2009

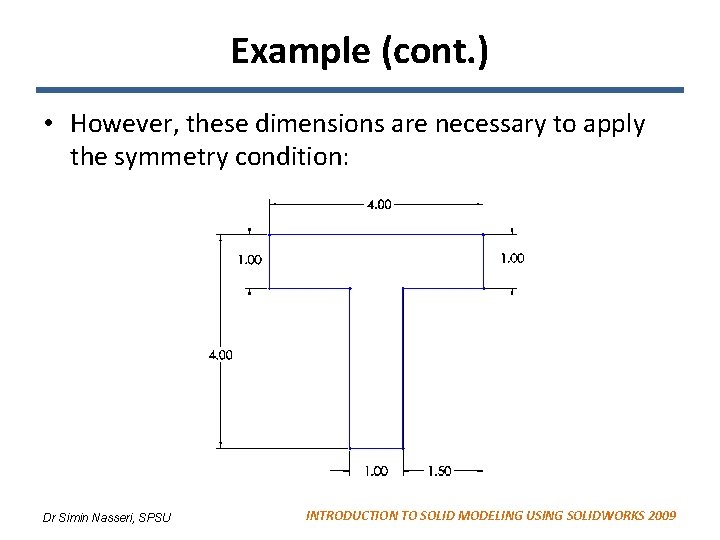
Example (cont. ) • However, these dimensions are necessary to apply the symmetry condition: Dr Simin Nasseri, SPSU INTRODUCTION TO SOLID MODELING USING SOLIDWORKS 2009

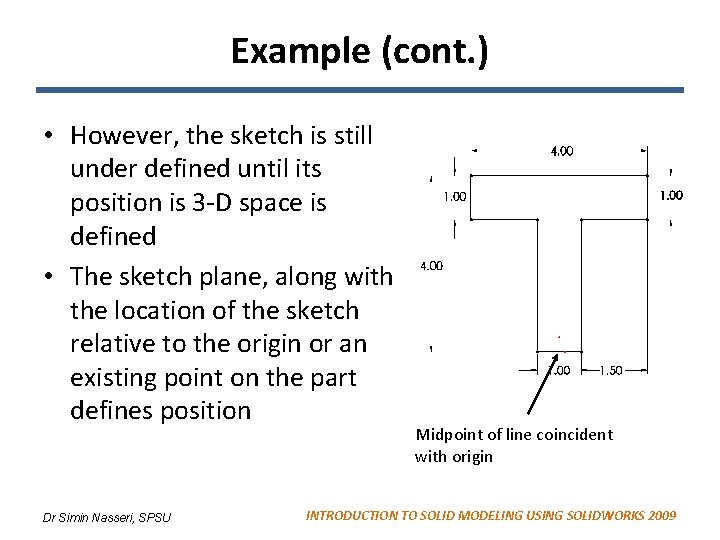
Example (cont. ) • However, the sketch is still under defined until its position is 3 -D space is defined • The sketch plane, along with the location of the sketch relative to the origin or an existing point on the part defines position Dr Simin Nasseri, SPSU Midpoint of line coincident with origin INTRODUCTION TO SOLID MODELING USING SOLIDWORKS 2009

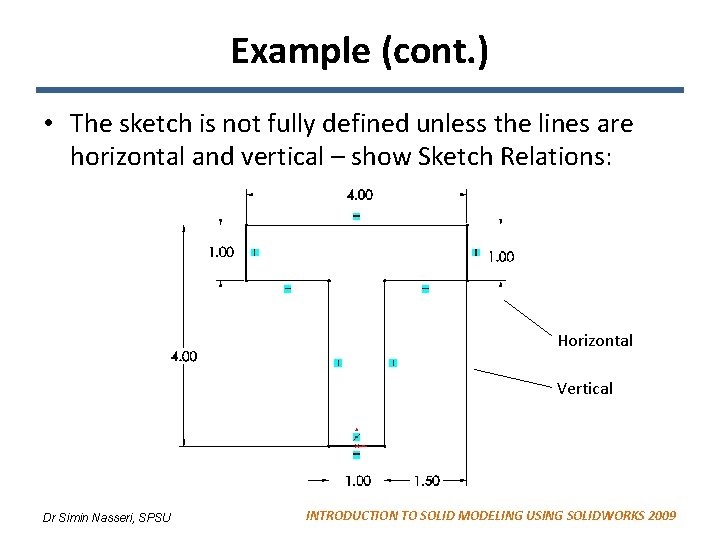
Example (cont. ) • The sketch is not fully defined unless the lines are horizontal and vertical – show Sketch Relations: Horizontal Vertical Dr Simin Nasseri, SPSU INTRODUCTION TO SOLID MODELING USING SOLIDWORKS 2009

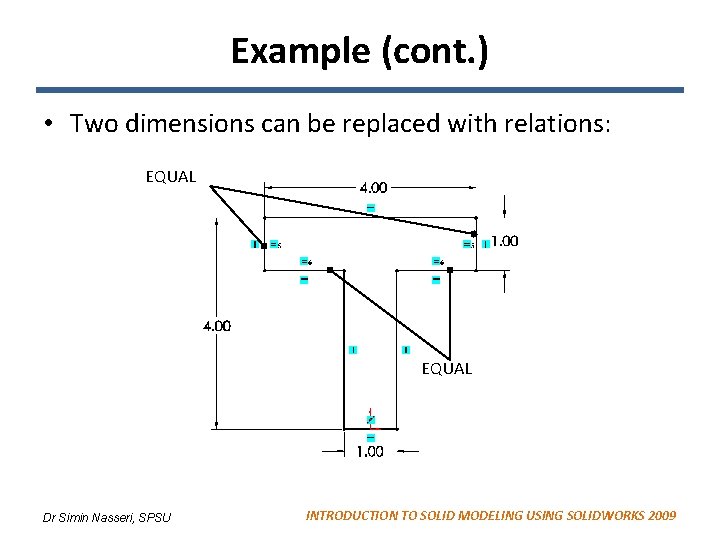
Example (cont. ) • Two dimensions can be replaced with relations: EQUAL Dr Simin Nasseri, SPSU INTRODUCTION TO SOLID MODELING USING SOLIDWORKS 2009

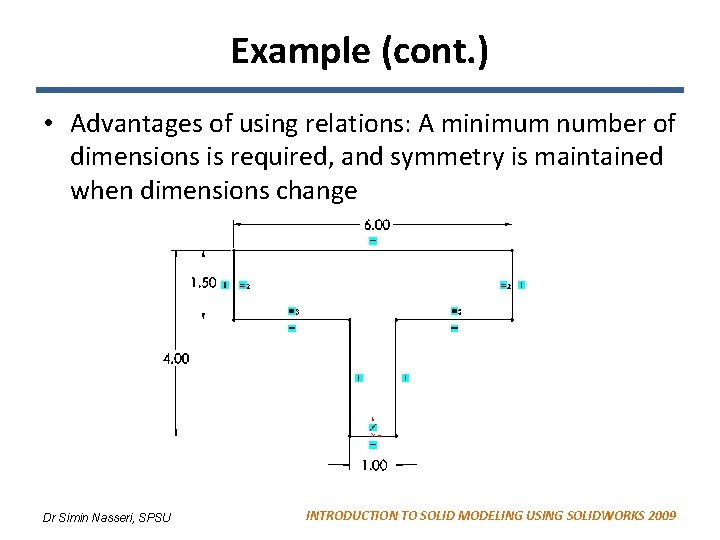
Example (cont. ) • Advantages of using relations: A minimum number of dimensions is required, and symmetry is maintained when dimensions change Dr Simin Nasseri, SPSU INTRODUCTION TO SOLID MODELING USING SOLIDWORKS 2009