Dimensions and Notes CLARITY AND EFFICIENCY IN DRAWINGS

- Slides: 8

Dimensions and Notes CLARITY AND EFFICIENCY IN DRAWINGS Dimensioning & Tolerances 2

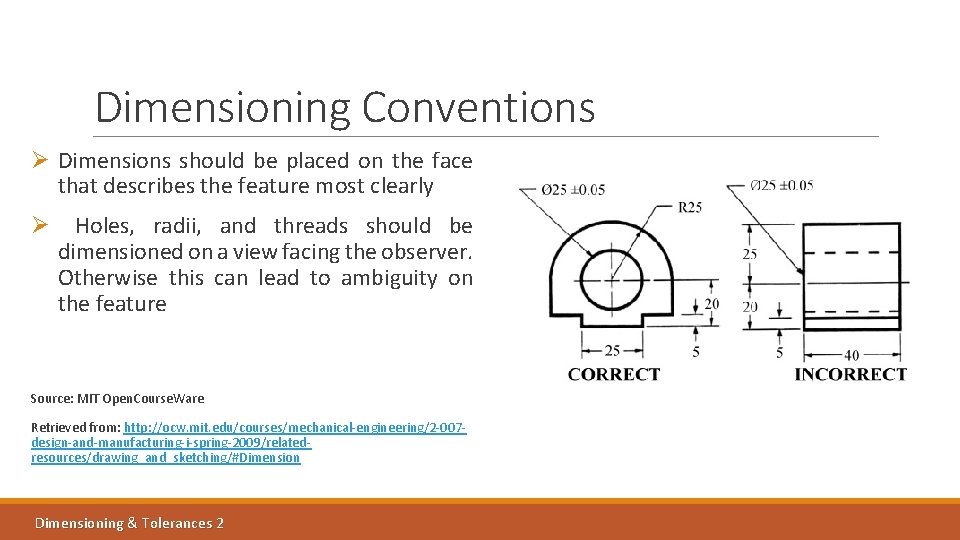
Dimensioning Conventions Ø Dimensions should be placed on the face that describes the feature most clearly Ø Holes, radii, and threads should be dimensioned on a view facing the observer. Otherwise this can lead to ambiguity on the feature Source: MIT Open. Course. Ware Retrieved from: http: //ocw. mit. edu/courses/mechanical-engineering/2 -007 design-and-manufacturing-i-spring-2009/relatedresources/drawing_and_sketching/#Dimensioning & Tolerances 2

Stacked Dimensions Ø Stacked dimensions allow for the use of one datum for multiple features. Ø Saves time for the machinist and adds more clarity to the drawing. Ø From datum 1, three features are defined. Ø From datum 2, the remaining two features are defined. Why is this good practice? Dimensioning & Tolerances 2

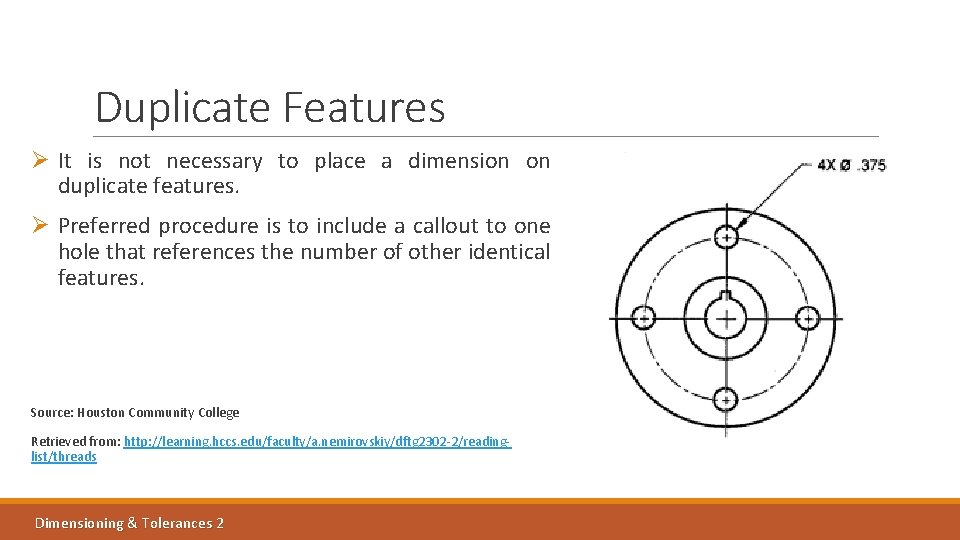
Duplicate Features Ø It is not necessary to place a dimension on duplicate features. Ø Preferred procedure is to include a callout to one hole that references the number of other identical features. Source: Houston Community College Retrieved from: http: //learning. hccs. edu/faculty/a. nemirovskiy/dftg 2302 -2/readinglist/threads Dimensioning & Tolerances 2

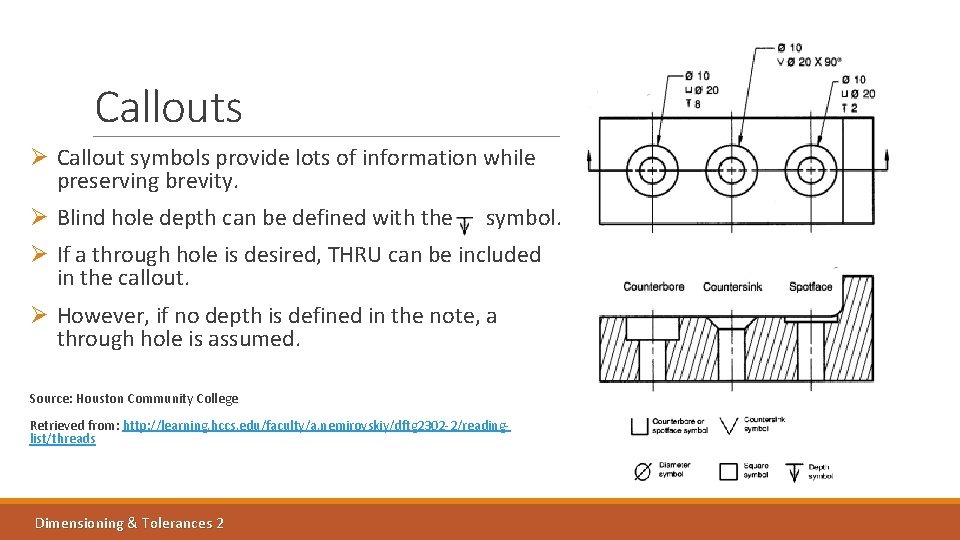
Callouts Ø Callout symbols provide lots of information while preserving brevity. Ø Blind hole depth can be defined with the symbol. Ø If a through hole is desired, THRU can be included in the callout. Ø However, if no depth is defined in the note, a through hole is assumed. Source: Houston Community College Retrieved from: http: //learning. hccs. edu/faculty/a. nemirovskiy/dftg 2302 -2/readinglist/threads Dimensioning & Tolerances 2

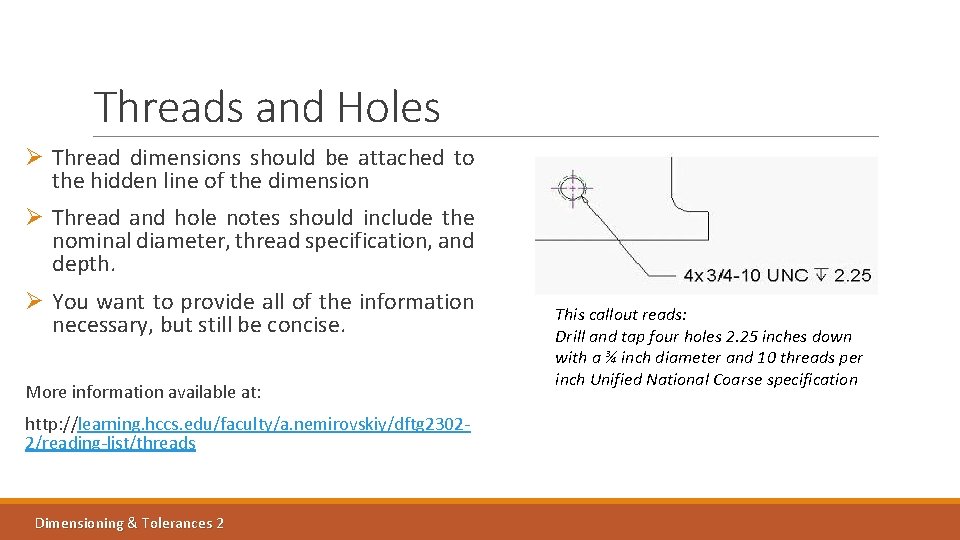
Threads and Holes Ø Thread dimensions should be attached to the hidden line of the dimension Ø Thread and hole notes should include the nominal diameter, thread specification, and depth. Ø You want to provide all of the information necessary, but still be concise. More information available at: http: //learning. hccs. edu/faculty/a. nemirovskiy/dftg 23022/reading-list/threads Dimensioning & Tolerances 2 This callout reads: Drill and tap four holes 2. 25 inches down with a ¾ inch diameter and 10 threads per inch Unified National Coarse specification

Rules to Remember: Ø The purpose of dimensioning is to provide a clear and complete description of an object. Ø A complete set of dimensions will permit only one interpretation needed to construct the part. Ø Dimensioning should follow these guidelines: v v Accuracy: correct values must be given. Clearness: dimensions must be placed in appropriate positions. Completeness: nothing must be left out, and nothing duplicated. Readability: clutter, intersecting lines, and wordiness should be minimized. Dimensioning & Tolerances 2

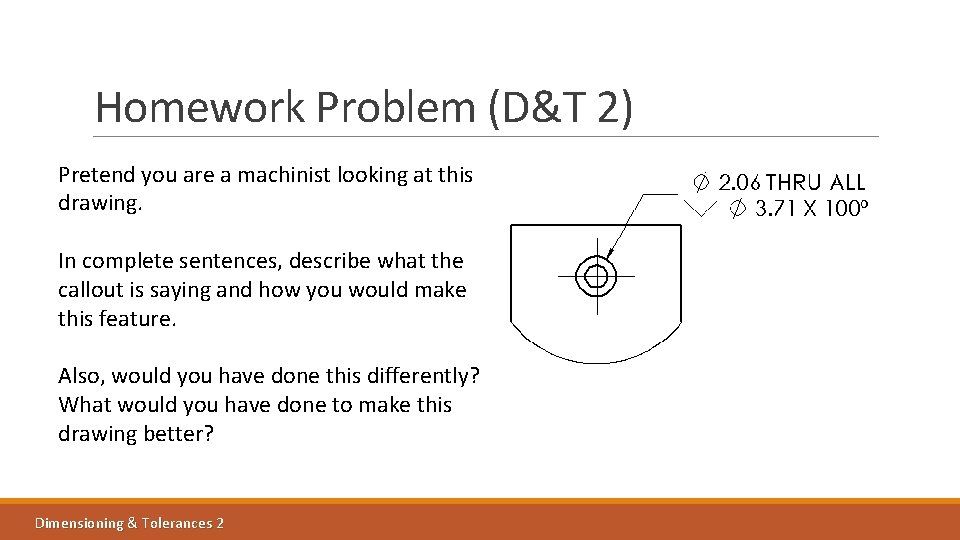
Homework Problem (D&T 2) Pretend you are a machinist looking at this drawing. In complete sentences, describe what the callout is saying and how you would make this feature. Also, would you have done this differently? What would you have done to make this drawing better? Dimensioning & Tolerances 2