DIMENSIONING WORKING DRAWINGS Footer Text 2262021 1 Dimensioning
- Slides: 20

DIMENSIONING WORKING DRAWINGS Footer Text 2/26/2021 1

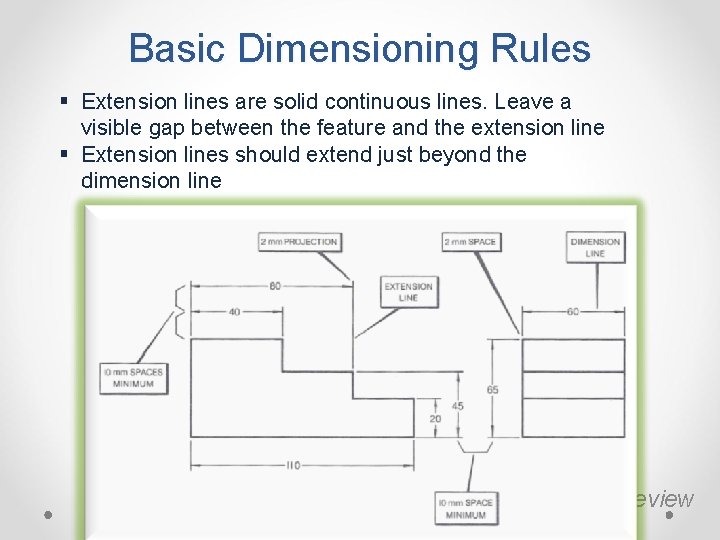
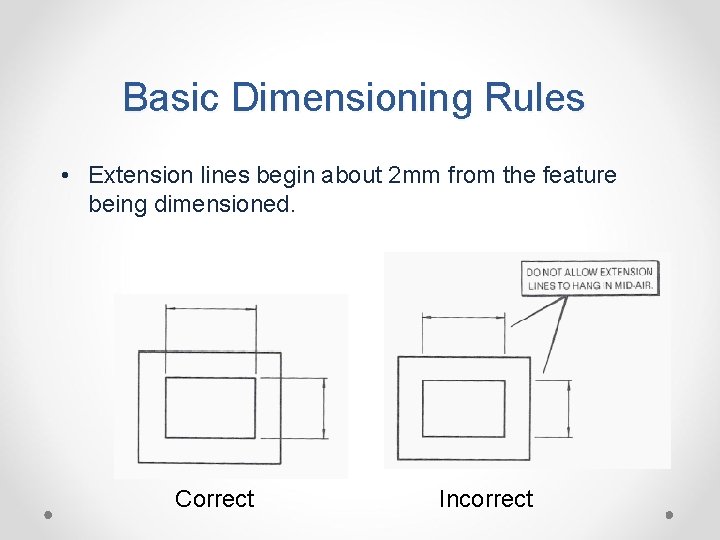
Dimensioning Line Types extension lines: • "extends" from the object with a gap of about 1 mm from the object, and continues to about 3 mm past the last dimension lines: • lines with arrowheads carrying the dimension digits. • arrowheads can be represented three different ways; arrowhead, slash, or dot. 2/26/2021 2

Dimensioning Line Types centre lines and reference lines: • alternating long and short dashes which indicates the centre or reference for a particular feature. • these lines may be used as extension lines for dimensioning. leaders: • thin uniform curved lines ending with arrowheads pointing to the feature to which they refer. 2/26/2021 3

Dimensioning Line Types Notes: • In order to completely describe an object, notes are sometimes given on the drawings (e. g. , All rounds and fillets 2 mm radius). • These notes are usually located on the right column of the drawing above the title block. 2/26/2021 4

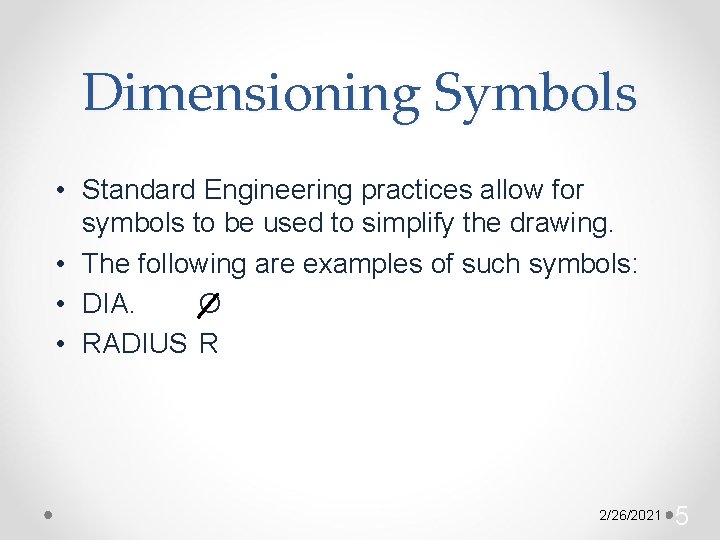
Dimensioning Symbols • Standard Engineering practices allow for symbols to be used to simplify the drawing. • The following are examples of such symbols: • DIA. O • RADIUS R 2/26/2021 5

Methods of Dimensioning • Aligned: all dimension figures, except those that apply to angular contours should be lettered parallel to the dimension lines. • Unidirectional: all dimensions figures should be lettered parallel to the bottom edge of the paper. 2/26/2021 6

Types of Dimensioning • Overall Dimensions: indicates the overall length, width or height of the object. • Detail Dimensions: provides information about size or location of any feature or detail about the part. 2/26/2021 7

Dimensioning Rules • A technical drawing must always specify the full-size dimensions of an object regardless of the scale to which the drawing has been prepared. • The units of measurement on metric technical drawings are assumed to be millimetres unless otherwise specified. 2/26/2021 8

Basic Dimensioning Rules § Extension lines are solid continuous lines. Leave a visible gap between the feature and the extension line § Extension lines should extend just beyond the dimension line Review

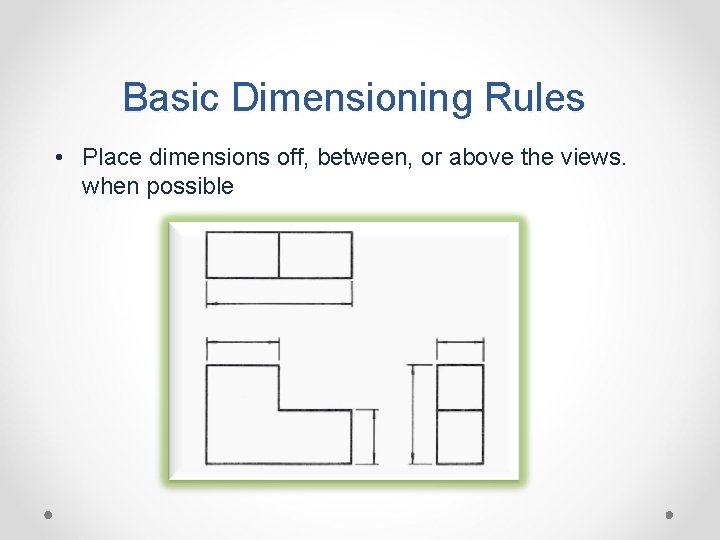
Basic Dimensioning Rules • Place dimensions off, between, or above the views. when possible

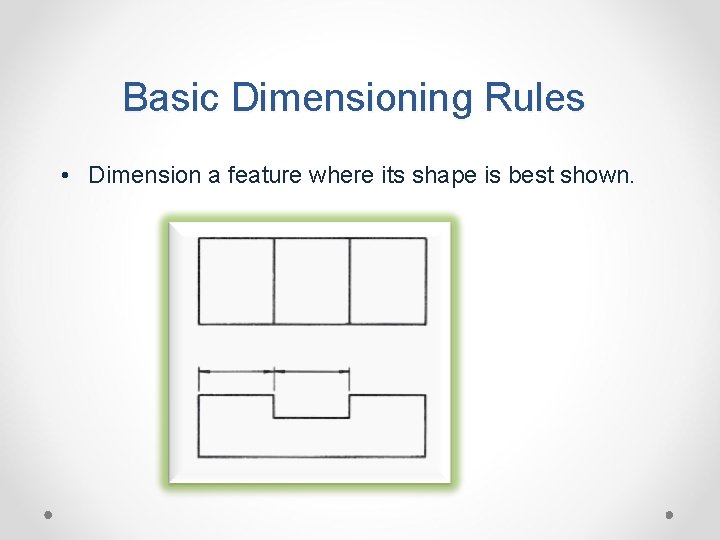
Basic Dimensioning Rules • Dimension a feature where its shape is best shown.

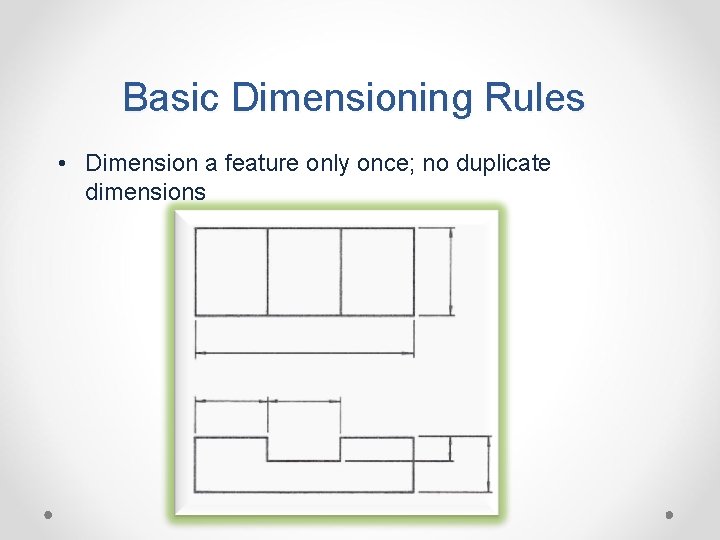
Basic Dimensioning Rules • Dimension a feature only once; no duplicate dimensions

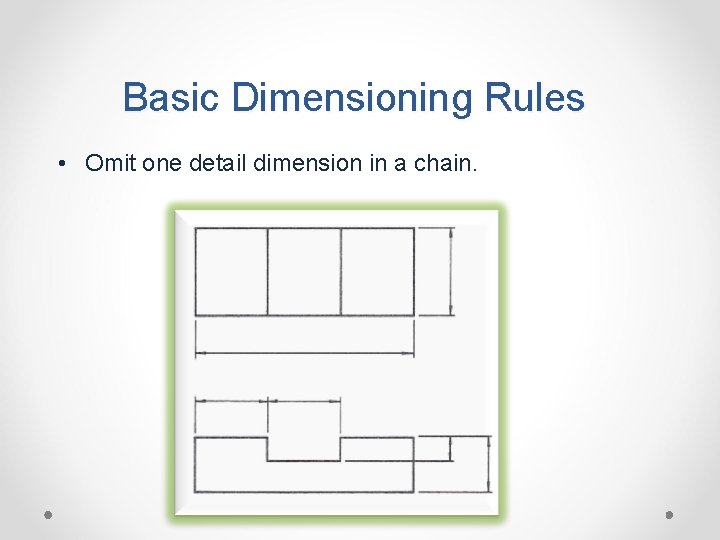
Basic Dimensioning Rules • Omit one detail dimension in a chain.

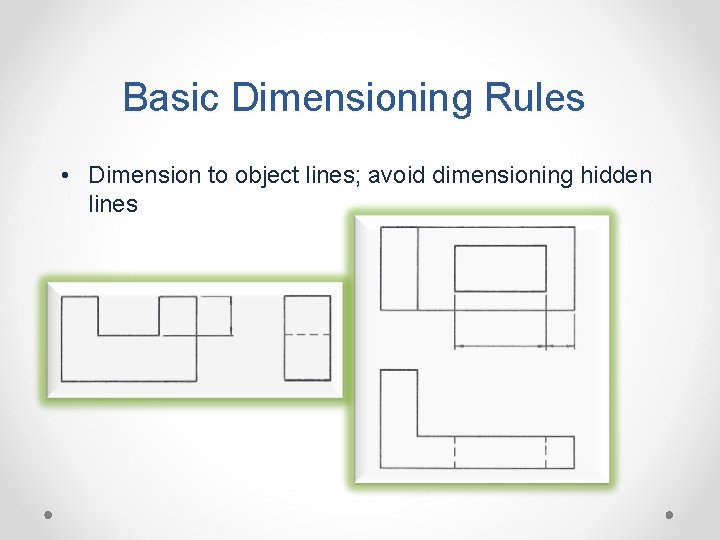
Basic Dimensioning Rules • Dimension to object lines; avoid dimensioning hidden lines

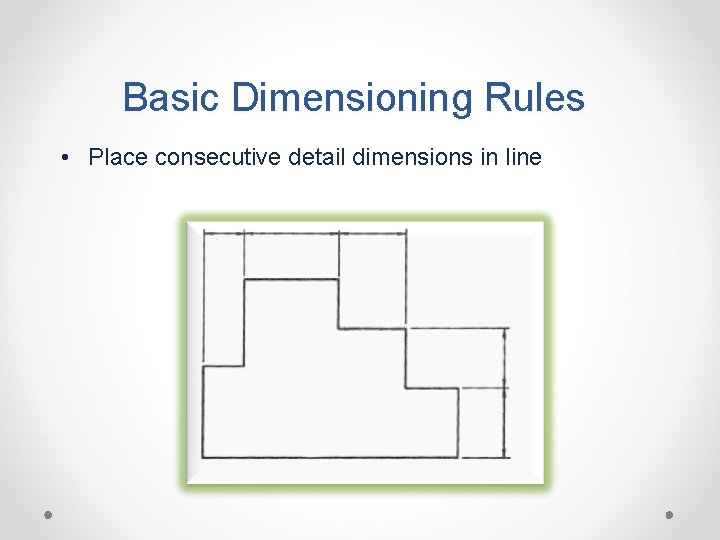
Basic Dimensioning Rules • Place consecutive detail dimensions in line

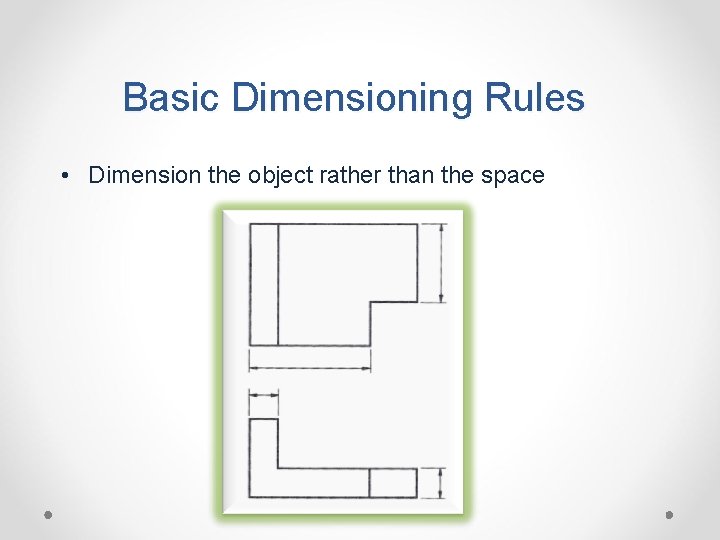
Basic Dimensioning Rules • Dimension the object rather than the space

Basic Dimensioning Rules • Extension lines begin about 2 mm from the feature being dimensioned. Correct Incorrect

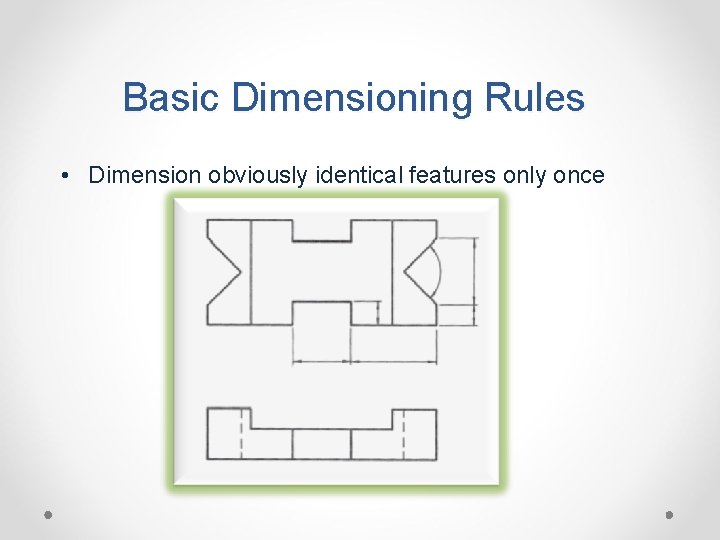
Basic Dimensioning Rules • Dimension obviously identical features only once

2/26/2021 19

2/26/2021 20