Dimensioning Standards and Techniques Organizations for Dimension Standards
- Slides: 47

Dimensioning Standards and Techniques

Organizations for Dimension Standards • American National Standards Institute – a U. S. organization that recommends standards for many products in various industries. Abbreviation: ANSI • The American Society of Mechanical Engineers (ASME) is a professional body, specifically an engineering society, focused on mechanical engineering. • The International Standards Organization - widely known as ISO, is an international-standard-setting body composed of representatives from various national standards organizations.

Functions of Dimensioning • Conveys communication to the drawing • Provides clarity • Describes necessary processes • Describes the scale, size, and location of features on an object • Must comply to standards

Objectives to Learn • Recognition of lines – Dimension lines, extension lines, and center lines – Review alphabet of lines and relationship to dimensioning • Placement and location of dimensions – Ease of reading, legibility, practicality, etc. • Choice of dimensions – Style - Fractional, decimal, metric, or dual – Systems – aligned or unidirectional

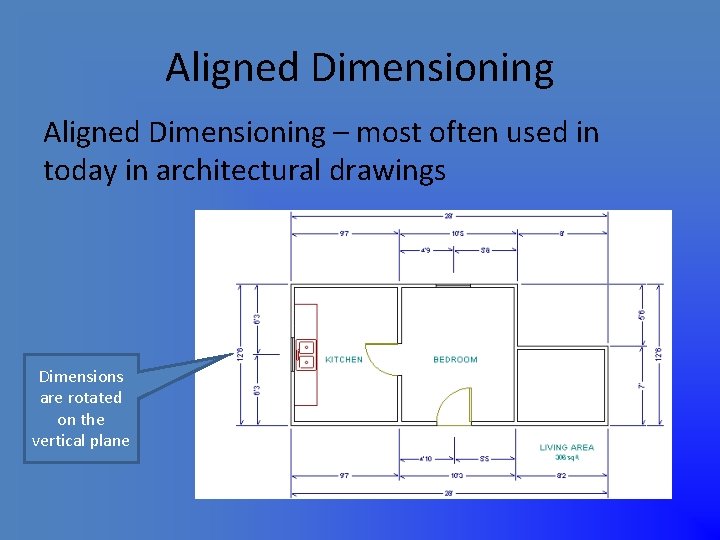
Aligned Dimensioning – most often used in today in architectural drawings Dimensions are rotated on the vertical plane

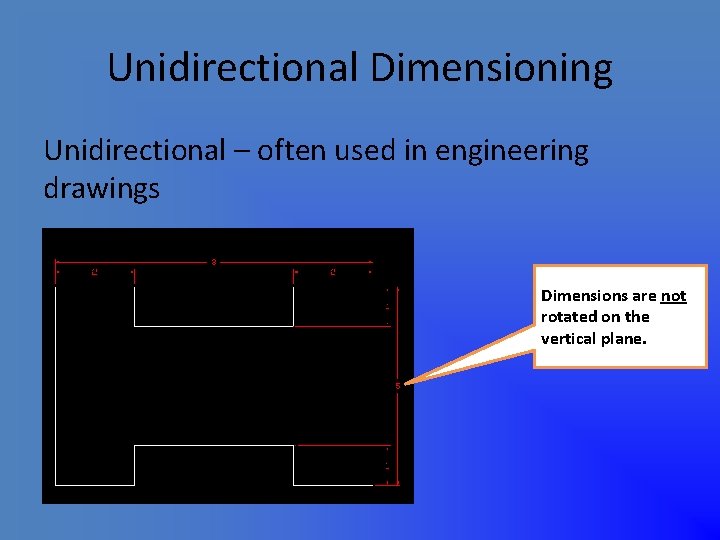
Unidirectional Dimensioning Unidirectional – often used in engineering drawings Dimensions are not rotated on the vertical plane.

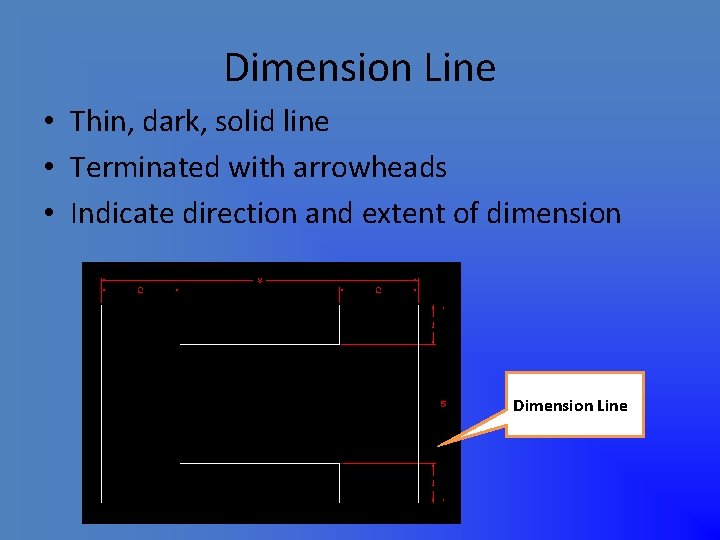
Dimension Line • Thin, dark, solid line • Terminated with arrowheads • Indicate direction and extent of dimension Dimension Line

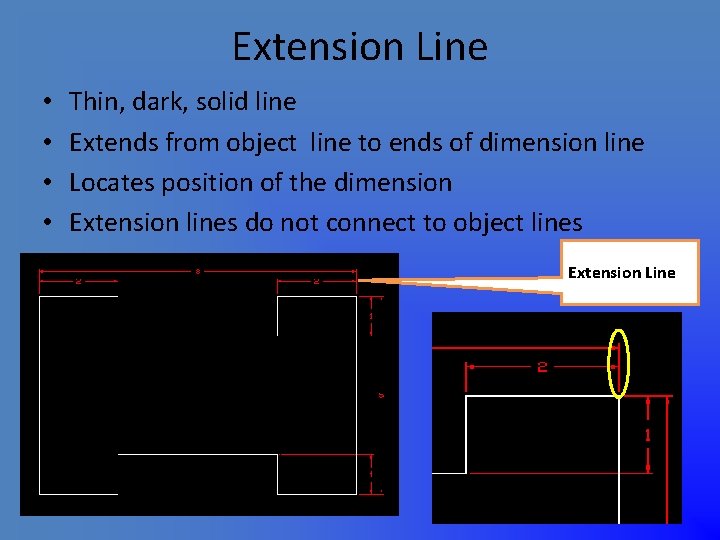
Extension Line • • Thin, dark, solid line Extends from object line to ends of dimension line Locates position of the dimension Extension lines do not connect to object lines Extension Line

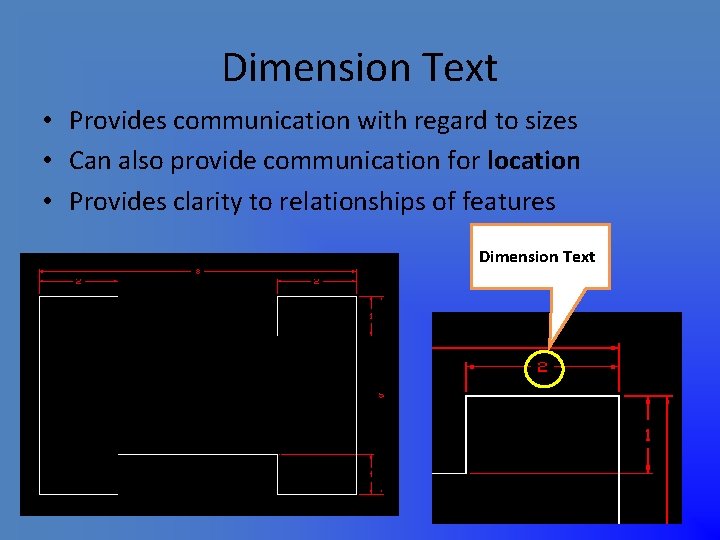
Dimension Text • Provides communication with regard to sizes • Can also provide communication for location • Provides clarity to relationships of features Dimension Text

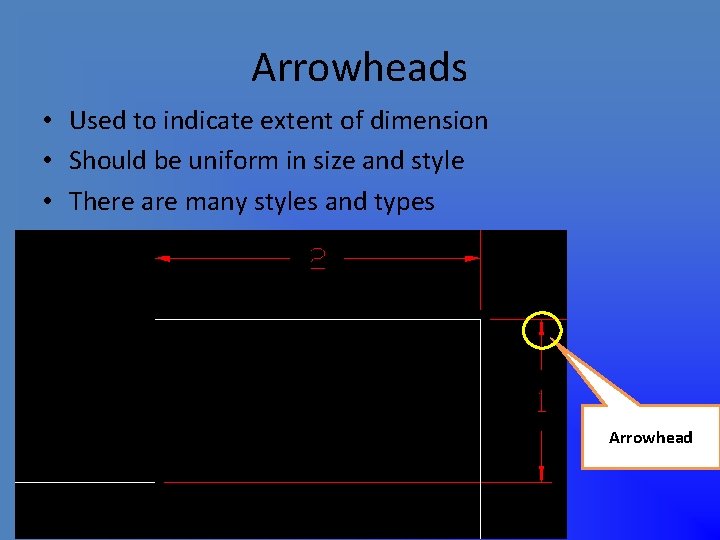
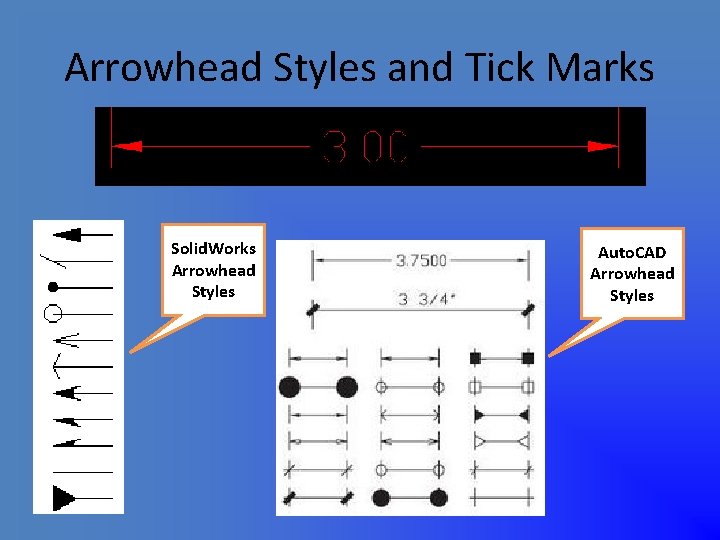
Arrowheads • Used to indicate extent of dimension • Should be uniform in size and style • There are many styles and types Arrowhead

Arrowhead Styles and Tick Marks Solid. Works Arrowhead Styles Auto. CAD Arrowhead Styles

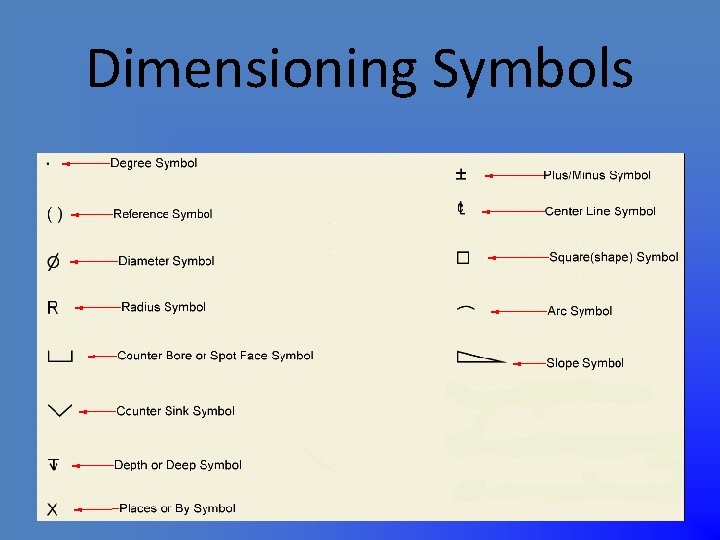
Dimensioning Symbols

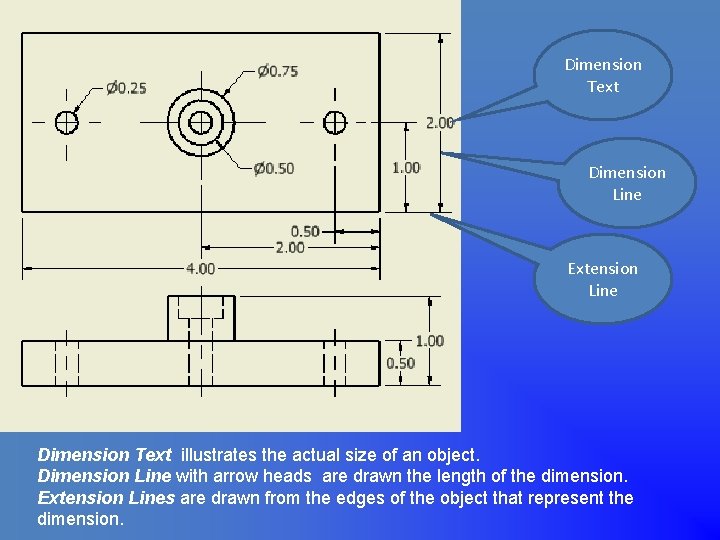
Dimension Text Dimension Line Extension Line Dimension Text illustrates the actual size of an object. Dimension Line with arrow heads are drawn the length of the dimension. Extension Lines are drawn from the edges of the object that represent the dimension.

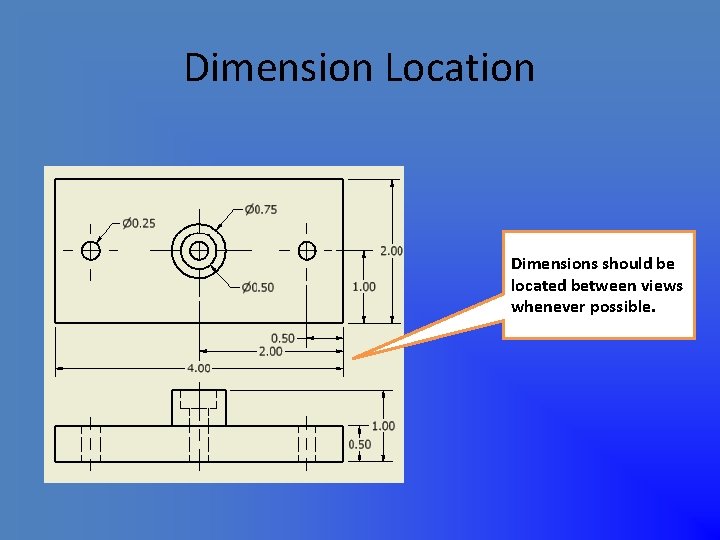
Dimension Location Dimensions should be located between views whenever possible.

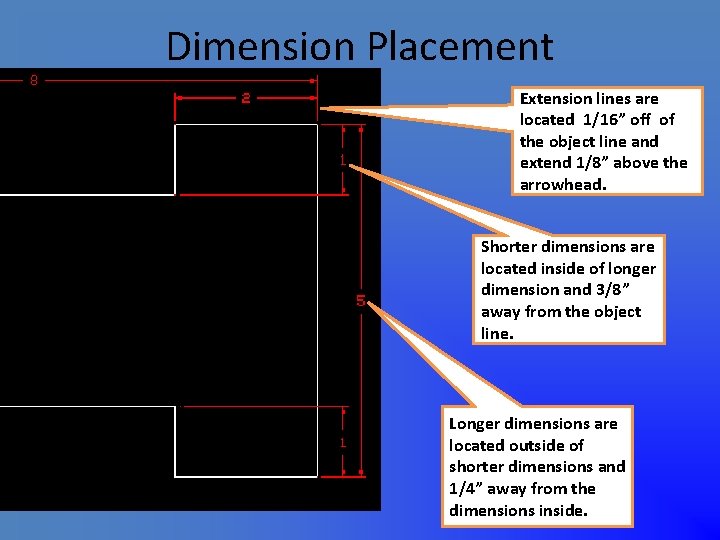
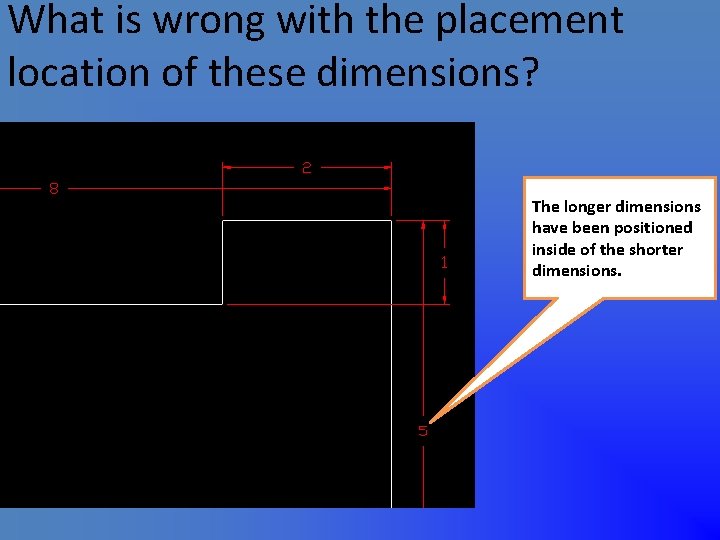
Dimension Placement Extension lines are located 1/16” off of the object line and extend 1/8” above the arrowhead. Shorter dimensions are located inside of longer dimension and 3/8” away from the object line. Longer dimensions are located outside of shorter dimensions and 1/4” away from the dimensions inside.

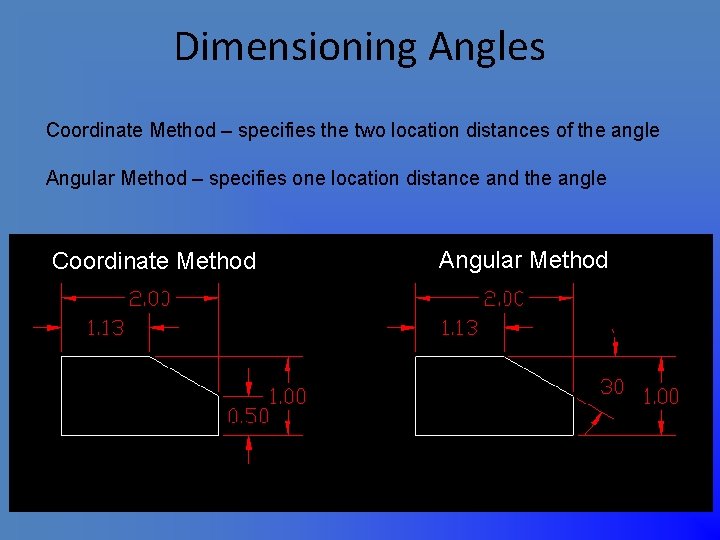
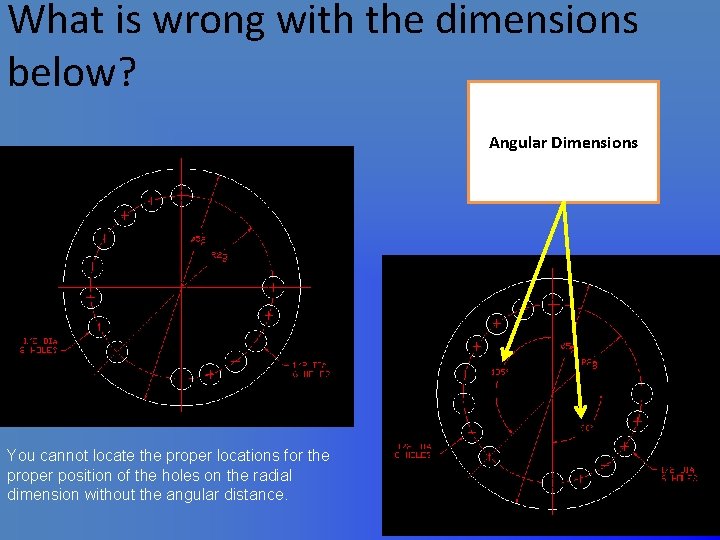
Dimensioning Angles Coordinate Method – specifies the two location distances of the angle Angular Method – specifies one location distance and the angle Coordinate Method Angular Method

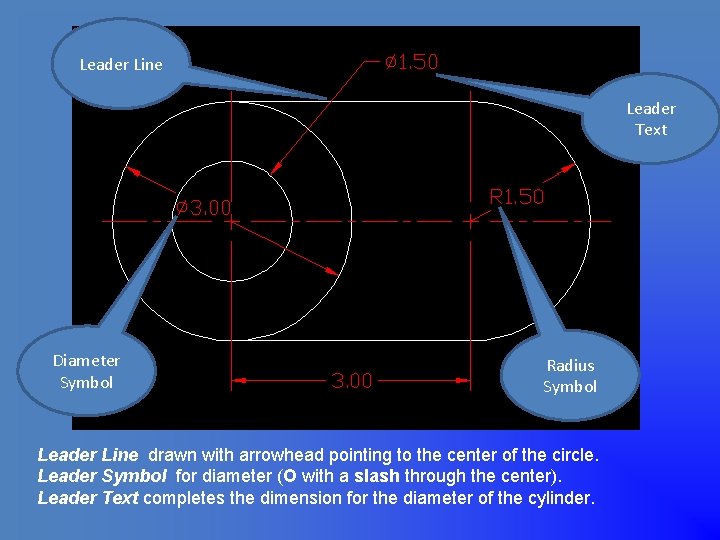
Leader Line Leader Text Diameter Symbol Radius Symbol Leader Line drawn with arrowhead pointing to the center of the circle. Leader Symbol for diameter (O with a slash through the center). Leader Text completes the dimension for the diameter of the cylinder.

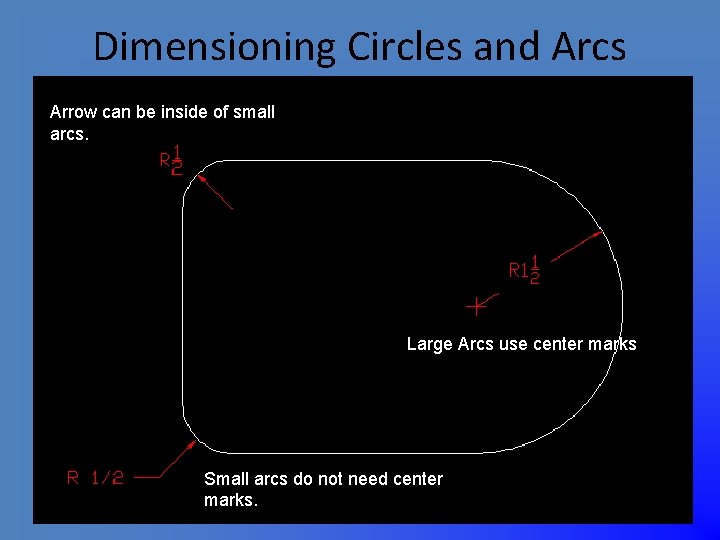
Dimensioning Circles and Arcs Arrow can be inside of small arcs. Large Arcs use center marks Small arcs do not need center marks.

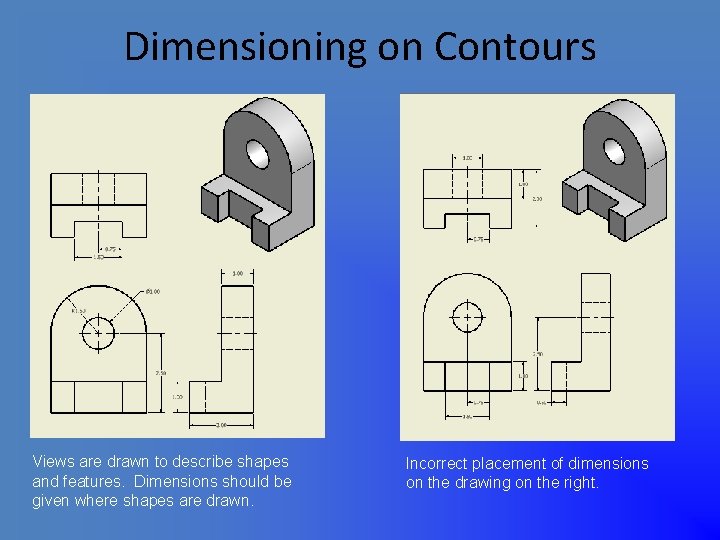
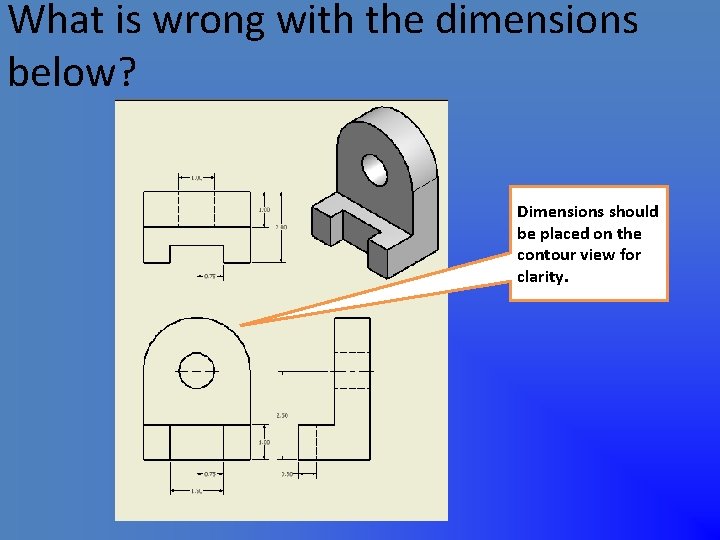
Dimensioning on Contours Views are drawn to describe shapes and features. Dimensions should be given where shapes are drawn. Incorrect placement of dimensions on the drawing on the right.

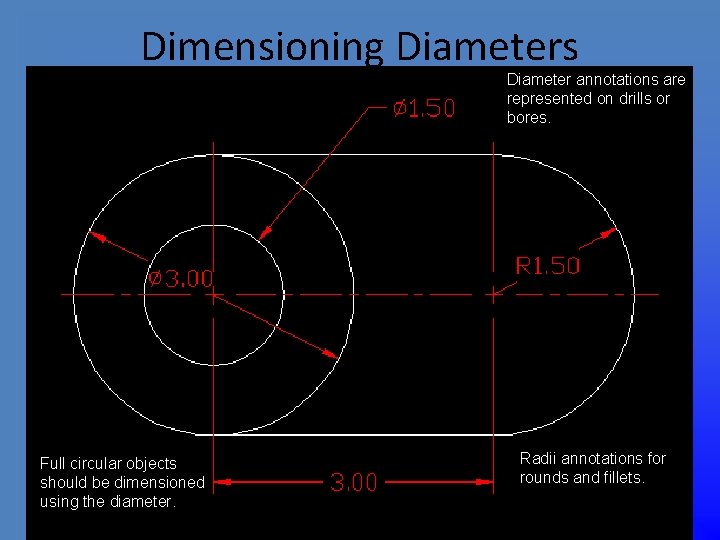
Dimensioning Diameters Diameter annotations are represented on drills or bores. Full circular objects should be dimensioned using the diameter. Radii annotations for rounds and fillets.

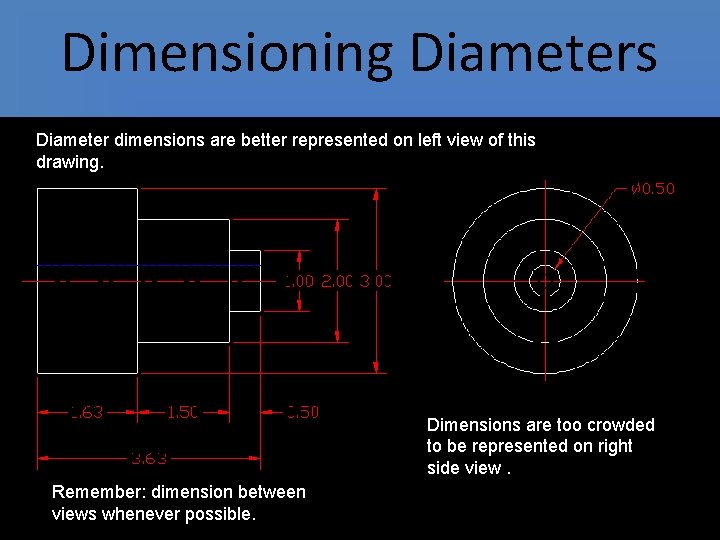
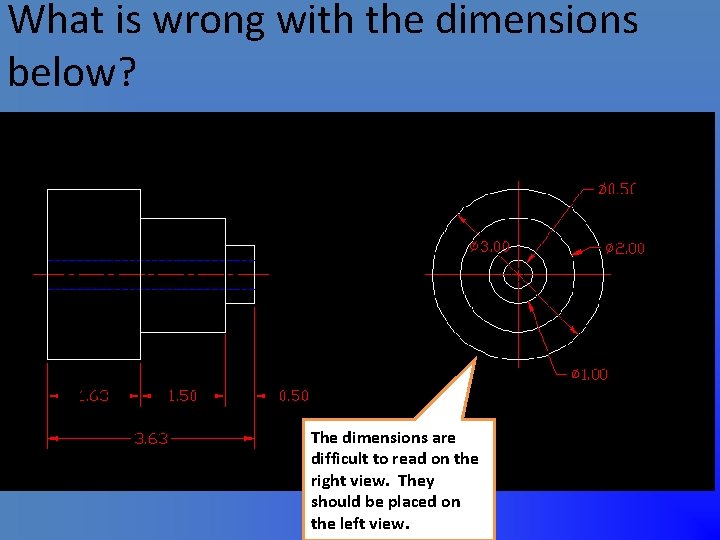
Dimensioning Diameters Diameter dimensions are better represented on left view of this drawing. Dimensions are too crowded to be represented on right side view. Remember: dimension between views whenever possible.

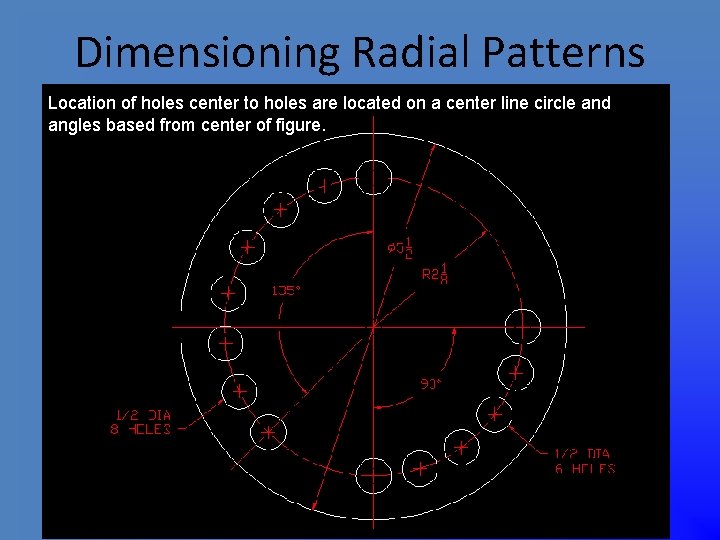
Dimensioning Radial Patterns Location of holes center to holes are located on a center line circle and angles based from center of figure.

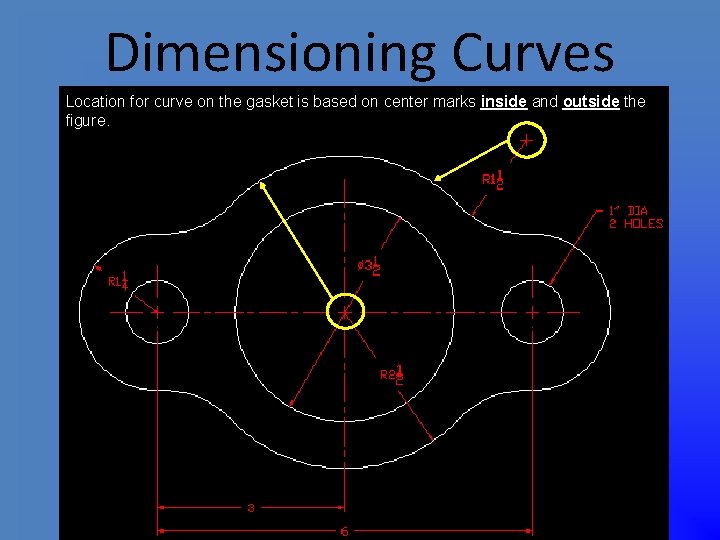
Dimensioning Curves Location for curve on the gasket is based on center marks inside and outside the figure.

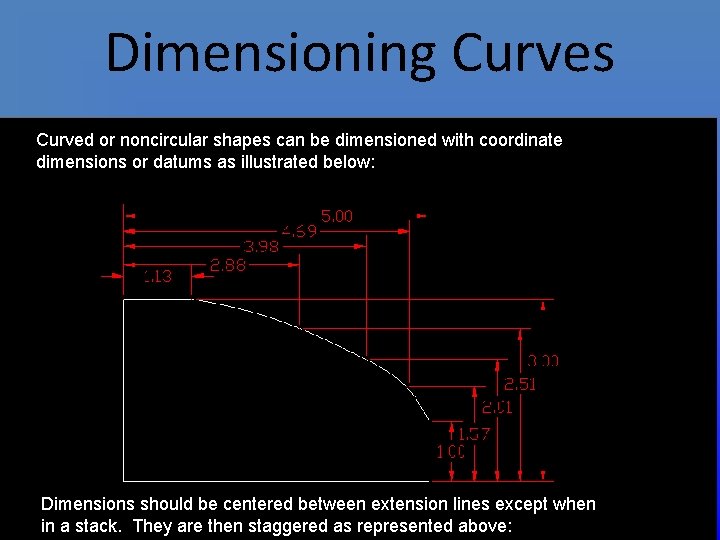
Dimensioning Curves Curved or noncircular shapes can be dimensioned with coordinate dimensions or datums as illustrated below: Dimensions should be centered between extension lines except when in a stack. They are then staggered as represented above:

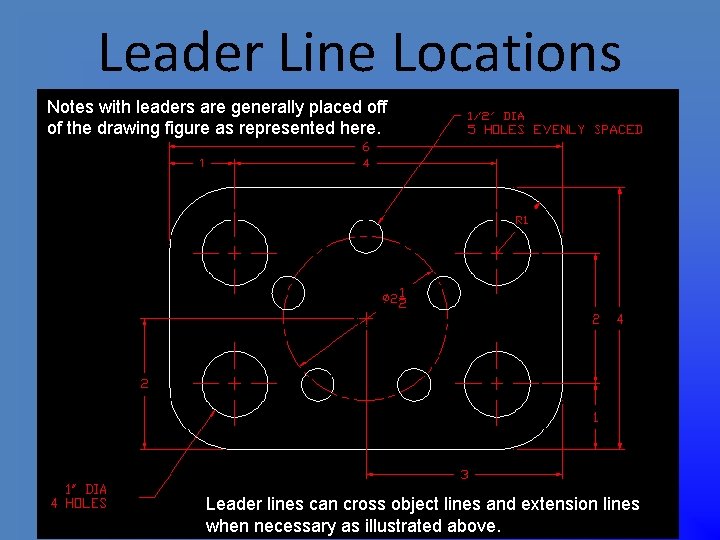
Leader Line Locations Notes with leaders are generally placed off of the drawing figure as represented here. Leader lines can cross object lines and extension lines when necessary as illustrated above.

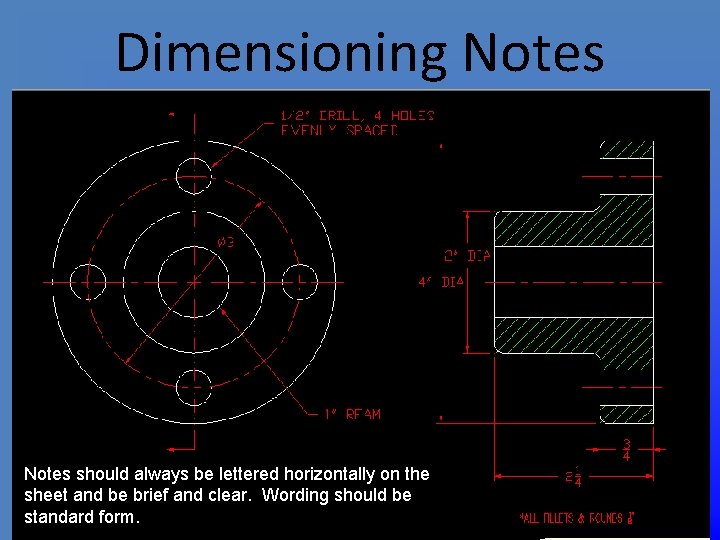
Dimensioning Notes should always be lettered horizontally on the sheet and be brief and clear. Wording should be standard form.

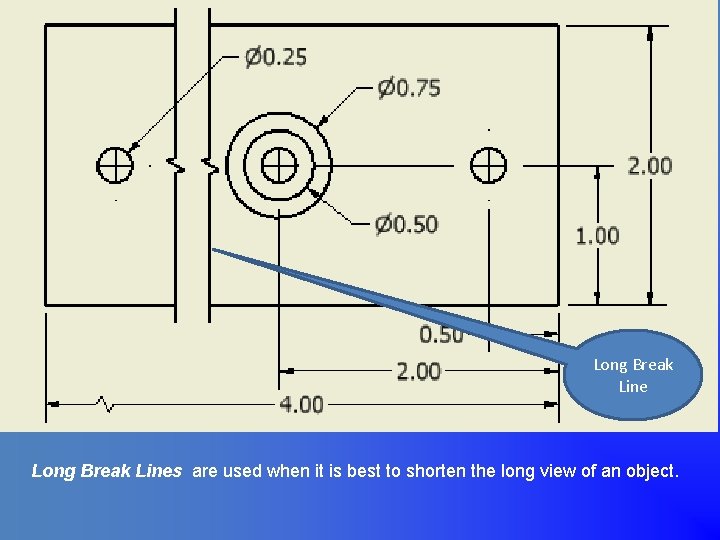
Long Break Line Long Break Lines are used when it is best to shorten the long view of an object.

Dimension Tolerances • Allows a range of acceptable variability • Assures assemblies will fit properly • Parts can be manufactured within a range of tolerances rather than exact • High precision means high cost

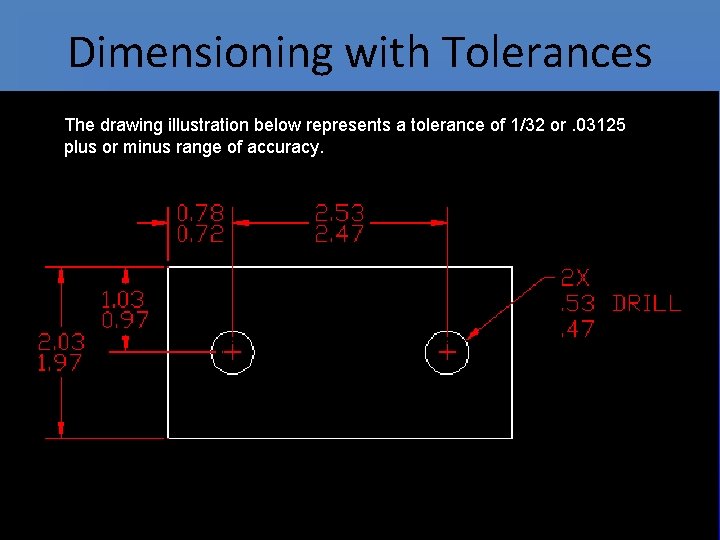
Dimensioning with Tolerances The drawing illustration below represents a tolerance of 1/32 or. 03125 plus or minus range of accuracy.

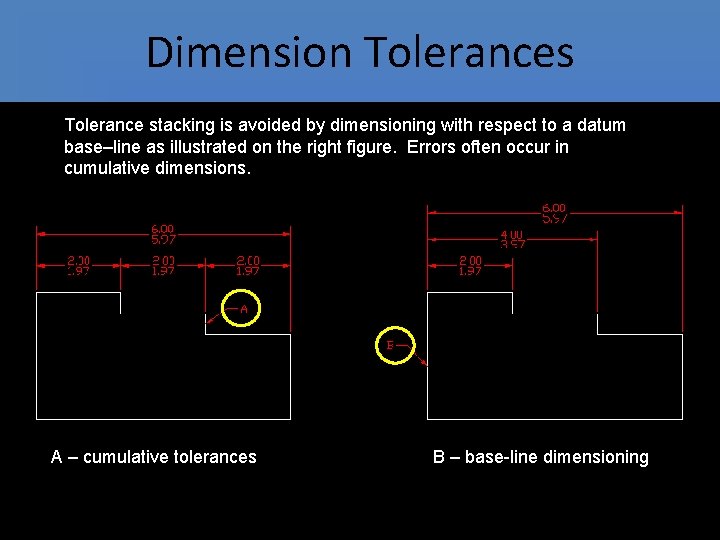
Dimension Tolerances Tolerance stacking is avoided by dimensioning with respect to a datum base–line as illustrated on the right figure. Errors often occur in cumulative dimensions. A – cumulative tolerances B – base-line dimensioning

Dimensioning Tips to Know • Fractional dimensions are generally used on cabinet drawings • Decimal dimensions are used on engineering drawings • Feet and inch dimensions are used on architectural drawings • Tolerances are dimensioned when assembly parts are necessary

Test your knowledge on the rest of the slides after reviewing the dimension rules from your class text.

What is wrong with the placement location of these dimensions? The longer dimensions have been positioned inside of the shorter dimensions.

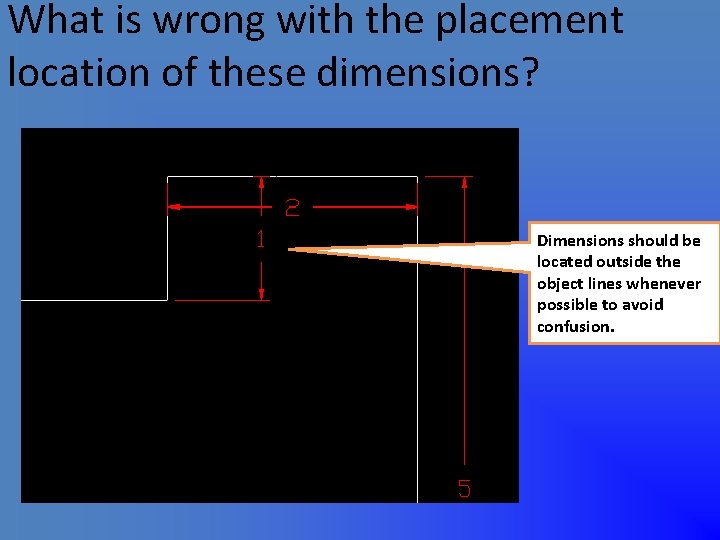
What is wrong with the placement location of these dimensions? Dimensions should be located outside the object lines whenever possible to avoid confusion.

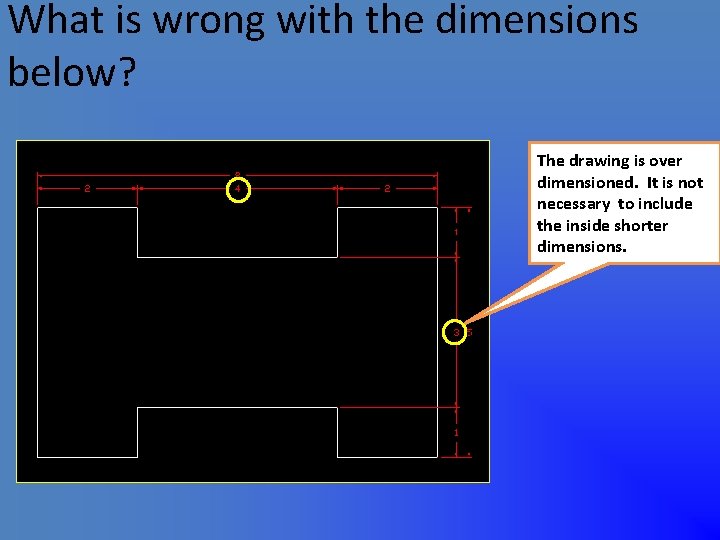
What is wrong with the dimensions below? The drawing is over dimensioned. It is not necessary to include the inside shorter dimensions.

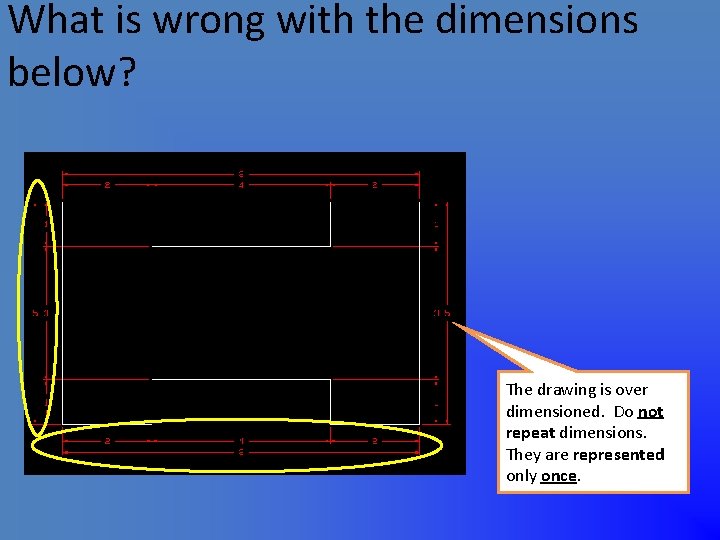
What is wrong with the dimensions below? The drawing is over dimensioned. Do not repeat dimensions. They are represented only once.

What is wrong with the dimensions below? The dimensions are difficult to read on the right view. They should be placed on the left view.

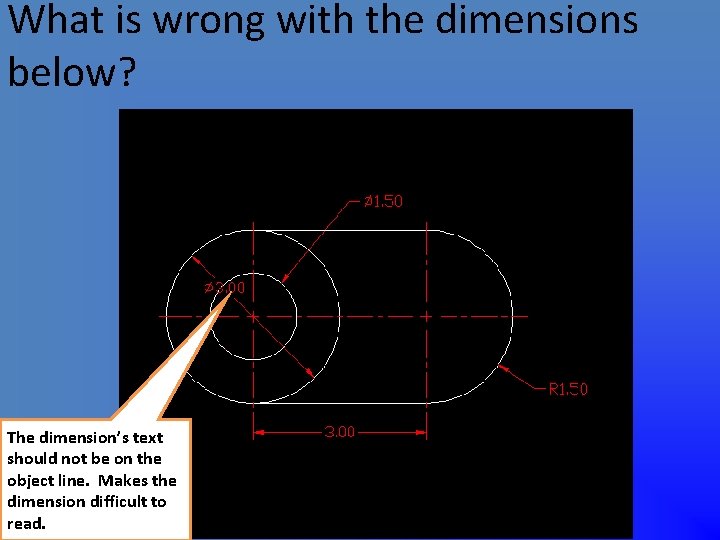
What is wrong with the dimensions below? The dimension’s text should not be on the object line. Makes the dimension difficult to read.

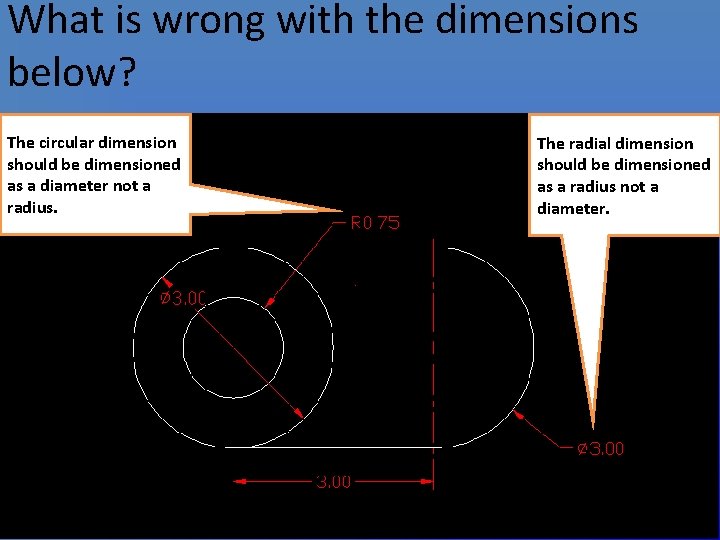
What is wrong with the dimensions below? The circular dimension should be dimensioned as a diameter not a radius. The radial dimension should be dimensioned as a radius not a diameter.

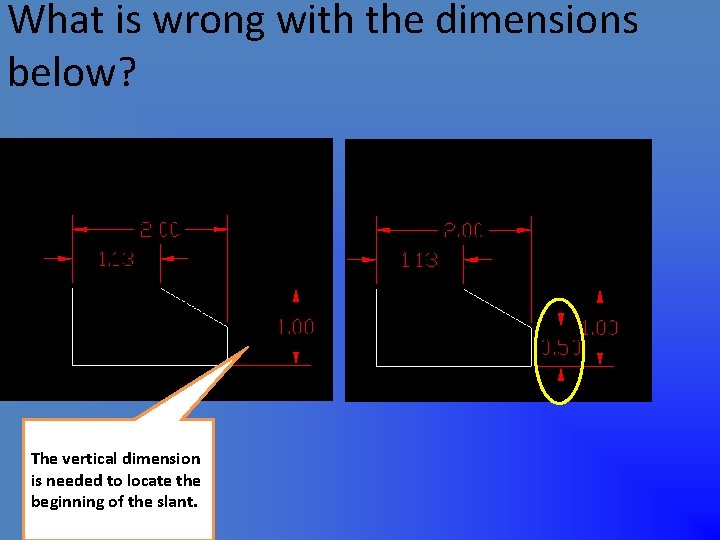
What is wrong with the dimensions below? The vertical dimension is needed to locate the beginning of the slant.

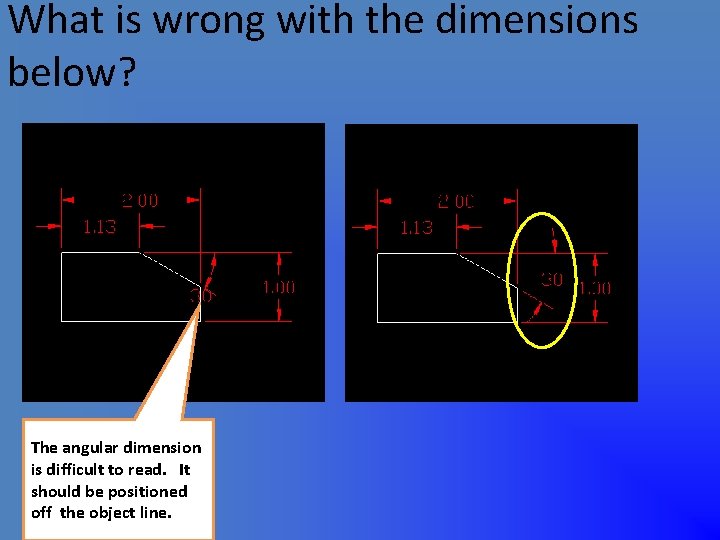
What is wrong with the dimensions below? The angular dimension is difficult to read. It should be positioned off the object line.

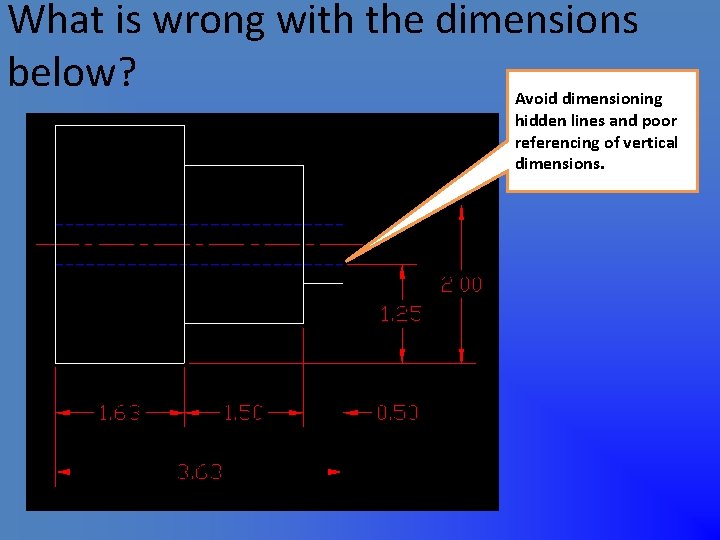
What is wrong with the dimensions below? Avoid dimensioning hidden lines and poor referencing of vertical dimensions.

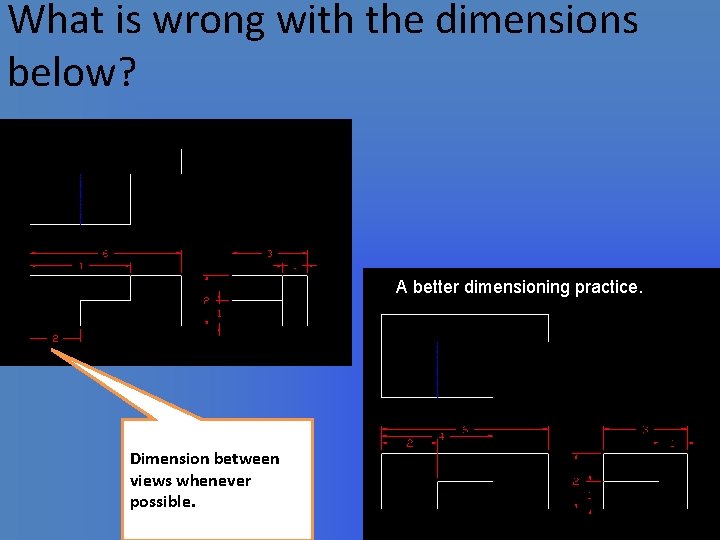
What is wrong with the dimensions below? A better dimensioning practice. Dimension between views whenever possible.

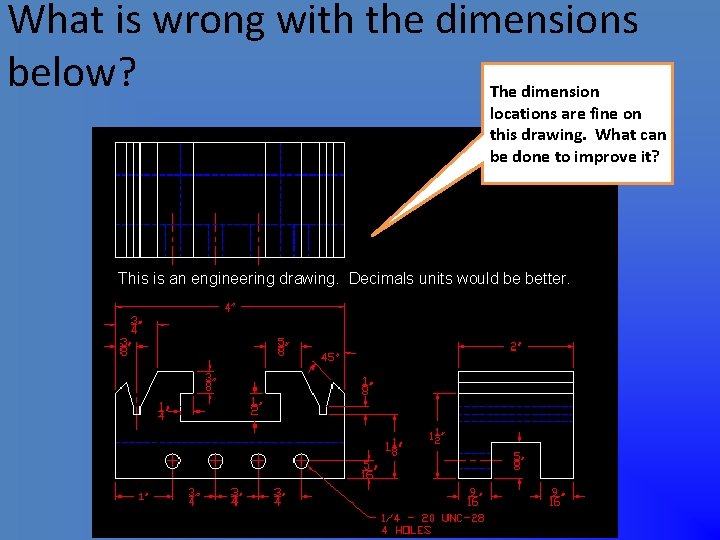
What is wrong with the dimensions below? The dimension locations are fine on this drawing. What can be done to improve it? This is an engineering drawing. Decimals units would be better.

What is wrong with the dimensions below? Angular Dimensions You cannot locate the proper locations for the proper position of the holes on the radial dimension without the angular distance.

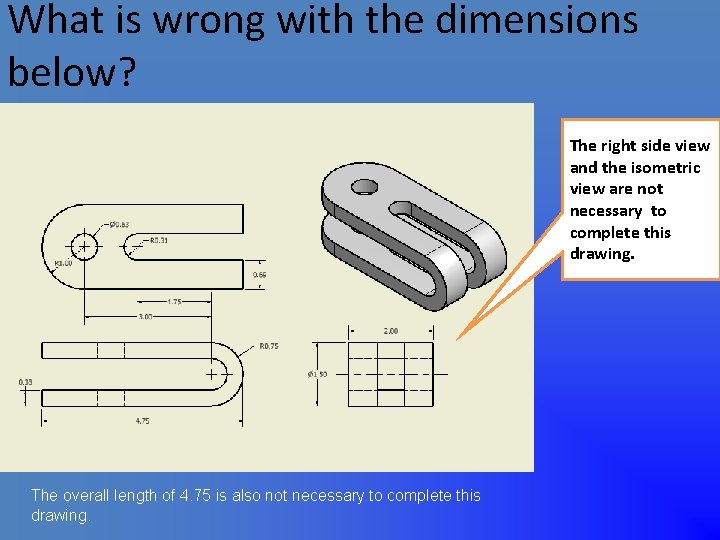
What is wrong with the dimensions below? The right side view and the isometric view are not necessary to complete this drawing. The overall length of 4. 75 is also not necessary to complete this drawing.

What is wrong with the dimensions below? Dimensions should be placed on the contour view for clarity.