Dimensioning part 1 with Solid Works ENGR 1182

- Slides: 15

Dimensioning part 1 with Solid. Works ENGR 1182 Solid. Works 08

Today’s Objectives § Formal Drawing Components: • Dimensioning with Solid. Works § SW 08 In-Class Activity § SW 08 Out-of-Class Homework Assignment

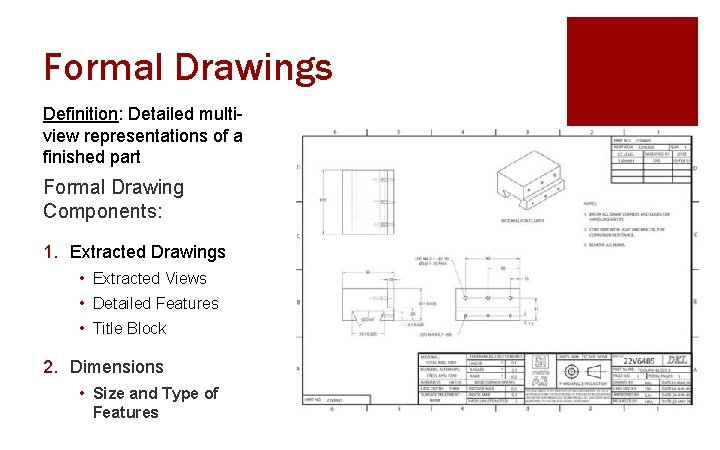
Formal Drawings Definition: Detailed multiview representations of a finished part Formal Drawing Components: 1. Extracted Drawings • Extracted Views • Detailed Features • Title Block 2. Dimensions • Size and Type of Features

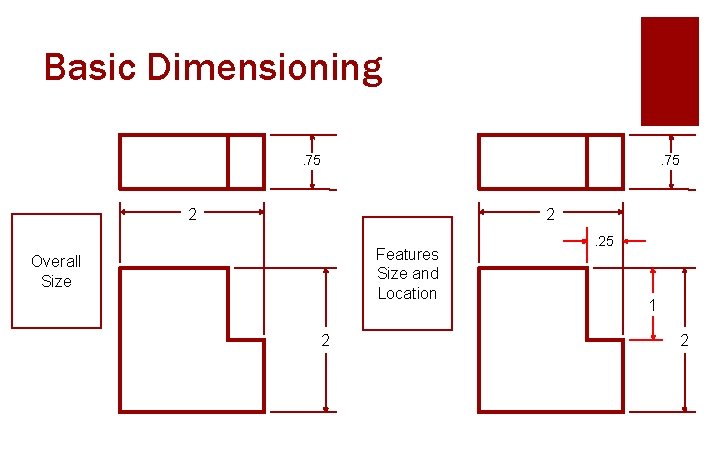
Basic Dimensioning is used to define an object so that it could be manufactured and must: § Define the overall size of the part in all 3 dimensions. § Define the size and location of the features of the part in all 3 dimensions.

Basic Dimensioning. 75 2 2 Features Size and Location Overall Size 2 . 25 1 2

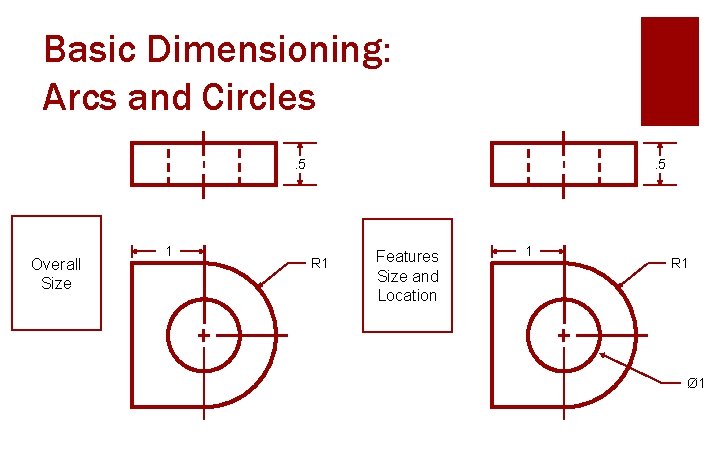
Basic Dimensioning: Arcs and Circles. 5 Overall Size 1 . 5 R 1 Features Size and Location 1 R 1 Ø 1

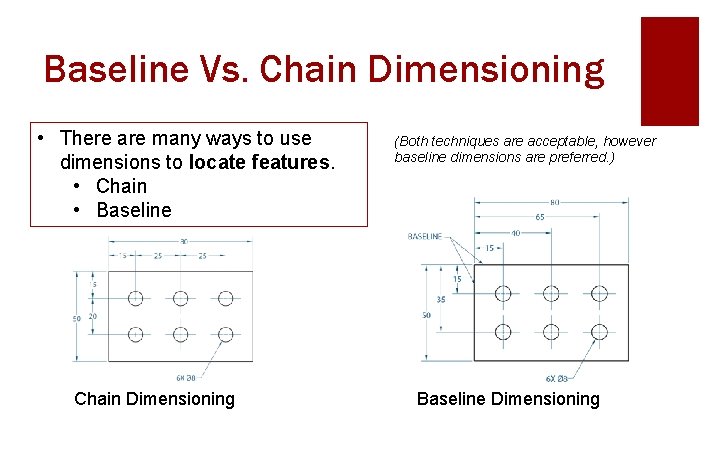
Baseline Vs. Chain Dimensioning • There are many ways to use dimensions to locate features. • Chain • Baseline Chain Dimensioning (Both techniques are acceptable, however baseline dimensions are preferred. ) Baseline Dimensioning

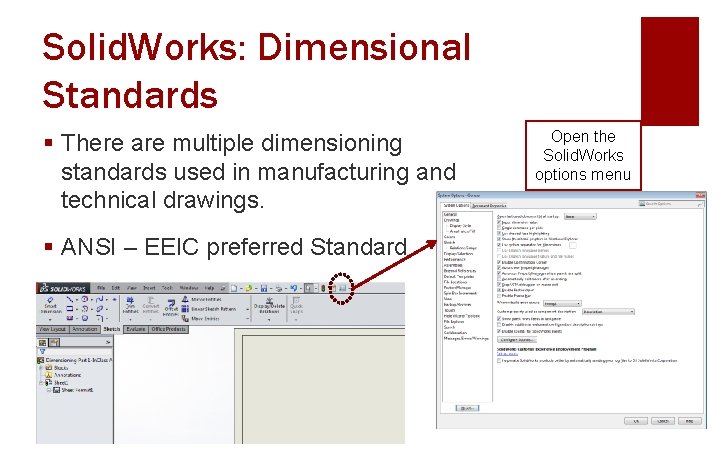
Solid. Works: Dimensional Standards § There are multiple dimensioning standards used in manufacturing and technical drawings. § ANSI – EEIC preferred Standard Open the Solid. Works options menu

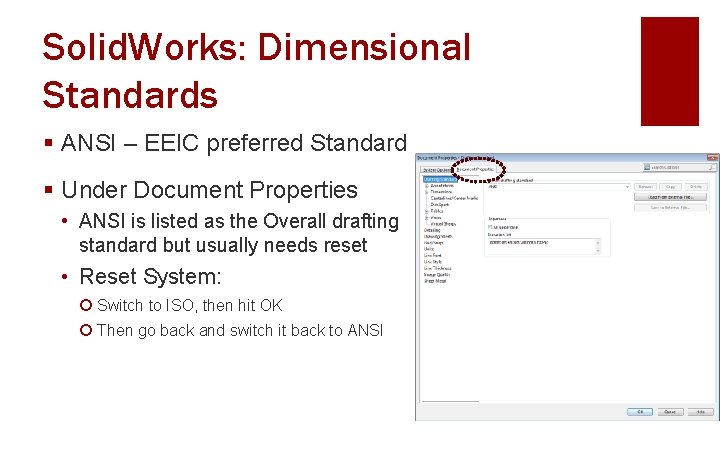
Solid. Works: Dimensional Standards § ANSI – EEIC preferred Standard § Under Document Properties • ANSI is listed as the Overall drafting standard but usually needs reset • Reset System: ¡ Switch to ISO, then hit OK ¡ Then go back and switch it back to ANSI

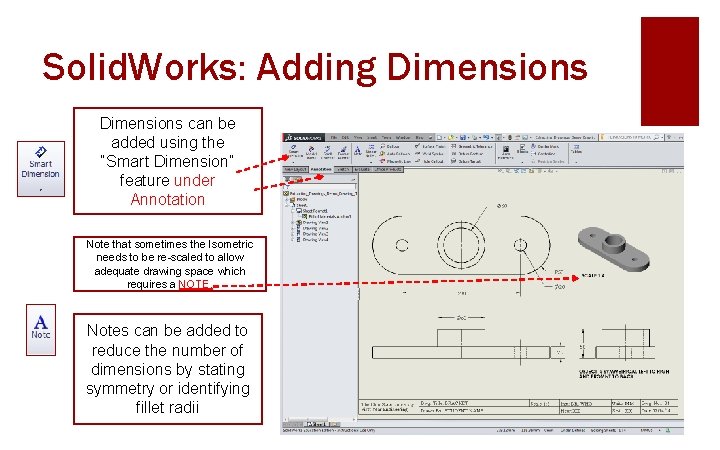
Solid. Works: Adding Dimensions can be added using the “Smart Dimension” feature under Annotation Note that sometimes the Isometric needs to be re-scaled to allow adequate drawing space which requires a NOTE. Notes can be added to reduce the number of dimensions by stating symmetry or identifying fillet radii

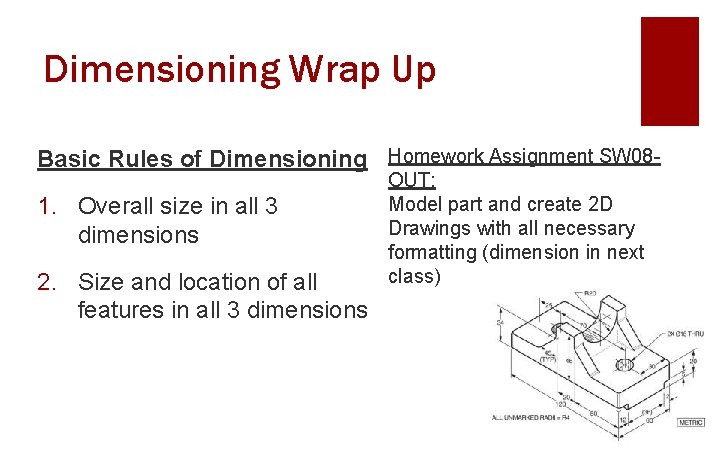
Dimensioning Wrap Up Basic Rules of Dimensioning Homework Assignment SW 08 - 1. Overall size in all 3 dimensions 2. Size and location of all features in all 3 dimensions OUT: Model part and create 2 D Drawings with all necessary formatting (dimension in next class)

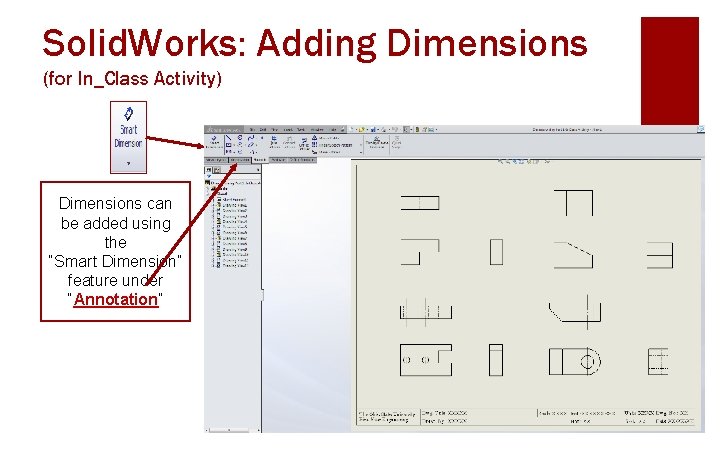
Solid. Works: Adding Dimensions (for In_Class Activity) Dimensions can be added using the “Smart Dimension” feature under “Annotation”

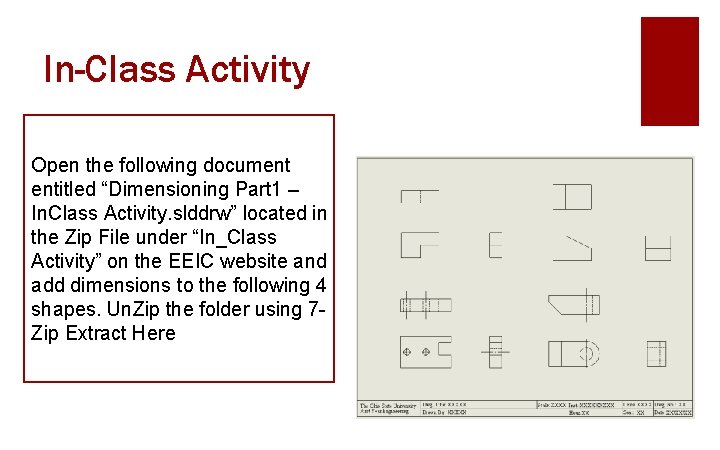
In-Class Activity Open the following document entitled “Dimensioning Part 1 – In. Class Activity. slddrw” located in the Zip File under “In_Class Activity” on the EEIC website and add dimensions to the following 4 shapes. Un. Zip the folder using 7 Zip Extract Here

Important Takeaways § Extracted drawings are used to show 3 D parts as 2 D drawings. § Titles blocks are used for identification and informative purposes. § Dimensioning is used to define an object, including the overall size with 3 dimensions and the location and size of part features.

What’s Next? § Due Next Class: SW 08 Out of Class HW § Before next class, you will read about dimensioning in detail. § Take Solid. Works 9 Quiz on readings