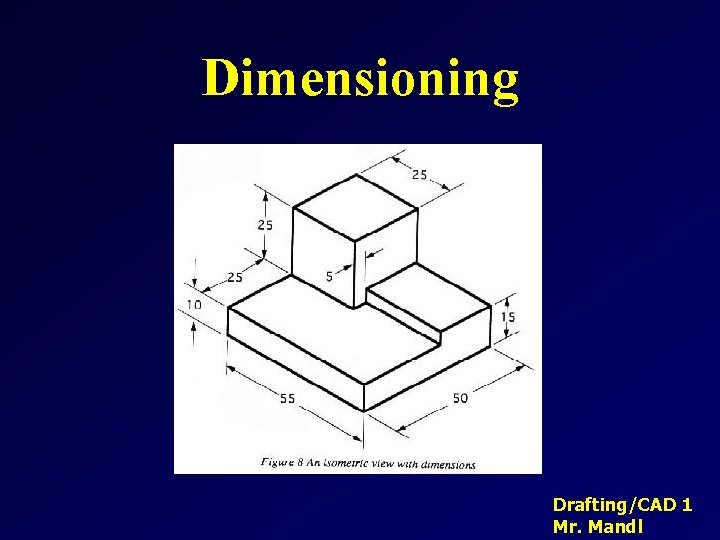
Dimensioning DraftingCAD 1 Mr Mandl Dimensioning Why do
- Slides: 24

Dimensioning Drafting/CAD 1 Mr. Mandl

Dimensioning Why do we dimension drawings? • In order to provide accurate size description of a part for manufacturing. • To describe the relationships between features in your drawing. Drafting/CAD 1 Mr. Mandl

Dimensioning There Are 2 Basic Types of Dimensions • Size Dimensions • Location Dimensions Drafting/CAD 1 Mr. Mandl

Dimensioning 5 Basic Rules to Remember 1. Start Small, Go Big 2. Do Not Dimension to Hidden Lines or Hidden Features 3. Avoid Placing Dimensions on Part 4. Place Dimensions Between Views 5. Do Not Dimension to Edge of Arcs Drafting/CAD 1 Mr. Mandl

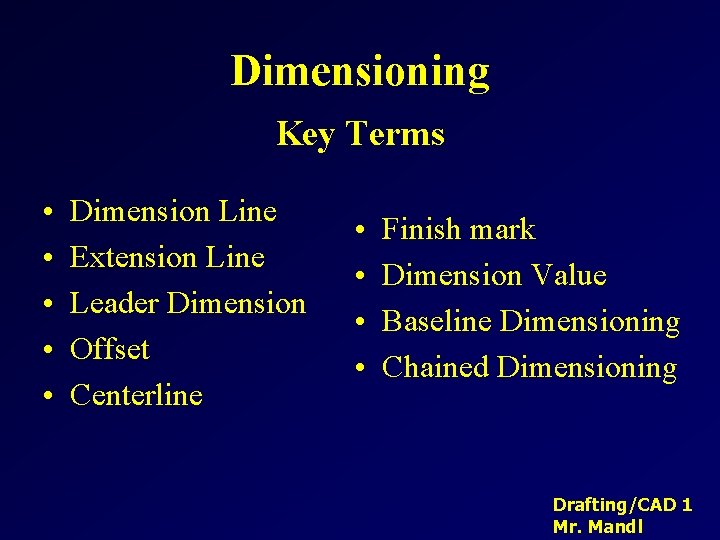
Dimensioning Key Terms • • • Dimension Line Extension Line Leader Dimension Offset Centerline • • Finish mark Dimension Value Baseline Dimensioning Chained Dimensioning Drafting/CAD 1 Mr. Mandl

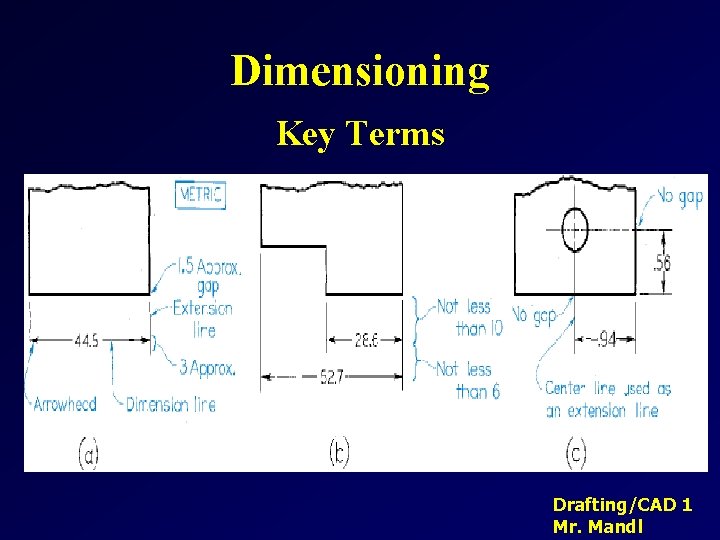
Dimensioning Key Terms Drafting/CAD 1 Mr. Mandl

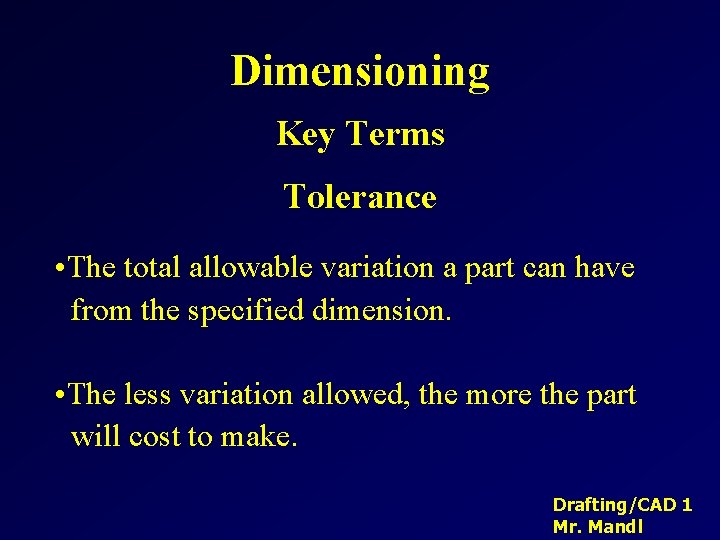
Dimensioning Key Terms Tolerance • The total allowable variation a part can have from the specified dimension. • The less variation allowed, the more the part will cost to make. Drafting/CAD 1 Mr. Mandl

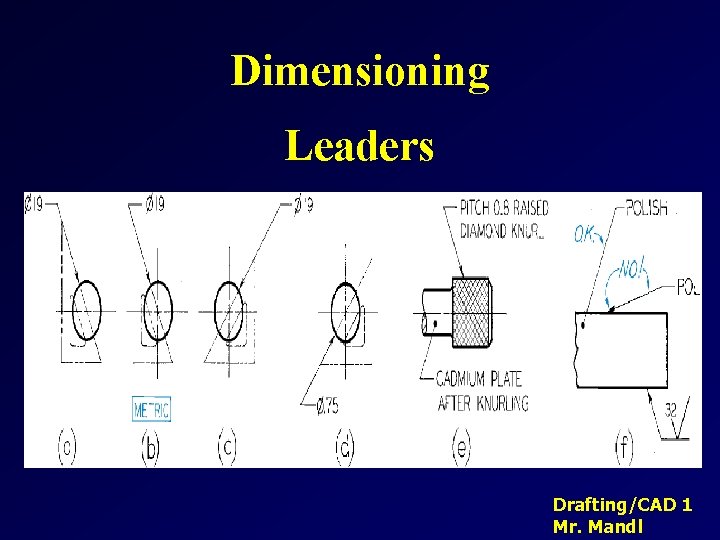
Dimensioning Leaders Drafting/CAD 1 Mr. Mandl

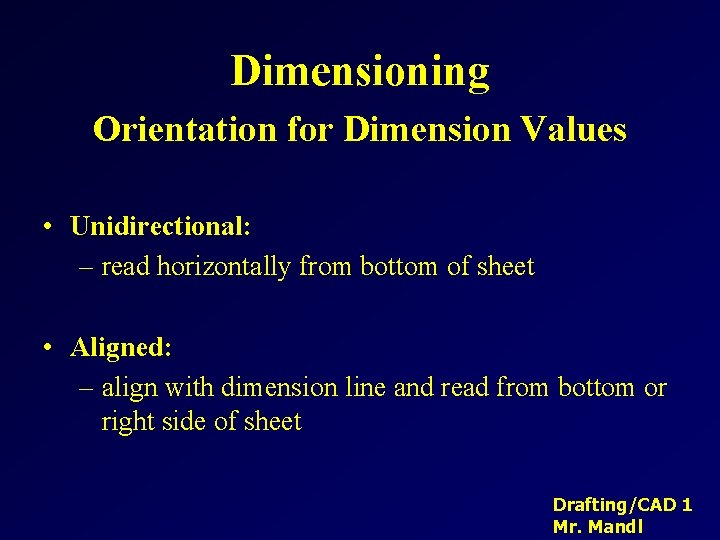
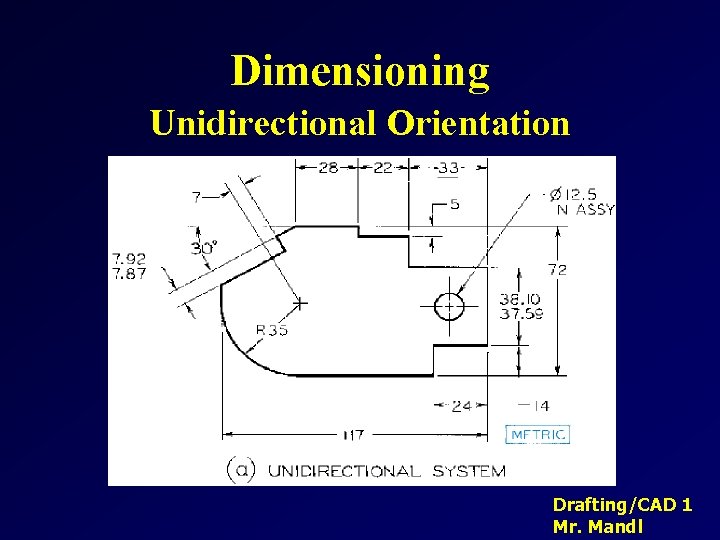
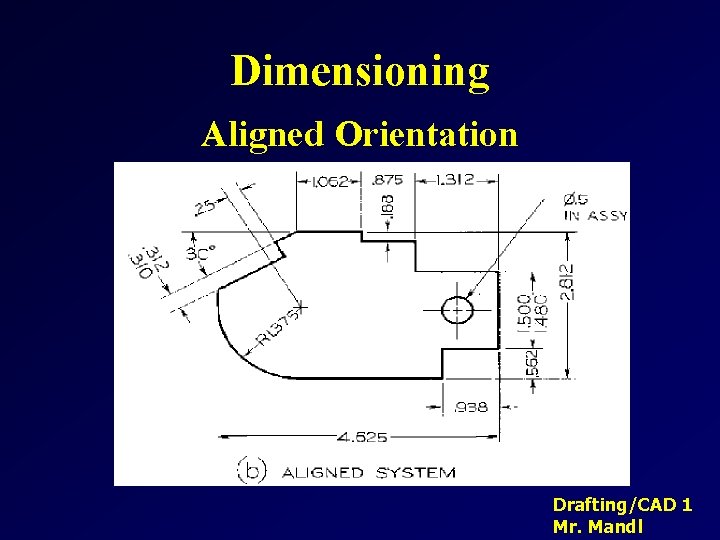
Dimensioning Orientation for Dimension Values • Unidirectional: – read horizontally from bottom of sheet • Aligned: – align with dimension line and read from bottom or right side of sheet Drafting/CAD 1 Mr. Mandl

Dimensioning Unidirectional Orientation Drafting/CAD 1 Mr. Mandl

Dimensioning Aligned Orientation Drafting/CAD 1 Mr. Mandl

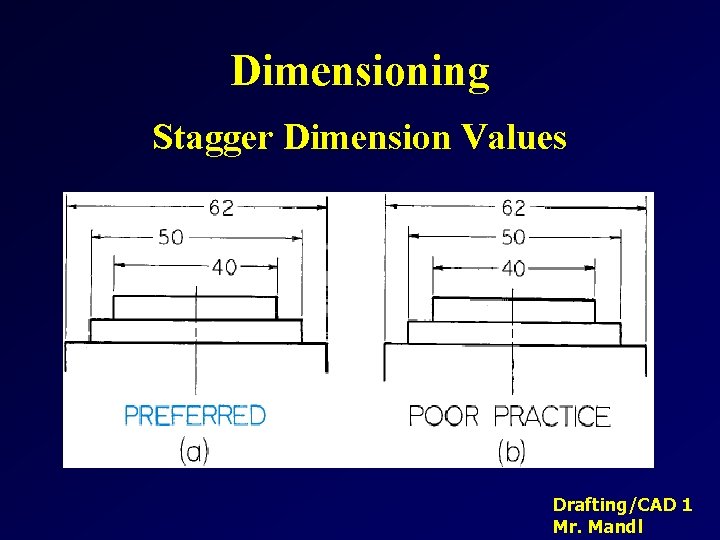
Dimensioning Stagger Dimension Values Drafting/CAD 1 Mr. Mandl

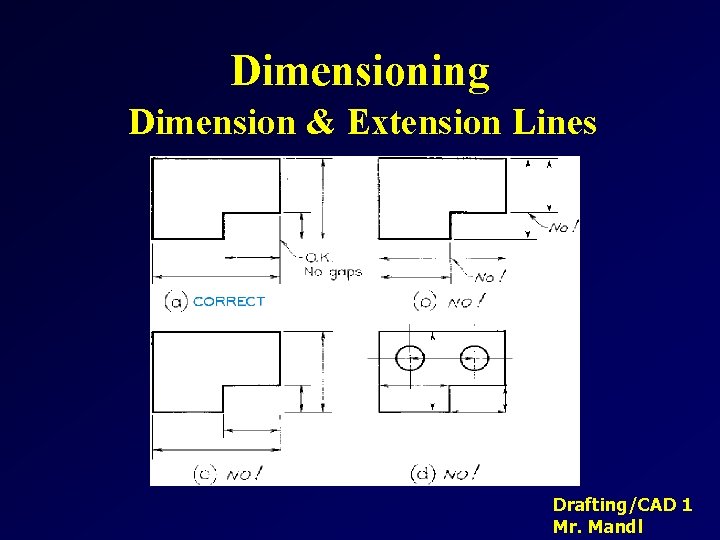
Dimensioning Dimension & Extension Lines Drafting/CAD 1 Mr. Mandl

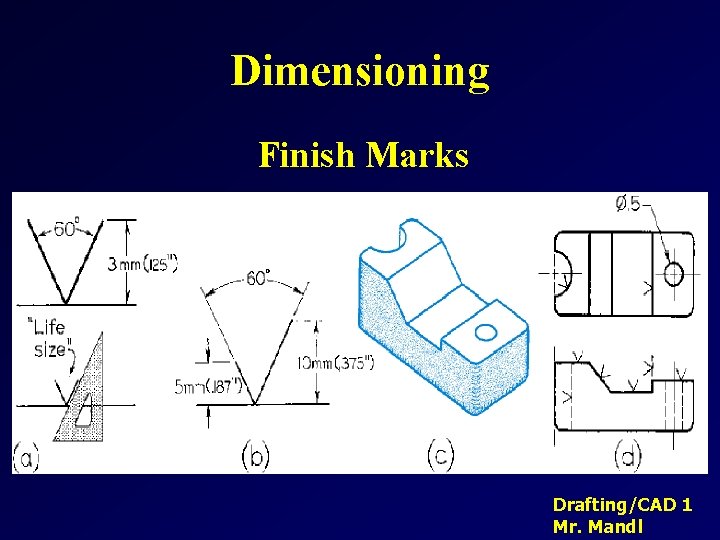
Dimensioning Finish Marks Drafting/CAD 1 Mr. Mandl

Dimensioning Choice of Dimensions • The dimensions you specify determine the way the part is manufactured and the way the tolerance is applied • Fully dimension each part • Do not over dimension, – Each dimensions should appear only once Drafting/CAD 1 Mr. Mandl

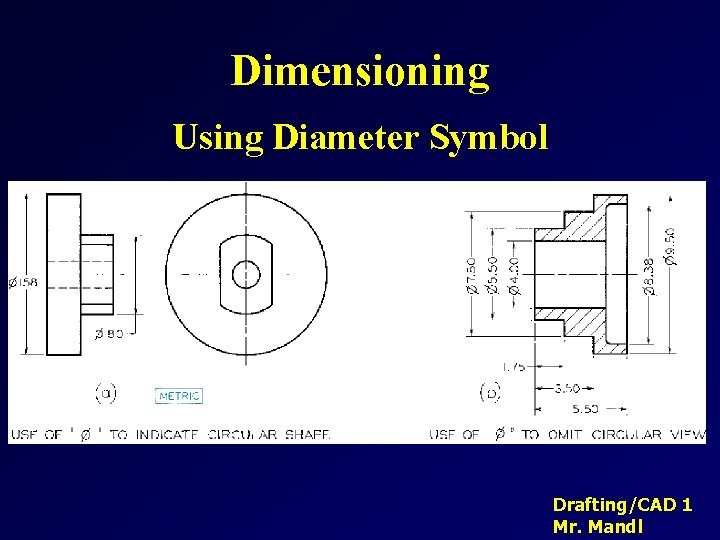
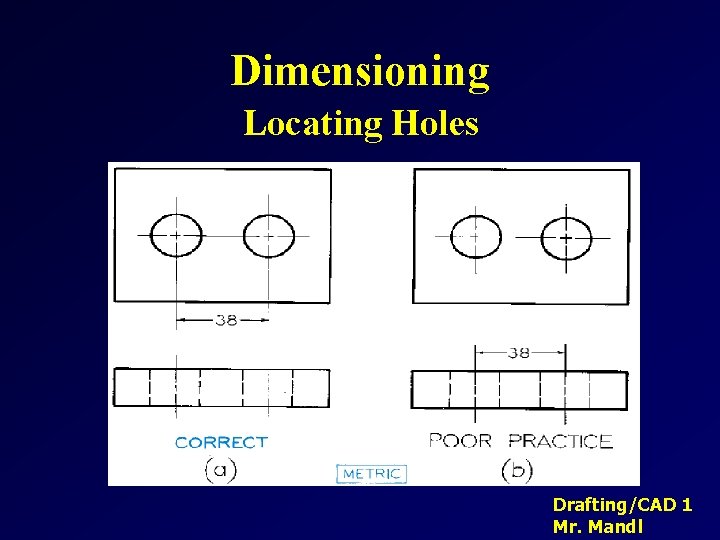
Dimensioning Choosing Which Dimensions to Show • Don’t over dimension! • Give the diameter of circular shapes. • Give the radius of arcs. • No redundant dimensions • Give size dimensions for features. • Give location dimensions to show features relate to one another. Drafting/CAD 1 Mr. Mandl

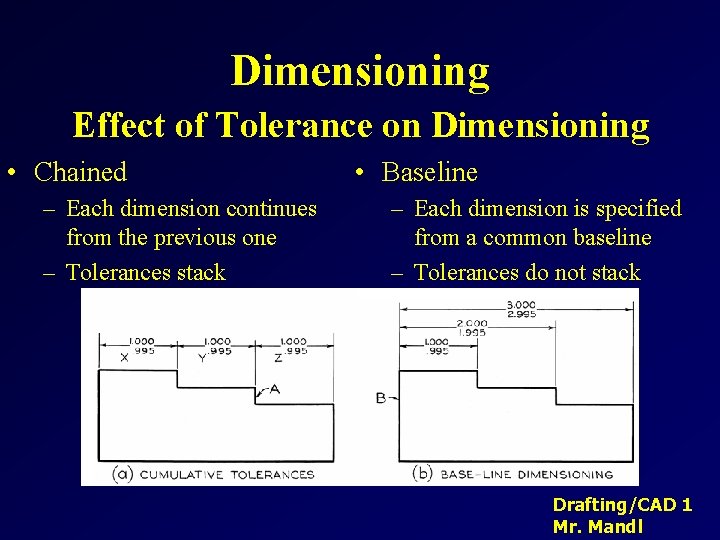
Dimensioning Effect of Tolerance on Dimensioning • Chained – Each dimension continues from the previous one – Tolerances stack • Baseline – Each dimension is specified from a common baseline – Tolerances do not stack Drafting/CAD 1 Mr. Mandl

Dimensioning Units • Metric values are typically given in whole millimeters or to one decimal place. – 3. 5 Drafting/CAD 1 Mr. Mandl

Dimensioning Placement of Dimensions • The rules for dimension placement help ensure that others will be able to interpret your drawing • Where placement practices conflict, remember that your goal is to clearly communicate the purpose of the drawing. Use the practice you feel will make the drawing easy to understand. Drafting/CAD 1 Mr. Mandl

Dimensioning Placement Practices • Avoid dimensioning on object (face of part). • Avoid dimensioning to hidden lines. • Place dimensions between views when possible. • Group dimensions around a central view. • Place dimensions where feature shows shape. • Dimension from or between machined surfaces • Give overall dimensions where possible. Drafting/CAD 1 Mr. Mandl

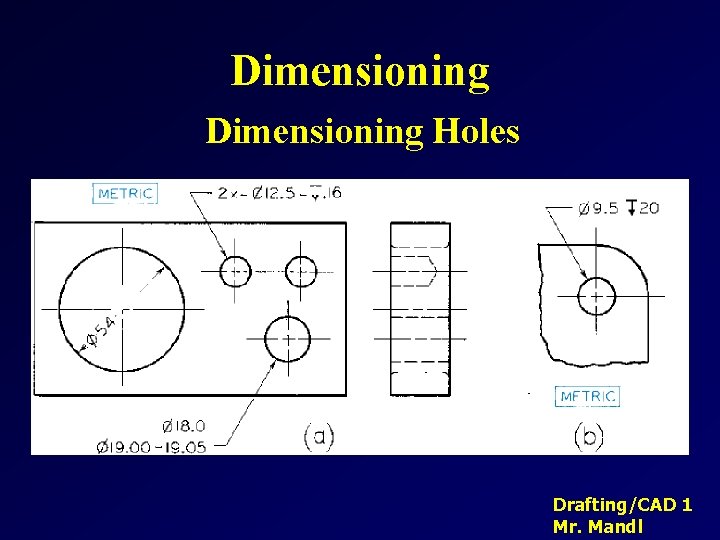
Dimensioning Holes Drafting/CAD 1 Mr. Mandl

Dimensioning Using Diameter Symbol Drafting/CAD 1 Mr. Mandl

Dimensioning Locating Holes Drafting/CAD 1 Mr. Mandl

Dimensioning Summary • Dimensioning drawings correctly can be as important or more important than drawing the shapes correctly. • Good dimensioning requires practice and thought! Drafting/CAD 1 Mr. Mandl