DIMENSIONING Chapter 10 Dimensioning What is the purpose
- Slides: 29

DIMENSIONING Chapter 10

Dimensioning What is the purpose of dimensions? To locate features To specify sizes Geometric shapes ANSI Skill & Practice

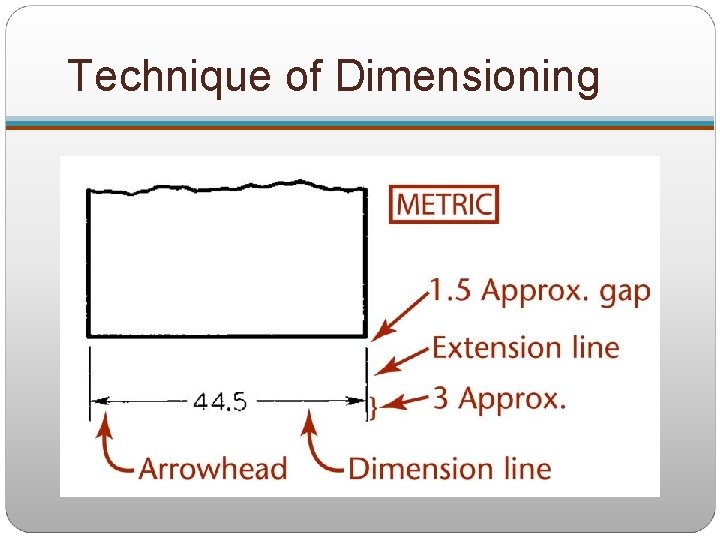
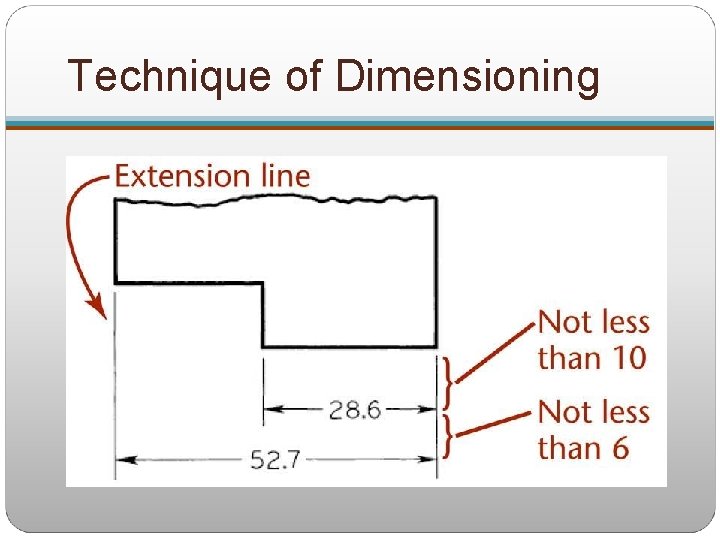
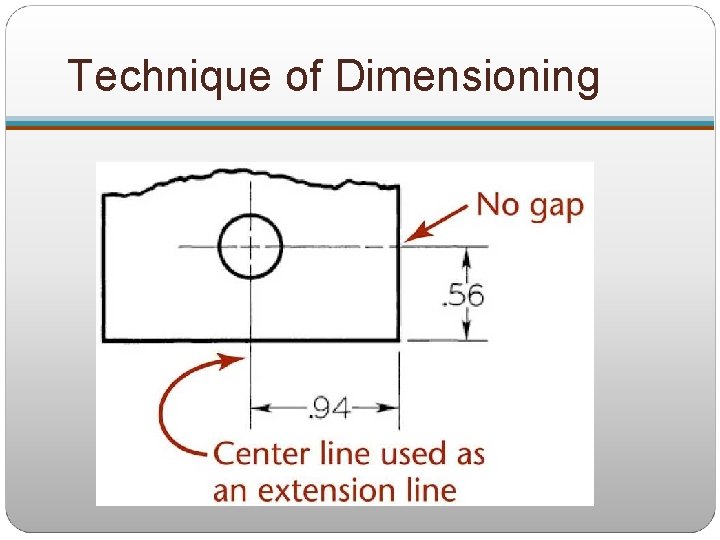
Dimensioning The ability to create good dimensions requires: Technique of dimensioning Appearance for lines, spacing, and arrowheads, placement of text Placement of dimensions Easy to read, easy to find, logical Choice of dimensions Affect how a design is manufactured

Technique of Dimensioning

Technique of Dimensioning

Technique of Dimensioning

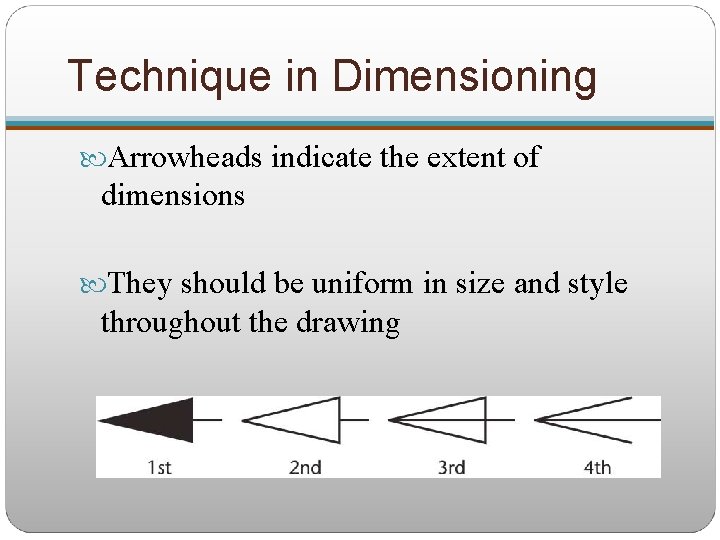
Technique in Dimensioning Arrowheads indicate the extent of dimensions They should be uniform in size and style throughout the drawing

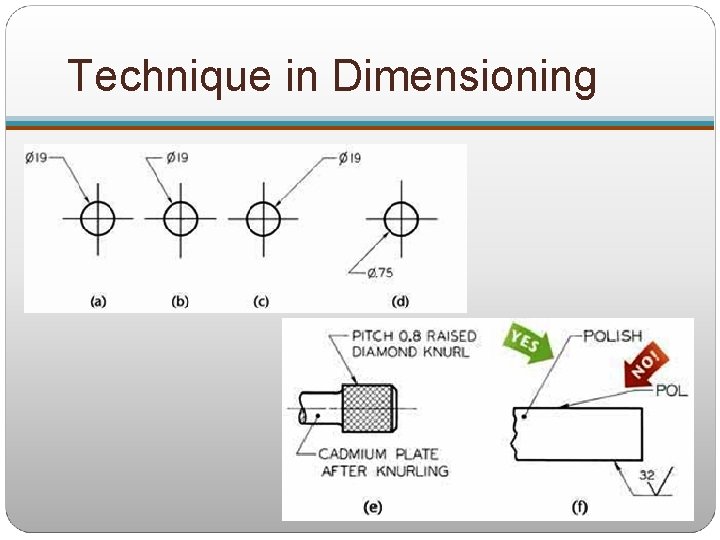
Technique in Dimensioning

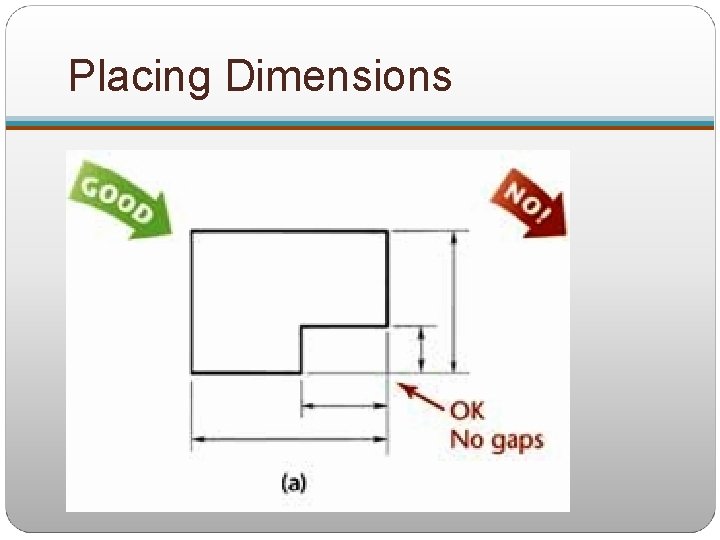
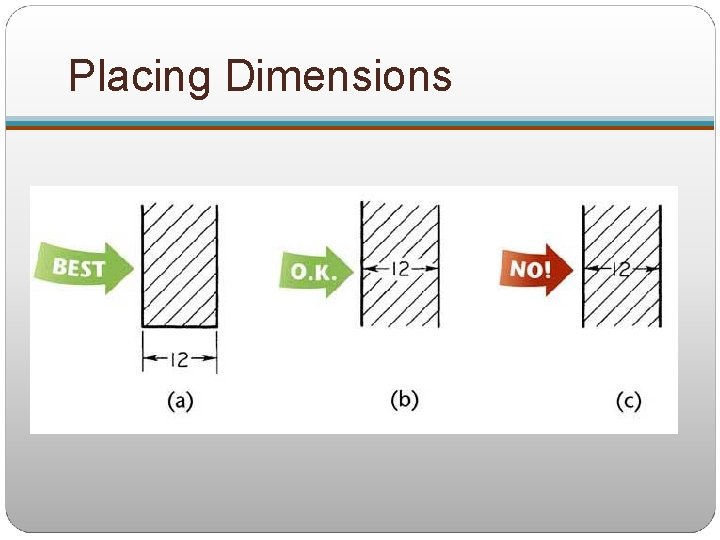
Placing Dimensions

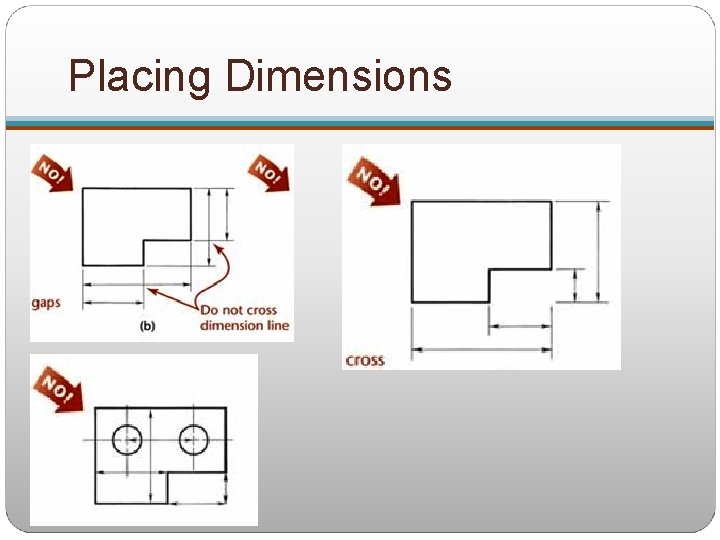
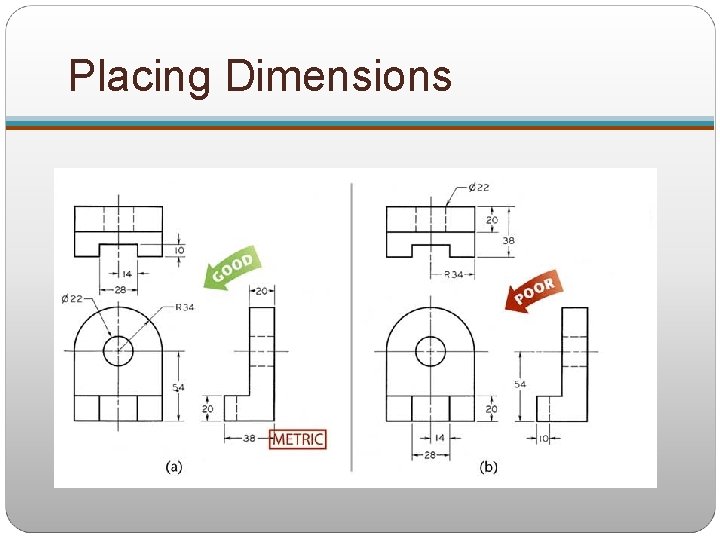
Placing Dimensions

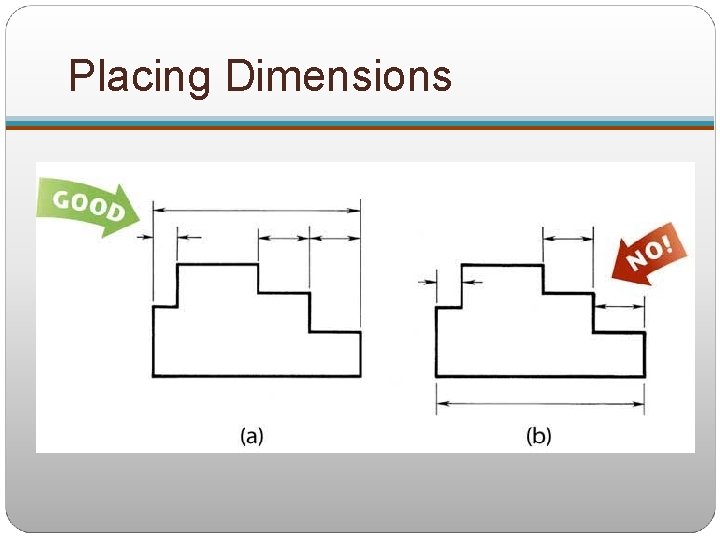
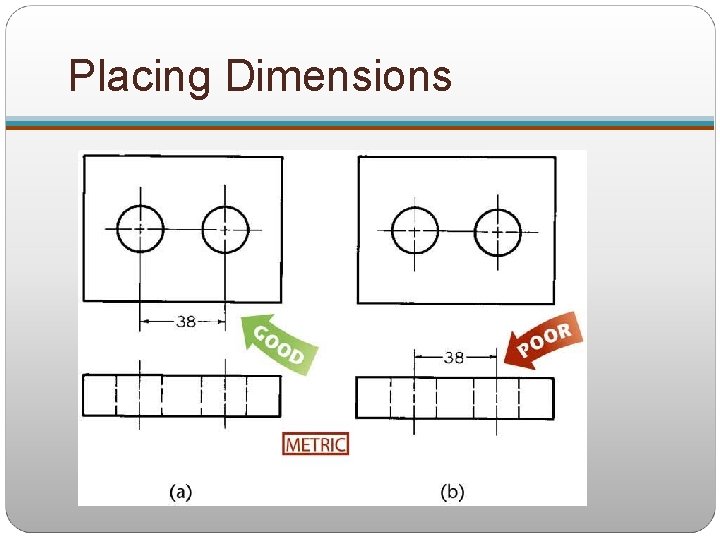
Placing Dimensions

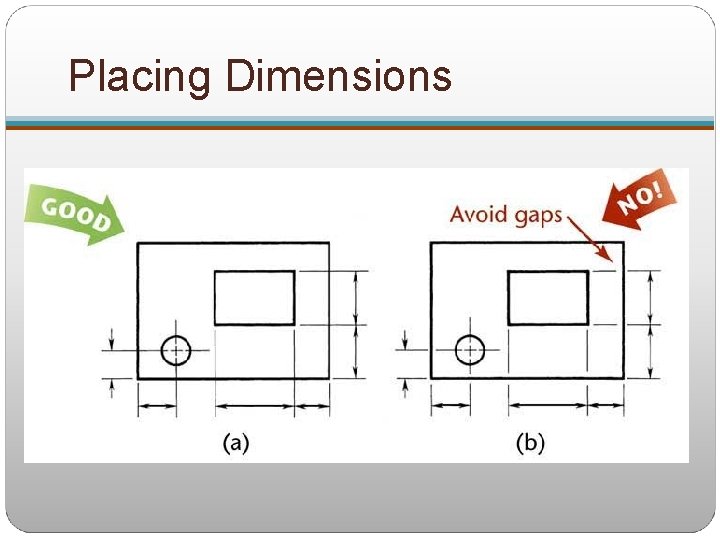
Placing Dimensions

Placing Dimensions

Placing Dimensions

Placing Dimensions

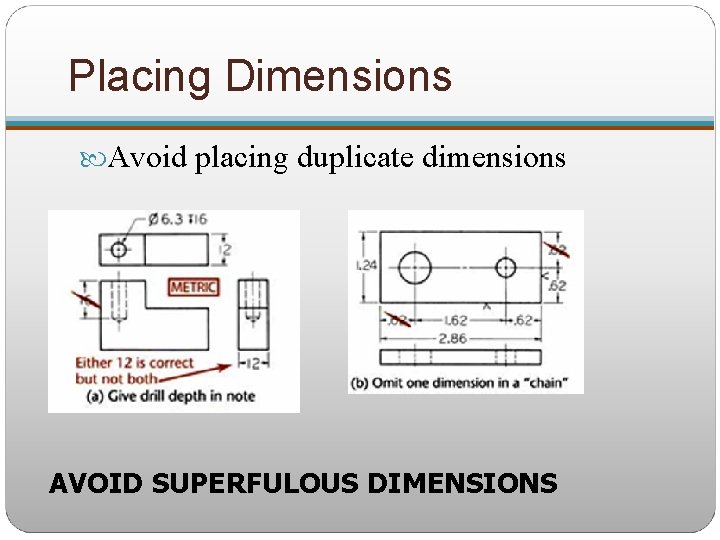
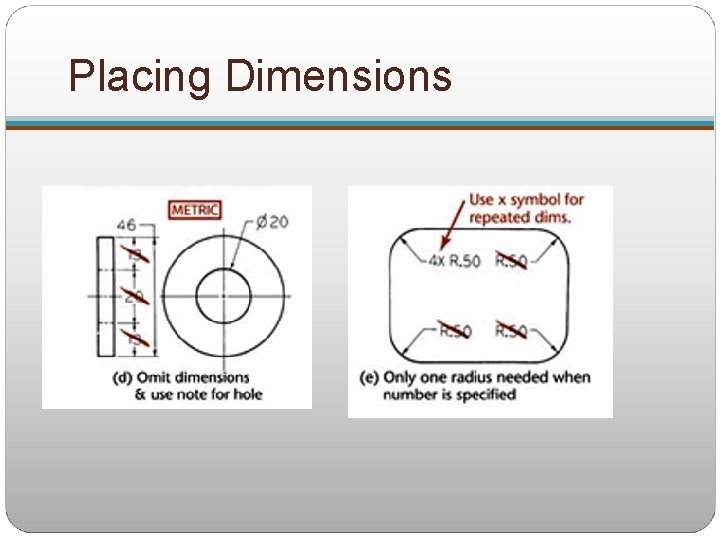
Placing Dimensions Avoid placing duplicate dimensions AVOID SUPERFULOUS DIMENSIONS

Placing Dimensions

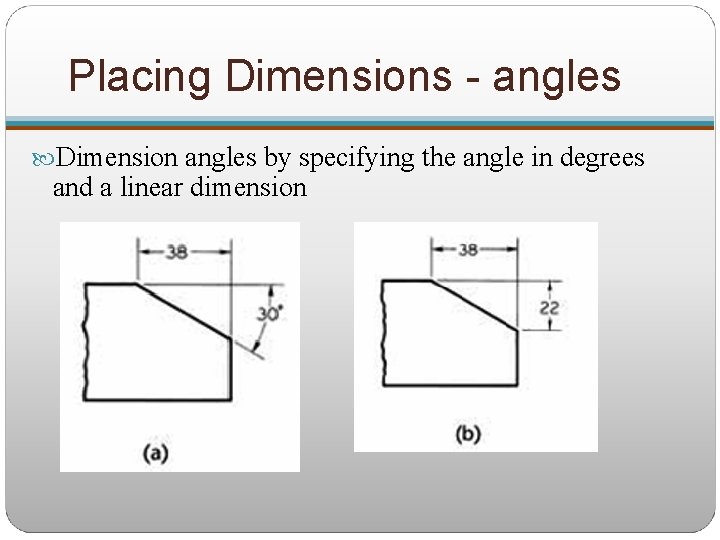
Placing Dimensions - angles Dimension angles by specifying the angle in degrees and a linear dimension

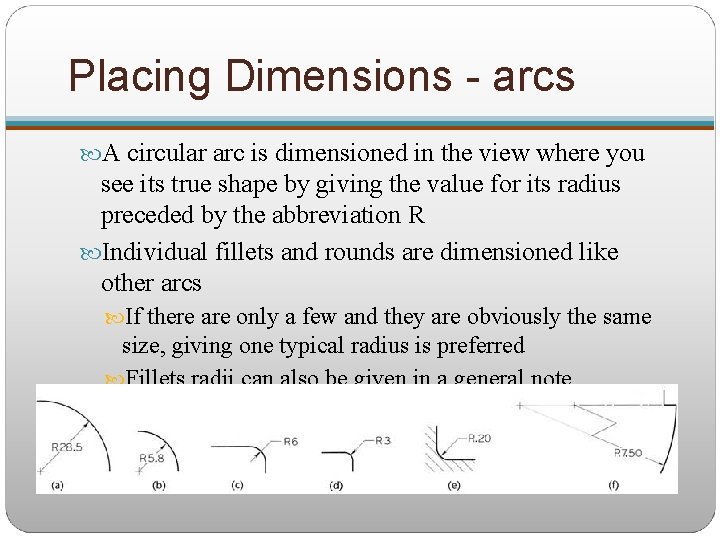
Placing Dimensions - arcs A circular arc is dimensioned in the view where you see its true shape by giving the value for its radius preceded by the abbreviation R Individual fillets and rounds are dimensioned like other arcs If there are only a few and they are obviously the same size, giving one typical radius is preferred Fillets radii can also be given in a general note

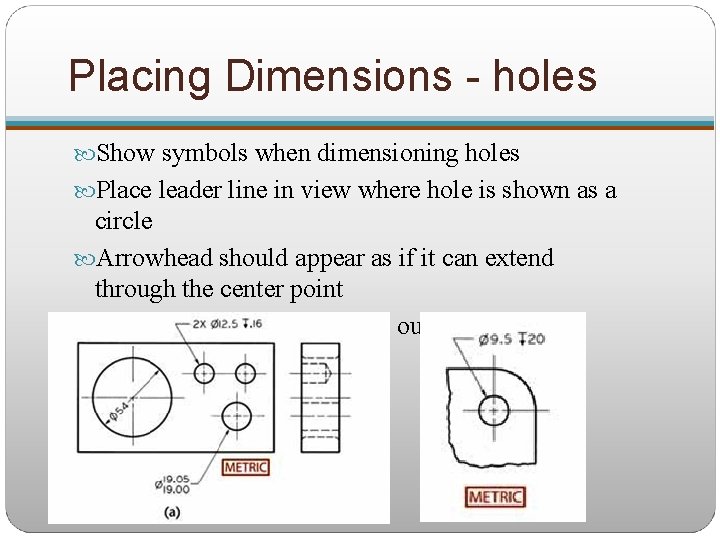
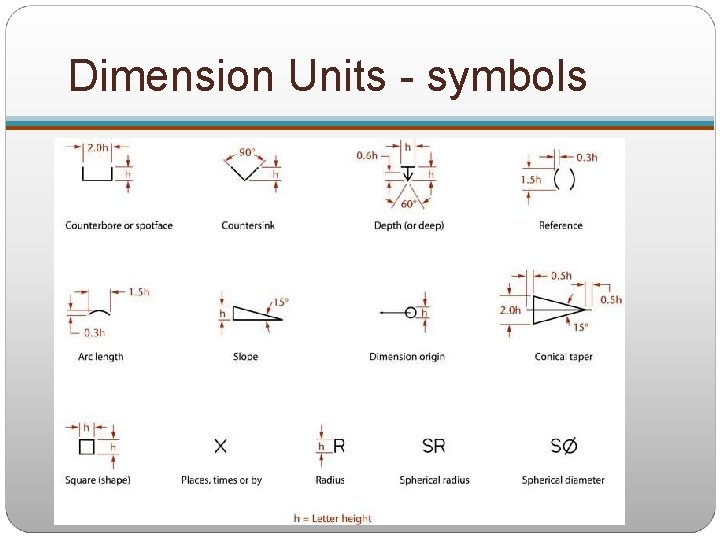
Placing Dimensions - holes Show symbols when dimensioning holes Place leader line in view where hole is shown as a circle Arrowhead should appear as if it can extend through the center point Arrowhead should touch the outside of circle

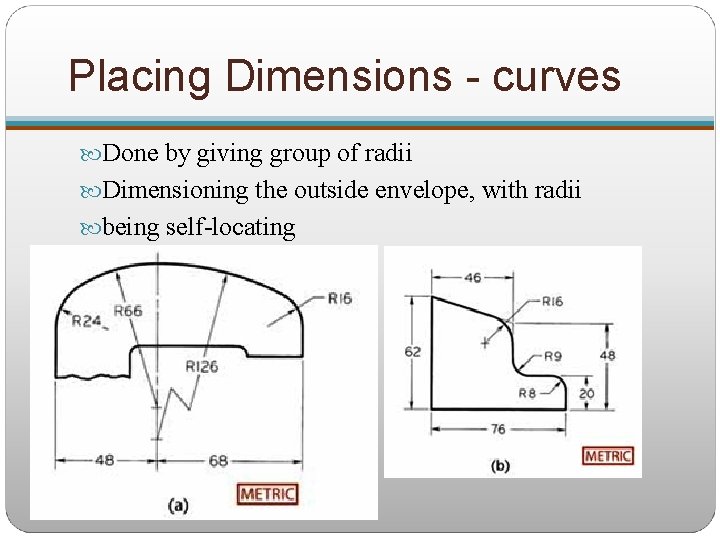
Placing Dimensions - curves Done by giving group of radii Dimensioning the outside envelope, with radii being self-locating

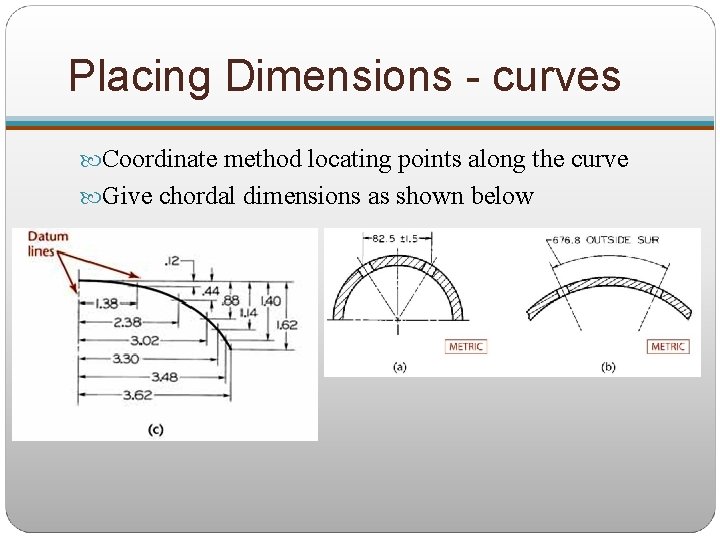
Placing Dimensions - curves Coordinate method locating points along the curve Give chordal dimensions as shown below

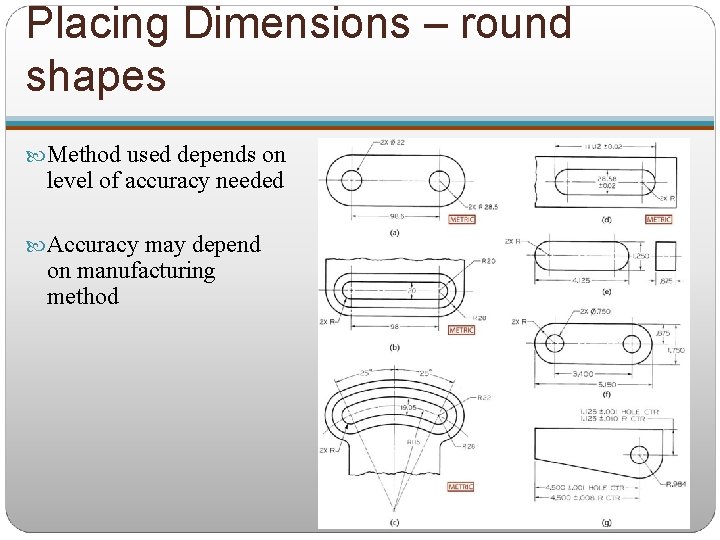
Placing Dimensions – round shapes Method used depends on level of accuracy needed Accuracy may depend on manufacturing method

Dimension Units Dimension values are lettered horizontally, should read from the bottom of the sheet Exception – ISO, Architectural dimensions Engineering drawings – metric or decimal inches Omit mm and inch designations on drawings and note the units in the title block Units noted somewhere on the drawing ALL MEASUREMENTS IN MILLIMTER UNLESS OTHERWISE NOTED

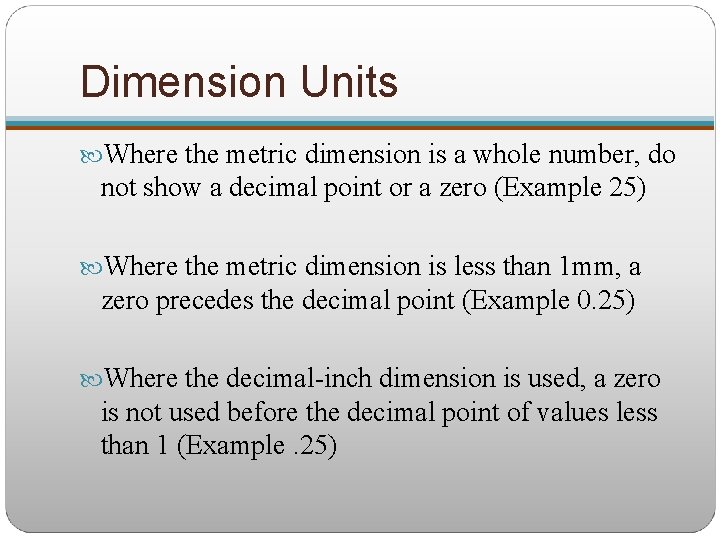
Dimension Units Where the metric dimension is a whole number, do not show a decimal point or a zero (Example 25) Where the metric dimension is less than 1 mm, a zero precedes the decimal point (Example 0. 25) Where the decimal-inch dimension is used, a zero is not used before the decimal point of values less than 1 (Example. 25)

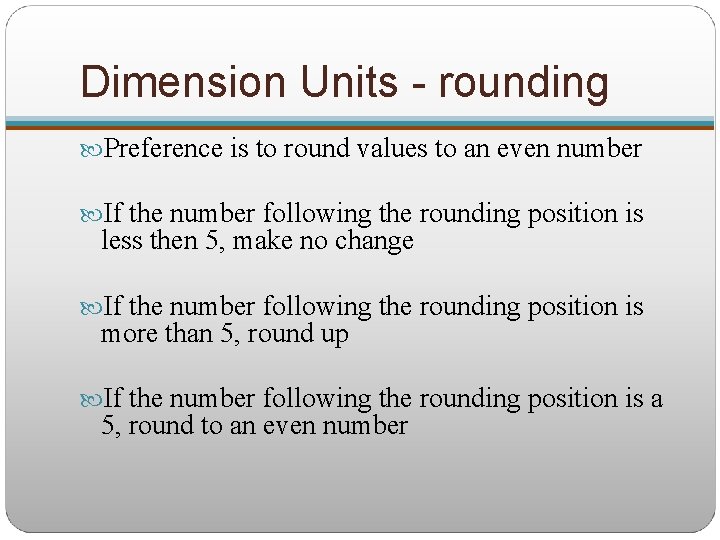
Dimension Units - rounding Preference is to round values to an even number If the number following the rounding position is less then 5, make no change If the number following the rounding position is more than 5, round up If the number following the rounding position is a 5, round to an even number

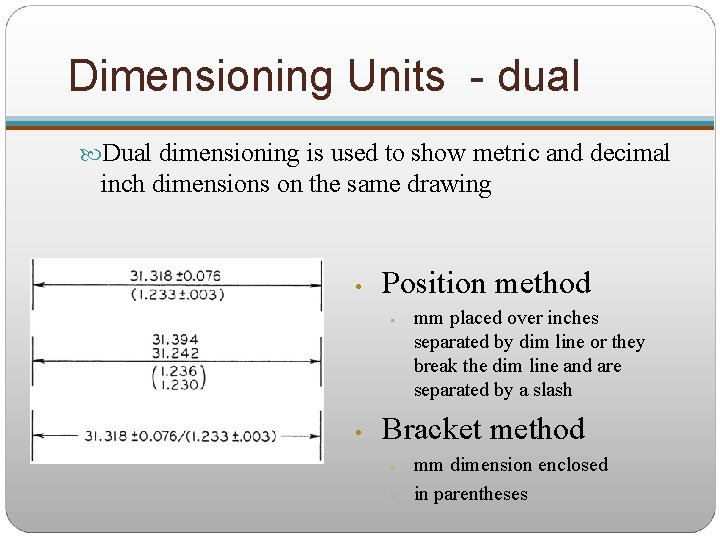
Dimensioning Units - dual Dual dimensioning is used to show metric and decimal inch dimensions on the same drawing • Position method • • mm placed over inches separated by dim line or they break the dim line and are separated by a slash Bracket method • • mm dimension enclosed in parentheses

Dimension Units - symbols

Dimension Units - tolerance When a finished part is measured it may vary slightly from the exact dimension specified Tolerance is the total amount that the feature on the actual part is allowed to vary from what is specified by the dimension