Dimensioning 2 D drawings shop drawings must show
- Slides: 15

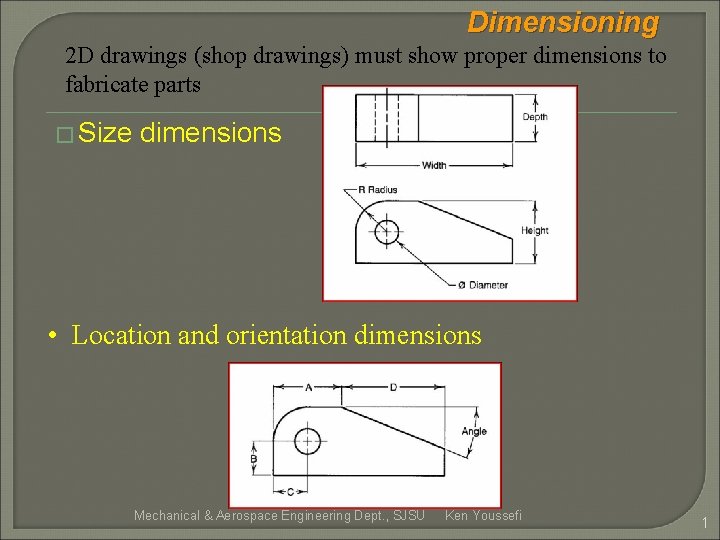
Dimensioning 2 D drawings (shop drawings) must show proper dimensions to fabricate parts � Size dimensions • Location and orientation dimensions Mechanical & Aerospace Engineering Dept. , SJSU Ken Youssefi 1

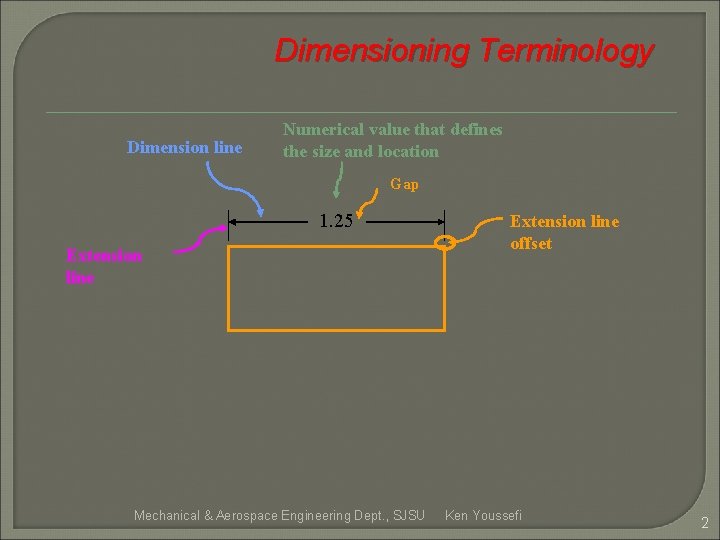
Dimensioning Terminology Dimension line Numerical value that defines the size and location Gap 1. 25 Extension line Mechanical & Aerospace Engineering Dept. , SJSU Extension line offset Ken Youssefi 2

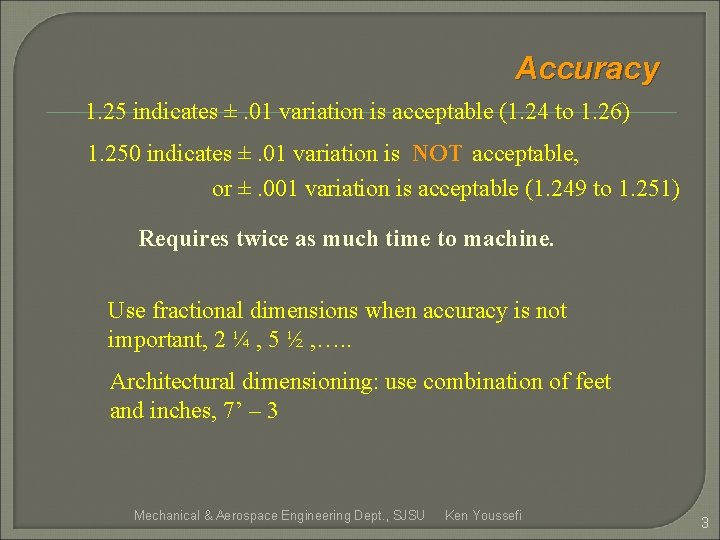
Accuracy 1. 25 indicates ±. 01 variation is acceptable (1. 24 to 1. 26) 1. 250 indicates ±. 01 variation is NOT acceptable, or ±. 001 variation is acceptable (1. 249 to 1. 251) Requires twice as much time to machine. Use fractional dimensions when accuracy is not important, 2 ¼ , 5 ½ , …. . Architectural dimensioning: use combination of feet and inches, 7’ – 3 Mechanical & Aerospace Engineering Dept. , SJSU Ken Youssefi 3

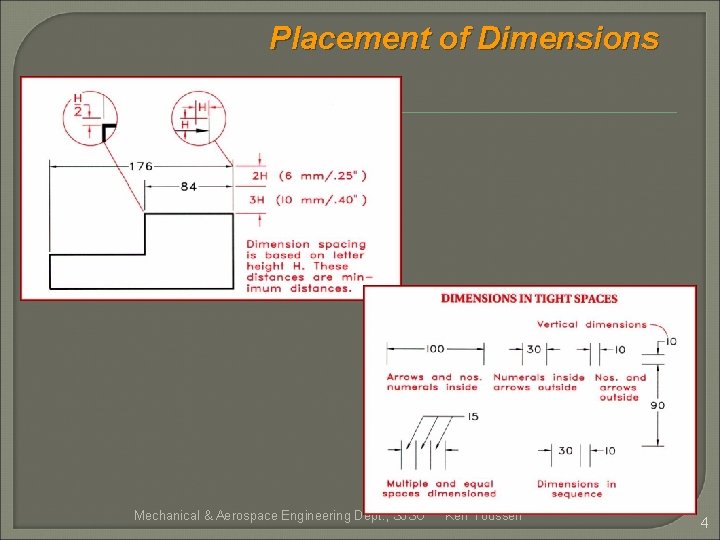
Placement of Dimensions Mechanical & Aerospace Engineering Dept. , SJSU Ken Youssefi 4

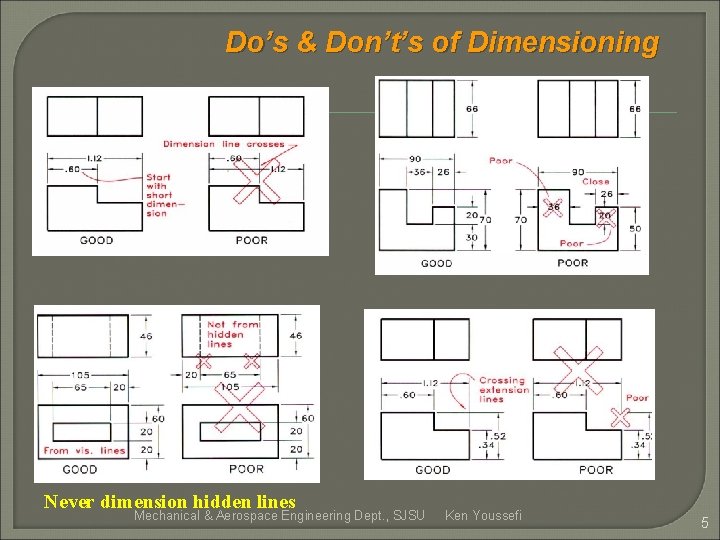
Do’s & Don’t’s of Dimensioning Never dimension hidden lines Mechanical & Aerospace Engineering Dept. , SJSU Ken Youssefi 5

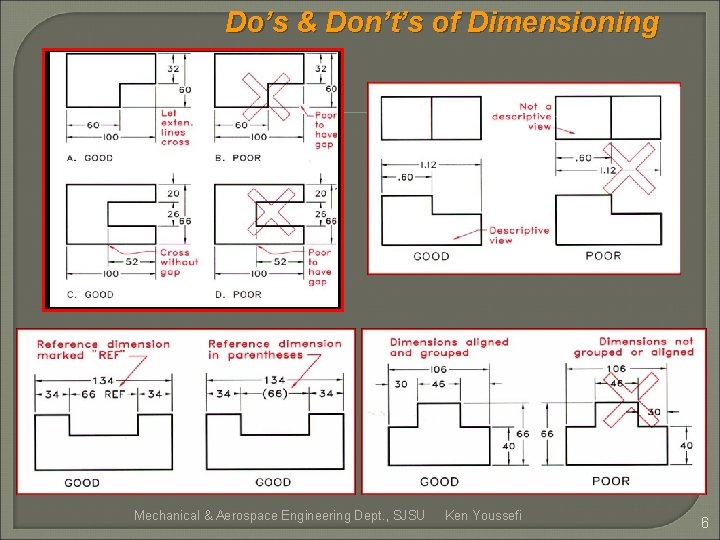
Do’s & Don’t’s of Dimensioning Mechanical & Aerospace Engineering Dept. , SJSU Ken Youssefi 6

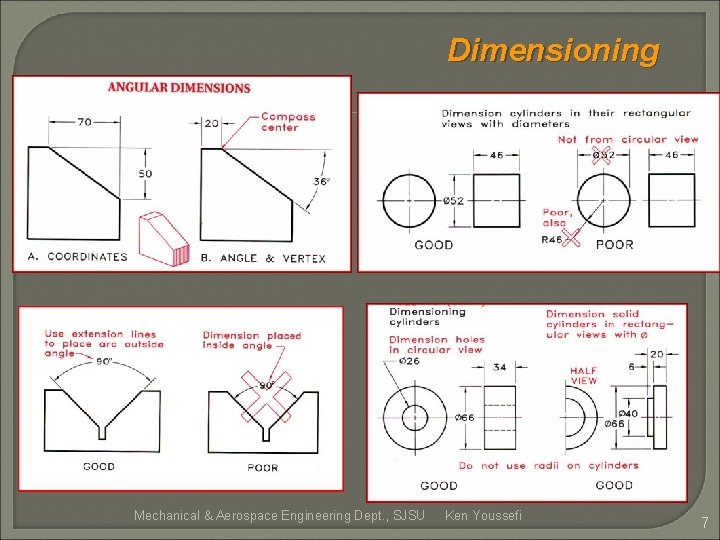
Dimensioning Mechanical & Aerospace Engineering Dept. , SJSU Ken Youssefi 7

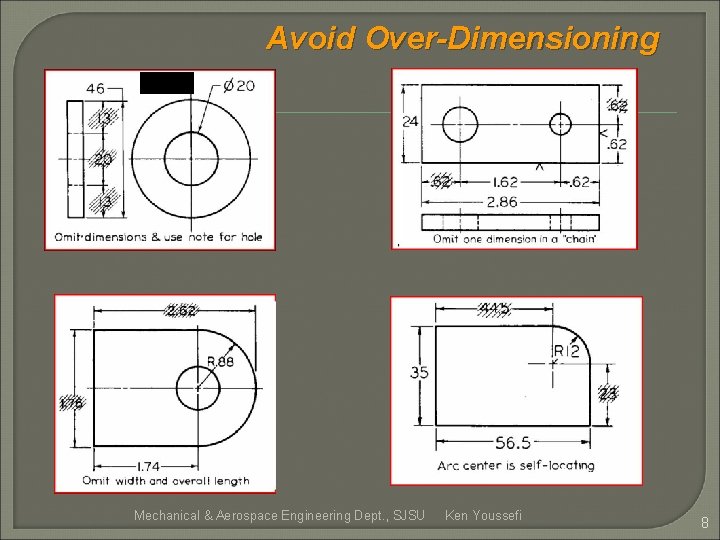
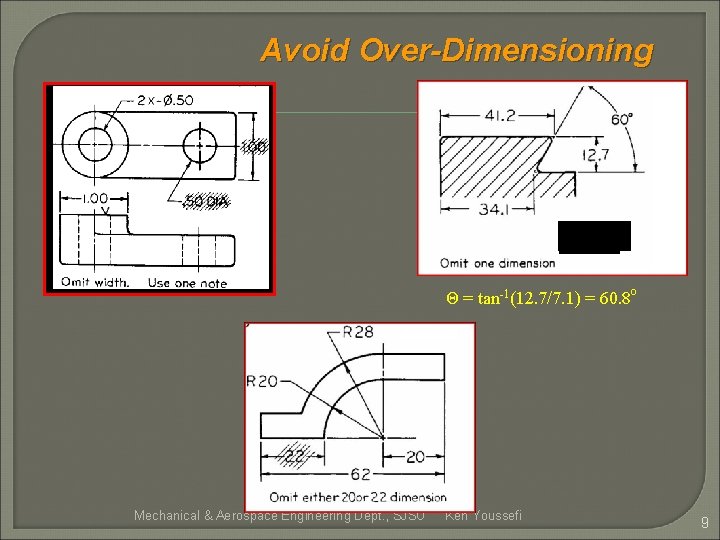
Avoid Over-Dimensioning Mechanical & Aerospace Engineering Dept. , SJSU Ken Youssefi 8

Avoid Over-Dimensioning Θ = tan-1(12. 7/7. 1) = 60. 8 o Mechanical & Aerospace Engineering Dept. , SJSU Ken Youssefi 9

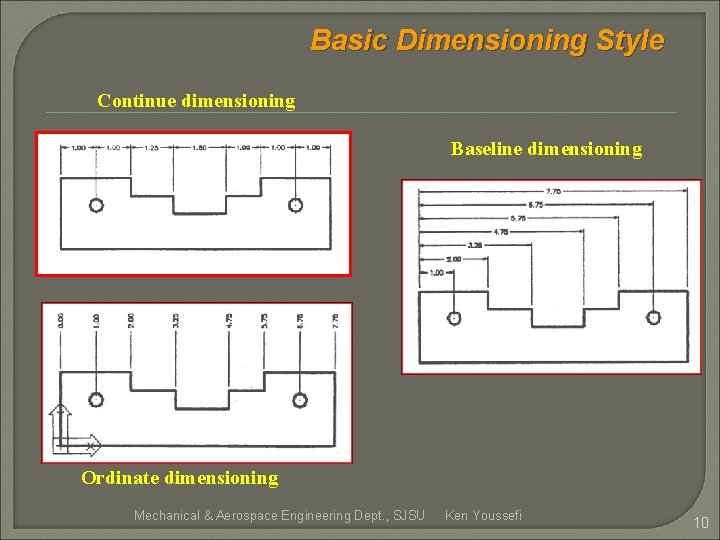
Basic Dimensioning Style Continue dimensioning Baseline dimensioning Ordinate dimensioning Mechanical & Aerospace Engineering Dept. , SJSU Ken Youssefi 10

Tolerancing is the technique of dimensioning parts within a desired range of variation. Why tolerancing? � Parts made by different companies have to be interchangeable. � Mating parts have to fit precisely. Mechanical & Aerospace Engineering Dept. , SJSU Ken Youssefi 11

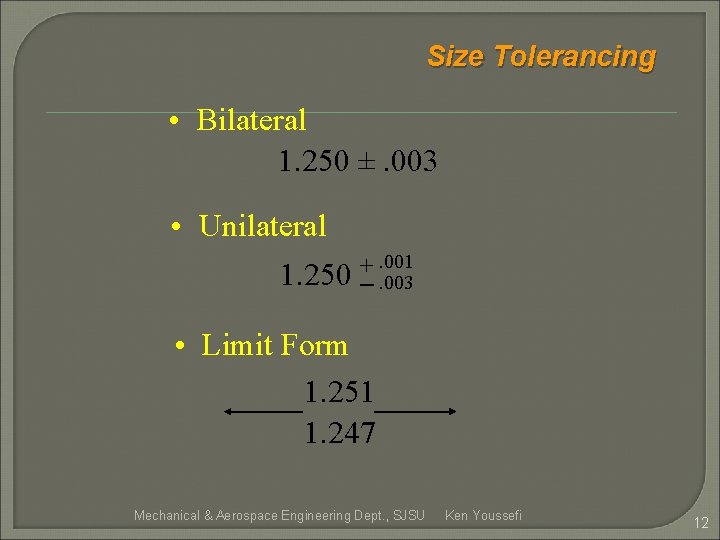
Size Tolerancing • Bilateral 1. 250 ±. 003 • Unilateral. 001 + _ 1. 250. 003 • Limit Form 1. 251 1. 247 Mechanical & Aerospace Engineering Dept. , SJSU Ken Youssefi 12

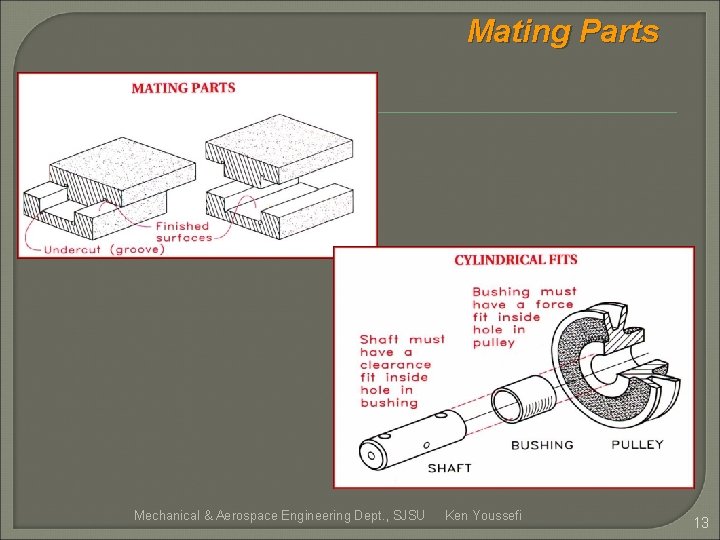
Mating Parts Mechanical & Aerospace Engineering Dept. , SJSU Ken Youssefi 13

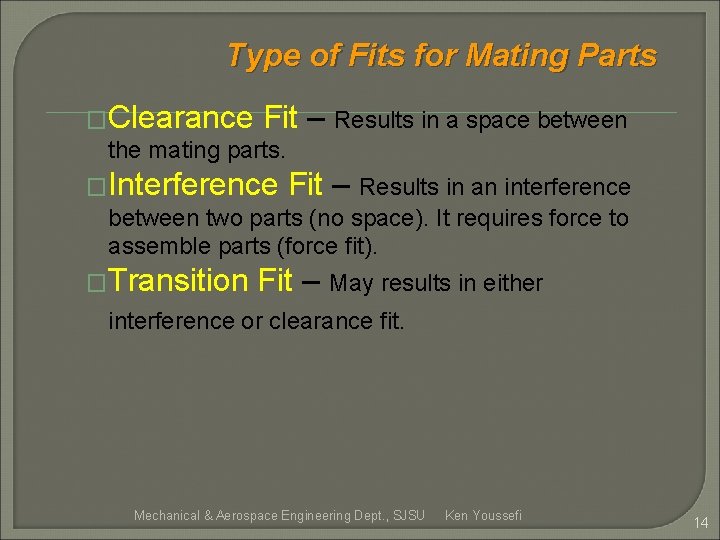
Type of Fits for Mating Parts �Clearance Fit the mating parts. – Results in a space between �Interference Fit – Results in an interference between two parts (no space). It requires force to assemble parts (force fit). �Transition Fit – May results in either interference or clearance fit. Mechanical & Aerospace Engineering Dept. , SJSU Ken Youssefi 14

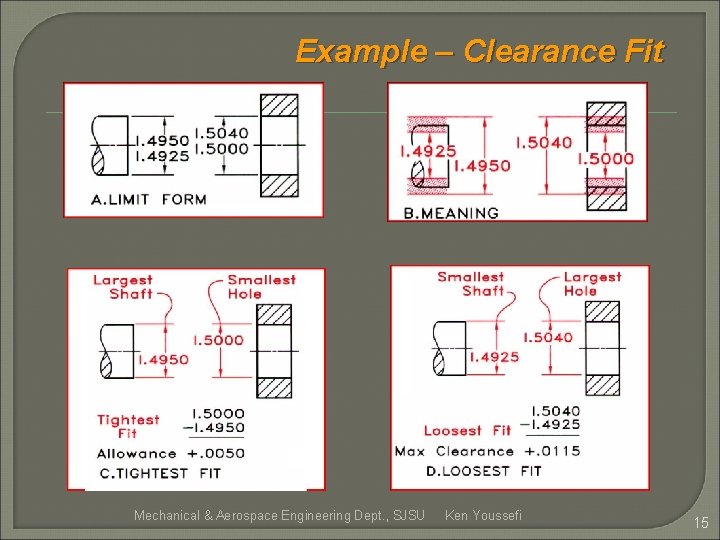
Example – Clearance Fit Mechanical & Aerospace Engineering Dept. , SJSU Ken Youssefi 15