DIMENSIONING 1 2 Why are dimensions needed ANSI

- Slides: 37

DIMENSIONING 1. 2. Why are dimensions needed? ANSI Standards 1. 2. 3. What style of dimensioning should be used Where should the dimensions be located Which dimensions are needed

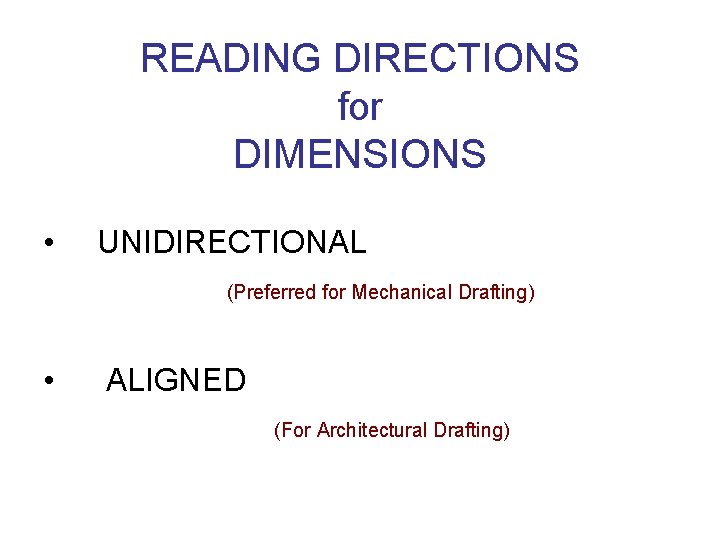
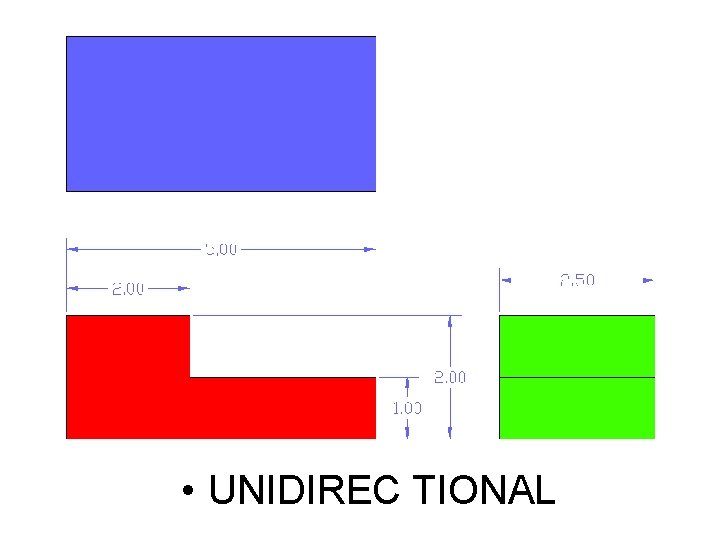
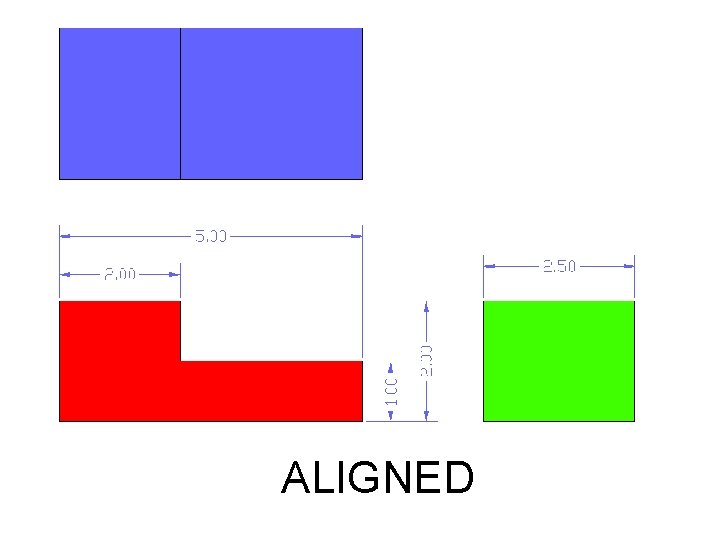
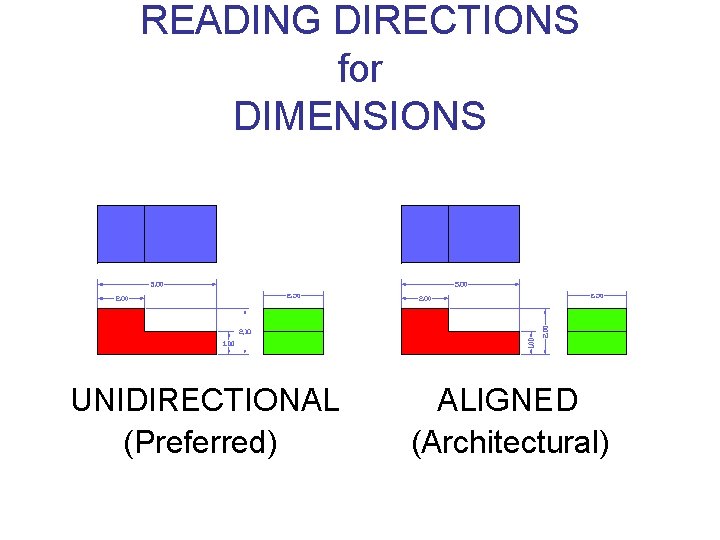
READING DIRECTIONS for DIMENSIONS • UNIDIRECTIONAL (Preferred for Mechanical Drafting) • ALIGNED (For Architectural Drafting)

• UNIDIREC TIONAL

ALIGNED

READING DIRECTIONS for DIMENSIONS UNIDIRECTIONAL (Preferred) ALIGNED (Architectural)

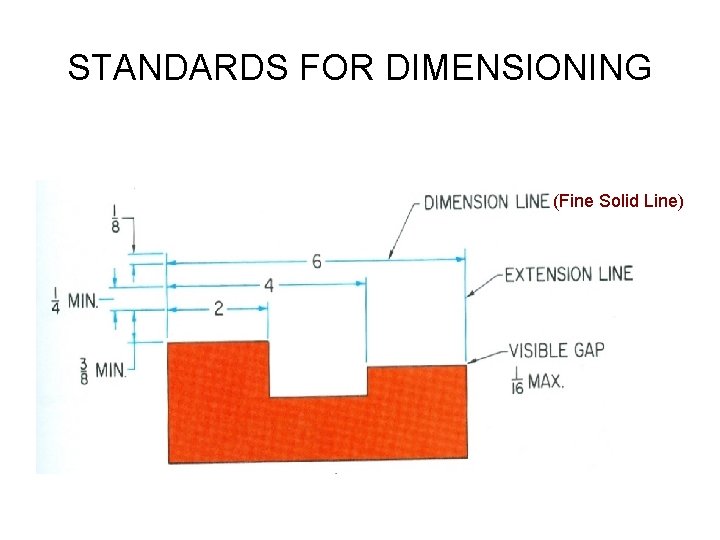
STANDARDS FOR DIMENSIONING • Fine solid line (Fine Solid Line)

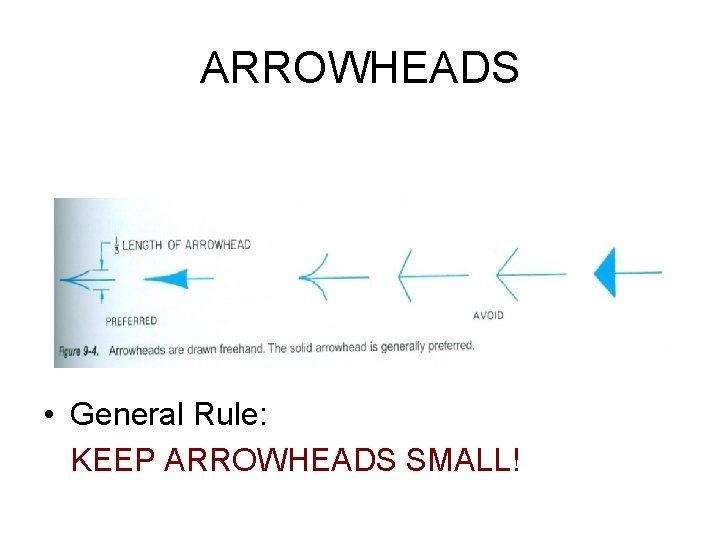
ARROWHEADS • General Rule: KEEP ARROWHEADS SMALL!

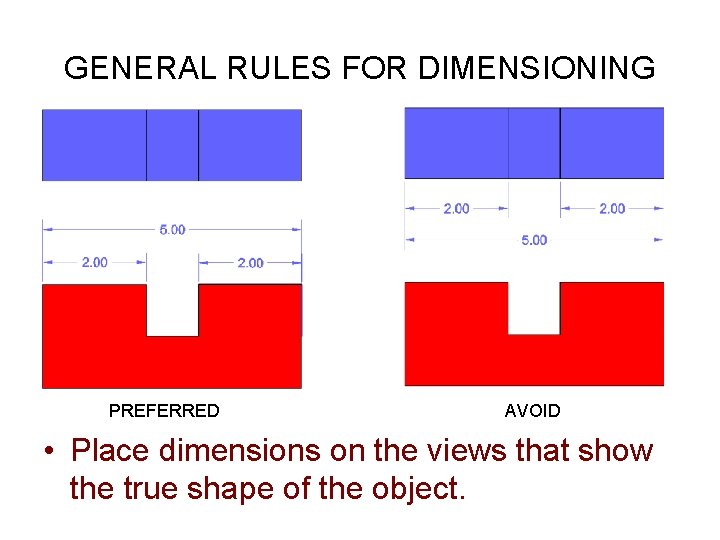
GENERAL RULES FOR DIMENSIONING PREFERRED AVOID • Place dimensions on the views that show the true shape of the object.

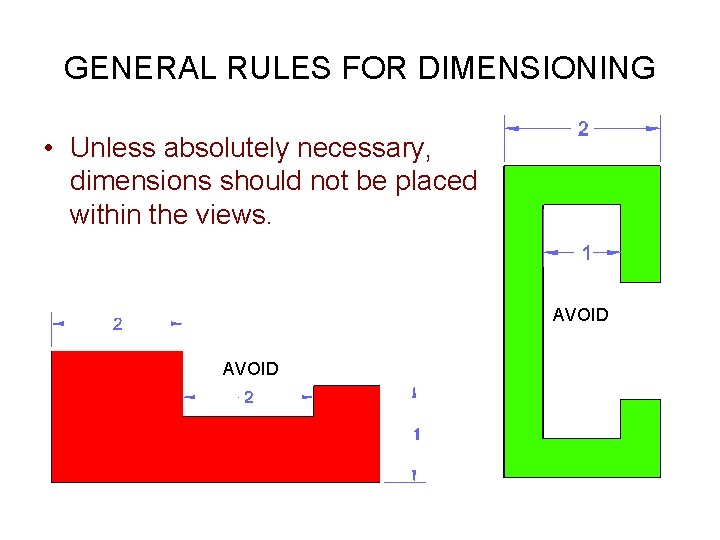
GENERAL RULES FOR DIMENSIONING • Unless absolutely necessary, dimensions should not be placed within the views. AVOID

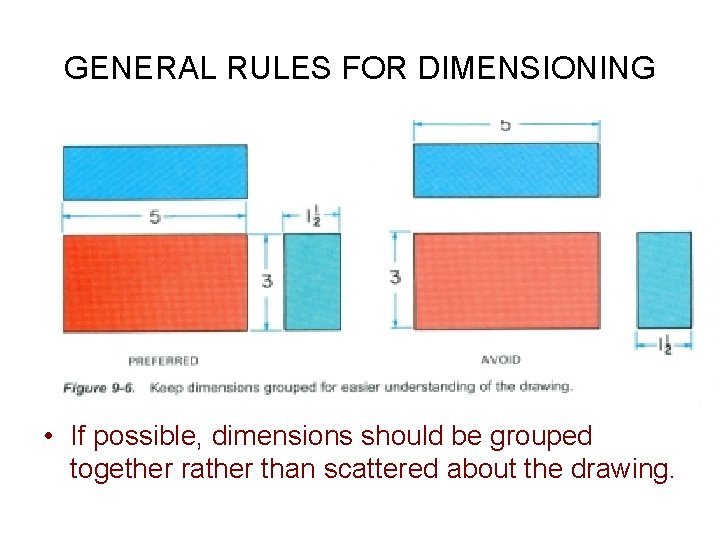
GENERAL RULES FOR DIMENSIONING • If possible, dimensions should be grouped together rather than scattered about the drawing.

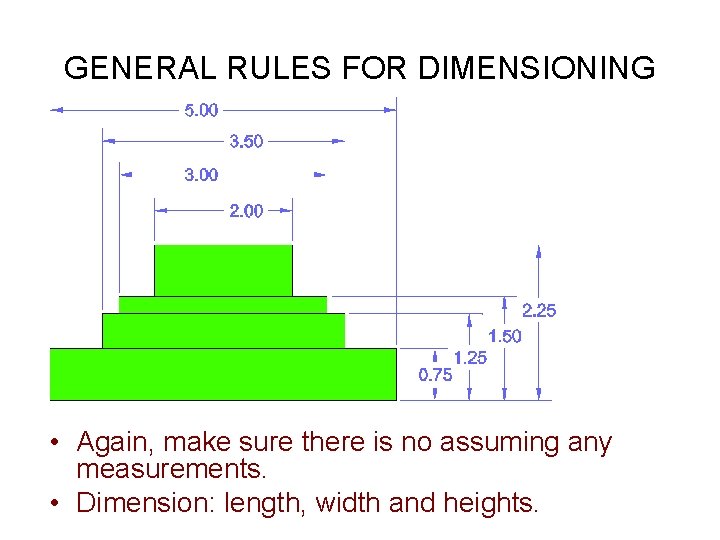
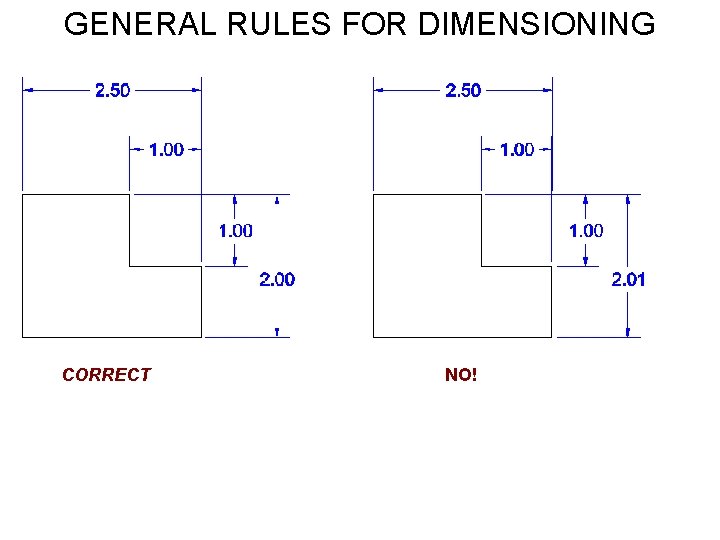
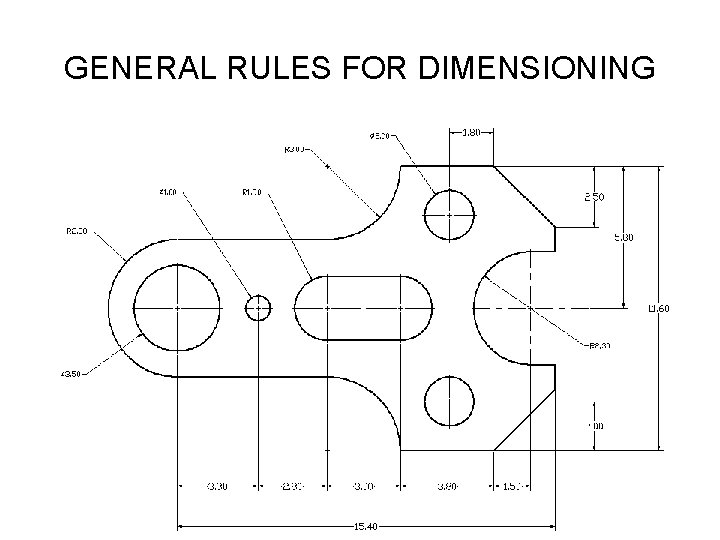
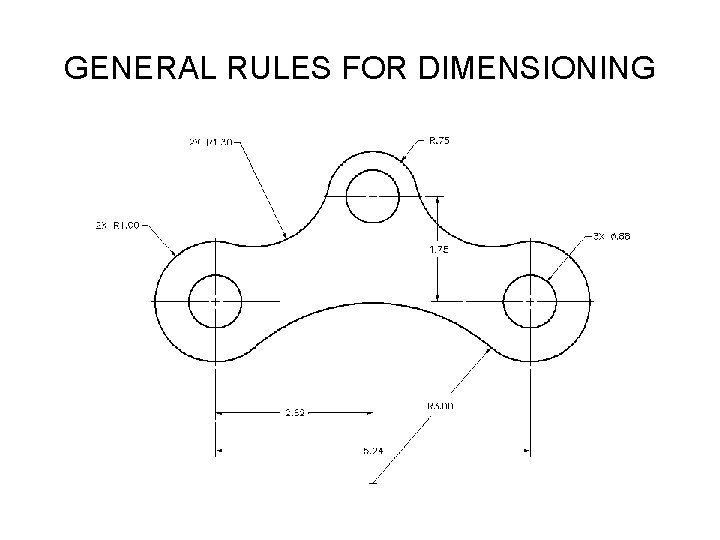
GENERAL RULES FOR DIMENSIONING • Dimensions must be complete, so no scaling of the drawing is required. It should be possible to determine sizes and shapes without assuming any measurements.

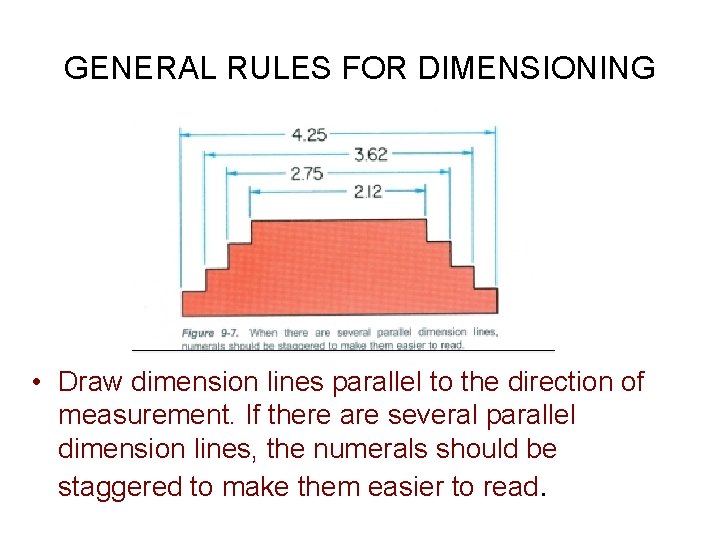
GENERAL RULES FOR DIMENSIONING • Draw dimension lines parallel to the direction of measurement. If there are several parallel dimension lines, the numerals should be staggered to make them easier to read.

GENERAL RULES FOR DIMENSIONING • Again, make sure there is no assuming any measurements. • Dimension: length, width and heights.

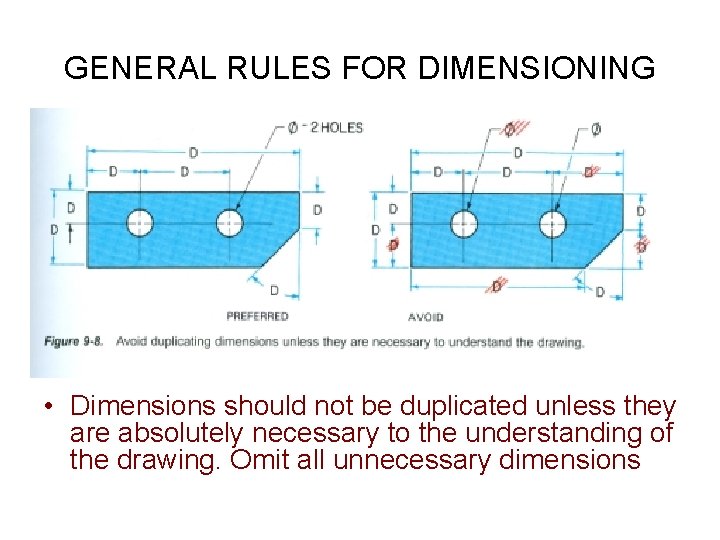
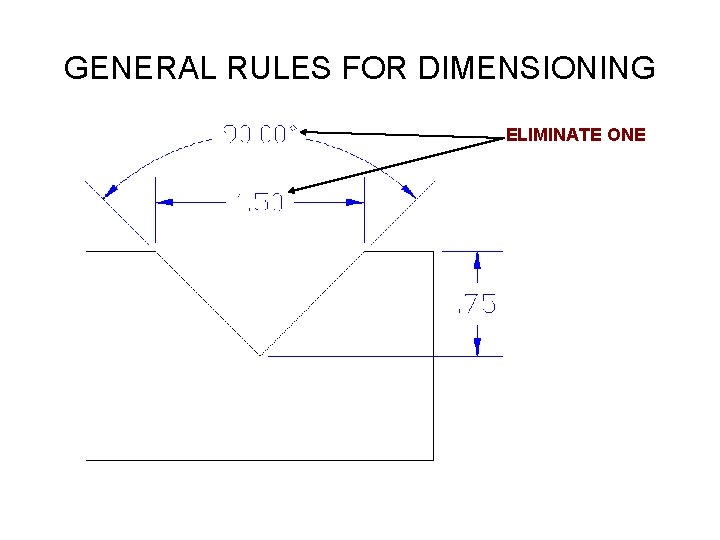
GENERAL RULES FOR DIMENSIONING • Dimensions should not be duplicated unless they are absolutely necessary to the understanding of the drawing. Omit all unnecessary dimensions

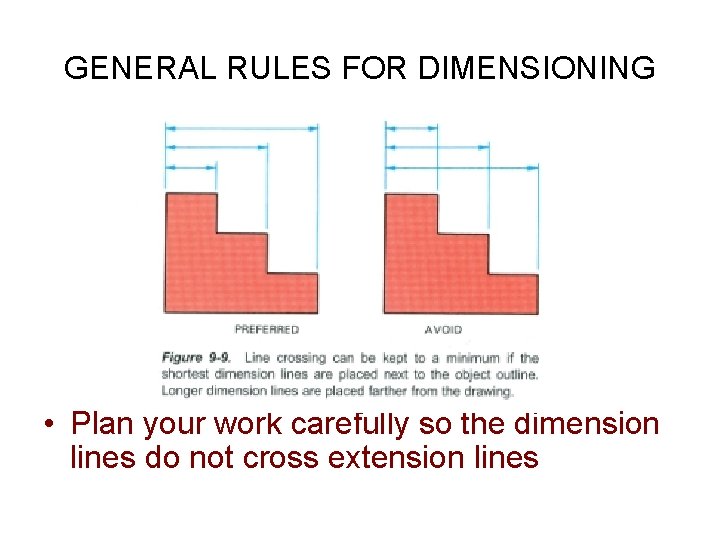
GENERAL RULES FOR DIMENSIONING • Plan your work carefully so the dimension lines do not cross extension lines

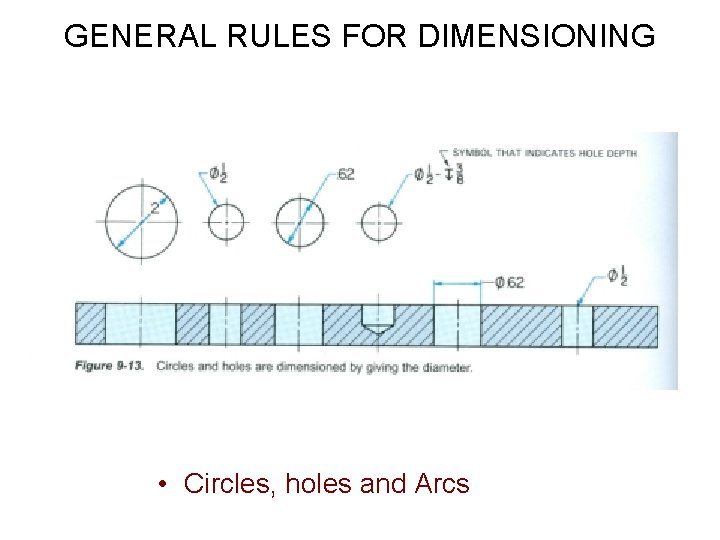
GENERAL RULES FOR DIMENSIONING • Circles, holes and Arcs

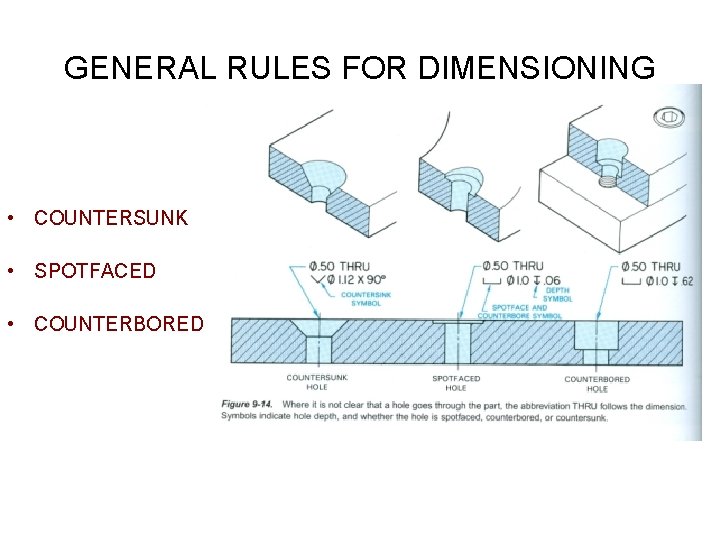
GENERAL RULES FOR DIMENSIONING • COUNTERSUNK • SPOTFACED • COUNTERBORED

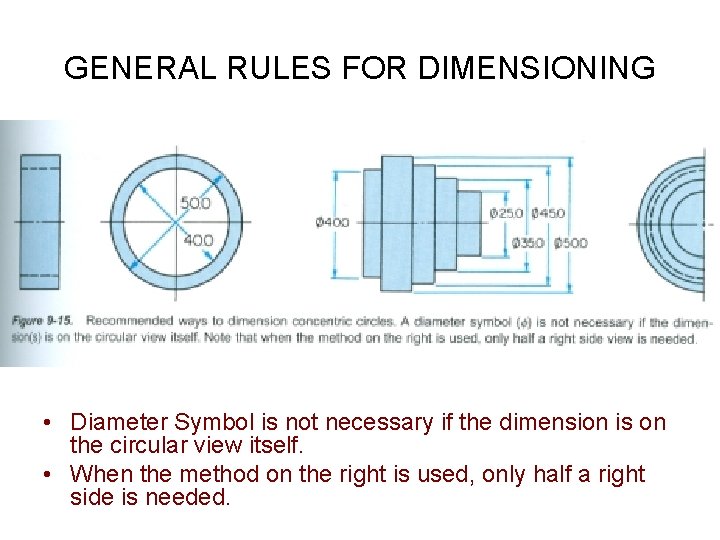
GENERAL RULES FOR DIMENSIONING • Diameter Symbol is not necessary if the dimension is on the circular view itself. • When the method on the right is used, only half a right side is needed.

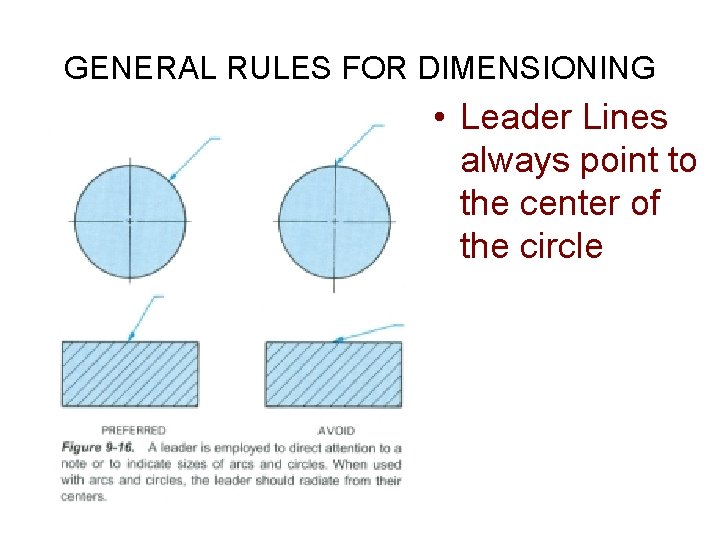
GENERAL RULES FOR DIMENSIONING • Leader Lines always point to the center of the circle

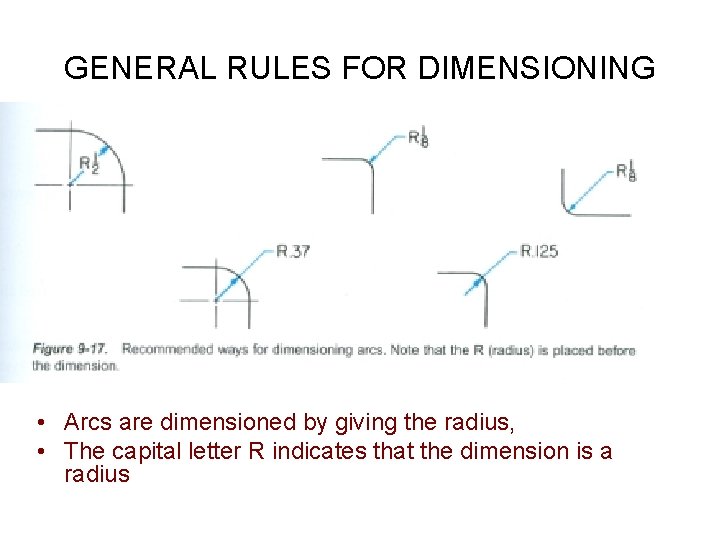
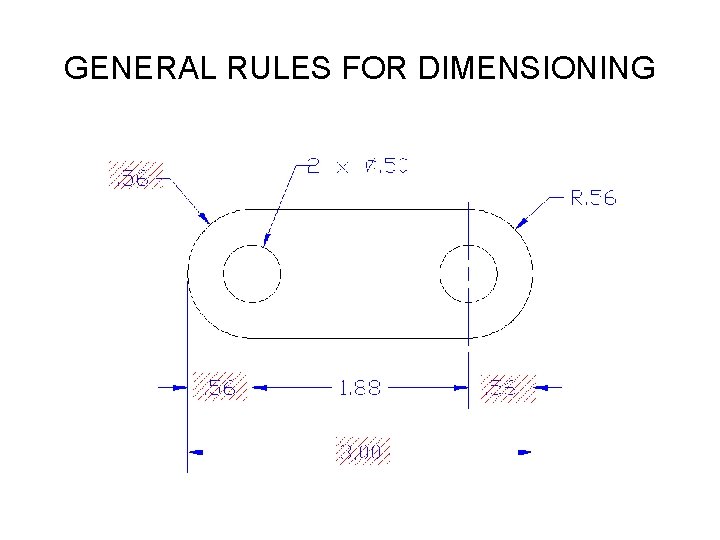
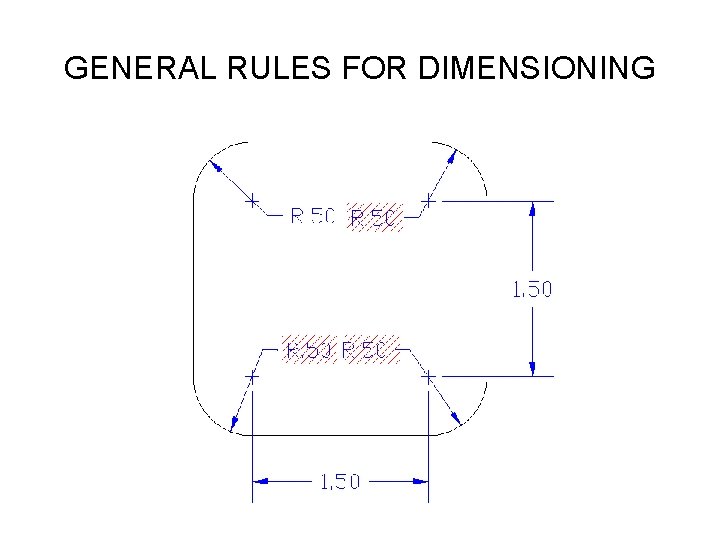
GENERAL RULES FOR DIMENSIONING • Arcs are dimensioned by giving the radius, • The capital letter R indicates that the dimension is a radius

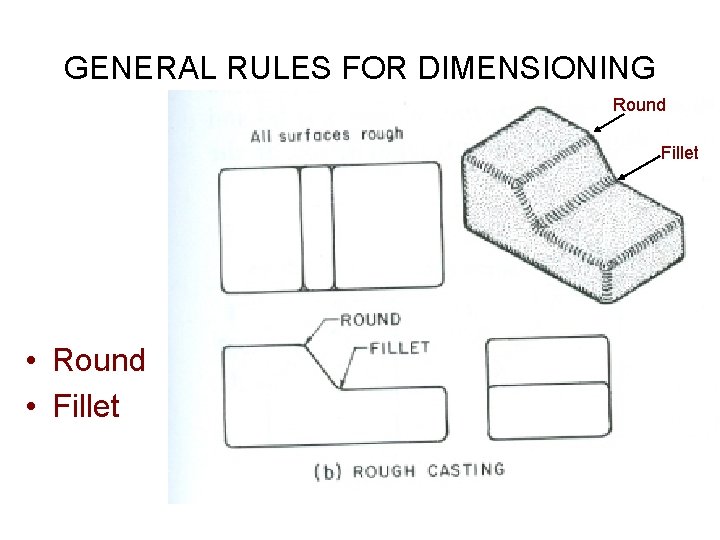
GENERAL RULES FOR DIMENSIONING Round Fillet • Round • Fillet

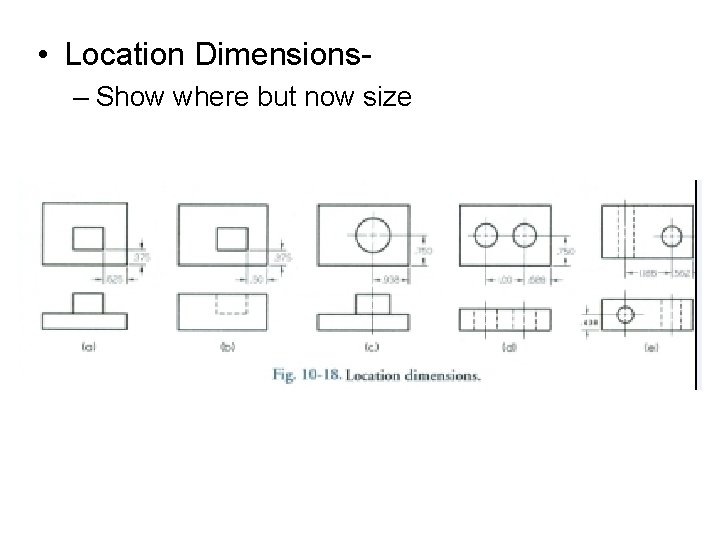
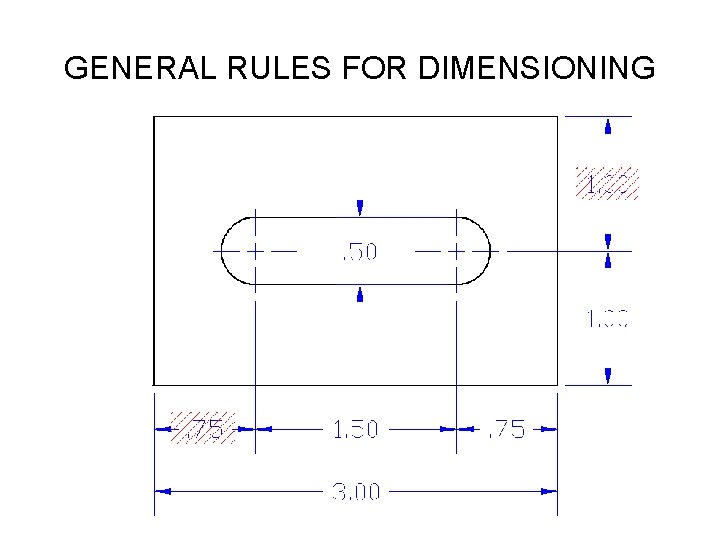
• Location Dimensions– Show where but now size

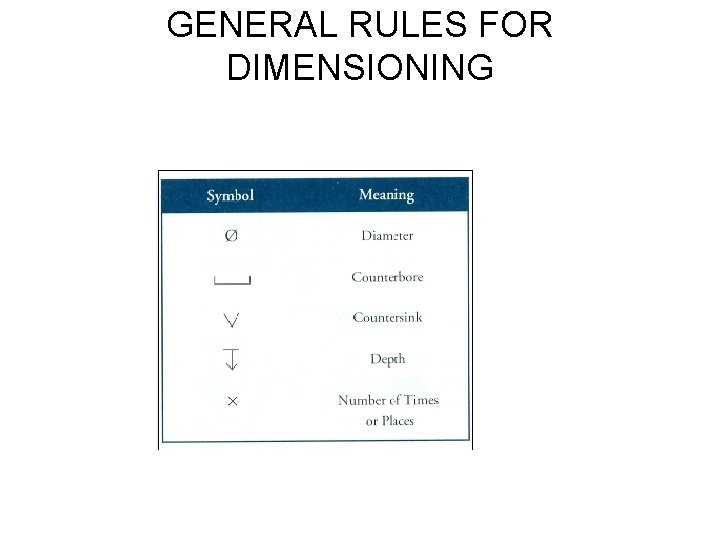
GENERAL RULES FOR DIMENSIONING

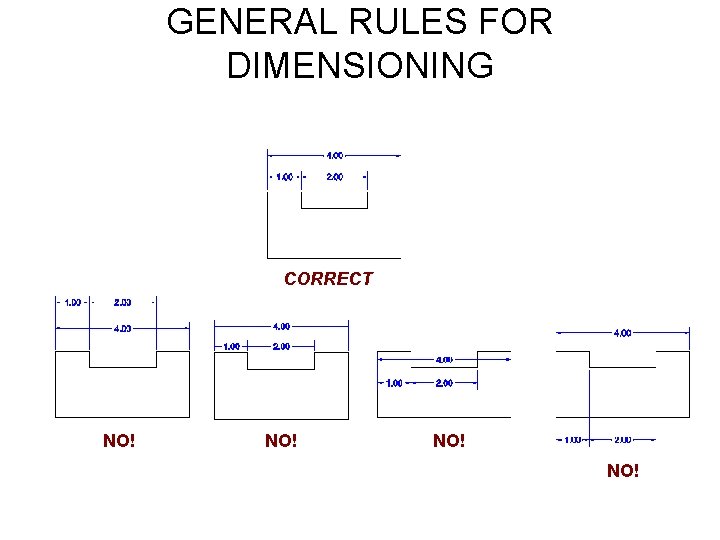
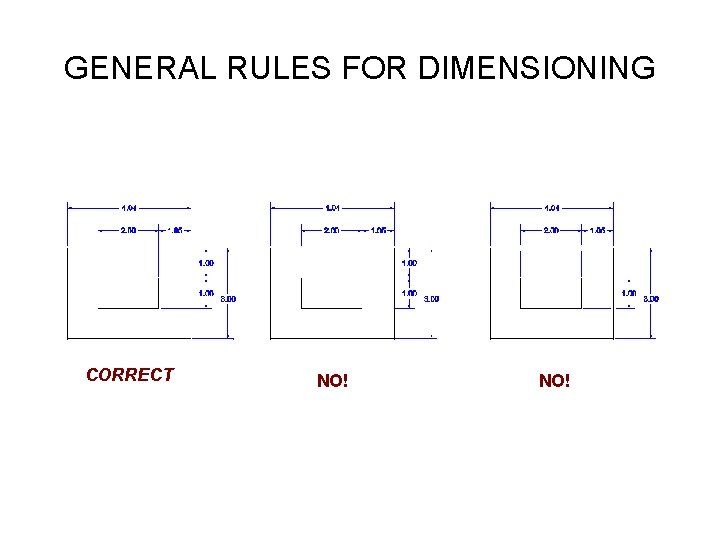
GENERAL RULES FOR DIMENSIONING CORRECT NO! NO!

GENERAL RULES FOR DIMENSIONING CORRECT NO!

GENERAL RULES FOR DIMENSIONING CORRECT NO!

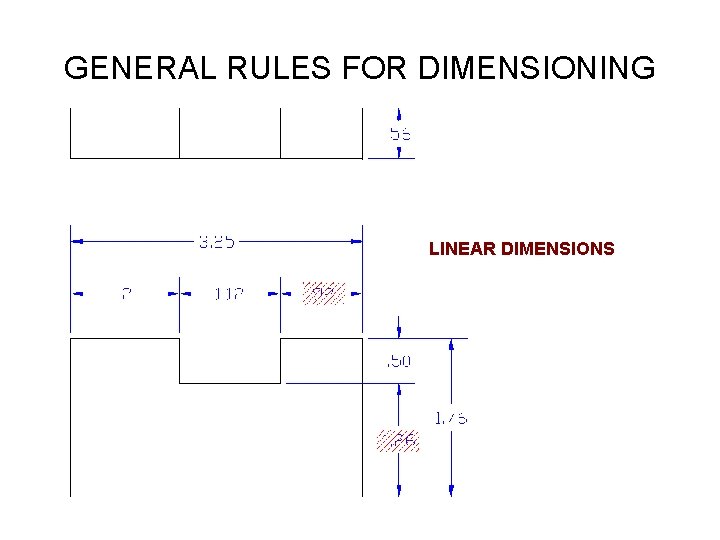
GENERAL RULES FOR DIMENSIONING LINEAR DIMENSIONS

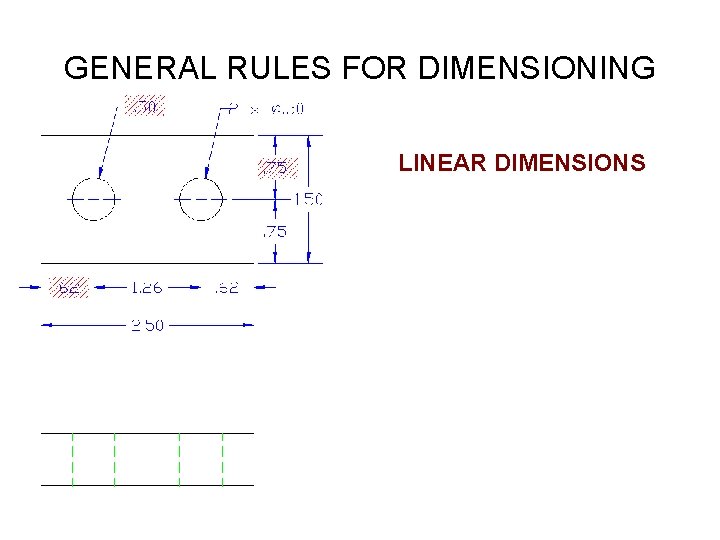
GENERAL RULES FOR DIMENSIONING LINEAR DIMENSIONS

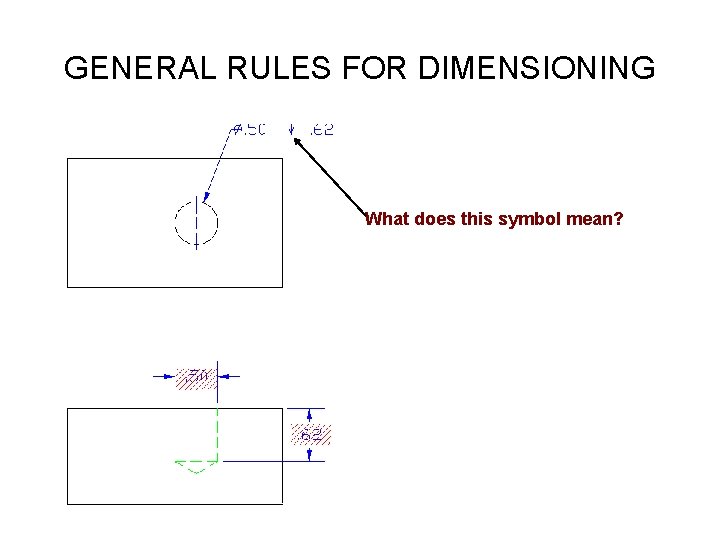
GENERAL RULES FOR DIMENSIONING What does this symbol mean?

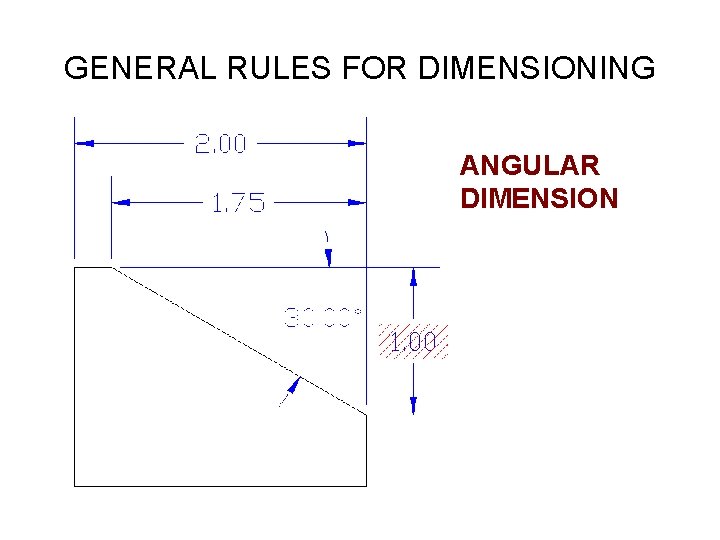
GENERAL RULES FOR DIMENSIONING • ANGULAR DIMENSION

GENERAL RULES FOR DIMENSIONING ELIMINATE ONE

GENERAL RULES FOR DIMENSIONING

GENERAL RULES FOR DIMENSIONING

GENERAL RULES FOR DIMENSIONING

GENERAL RULES FOR DIMENSIONING

GENERAL RULES FOR DIMENSIONING
