Depth Measurement MACH 112 Cutting Tools Measurement USING
- Slides: 7

Depth Measurement MACH 112: Cutting Tools & Measurement

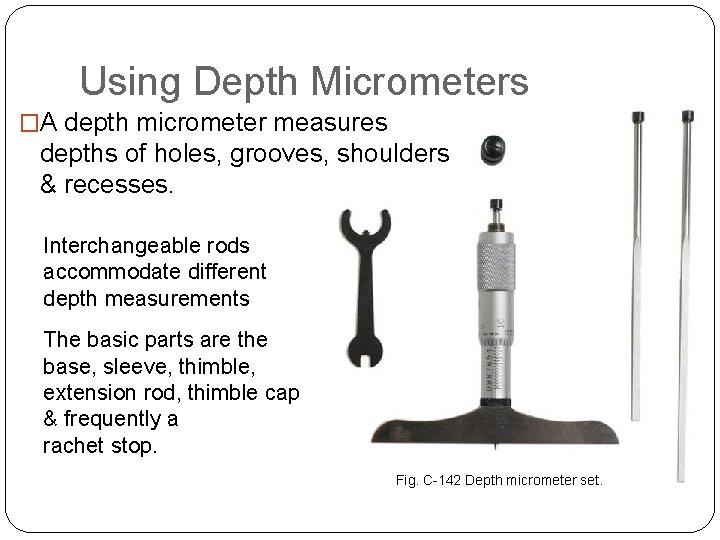
USING MICROMETER INSTRUMENTS Using Depth Micrometers �A depth micrometer measures depths of holes, grooves, shoulders & recesses. Interchangeable rods accommodate different depth measurements The basic parts are the base, sleeve, thimble, extension rod, thimble cap & frequently a rachet stop. Fig. C-142 Depth micrometer set.

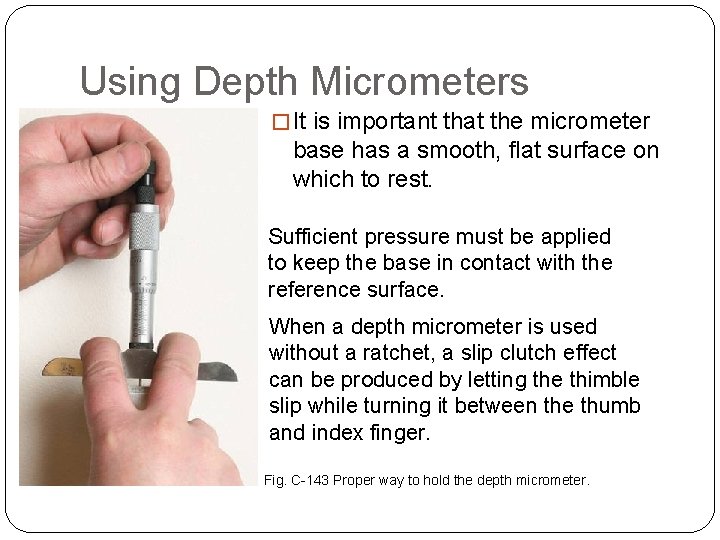
USING MICROMETER INSTRUMENTS Using Depth Micrometers � It is important that the micrometer base has a smooth, flat surface on which to rest. Sufficient pressure must be applied to keep the base in contact with the reference surface. When a depth micrometer is used without a ratchet, a slip clutch effect can be produced by letting the thimble slip while turning it between the thumb and index finger. Fig. C-143 Proper way to hold the depth micrometer.

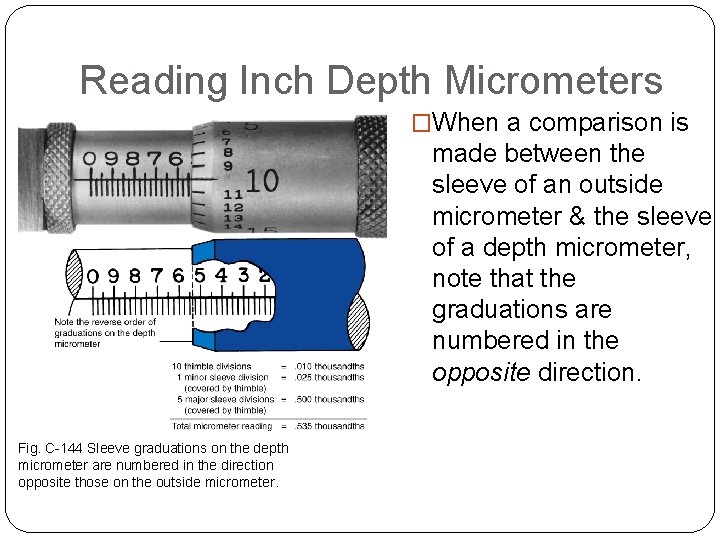
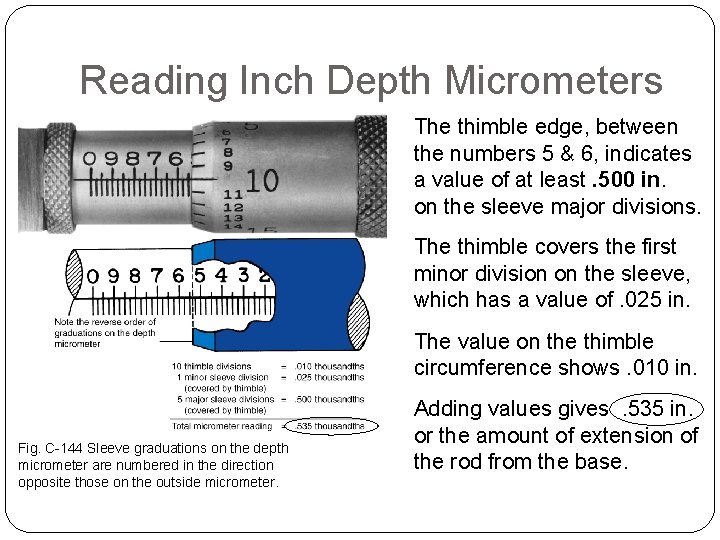
USING MICROMETER INSTRUMENTS Reading Inch Depth Micrometers �When a comparison is made between the sleeve of an outside micrometer & the sleeve of a depth micrometer, note that the graduations are numbered in the opposite direction. Fig. C-144 Sleeve graduations on the depth micrometer are numbered in the direction opposite those on the outside micrometer.

HOW TO DO IT… Reading Inch Depth Micrometers The thimble edge, between the numbers 5 & 6, indicates a value of at least. 500 in. on the sleeve major divisions. The thimble covers the first minor division on the sleeve, which has a value of. 025 in. The value on the thimble circumference shows. 010 in. Fig. C-144 Sleeve graduations on the depth micrometer are numbered in the direction opposite those on the outside micrometer. Adding values gives. 535 in. or the amount of extension of the rod from the base.

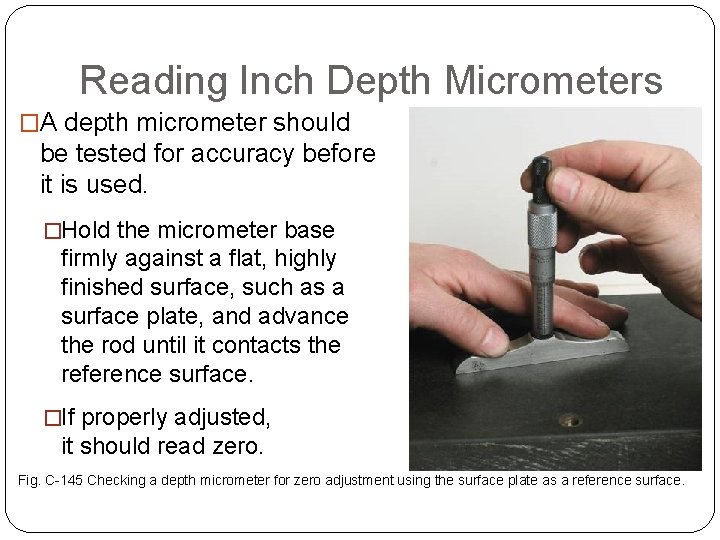
USING MICROMETER INSTRUMENTS Reading Inch Depth Micrometers �A depth micrometer should be tested for accuracy before it is used. �Hold the micrometer base firmly against a flat, highly finished surface, such as a surface plate, and advance the rod until it contacts the reference surface. �If properly adjusted, it should read zero. Fig. C-145 Checking a depth micrometer for zero adjustment using the surface plate as a reference surface.

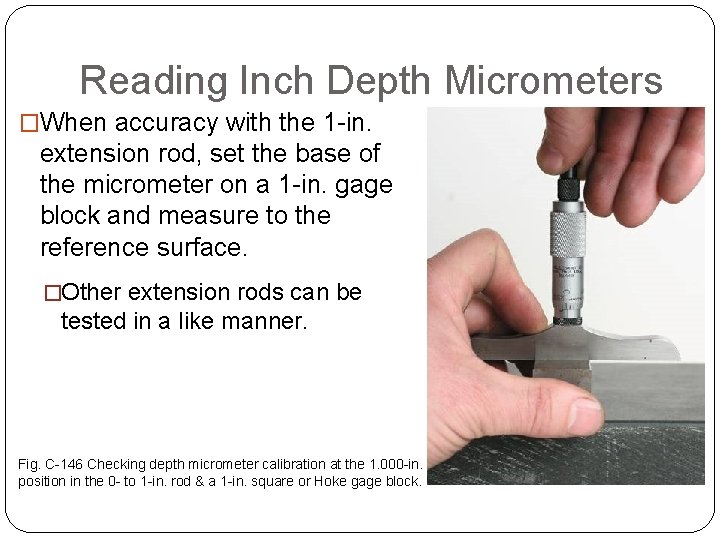
USING MICROMETER INSTRUMENTS Reading Inch Depth Micrometers �When accuracy with the 1 -in. extension rod, set the base of the micrometer on a 1 -in. gage block and measure to the reference surface. �Other extension rods can be tested in a like manner. Fig. C-146 Checking depth micrometer calibration at the 1. 000 -in. position in the 0 - to 1 -in. rod & a 1 -in. square or Hoke gage block.