CPR in Adults MarieClaire Farrell 40076991 Outline CPR


- Slides: 14

CPR in Adults Marie-Claire Farrell 40076991

Outline • CPR is a very simple but essential skill for First Aid • It can mean the difference between life and death • Learning CPR can be achieved using 9 steps • Using this same approach when assessing a medical situation will provide structure and confidence to give safe assistance

Step 1: Danger • Assess the area for danger! • You cannot help a patient if you endanger yourself in the process • Search the area for broken glass, blood or fluid on the floor, electrical cables, sharp objects or needles

Step 2: Help • Don’t forget to shout for help • At this stage you do not know if you have a conscious breathing or an unconscious non breathing casualty. • It is important to have someone on standby for assistance if required • Ask for a defibrillator if one is available

Step 3: Conscious Level • Is the patient alert and conscious? Will they need CPR? • Gently shake their shoulders • Say loudly into each ear “Hello, can you open your eyes for me? ” • Asking the patient to perform an action is a more efficient way to receive a response • Speak into both ears! Patient may be deaf in one ear or have a hearing aid in situ

Step 4: Airways • Listen, look and feel! • Listen for breath sounds • Look for movements in their stomach or chest • Feel for breath on your cheek • Do this for 10 seconds • If there is no change, proceed to step 5

Step 5: Mouth • Check inside the casualty’s mouth for food, vomit or any foreign objects • If you are a medical professional you may use an aspirational pump to remove the object and clear the airway • Using a torch may assist your inspection

Step 6: Ring 999 • Ask your standby to ring for an ambulance. • Tell them we have an unconscious casualty not breathing. • Provide the address • If there is no one else available ring for an ambulance yourself and put it on loud speaker

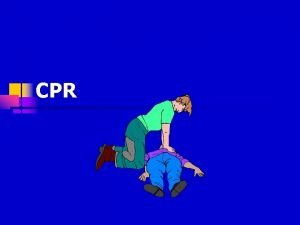
Step 7: Start CPR • Kneel next to the casualty • Expose the area of the chest • Place the palm of your hand onto the middle of their chest and interlock your fingers • Keep your elbows locked!-pivot from your waist using your body weight rather than upper arms • Press down about 5 -6 cm • Aim for 2 compressions per second

Step 8: Rescue Breaths • The rescue breaths are optional in a first aid setting • To do rescue breaths, place your hand on their forehead and gently tilt their head back • Now place two fingers under their chin to hold their head in this position • Remove your hand from their forehead and pinch their nostrils • This allows maximum air entry to the lungs

Step 8: continued • Form a seal around their mouth with your own mouth and blow for 1 second. • Rest 1 second • Provide another rescue breath • Watch their chest each time- it should rise • If you would prefer or cannot give rescue breaths, continue with chest compressions. • In a hospital setting, a rebreathing mask is used to replace the rescue breaths. This is attached to oxygen.

Step 9: 30: 2 • Once rescue breaths are given go back to 30 compressions • Continue this process 30 chest compression to 2 breaths • Do not stop until someone relieves you, the ambulance arrives and takes over, your standby brings you a defibrillator or you physically cannot do anymore.

Extra: Defib • A defibrillator may be used if one is available • They come with instructions that the machine talks you through • Expose the area – scissors to remove clothing is available • You may need to shave the areas where the pads are goingdisposable razors are provided • Remove any metal or piercings the casualty may have on

Extra: defib • Apply the pads as soon as you confirm your casualty is not breathing • The defib will assess if a shock is applicable or not – if not, continue CPR • It will tell you whether to continue with CPR or not after shocking.
 Cpr cycle for adults
 What are the 7 steps of cpr
 Words to christ be our light
 Who is farrell jarreau
 Byron farrell
 Simon farrell qc
 Enteralite infinity no flow out
 Stacy o'farrell santa cruz
 Kelly farrell
 Bread sentence
 Assessment strategies for adults
 Tta adults
 Token economy in prisons examples
 Portsmouth safeguarding adults board
 Office of aging and adults services
