COW EYE DISSECTION Use this presentation as your


- Slides: 16
COW EYE DISSECTION Use this presentation as your “virtual” cow eye dissection, or use it as a guide for your actual classroom dissection (recommended). If you are following along at school, please be careful. Scalpels and razors can cut you as easily as they cut cow eyes. You can order cow's eyes at a butcher shop or purchase them directly from a slaughterhouse. Try to get eyes with the muscles and fat still attached. If possible pick up the cow's eyes the day of the dissection, eyes are easier to cut when they are fresh.
Before Beginning. Recorder Copy: Part Function 10 total! Recorder should fill in as dissection progresses! Actual Description from lab
Before Beginning: Digital Specialist copy Video Groups 30 -35 word summary! Do not go over or under! 1 2 3 4 Digital specialist should records GROUPS response after watching video!
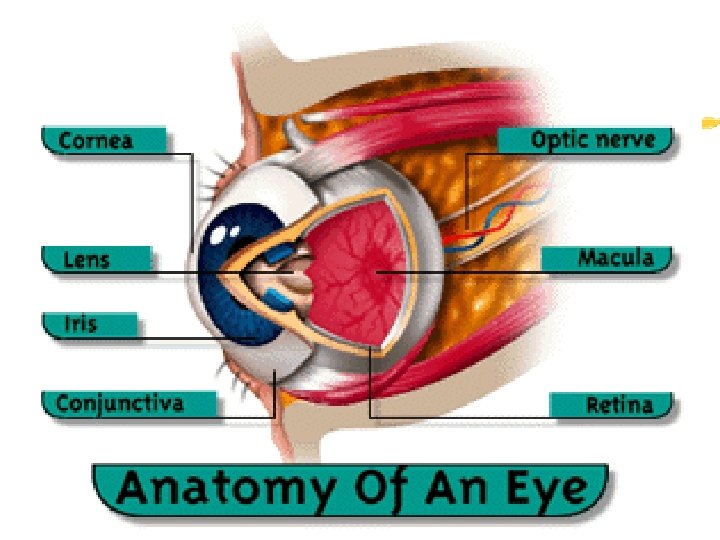
STEP 1: EXAMINE EYE Examine the outside of the eye. See how many parts of the eye you can identify. You should be able to find the whites (or sclera) and the clear covering over the front of the eye (the cornea). You should also be able to identify the fat and muscle surronding the eye. Add underlined parts to chart
Step 1: Continued Remove pieces of fat and muscle from the back of the eye and find the thick optic nerve. We measured this diameter of your optic nerve in our blind spot lab. Watch video on Glaucoma.
STEP 2: FIRST INCISION Make the first incision where the sclera meets the cornea. Cut until the aqueous humor is released.
STEP 3: CORNEA Rotate the eye and cut around the cornea. Be careful not to cut too deep. As the cornea starts to cut free, hold the cornea in the center and make the last cuts around it. Watch the Lasik eye surgery video to see how the cornea can be reshaped.
STEP 4: CORNEA Once you have removed the cornea, place it on the board (or cutting surface) and cut it with your scalpel or razor.
STEP 5: IRIS With the cornea removed, the next step is to pull out the iris. Place one finger in the center of the eye. Find the iris and pull it back. It should come out in one piece, notice the hole in the center, the pupil. Look at your lab groups iris’s. Everyone is unique and as individual as a fingerprint. Does anyone have any freckles on their iris?
STEP 6: SCLERA It can be a bit tricky to remove the lens with the vitreous humor attached. It works best if you cut slits in the sclera. Be careful not to cut the lens.
STEP 7: LENS After enough incisions have been made in the sclera, you should be able to remove the lens. Sometimes the vitreous humor will be removed along with the lens.
STEP 8: EXAMINE LENS Hold up the lens and look through it. If the lens is too slippery, pat it dry and try again. Check out the cataract surgery video.
STEP 9: RETINA The thin, brownish tissue on the back of the eye is the retina. Find the spot where the retina is attached. The shiny blue-green material is the tapetum. Humans do not have this shiny layer.
STEP 10: OPTIC NERVE Find the spot where all the retina's nerves collect. It is called the blind spot. This is where all the nerves go out the back of the eye, forming the optic nerve.
STEP 13: CLEAN-UP Once the dissection is complete, properly dispose of the remains. Please clean all tools and dissecting pan. Spray down your table.