COUPLING Part II Lec 14 Prod Eng Mech





- Slides: 29

COUPLING Part II Lec. 14 Prod. Eng. & Mech. Design Dept. Faculty of Engineering

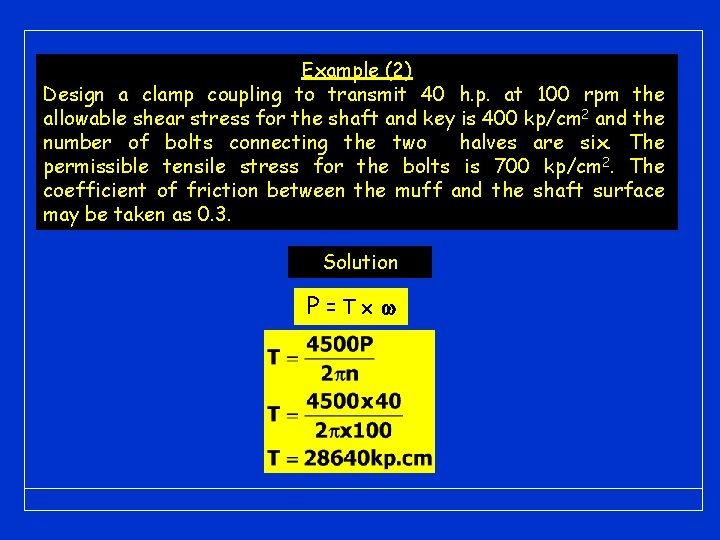
Example (2) Design a clamp coupling to transmit 40 h. p. at 100 rpm the allowable shear stress for the shaft and key is 400 kp/cm 2 and the number of bolts connecting the two halves are six. The permissible tensile stress for the bolts is 700 kp/cm 2. The coefficient of friction between the muff and the shaft surface may be taken as 0. 3. Solution P=T

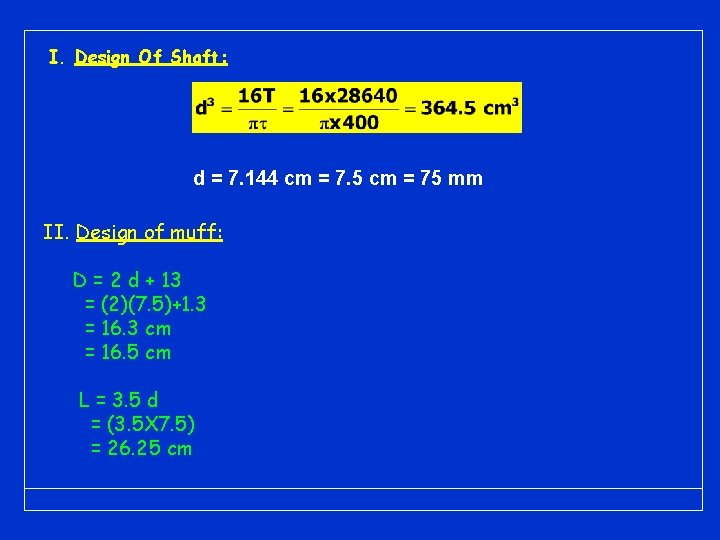
I. Design Of Shaft: d = 7. 144 cm = 7. 5 cm = 75 mm II. Design of muff: D = 2 d + 13 = (2)(7. 5)+1. 3 = 16. 3 cm = 16. 5 cm L = 3. 5 d = (3. 5 X 7. 5) = 26. 25 cm

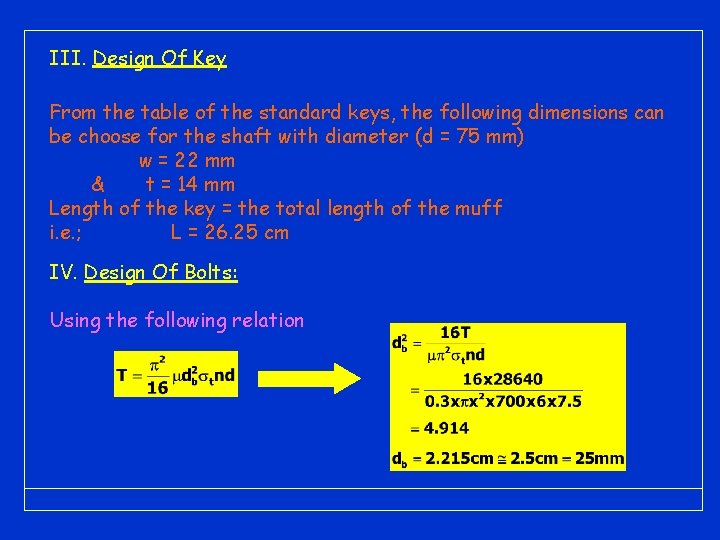
III. Design Of Key From the table of the standard keys, the following dimensions can be choose for the shaft with diameter (d = 75 mm) w = 22 mm & t = 14 mm Length of the key = the total length of the muff i. e. ; L = 26. 25 cm IV. Design Of Bolts: Using the following relation

5. FLANGE COUPLING A flange coupling consists of two separate cast iron flanges that can be used to connect two in-line shafts. The following conditions should be noticed by flange couplings: - Each flange is mounted on the shaft end and keyed to it. - The faces of the flanges should be turned to ensure right angle with the axis of the shaft. - To maintain alignment, one of the flanges should have a projected portion while the other have a corresponding recess. - The two flanges are coupled together by means of bolts.

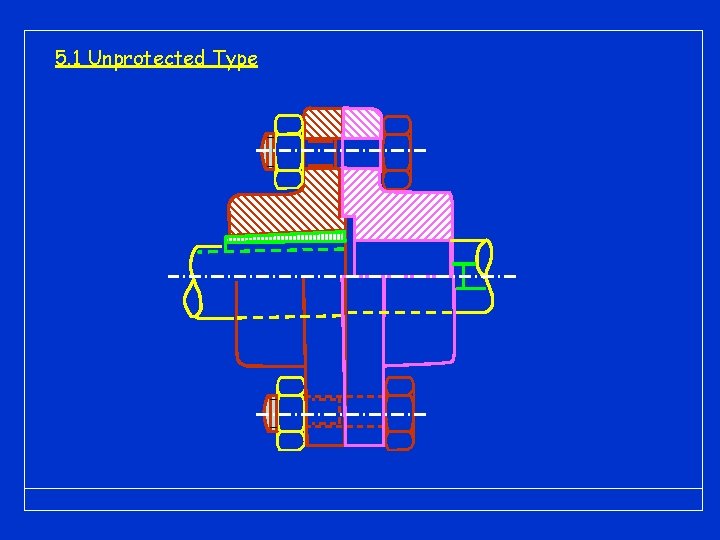
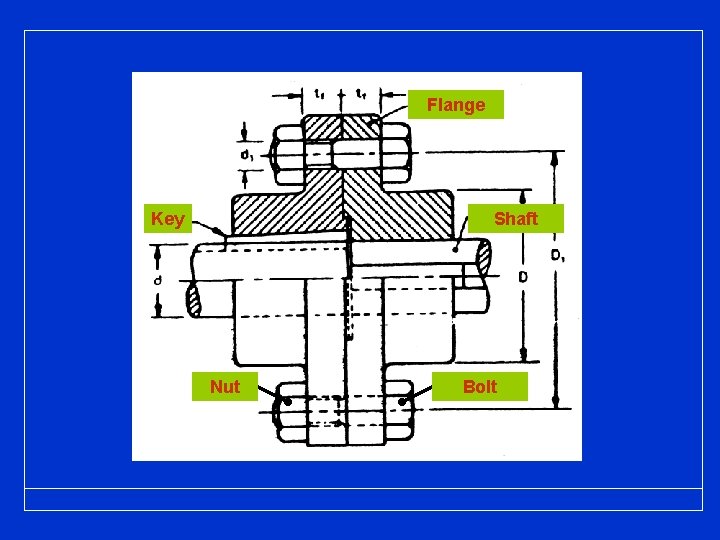
In general, the flange couplings are used for heavy duty and hence they are used for connecting of large shafts. However, this type can be classified into the following mean types: - Unprotected type. - Protected type. - Marine type. In the unprotected type, each shaft is keyed to the boss of the flange with a counter sunk key and the flanges are coupled together by means of bolts. Generally, 3, 4 or six bolts are used. The keys of the shafts are adjusted to be at right angle along the circumference of the shaft to minimize the weakening effect of the keyways.

5. 1 Unprotected Type

Flange Key Shaft Nut Bolt

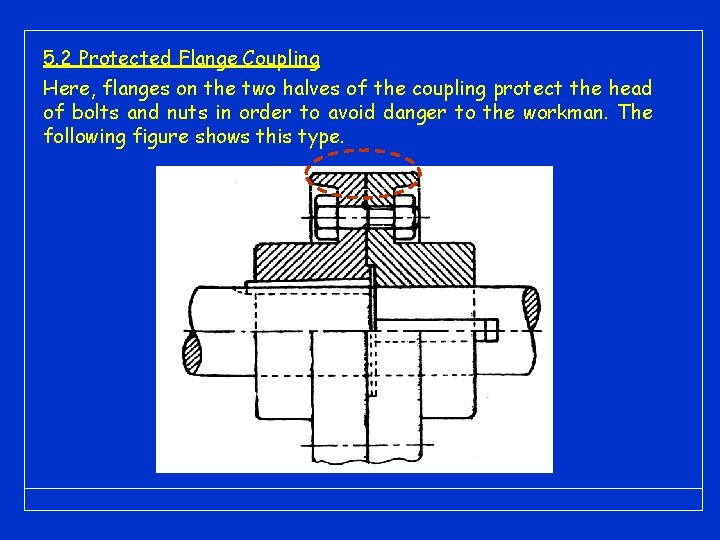
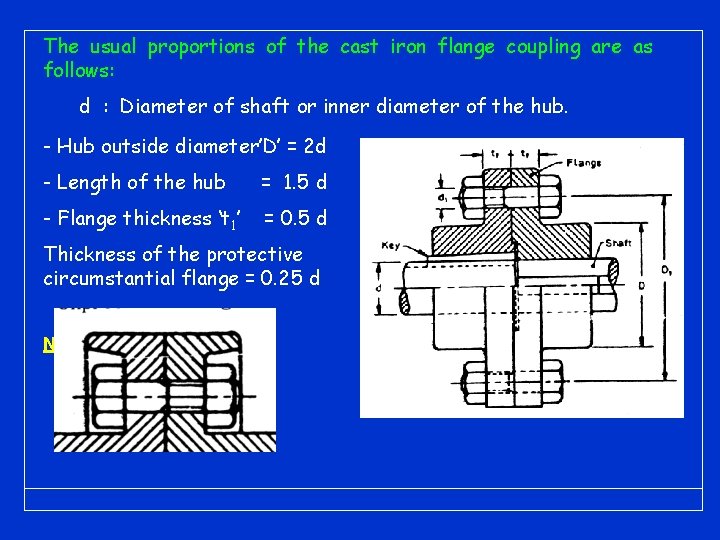
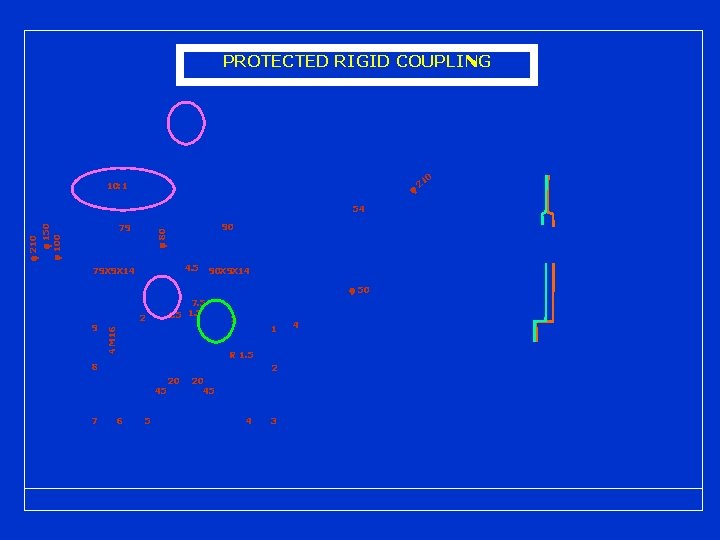
5. 2 Protected Flange Coupling Here, flanges on the two halves of the coupling protect the head of bolts and nuts in order to avoid danger to the workman. The following figure shows this type.

The usual proportions of the cast iron flange coupling are as follows: d : Diameter of shaft or inner diameter of the hub. - Hub outside diameter’D’ = 2 d - Length of the hub = 1. 5 d - Flange thickness ‘t 1’ = 0. 5 d Thickness of the protective circumstantial flange = 0. 25 d Number of bolts: = 3 for (d) upto 40 mm = 4 for (d) upto 100 mm = 6 for (d) upto 180 mm

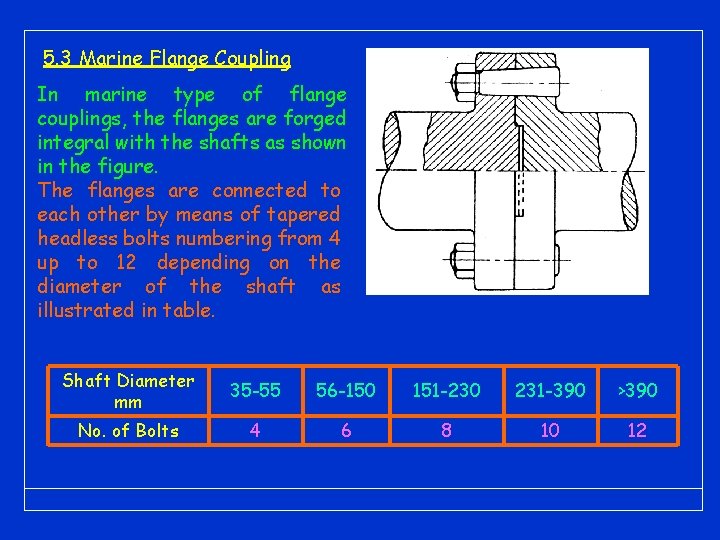
5. 3 Marine Flange Coupling In marine type of flange couplings, the flanges are forged integral with the shafts as shown in the figure. The flanges are connected to each other by means of tapered headless bolts numbering from 4 up to 12 depending on the diameter of the shaft as illustrated in table. Shaft Diameter mm 35 -55 56 -150 151 -230 231 -390 >390 No. of Bolts 4 6 8 10 12

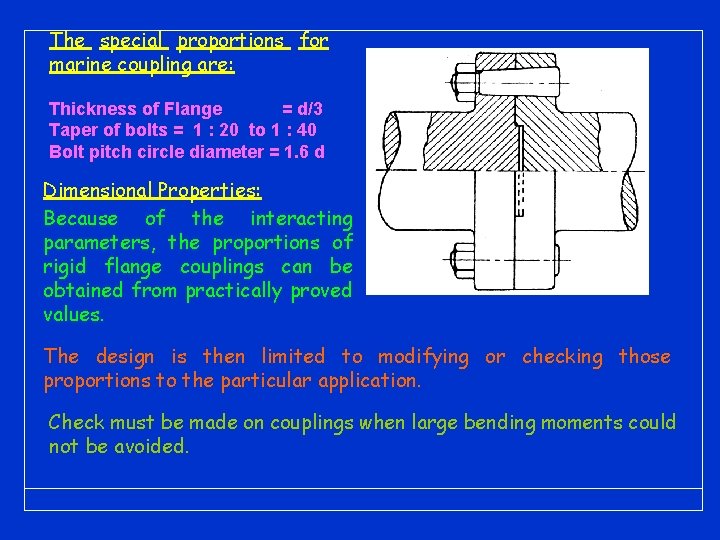
The special proportions for marine coupling are: Thickness of Flange = d/3 Taper of bolts = 1 : 20 to 1 : 40 Bolt pitch circle diameter = 1. 6 d Dimensional Properties: Because of the interacting parameters, the proportions of rigid flange couplings can be obtained from practically proved values. The design is then limited to modifying or checking those proportions to the particular application. Check must be made on couplings when large bending moments could not be avoided.

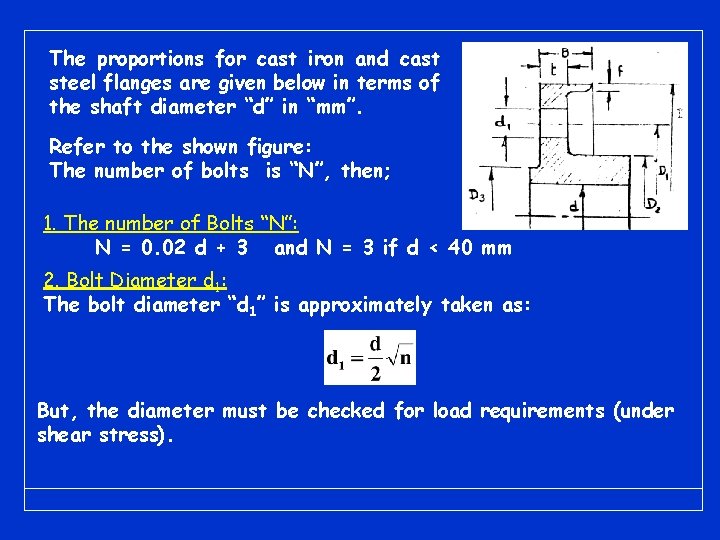
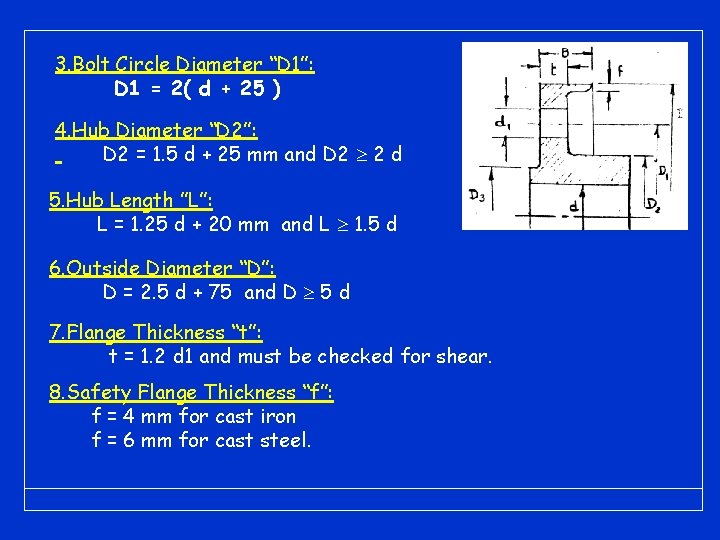
The proportions for cast iron and cast steel flanges are given below in terms of the shaft diameter “d” in “mm”. Refer to the shown figure: The number of bolts is “N”, then; 1. The number of Bolts “N”: N = 0. 02 d + 3 and N = 3 if d < 40 mm 2. Bolt Diameter d 1: The bolt diameter “d 1” is approximately taken as: But, the diameter must be checked for load requirements (under shear stress).

3. Bolt Circle Diameter “D 1”: D 1 = 2( d + 25 ) 4. Hub Diameter “D 2”: D 2 = 1. 5 d + 25 mm and D 2 2 d 5. Hub Length ”L”: L = 1. 25 d + 20 mm and L 1. 5 d 6. Outside Diameter “D”: D = 2. 5 d + 75 and D 5 d 7. Flange Thickness “t”: t = 1. 2 d 1 and must be checked for shear. 8. Safety Flange Thickness “f”: f = 4 mm for cast iron f = 6 mm for cast steel.

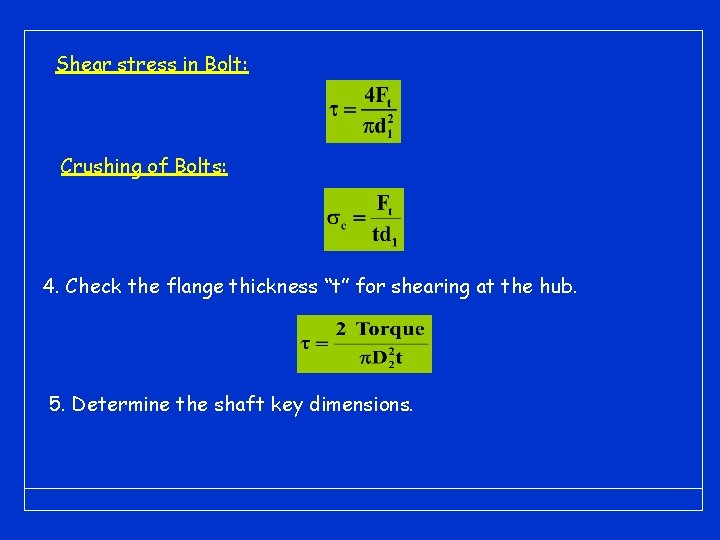
7. DESIGN PROCEDURE: The important data that should be given are: 1. The transmitted power ‘P’ 2. The shaft speed ‘N’. 3. The shaft diameter ’d’. The following steps should be carried out: 1. Determine n, D 1 (bolt center diameter), D 2 (hub external diameter) , D (hub internal diameter = shaft diameter ‘d’ and L (hub length) from the given empirical formulas. 2. Determine the tangential force per bolt necessary to transmit the required power (torque at certain velocity) considering a safety factor of 2. 3. Check or determine the bolt diameter “d 1”. If the bolts are fitted, they must be check for shear and crushing assuming that half the number of bolt will carry the load.

Shear stress in Bolt: Crushing of Bolts: 4. Check the flange thickness “t” for shearing at the hub. 5. Determine the shaft key dimensions.

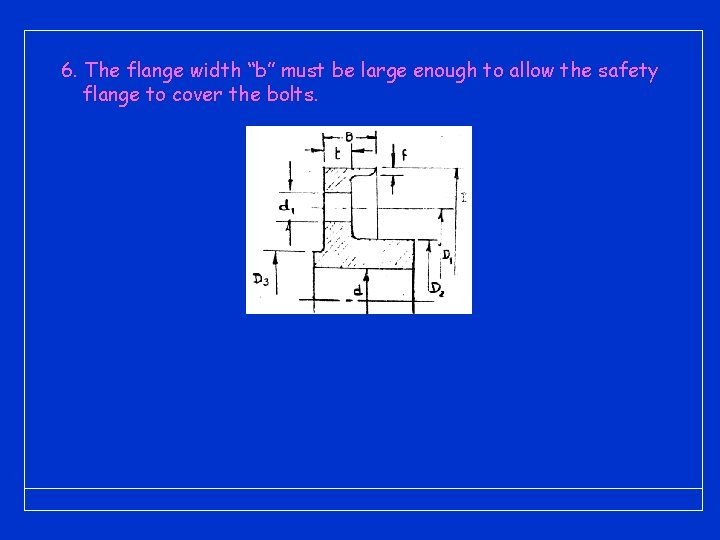
6. The flange width “b” must be large enough to allow the safety flange to cover the bolts.

8. Hub Design of hub can be carried out by considering the hub as a hollow shaft, which transmits the same power (torque at specific speed), i. e. , Where, N. B: k = d/D 2 Hub length = 3 D 2

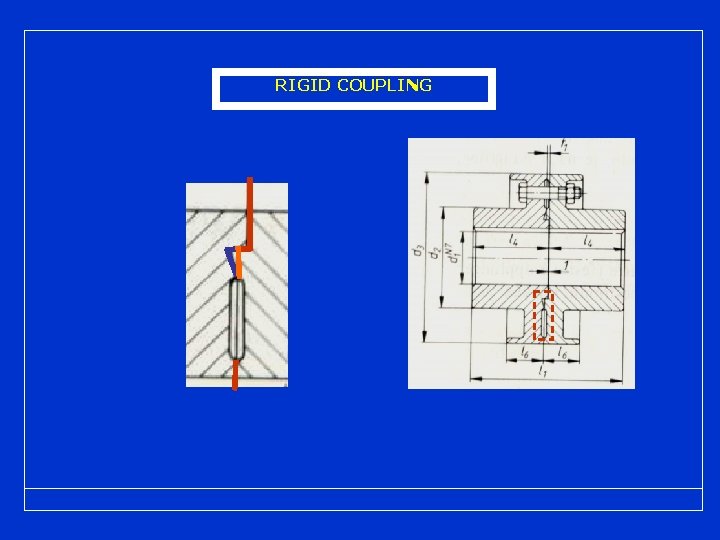
RIGID COUPLING

PROTECTED RIGID COUPLING 0 10: 1 54 90 80 210 150 100 79 4. 5 79 X 9 X 14 90 X 9 X 14 50 2 4 M 16 9 7. 5 1. 5 2 1 R 1. 5 8 2 45 7 6 5 20 20 45 4 3 4 21

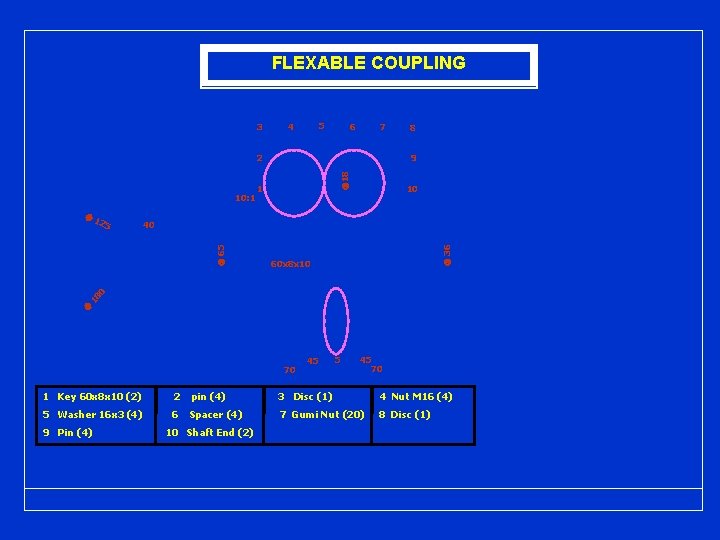
FLEXABLE COUPLING 3 5 4 6 7 2 10: 1 18 1 10 40 60 x 8 x 10 18 0 65 25 9 36 1 8 70 45 5 45 70 1 Key 60 x 8 x 10 (2) 2 pin (4) 3 Disc (1) 4 Nut M 16 (4) 5 Washer 16 x 3 (4) 6 Spacer (4) 7 Gumi Nut (20) 8 Disc (1) 9 Pin (4) 10 Shaft End (2)

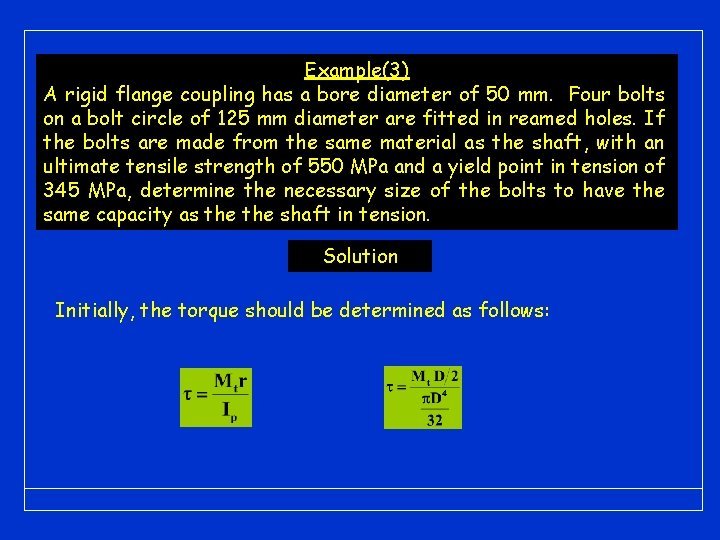
Example(3) A rigid flange coupling has a bore diameter of 50 mm. Four bolts on a bolt circle of 125 mm diameter are fitted in reamed holes. If the bolts are made from the same material as the shaft, with an ultimate tensile strength of 550 MPa and a yield point in tension of 345 MPa, determine the necessary size of the bolts to have the same capacity as the shaft in tension. Solution Initially, the torque should be determined as follows:

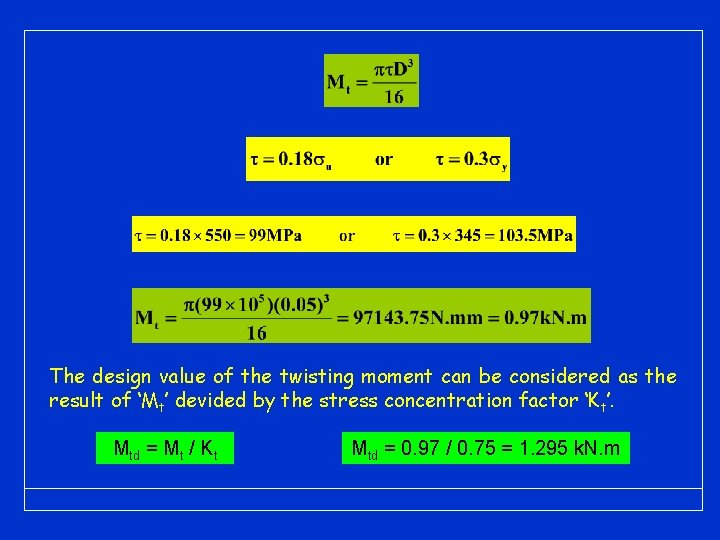
The design value of the twisting moment can be considered as the result of ‘Mt’ devided by the stress concentration factor ‘Kt’. Mtd = Mt / Kt Mtd = 0. 97 / 0. 75 = 1. 295 k. N. m

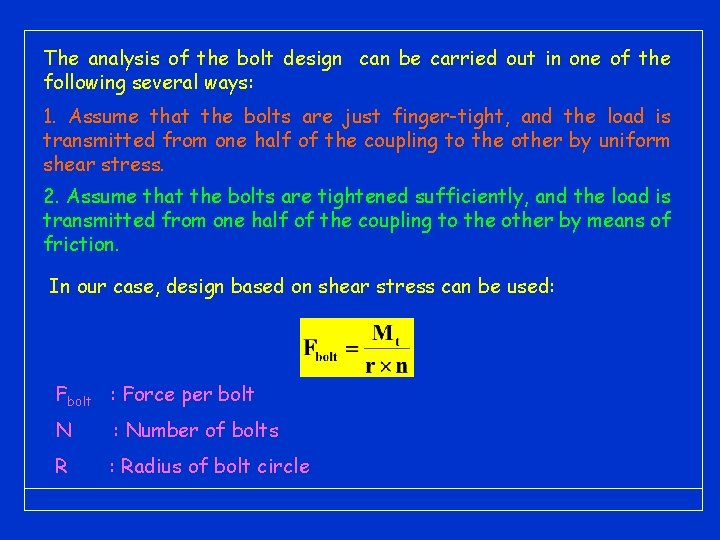
The analysis of the bolt design can be carried out in one of the following several ways: 1. Assume that the bolts are just finger-tight, and the load is transmitted from one half of the coupling to the other by uniform shear stress. 2. Assume that the bolts are tightened sufficiently, and the load is transmitted from one half of the coupling to the other by means of friction. In our case, design based on shear stress can be used: Fbolt : Force per bolt N : Number of bolts R : Radius of bolt circle

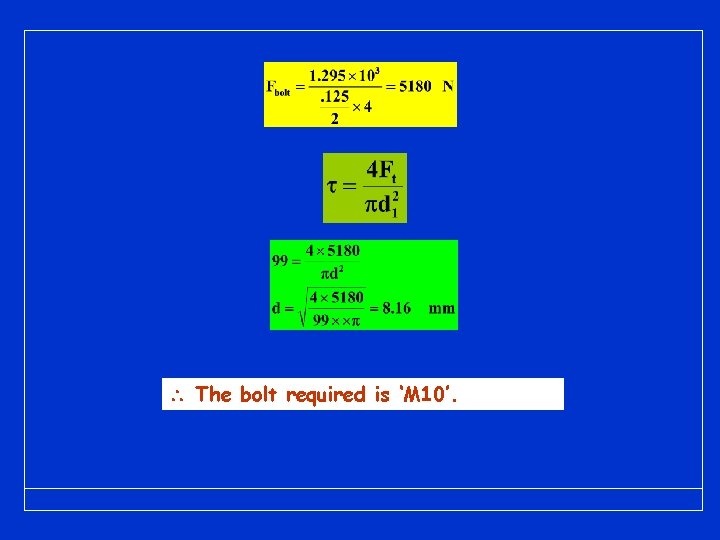
The bolt required is ‘M 10’.

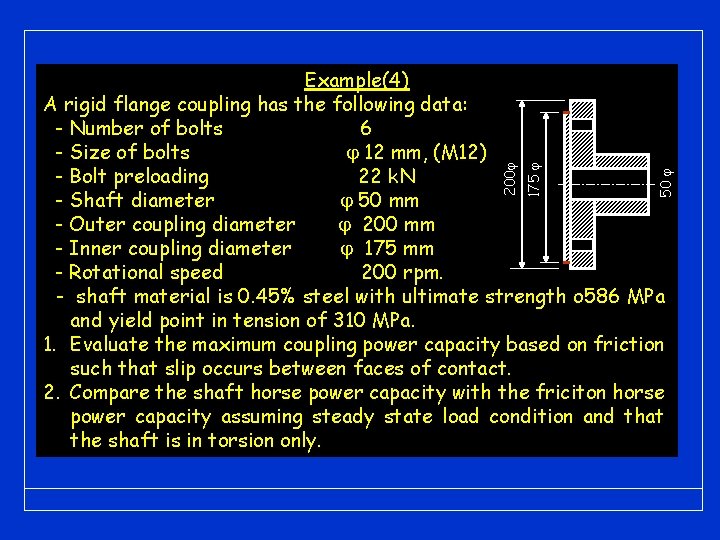
50 175 200 Example(4) A rigid flange coupling has the following data: - Number of bolts 6 - Size of bolts 12 mm, (M 12) - Bolt preloading 22 k. N - Shaft diameter 50 mm - Outer coupling diameter 200 mm - Inner coupling diameter 175 mm - Rotational speed 200 rpm. - shaft material is 0. 45% steel with ultimate strength o 586 MPa and yield point in tension of 310 MPa. 1. Evaluate the maximum coupling power capacity based on friction such that slip occurs between faces of contact. 2. Compare the shaft horse power capacity with the friciton horse power capacity assuming steady state load condition and that the shaft is in torsion only.

Solution In the design of rigid couplings, it is assumed that the bolts are loosed in service and the coupling capacity is based on the generated stress due to shearing. The tightening effect of the bolts; with friction as the base of power transmission is generally neglected. However, it is required here to evaluate the capacity of the given coupling based on friction.

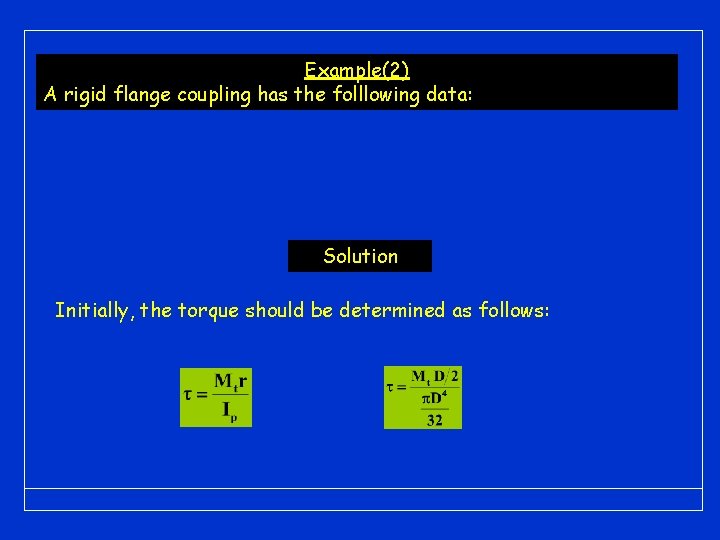
Example(2) A rigid flange coupling has the folllowing data: Solution Initially, the torque should be determined as follows:

EN D