
CONSTRUCTING A RIGHT TRIANGLE ARRANGEMENT Written by Holli

CONSTRUCTING A RIGHT TRIANGLE ARRANGEMENT Written by: Holli Bowman & David Lynn Hall County Board of Education April 2003 Modified by Georgia Agriculture Education Curriculum Office September 2005
This presentation is designed to supplement the textbook, Floriculture: Designing & Merchandising, Unit 11, “Triangular Arrangements”. The author is Charles Griner and it is published by Delmar Publishers.
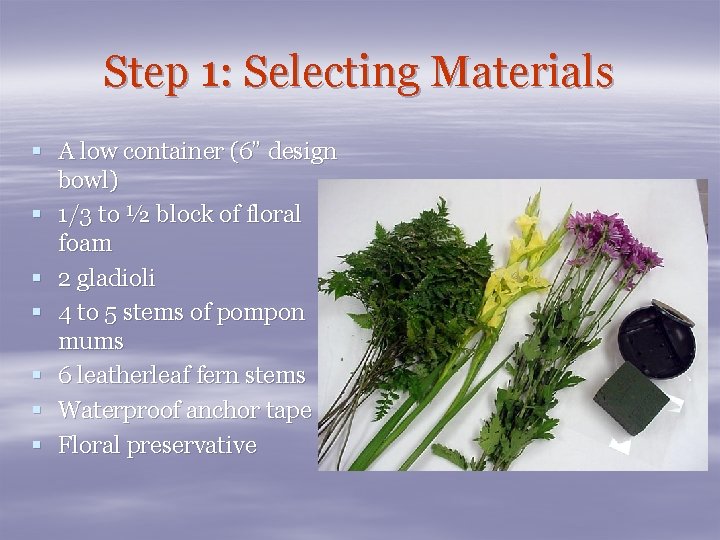
Step 1: Selecting Materials § A low container (6” design bowl) § 1/3 to ½ block of floral foam § 2 gladioli § 4 to 5 stems of pompon mums § 6 leatherleaf fern stems § Waterproof anchor tape § Floral preservative
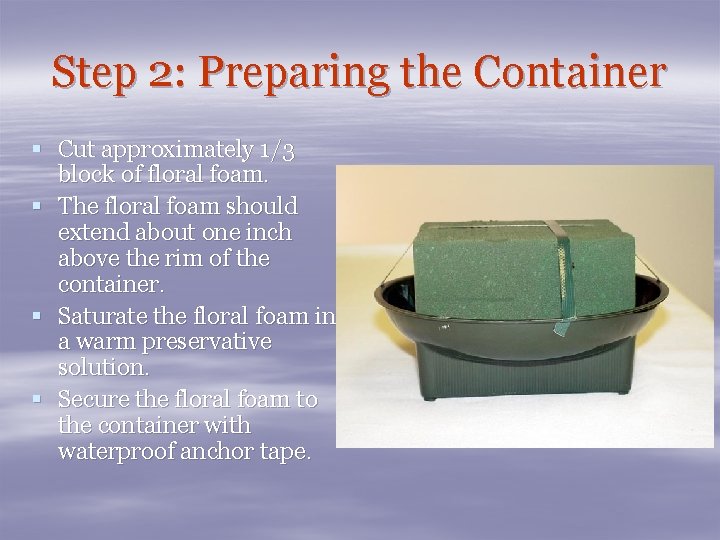
Step 2: Preparing the Container § Cut approximately 1/3 block of floral foam. § The floral foam should extend about one inch above the rim of the container. § Saturate the floral foam in a warm preservative solution. § Secure the floral foam to the container with waterproof anchor tape.
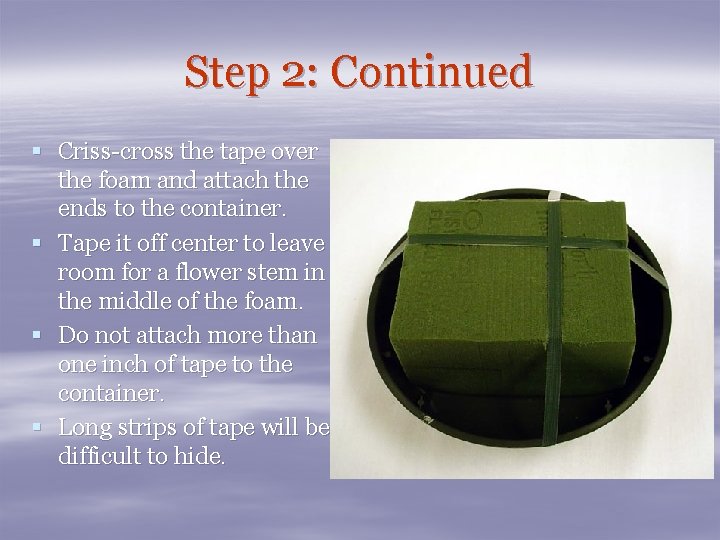
Step 2: Continued § Criss-cross the tape over the foam and attach the ends to the container. § Tape it off center to leave room for a flower stem in the middle of the foam. § Do not attach more than one inch of tape to the container. § Long strips of tape will be difficult to hide.
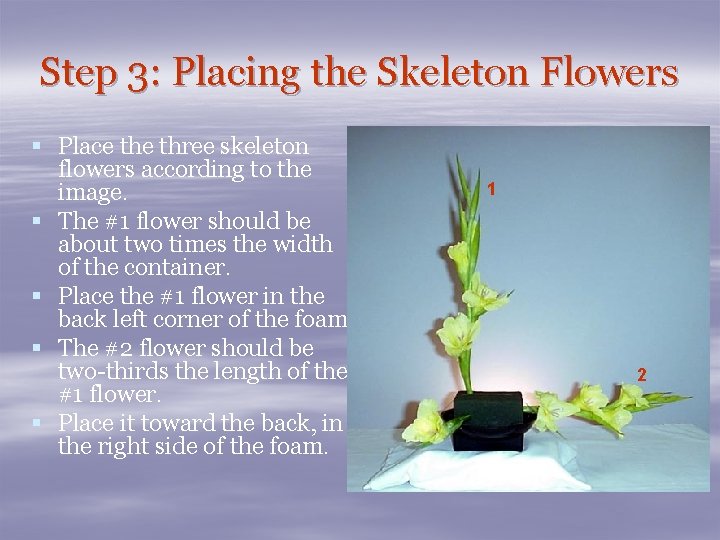
Step 3: Placing the Skeleton Flowers § Place three skeleton flowers according to the image. § The #1 flower should be about two times the width of the container. § Place the #1 flower in the back left corner of the foam. § The #2 flower should be two-thirds the length of the #1 flower. § Place it toward the back, in the right side of the foam. 1 2
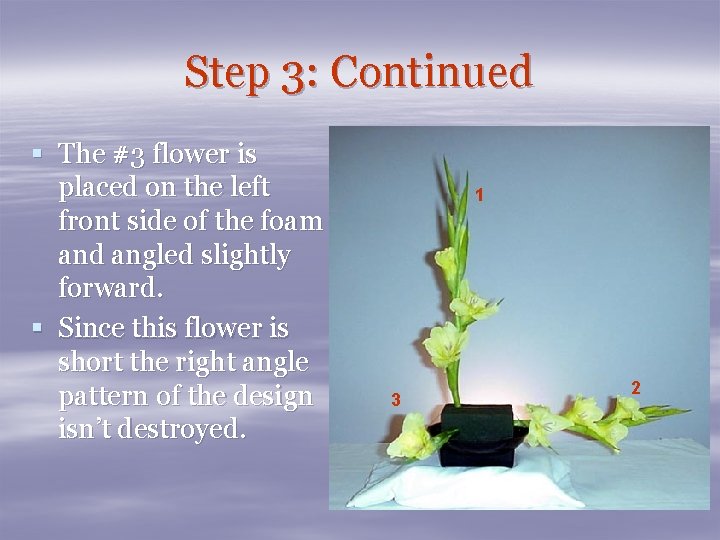
Step 3: Continued § The #3 flower is placed on the left front side of the foam and angled slightly forward. § Since this flower is short the right angle pattern of the design isn’t destroyed. 1 3 2
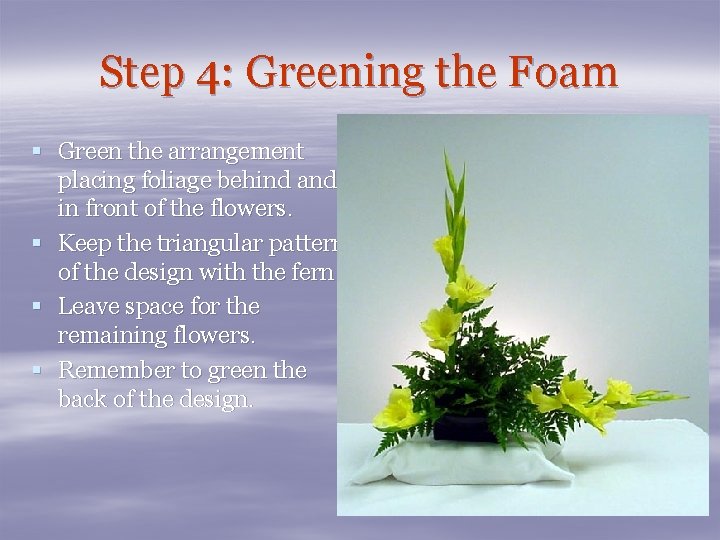
Step 4: Greening the Foam § Green the arrangement placing foliage behind and in front of the flowers. § Keep the triangular pattern of the design with the fern. § Leave space for the remaining flowers. § Remember to green the back of the design.
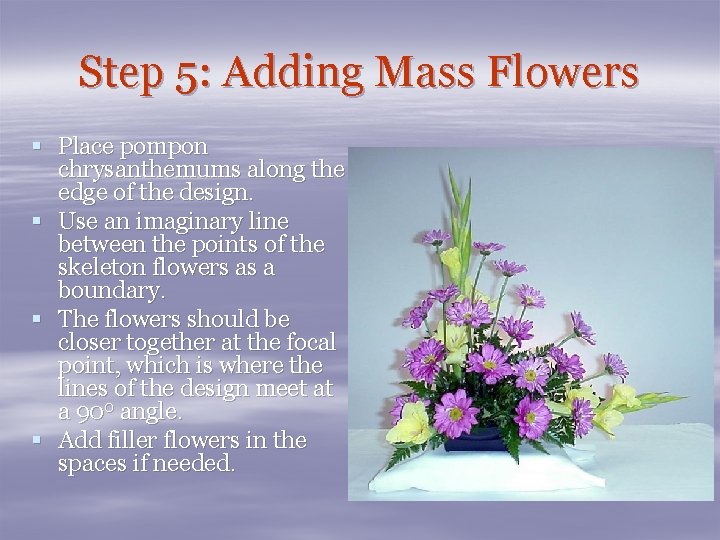
Step 5: Adding Mass Flowers § Place pompon chrysanthemums along the edge of the design. § Use an imaginary line between the points of the skeleton flowers as a boundary. § The flowers should be closer together at the focal point, which is where the lines of the design meet at a 900 angle. § Add filler flowers in the spaces if needed.
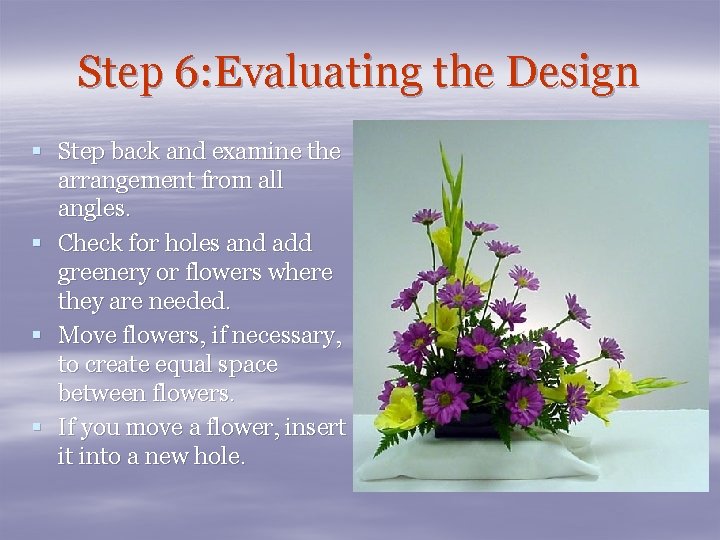
Step 6: Evaluating the Design § Step back and examine the arrangement from all angles. § Check for holes and add greenery or flowers where they are needed. § Move flowers, if necessary, to create equal space between flowers. § If you move a flower, insert it into a new hole.
- Slides: 10