ComputerAssisted Qualitative Data Analysis Applications to Educational Research


 2. ‘Chunking’")


 2. Right click")


- Slides: 27
Computer-Assisted Qualitative Data Analysis: Applications to Educational Research Jacklyn Altuna Hannah Betesh Berkeley Policy Associates
Use of Software in Qualitative Research • Useful tool for improving rigor and transparency in qualitative data analysis • Concern that computers mechanize analysis and discourages deeper examination of data • Researchers do research. Software is merely a tool.
Advantages of Computer Assistance • Clear audit trail • Check assumptions about patterns with queries and frequency counts • Consolidate voluminous data—especially useful for multi-year studies!
Stages of Analysis 1. Outlining broad topics/ categories (part of data cleaning) 2. ‘Chunking’ the data into these categories (auto-coding) 3. Inductive coding making free nodes 4. Organizing and reorganizing free nodes into hierarchical ‘trees’ 5. Mapping codes to research questions 6. Using coded data to construct a narrative
Data Cleaning: Setting Up Your Data for Auto Coding Data Sources: Interviews & Field Notes • Outline broad topic areas from your interview and observation protocols and insert them into your transcripts and field notes. • Format using header styles (e. g. Heading 1, Heading 2, etc. ) • For field notes from direct observations, set up your template so that the fonts are already formatted
Step 1 a: Insert topic headings into transcript
Step 1 b: Format topic headings using heading styles Use “Heading 1” Use “Normal” Heading 1
Step 2 a: Import data into Nvivo 1. Right click in “Internals” and click on “Import Internals” 2. Choose all documents to import into Nvivo project 3. Click “OK”
Step 2 b: Auto code! 1. Select your “internals” (data sources) 2. Right click and choose “Auto Code”
Step 2 b: Auto code! 3 5 6 3. 4 4. 5. 6. Code by: Paragraph Style Choose your paragraph styles (Headings only) Code under “New Node” Name the tree node and click “OK”
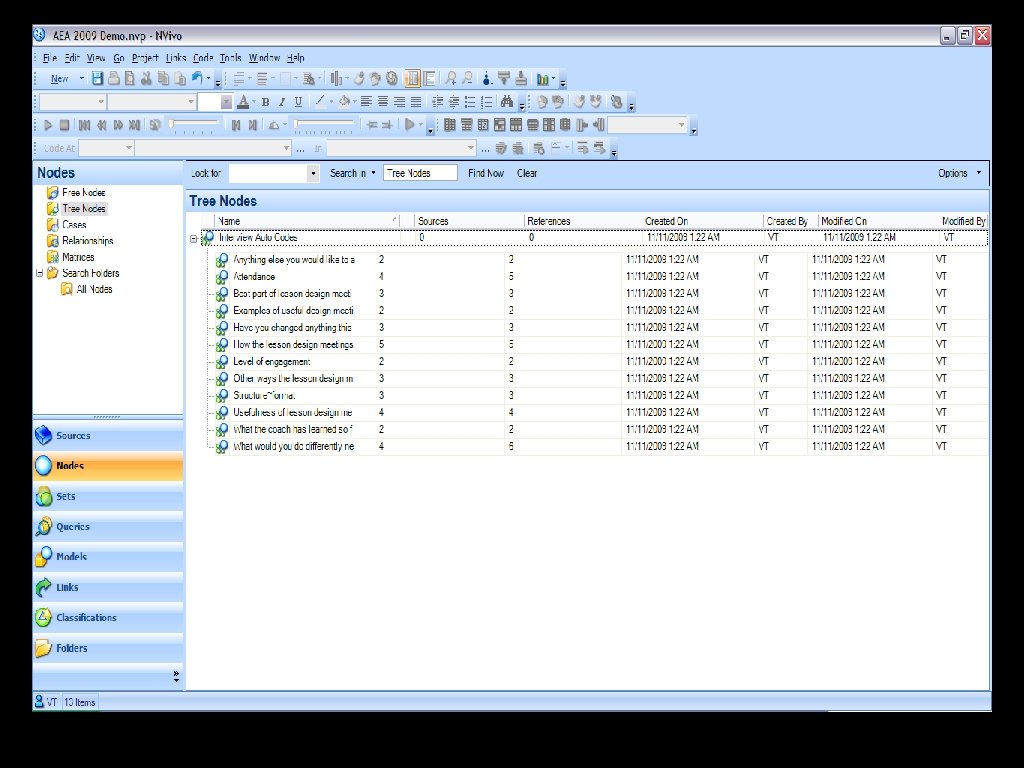
Step 2 c: Review your auto-codes, clean and recode as necessary 1. Review your auto codes; note your tree structure and hierarchies: • Is the text falling under the appropriate headings? • Are there duplicates? (discuss potential causes of dupes – extra spaces, misspellings, etc. ) • Spot check that all of your sources were auto coded 2. Clean and recode as necessary
Step 3 a: Inductive Coding Within Tree Nodes Creating Free Nodes & Child Nodes
Step 3 a: Inductive Coding Within Tree Nodes Creating Free Nodes & Child Nodes 1. After you’re satisfied with your auto code hierarchy, read through each node (code) and note interesting themes by creating “child/sub nodes”. • As you read through the data and create these child nodes, emerging themes will become apparent • Use annotation feature as your questions and thoughts about the data emerge 2. 3. 4. 5. 6. Highlight the text you want to code Right click Choose Code Selection At New Node Name the new node; Click “OK” Copy and paste the new node into its desired place in the tree hierarchy OR leave it as a free node
Step 3 b: Using Annotations Annotation
Step 4: Organizing Free Nodes and Reorganizing Tree Node Hierarchies 1. Revisit Research Questions: • Implementation Context: What conditions support or hinder the implementation of this professional development program? • Fidelity to Model: Is the intervention being implemented as planned? 2. Restructure tree hierarchies in a way that your RQs can be answered. Tree structure can also serve as outline for your narrative.
Step 4: Organizing Free Nodes and Reorganizing Tree Node Hierarchies 1. Revisit Research Questions 2. Restructure tree hierarchies in a way that your RQs can be answered. Tree structure can also serve as outline for your narrative.
Using Memos in Nvivo • Can store analytic, methodological, or theoretical memos within the Nvivo project • Memos can evolve and grow into documents and key pieces of your report • Memos can be linked to individual nodes or sources, or can stand alone
Creating Memos in Nvivo 1. 2. 3. 4. 5. 6. 7. In Navigation View , click the Sources button. Click the Memos folder. Click the New toolbar button. Click the Memo in This Folder option. The New Memo window is displayed. Enter a name in the Name field. Click OK.
Creating Memos in Nvivo
Link Memo to Node
Querying: Text Search 1. Use queries to cross-check what has already been coded 2. Search for key words to explore or test your hypotheses and preliminary findings
Querying: Text Search 3 1. 2. 2 1 3. Click on Queries Right click in Navigation pane New Query Text Search
Querying: Text Search 5 4 4. Set text search criteria using operators 5. Check ‘Add to Project’ to save the search 6. Click ‘Run’ 6
Step 6: Begin Drafting Your Narrative!
Questions?
Contact Information Jacklyn Altuna jacklyn@bpacal. com Hannah Betesh hannah@bpacal. com Berkeley Policy Associates 440 Grand Ave. , Suite 500 Oakland, CA 946105085 Ph: 510 -465 -7884 Fax: 510 -465 -7885