Computer Aided Design Manufacturing Measurement Integration Computer Aided

- Slides: 19

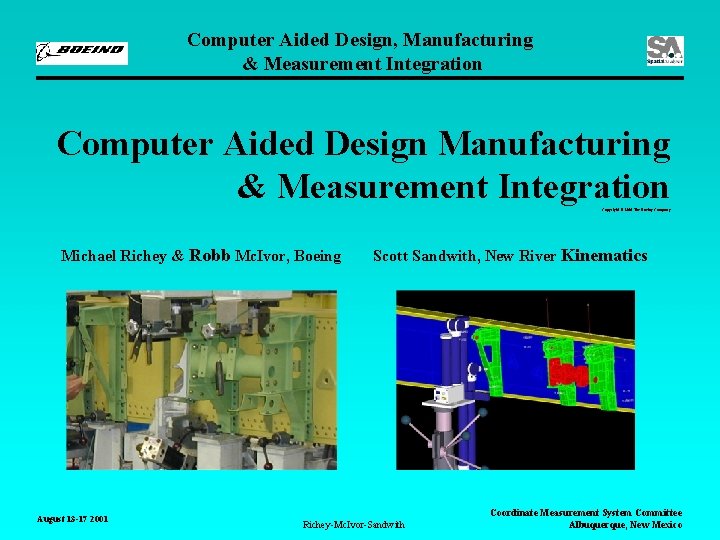
Computer Aided Design, Manufacturing & Measurement Integration Computer Aided Design Manufacturing & Measurement Integration Copyright © 2001 The Boeing Company Michael Richey & Robb Mc. Ivor, Boeing August 13 -17 2001 Scott Sandwith, New River Kinematics Richey-Mc. Ivor-Sandwith Coordinate Measurement System Committee Albuquerque, New Mexico

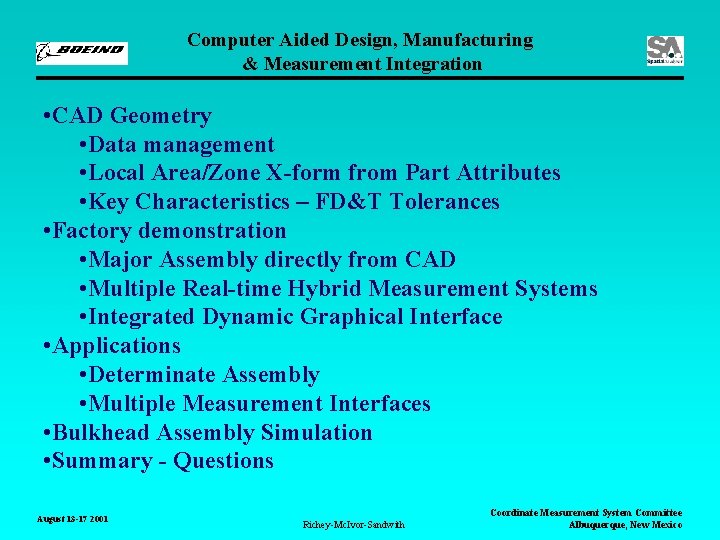
Computer Aided Design, Manufacturing & Measurement Integration • CAD Geometry • Data management • Local Area/Zone X-form from Part Attributes • Key Characteristics – FD&T Tolerances • Factory demonstration • Major Assembly directly from CAD • Multiple Real-time Hybrid Measurement Systems • Integrated Dynamic Graphical Interface • Applications • Determinate Assembly • Multiple Measurement Interfaces • Bulkhead Assembly Simulation • Summary - Questions August 13 -17 2001 Richey-Mc. Ivor-Sandwith Coordinate Measurement System Committee Albuquerque, New Mexico

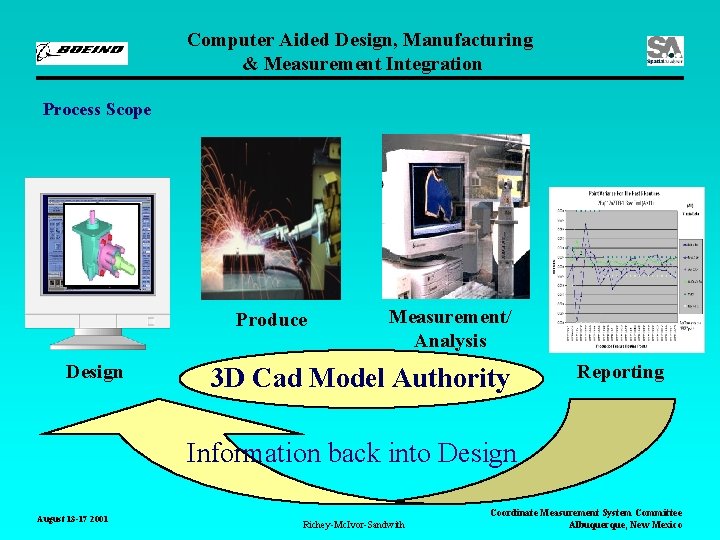
Computer Aided Design, Manufacturing & Measurement Integration Process Scope Produce Design Measurement/ Analysis 3 D Cad Model Authority Reporting Information back into Design August 13 -17 2001 Richey-Mc. Ivor-Sandwith Coordinate Measurement System Committee Albuquerque, New Mexico

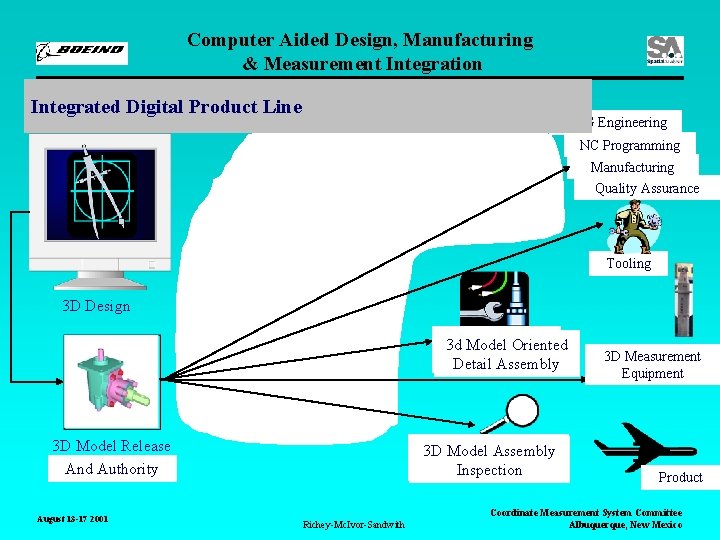
Computer Aided Design, Manufacturing & Measurement Integration Digital Product Line Today Integrated Digital Product Line MFG Engineering NC Programming 2 D Drawing Authority 2 D Drawing Interpretation Manufacturing Quality Assurance Tooling 3 D Design Tool Oriented 3 d Model Oriented Detail. Assembly 3 D Model Release And Authority August 13 -17 2001 2 D Assembly 3 Ddrawing Model Assembly Inspection Richey-Mc. Ivor-Sandwith 3 D Measurement Equipment Product Coordinate Measurement System Committee Albuquerque, New Mexico

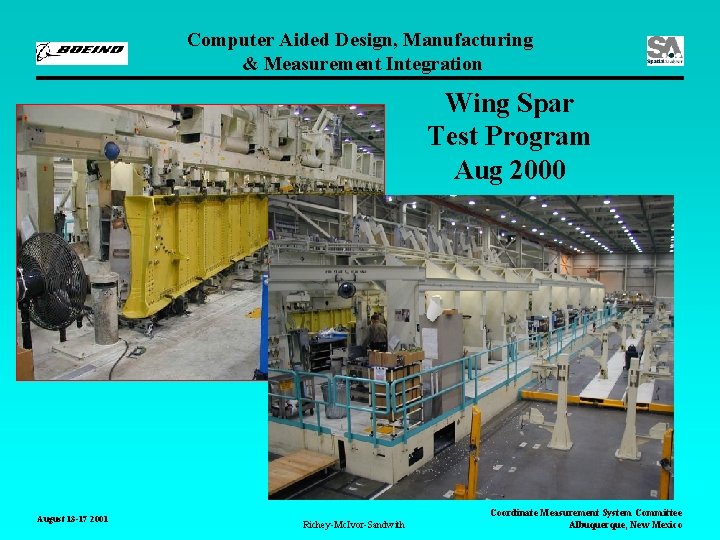
Computer Aided Design, Manufacturing & Measurement Integration Wing Spar Test Program Aug 2000 August 13 -17 2001 Richey-Mc. Ivor-Sandwith Coordinate Measurement System Committee Albuquerque, New Mexico

Computer Aided Design, Manufacturing & Measurement Integration Overview of 3 D Measurement Pilot • Create 3 D CAD Models of components, sub-assemblies and major components • CATIA Model with Embedded Tolerancing • Local Area/Zone X-form from Part Attributes • Key Characteristics • FD&T Tolerances • Measurement Systems August 13 -17 2001 Richey-Mc. Ivor-Sandwith Coordinate Measurement System Committee Albuquerque, New Mexico

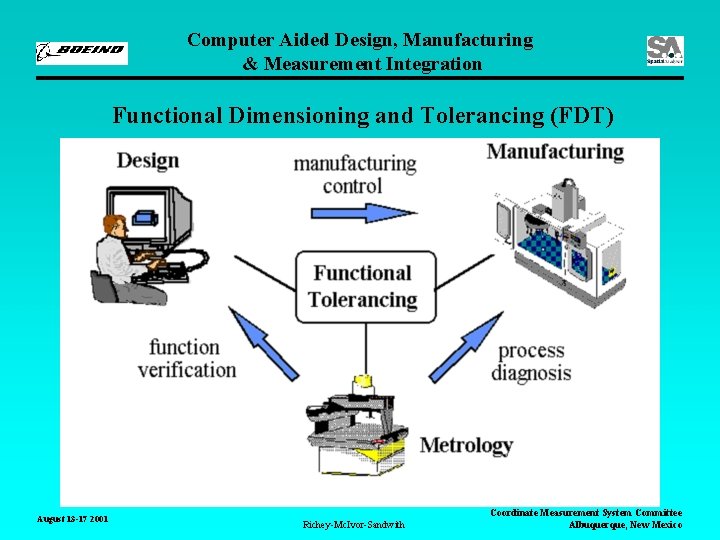
Computer Aided Design, Manufacturing & Measurement Integration Functional Dimensioning and Tolerancing (FDT) August 13 -17 2001 Richey-Mc. Ivor-Sandwith Coordinate Measurement System Committee Albuquerque, New Mexico

Computer Aided Design, Manufacturing & Measurement Integration • Data Transfer between CAD system and metrology system • STEP (Standard for the Exchange of Product) • International Standard ISO 10303 • AP 203, AP 219, and XML-Express • Boeing Standard for Data Exchange (Lifecycle) • IGES (International Graphics Exchange Specification). • The format used for this project was STEP August 13 -17 2001 Richey-Mc. Ivor-Sandwith Coordinate Measurement System Committee Albuquerque, New Mexico

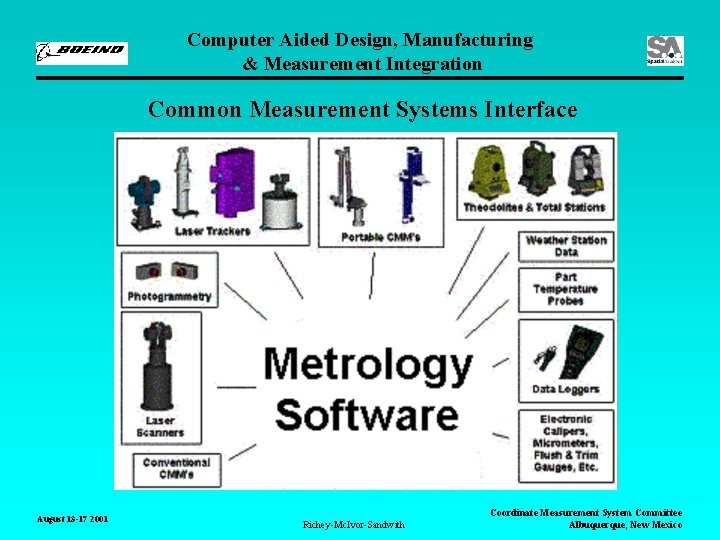
Computer Aided Design, Manufacturing & Measurement Integration Measurements System Integration Challenges • Boeing uses different types of CAMS for tool construction and maintenance which are controlled by 2 D drawings. • Operators are not trained to operate all of the different measurement systems. Operating software and data analysis varies significantly between systems, even for like kind technologies. Measurements System Integration Solution • A key to the success of this project was software which provided a common instrument interface, simultaneous and synchronsis data acquisition from different measurement instruments. August 13 -17 2001 Richey-Mc. Ivor-Sandwith Coordinate Measurement System Committee Albuquerque, New Mexico

Computer Aided Design, Manufacturing & Measurement Integration Common Measurement Systems Interface August 13 -17 2001 Richey-Mc. Ivor-Sandwith Coordinate Measurement System Committee Albuquerque, New Mexico

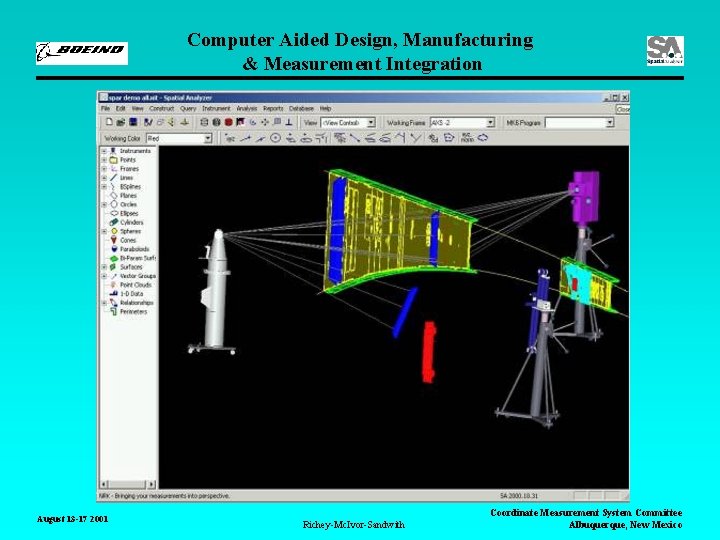
Computer Aided Design, Manufacturing & Measurement Integration Measurement and Assembly • Dynamic real time graphical interface shows the measured location of the part against the CAD model. Easy to make adjustments with confidence. • Distributed Computing Capable (real-time multi-task measurement and analysis across multiple computers) • Synchronous Measurement between Instruments (Master-Slave or Synchronous Polled Modes) • TCP/IP interfaces to instruments to enable distributed processing • Supports remote process control and monitoring. August 13 -17 2001 Richey-Mc. Ivor-Sandwith Coordinate Measurement System Committee Albuquerque, New Mexico

Computer Aided Design, Manufacturing & Measurement Integration Project Specifics • Using a 3 D CAD model; build components onto a wing spar web in tolerance with minimal tooling and CAMS equipment • CAMS equipment consisted of two different manufacturers laser trackers and a PCMM • “Tooling” consisted of movable steel stanchions and wooden wedges August 13 -17 2001 Richey-Mc. Ivor-Sandwith Coordinate Measurement System Committee Albuquerque, New Mexico

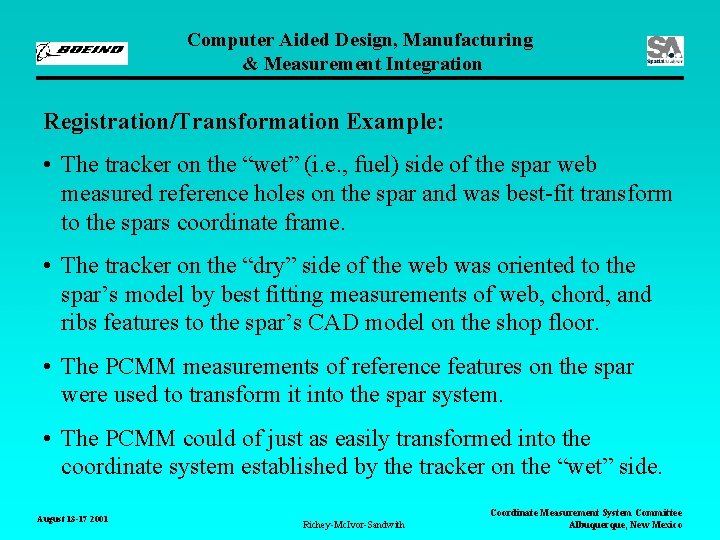
Computer Aided Design, Manufacturing & Measurement Integration Registration/Transformation Example: • The tracker on the “wet” (i. e. , fuel) side of the spar web measured reference holes on the spar and was best-fit transform to the spars coordinate frame. • The tracker on the “dry” side of the web was oriented to the spar’s model by best fitting measurements of web, chord, and ribs features to the spar’s CAD model on the shop floor. • The PCMM measurements of reference features on the spar were used to transform it into the spar system. • The PCMM could of just as easily transformed into the coordinate system established by the tracker on the “wet” side. August 13 -17 2001 Richey-Mc. Ivor-Sandwith Coordinate Measurement System Committee Albuquerque, New Mexico

Computer Aided Design, Manufacturing & Measurement Integration August 13 -17 2001 Richey-Mc. Ivor-Sandwith Coordinate Measurement System Committee Albuquerque, New Mexico

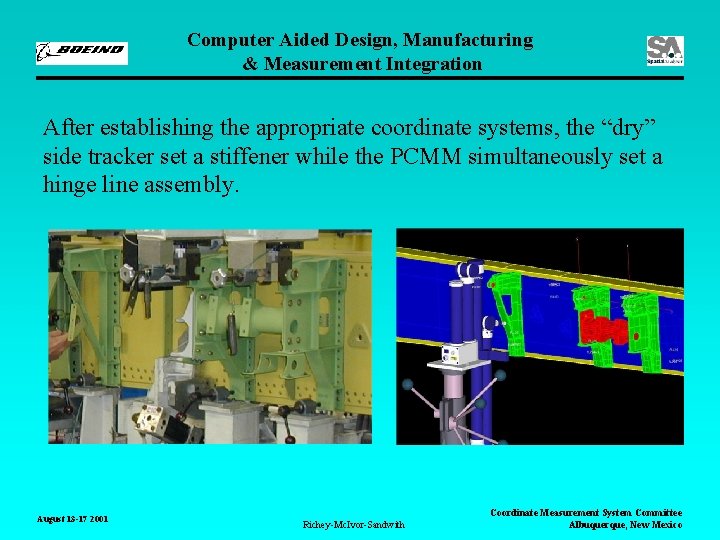
Computer Aided Design, Manufacturing & Measurement Integration After establishing the appropriate coordinate systems, the “dry” side tracker set a stiffener while the PCMM simultaneously set a hinge line assembly. August 13 -17 2001 Richey-Mc. Ivor-Sandwith Coordinate Measurement System Committee Albuquerque, New Mexico

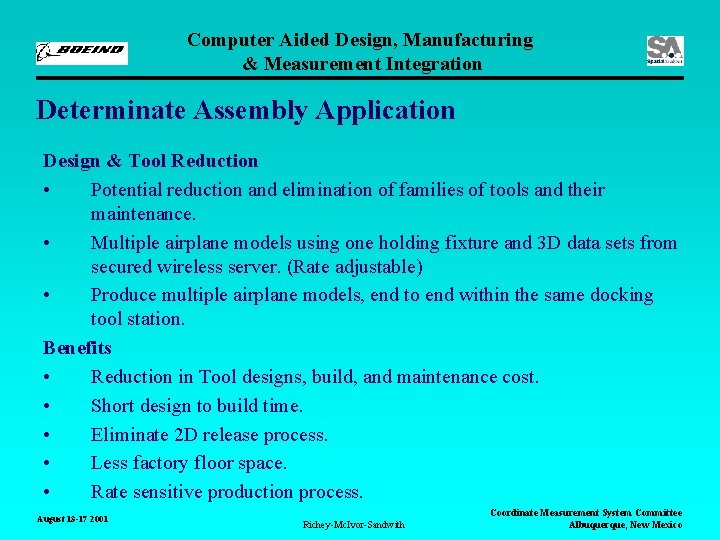
Computer Aided Design, Manufacturing & Measurement Integration Determinate Assembly Application Design & Tool Reduction • Potential reduction and elimination of families of tools and their maintenance. • Multiple airplane models using one holding fixture and 3 D data sets from secured wireless server. (Rate adjustable) • Produce multiple airplane models, end to end within the same docking tool station. Benefits • Reduction in Tool designs, build, and maintenance cost. • Short design to build time. • Eliminate 2 D release process. • Less factory floor space. • Rate sensitive production process. August 13 -17 2001 Richey-Mc. Ivor-Sandwith Coordinate Measurement System Committee Albuquerque, New Mexico

Computer Aided Design, Manufacturing & Measurement Integration Aft Pressure Bulkhead Assembly Simulation August 13 -17 2001 Richey-Mc. Ivor-Sandwith Coordinate Measurement System Committee Albuquerque, New Mexico

Computer Aided Design, Manufacturing & Measurement Integration Summary CAD -> Design • • By-pass the 2 D drawing release process Smart DA Tool applications and wireless real-time location of CAD data to factory Use of full production part assembly tolerances “embedded CAD attributes” Compress Design to Build cycle times CAMS -> Produce & Measure Anywhere • • • Perform Tool Routines with the tool in the loaded condition for sustaining programs Fleet Support and filed maintenance Wireless data between the DB and factory floor Rate adjustable Determinate Assembly Smart Tool docking stations Integrate "Key Characteristics" from the production part, into the & build plans CAD -> Analysis • • Common web enabled database for Internal/External Supplier Provide database foundation for reduction in product variability and work repetition Statistical Process Control, focus on unstable features to drive out root cause Information, Utilized by all organizations 24/7 August 13 -17 2001 Richey-Mc. Ivor-Sandwith Coordinate Measurement System Committee Albuquerque, New Mexico

Computer Aided Design, Manufacturing & Measurement Integration References: Boeing Team Members: Michael Richey, CATIA LEAD Instructor Rob Mc. Ivor 777 Tool Construction New River Kinematics Team Members: Scott Sandwith August 13 -17 2001 Richey-Mc. Ivor-Sandwith Coordinate Measurement System Committee Albuquerque, New Mexico