
Compost Basics Home Composting Workshop Todays Workshop Leaders
Compost Basics Home Composting Workshop Today’s Workshop Leaders: Melanie Burgess Bridget Ballatori Master Composters Santa Clara County - Composting Education Program
Objectives • Learn the basic processes for: – Backyard Composting – Grasscycling – Vermicomposting • Enable you to: – Decide which composting method(s) is/are appropriate for you & your home – Create a plan to start composting or expand/improve your current composting system – Find additional composting resources 2
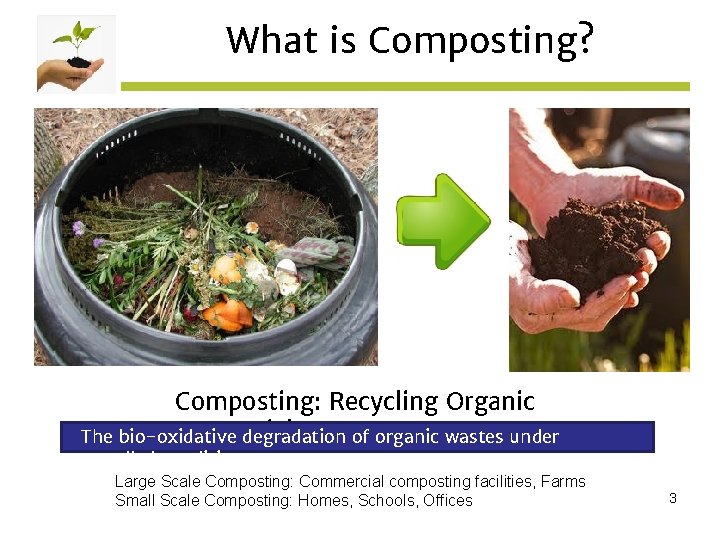
What is Composting? Composting Recycling organic materials Composting: Recycling Organic Materials The bio-oxidative degradation of organic wastes under controlled conditions Large Scale Composting: Commercial composting facilities, Farms Small Scale Composting: Homes, Schools, Offices 3
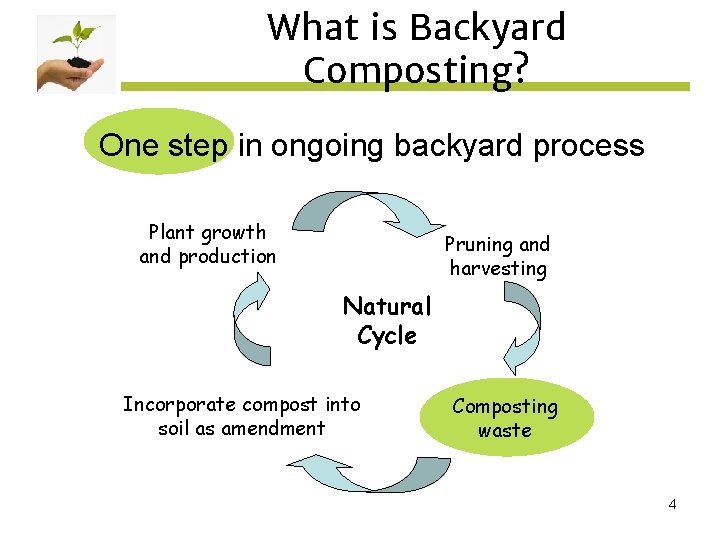
What is Backyard Composting? One step in ongoing backyard process Plant growth and production Pruning and harvesting Natural Cycle Incorporate compost into soil as amendment Composting waste 4
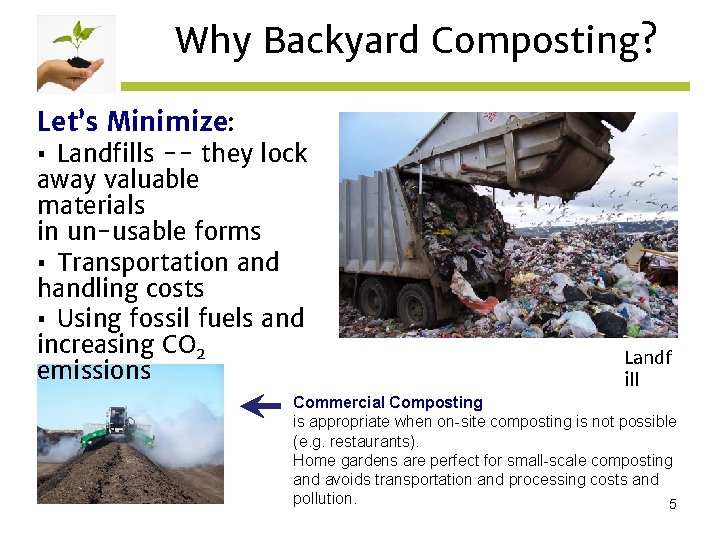
Why Backyard Composting? Let’s Minimize: ▪ Landfills -- they lock away valuable materials in un-usable forms ▪ Transportation and handling costs ▪ Using fossil fuels and increasing CO 2 emissions Landf ill Commercial Composting is appropriate when on-site composting is not possible (e. g. restaurants). Home gardens are perfect for small-scale composting and avoids transportation and processing costs and pollution. 5
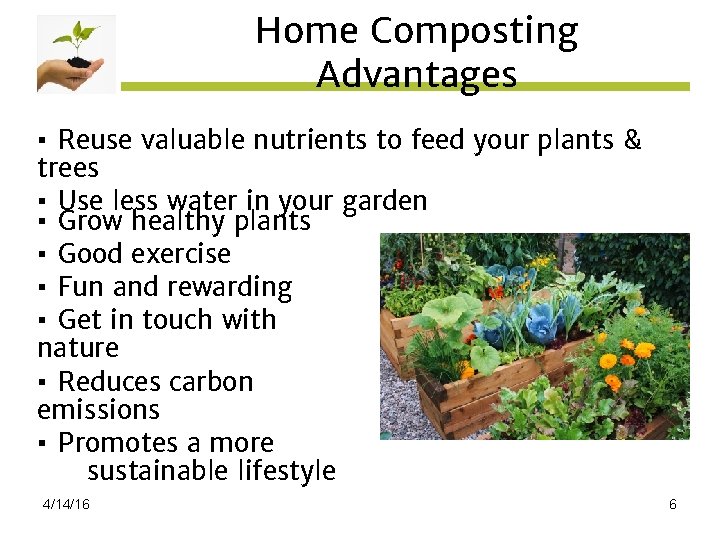
Home Composting Advantages ▪ Reuse valuable nutrients to feed your plants & trees ▪ Use less water in your garden ▪ Grow healthy plants ▪ Good exercise ▪ Fun and rewarding ▪ Get in touch with nature ▪ Reduces carbon emissions ▪ Promotes a more sustainable lifestyle 4/14/16 6
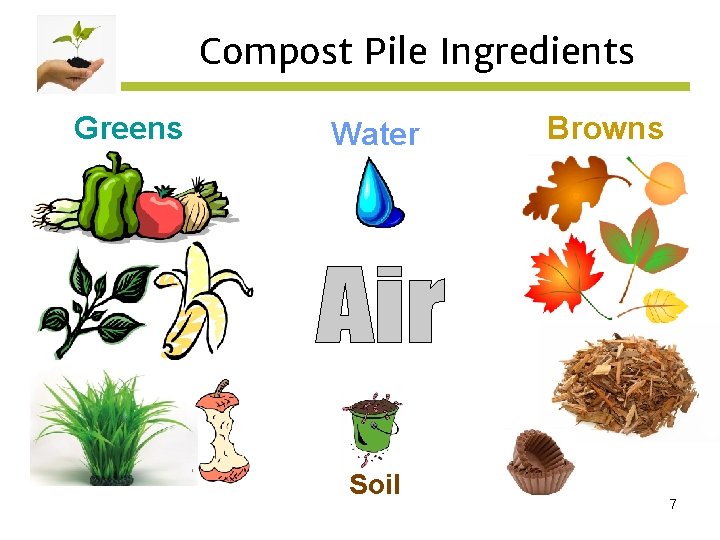
Compost Pile Ingredients Greens Water Soil Browns 7
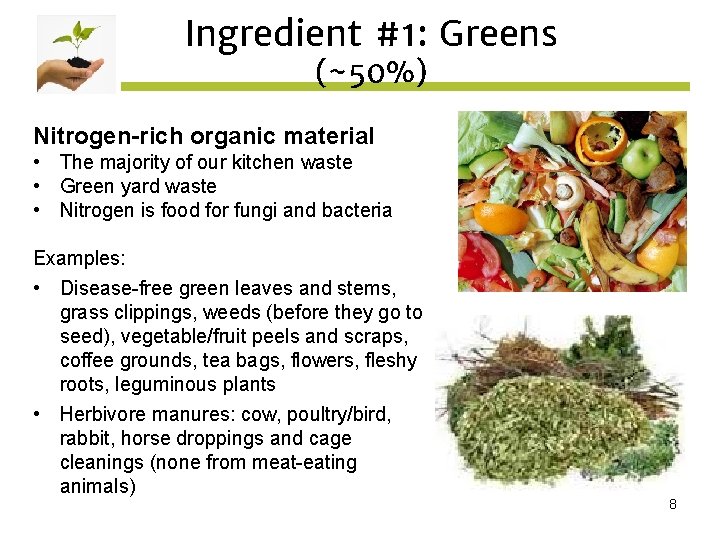
Ingredient #1: Greens (~50%) Nitrogen-rich organic material • • • The majority of our kitchen waste Green yard waste Nitrogen is food for fungi and bacteria Examples: • Disease-free green leaves and stems, grass clippings, weeds (before they go to seed), vegetable/fruit peels and scraps, coffee grounds, tea bags, flowers, fleshy roots, leguminous plants • Herbivore manures: cow, poultry/bird, rabbit, horse droppings and cage cleanings (none from meat-eating animals) 8
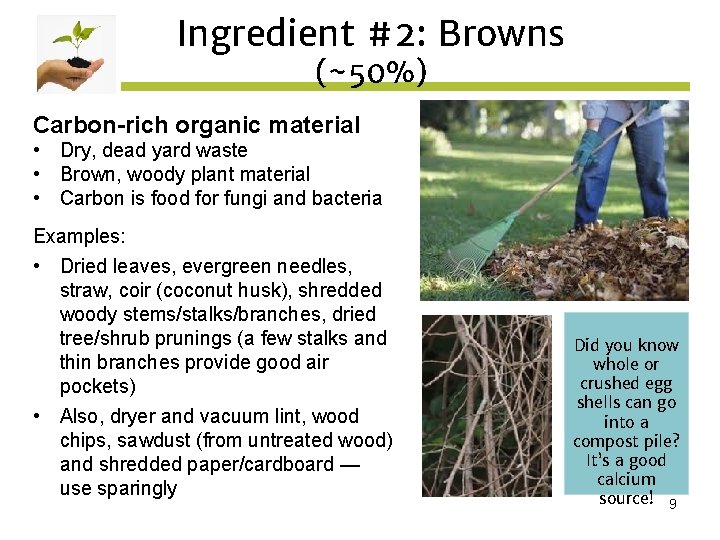
Ingredient #2: Browns (~50%) Carbon-rich organic material • • • Dry, dead yard waste Brown, woody plant material Carbon is food for fungi and bacteria Examples: • Dried leaves, evergreen needles, straw, coir (coconut husk), shredded woody stems/stalks/branches, dried tree/shrub prunings (a few stalks and thin branches provide good air pockets) • Also, dryer and vacuum lint, wood chips, sawdust (from untreated wood) and shredded paper/cardboard — use sparingly Did you know whole or crushed egg shells can go into a compost pile? It’s a good calcium source! 9
Ingredients #3 - #5 Ingredient #3 Air - Air is necessary for microorganisms to thrive and to breakdown the organic materials into compost. - A compost pile needs aeration by turning or fluffing. Ingredient #4 Water - Moisture allows microorganisms be active and to move around. - Moisture is easier to regulate in bins that are contained and have lids. - Your pile should be kept as moist as a wrung-out sponge. Ingredient #5 Soil - Not always necessary! Soil contains very helpful microorganisms (bacteria and fungi) but most greens and browns have them also. If dirt is added, only a small quantity is needed. Too much dirt makes the compost pile heavier to turn. 10
What to Avoid • No animal products - meats, bones, fish Egg shells are OK • No dairy products: cheese, milk, yogurt • Be careful with breads (because of molds) • No pet wastes or litter from carnivores (e. g. cat or dog feces) • • No oils or plastics No wood ash or charcoal No diseased plants No plants treated with herbicides No toxic materials 11
Ingredient Tips These items may spread undesirable plants or have negative effects when using your compost: • Bermuda grass • Bind weed (wild morning glory) • Oleander or any weed with seed heads or persistent roots (ok if hot composting higher than 140 o. F) • Ivy (ok if dried and finely chopped) • Thorny plants (ok if finely shredded) 12
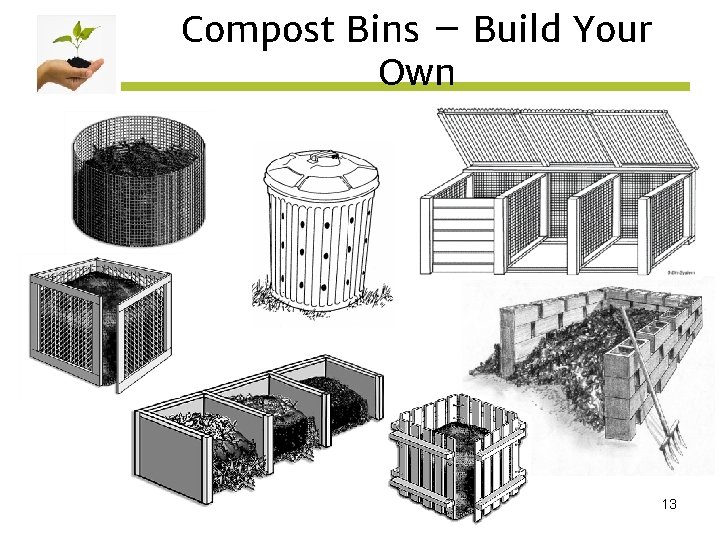
Compost Bins – Build Your Own 13
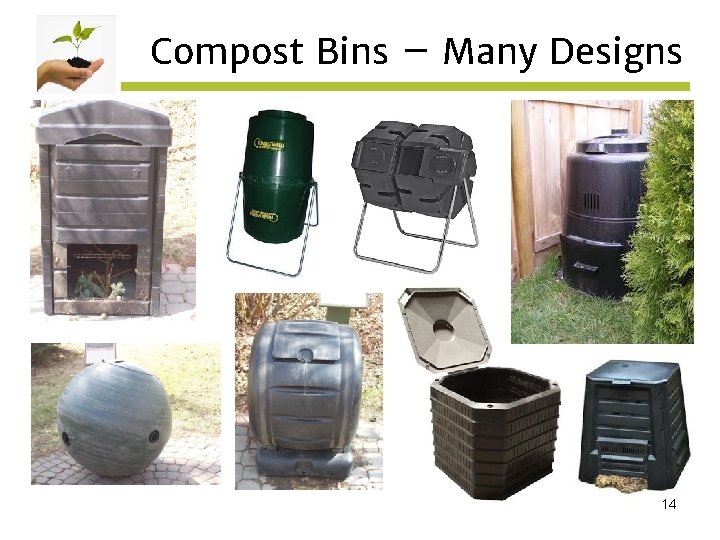
Compost Bins – Many Designs 14
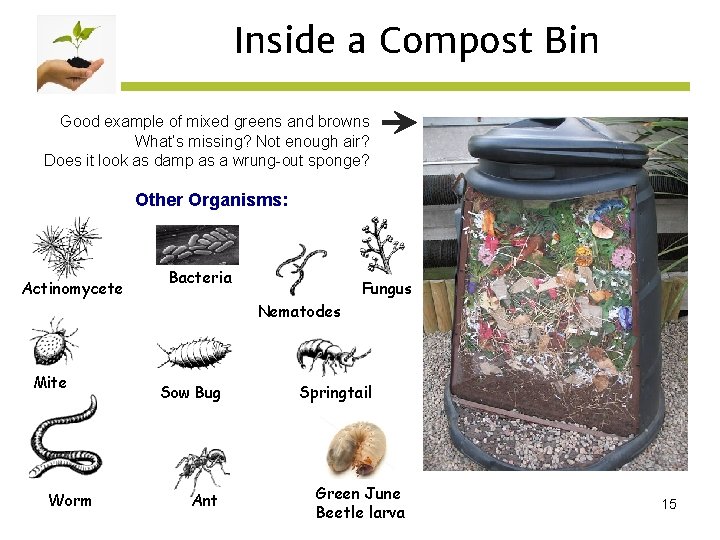
Inside a Compost Bin Good example of mixed greens and browns What’s missing? Not enough air? Does it look as damp as a wrung-out sponge? Other Organisms: Actinomycete Bacteria Fungus Nematodes Mite Worm Sow Bug Ant Springtail Green June Beetle larva 15
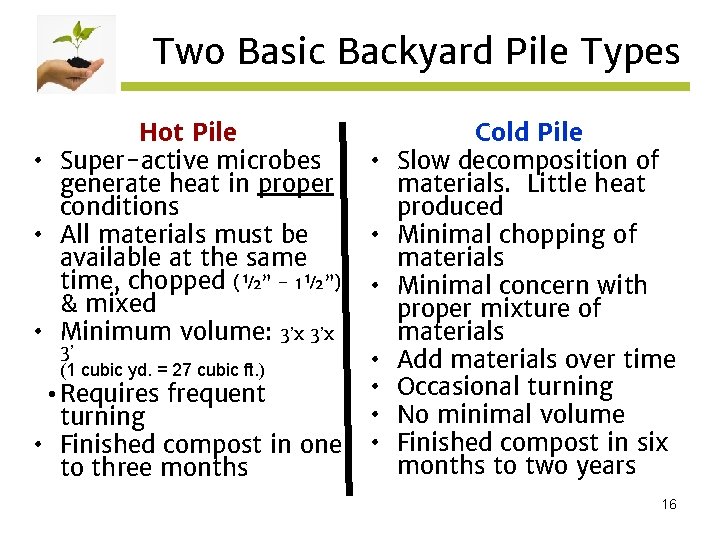
Two Basic Backyard Pile Types Hot Pile • Super-active microbes generate heat in proper conditions • All materials must be available at the same time, chopped (½” - 1½”) & mixed • Minimum volume: 3’x 3’ (1 cubic yd. = 27 cubic ft. ) • Requires frequent turning • Finished compost in one to three months • • Cold Pile Slow decomposition of materials. Little heat produced Minimal chopping of materials Minimal concern with proper mixture of materials Add materials over time Occasional turning No minimal volume Finished compost in six months to two years 16
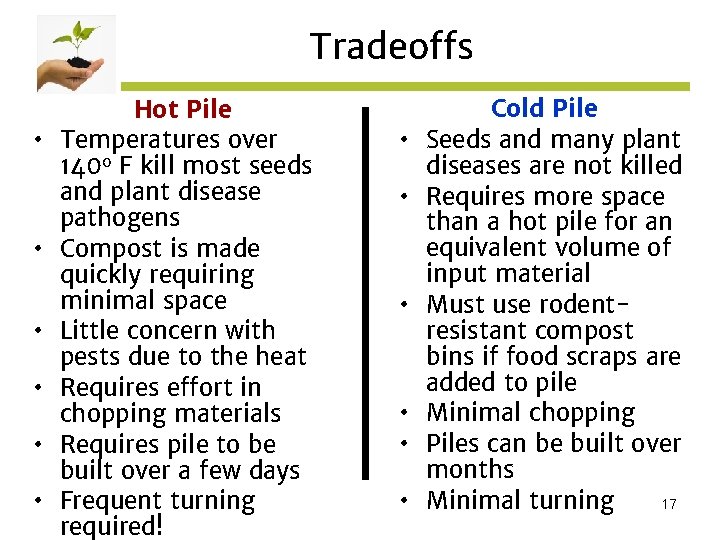
Tradeoffs • • • Hot Pile Temperatures over 140 o F kill most seeds and plant disease pathogens Compost is made quickly requiring minimal space Little concern with pests due to the heat Requires effort in chopping materials Requires pile to be built over a few days Frequent turning required! • • • Cold Pile Seeds and many plant diseases are not killed Requires more space than a hot pile for an equivalent volume of input material Must use rodentresistant compost bins if food scraps are added to pile Minimal chopping Piles can be built over months Minimal turning 17
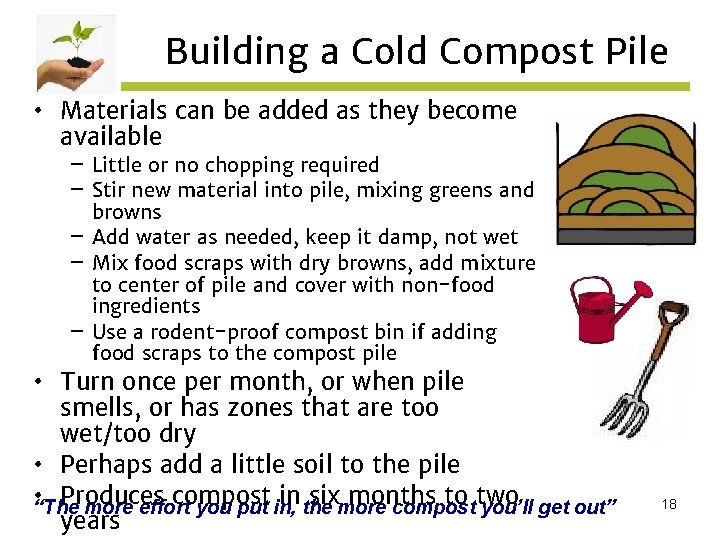
Building a Cold Compost Pile • Materials can be added as they become available – Little or no chopping required – Stir new material into pile, mixing greens and browns – Add water as needed, keep it damp, not wet – Mix food scraps with dry browns, add mixture to center of pile and cover with non-food ingredients – Use a rodent-proof compost bin if adding food scraps to the compost pile • Turn once per month, or when pile smells, or has zones that are too wet/too dry • Perhaps add a little soil to the pile • “The Produces compost in six months to two more effort you put in, the more compost you’ll get out” years 18
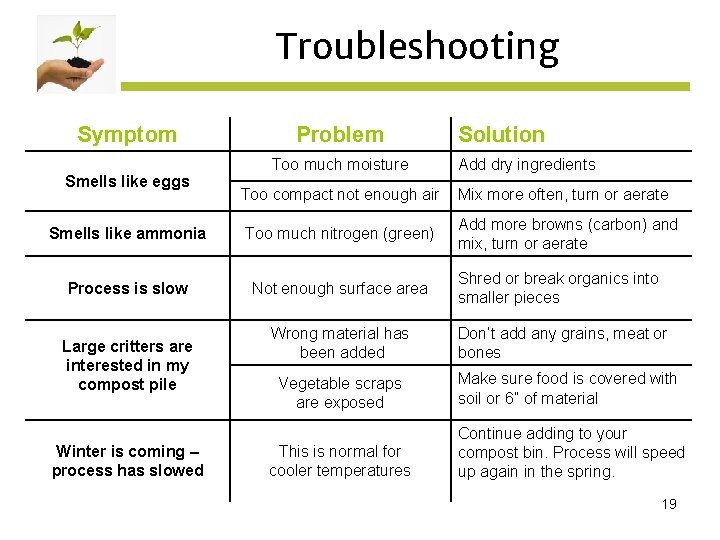
Troubleshooting Symptom Smells like eggs Problem Too much moisture Too compact not enough air Solution Add dry ingredients Mix more often, turn or aerate Add more browns (carbon) and mix, turn or aerate Smells like ammonia Too much nitrogen (green) Process is slow Not enough surface area Shred or break organics into smaller pieces Wrong material has been added Don’t add any grains, meat or bones Large critters are interested in my compost pile Winter is coming – process has slowed Vegetable scraps are exposed Make sure food is covered with soil or 6” of material This is normal for cooler temperatures Continue adding to your compost bin. Process will speed up again in the spring. 19
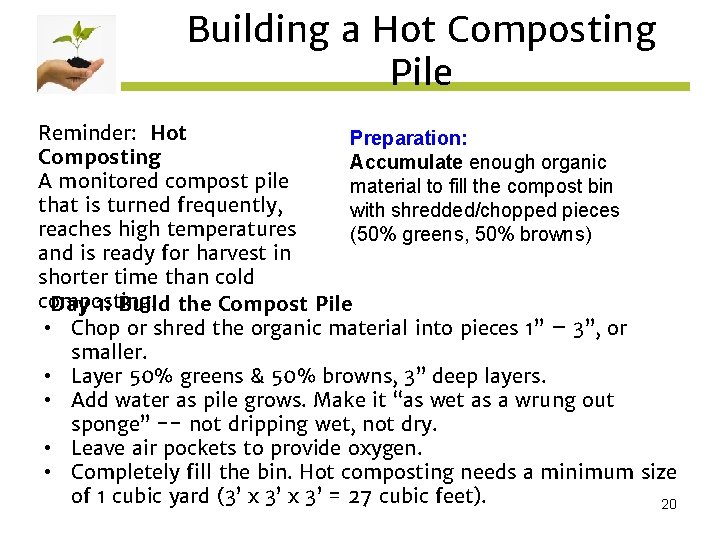
Building a Hot Composting Pile Reminder: Hot Preparation: Composting Accumulate enough organic A monitored compost pile material to fill the compost bin that is turned frequently, with shredded/chopped pieces reaches high temperatures (50% greens, 50% browns) and is ready for harvest in shorter time than cold composting. Day 1: Build the Compost Pile • Chop or shred the organic material into pieces 1” – 3”, or smaller. • Layer 50% greens & 50% browns, 3” deep layers. • Add water as pile grows. Make it “as wet as a wrung out sponge” -- not dripping wet, not dry. • Leave air pockets to provide oxygen. • Completely fill the bin. Hot composting needs a minimum size of 1 cubic yard (3’ x 3’ = 27 cubic feet). 20
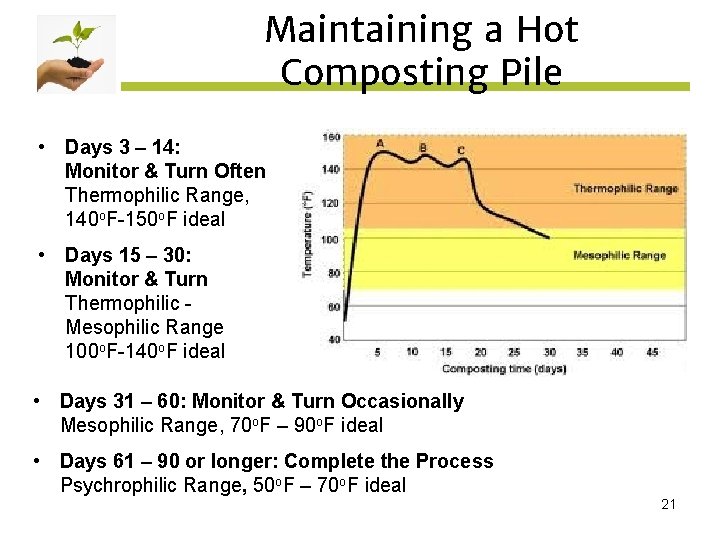
Maintaining a Hot Composting Pile • Days 3 – 14: Monitor & Turn Often Thermophilic Range, 140 o. F-150 o. F ideal • Days 15 – 30: Monitor & Turn Thermophilic Mesophilic Range 100 o. F-140 o. F ideal • Days 31 – 60: Monitor & Turn Occasionally Mesophilic Range, 70 o. F – 90 o. F ideal • Days 61 – 90 or longer: Complete the Process Psychrophilic Range, 50 o. F – 70 o. F ideal 21
Maintaining a Hot Composting Pile Days 3 – 14: Thermophilic Range Check temperature in several locations. If it doesn’t heat up, check green/brown mix, moisture level and air exposure. The ideal temperature is 140 o. F-150 o. F uniformly throughout the pile. Avoid temperatures exceeding 160 o. F (creates ash which is low in nutrients). Turn compost pile a minimum of once per week with a spade or fork, ideally every 2 -3 days for the first 2 weeks. If turning is not possible, use an aeration tool to allow oxygen and water to enter the pile. It’s normal for the pile to be steaming. While turning, look for dry spots, add water as needed (normally a pile needs some water at this stage). Make it as wet as a wrung out sponge - not dripping wet, not dry. Days 15 – 30: Thermophilic - Mesophilic Range Check temperature of compost pile in several locations. The ideal temperature is 140 o. F-150 o. F at the beginning, then approximately 100 o. F towards the end of 30 days (uniformly throughout the pile). If it’s not, check moisture and air levels. Turn compost pile a minimum of once per week. If turning is not 22 possible, use the aeration tool to allow oxygen and water to enter the
Maintaining a Hot Composting Pile Days 31 – 60: Mesophilic Range Turn the compost pile every 2 - 3 weeks. If turning is not possible, use an aeration tool to allow oxygen and water to enter the pile. The temperature should be between 70 o. F – 100 o. F. While turning, look for dry spots, add water as needed (normally needs a small amount of water at this stage). The pile will not be steaming, but still warm to the touch. Bugs and worms may join in to assist the decomposition process. Days 61 – 90 or longer: Completing the Process (Psychrophilic Range) Let the compost mature. The temperature should be approximately 50 o. F – 70 o. F (depends on the ambient temperature). Use an aeration tool to allow oxygen to enter the pile. Add water if needed (normally not needed). Adapt the “recipe”to fit your backyard, materials on hand, time available and how the composting process is progressing. It’s like cooking or 23 baking, each time you do it -- you can get a different result.
Troubleshooting a Hot Compost Pile Why Won’t My Pile Get Hot? • Not enough volume – A small yard/garden generates about 1 - 3 cubic ft. of material per week (varies by season). 27 cubic ft. is needed to initiate a hot compost pile. • Materials not chopped fine enough • – Ideal size for raw materials is 0. 5” – 1. 5” Improper C: N ratio (25 -30: 1 is ideal) – If there’s too much nitrogen, the pile quickly “burns out”, cools, and becomes soggy. – If too little nitrogen, the pile never heats up. • Not enough water – A dry pile decays very slowly, if at all. • Not enough oxygen – All the oxygen inside the pile has been used up by the rapid decomposition process. Turn the pile to aerate it. 24
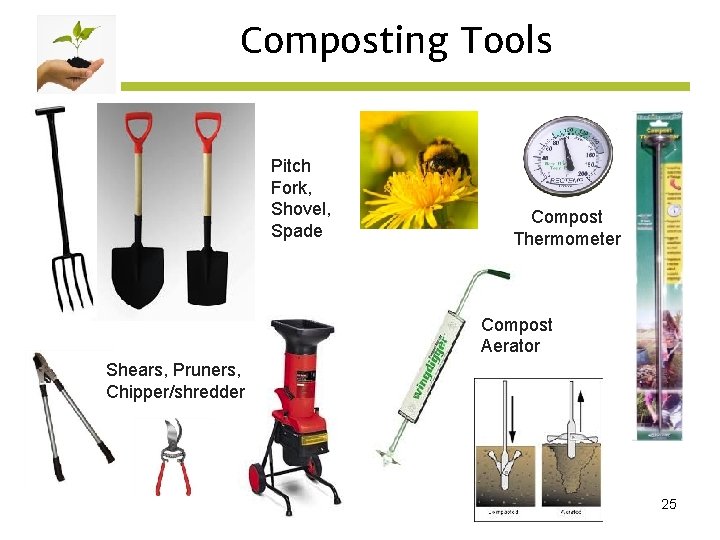
Composting Tools Pitch Fork, Shovel, Spade Compost Thermometer Compost Aerator Shears, Pruners, Chipper/shredder 25
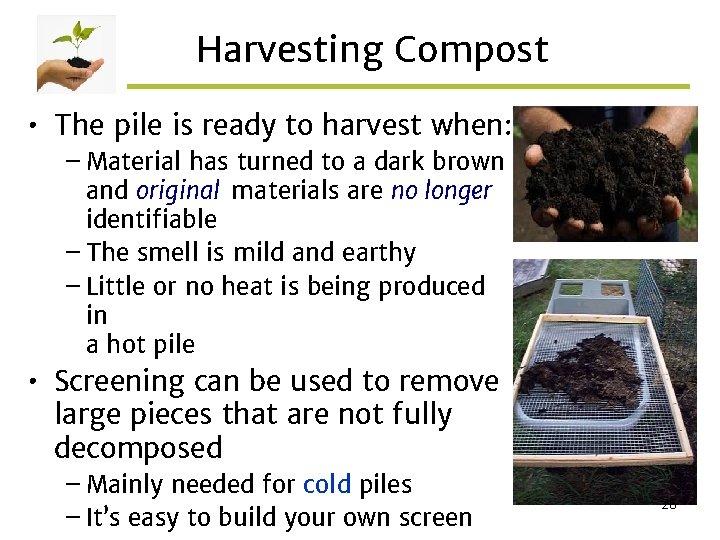
Harvesting Compost • The pile is ready to harvest when: – Material has turned to a dark brown and original materials are no longer identifiable – The smell is mild and earthy – Little or no heat is being produced in a hot pile • Screening can be used to remove large pieces that are not fully decomposed – Mainly needed for cold piles – It’s easy to build your own screen 26
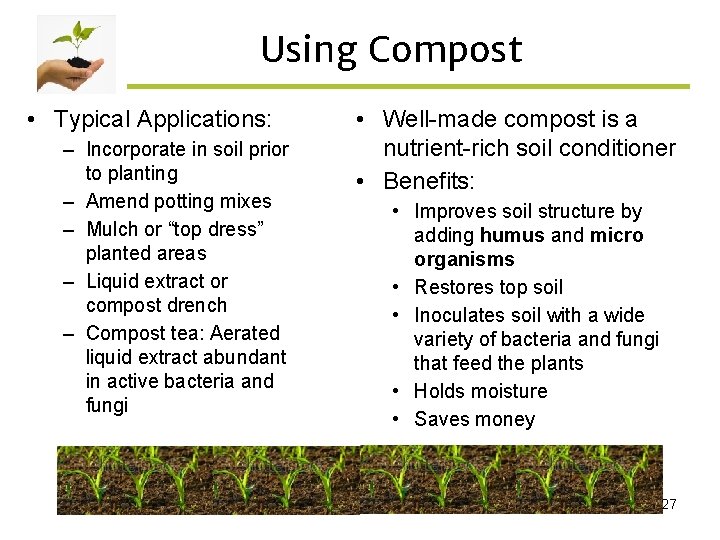
Using Compost • Typical Applications: – Incorporate in soil prior to planting – Amend potting mixes – Mulch or “top dress” planted areas – Liquid extract or compost drench – Compost tea: Aerated liquid extract abundant in active bacteria and fungi • Well-made compost is a nutrient-rich soil conditioner • Benefits: • Improves soil structure by adding humus and micro organisms • Restores top soil • Inoculates soil with a wide variety of bacteria and fungi that feed the plants • Holds moisture • Saves money 27
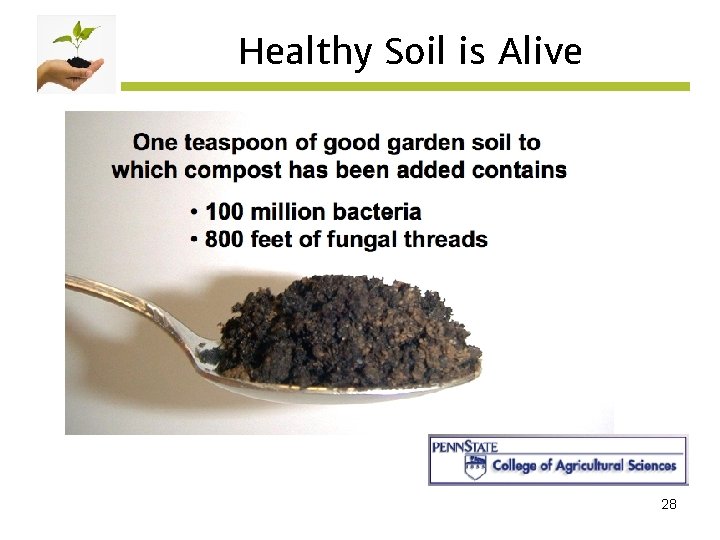
Healthy Soil is Alive 28
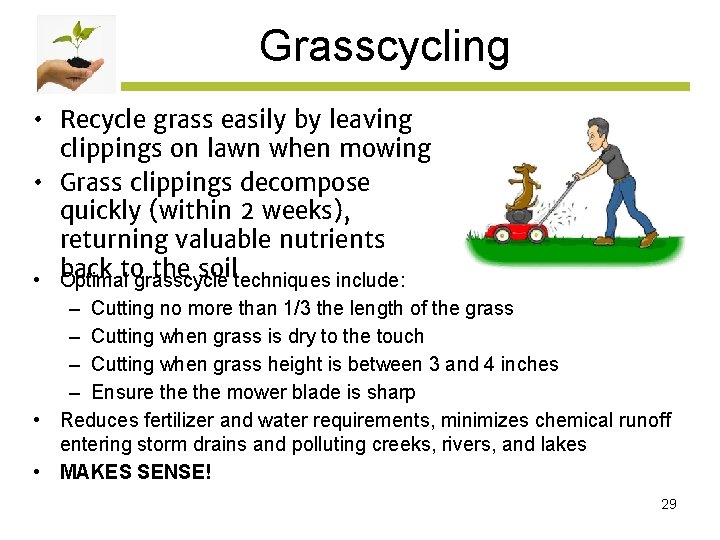
Grasscycling • Recycle grass easily by leaving clippings on lawn when mowing • Grass clippings decompose quickly (within 2 weeks), returning valuable nutrients back to the soil • Optimal grasscycle techniques include: • • – Cutting no more than 1/3 the length of the grass – Cutting when grass is dry to the touch – Cutting when grass height is between 3 and 4 inches – Ensure the mower blade is sharp Reduces fertilizer and water requirements, minimizes chemical runoff entering storm drains and polluting creeks, rivers, and lakes MAKES SENSE! 29
Vermicomposting a. k. a Worm Composting
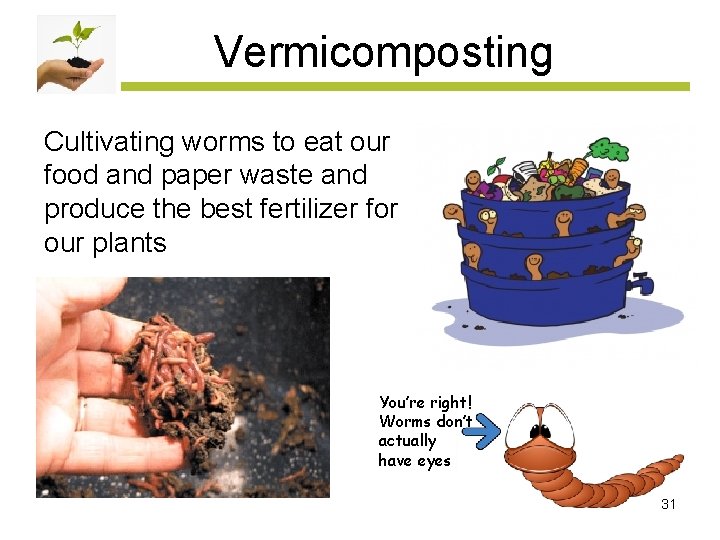
Vermicomposting Cultivating worms to eat our food and paper waste and produce the best fertilizer for our plants You’re right! Worms don’t actually have eyes 31
Vermicomposting • Worm composting is neat, easy, and odorless – when properly maintained • A great way to turn hard-to-dispose food waste and some paper waste into fertilizer • Can be done indoors, in garage, on the patio or porch, or in any moderate temperature place (50ºF - 90ºF) • Compost year round • Limited space is ok 32
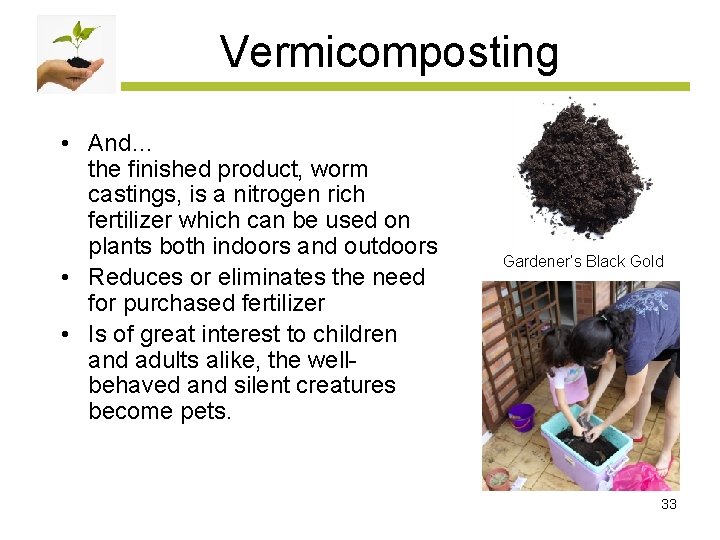
Vermicomposting • And… the finished product, worm castings, is a nitrogen rich fertilizer which can be used on plants both indoors and outdoors • Reduces or eliminates the need for purchased fertilizer • Is of great interest to children and adults alike, the wellbehaved and silent creatures become pets. Gardener’s Black Gold 33
Worms for Composting • • Thousands of worm species live in the soil, we find some in our gardens and compost piles Only a few species are feasible for vermicomposting: 1) 2) 3) 4) 5) 6) • Red Wiggler (Eisenia fetida), aka brandling worm, tiger worm Red Tiger (Eisenia andrei), often confused with red wiggler Blue Worm (Perionyx excavatus) for tropical climate Red Worm or Red Earthworm (Lumbricus rubellus) African Nightcrawler (Eudrilus engeniae) European Nightcrawler (Eisenia hortensis) Best compost worm for our area is the Red Wiggler 34
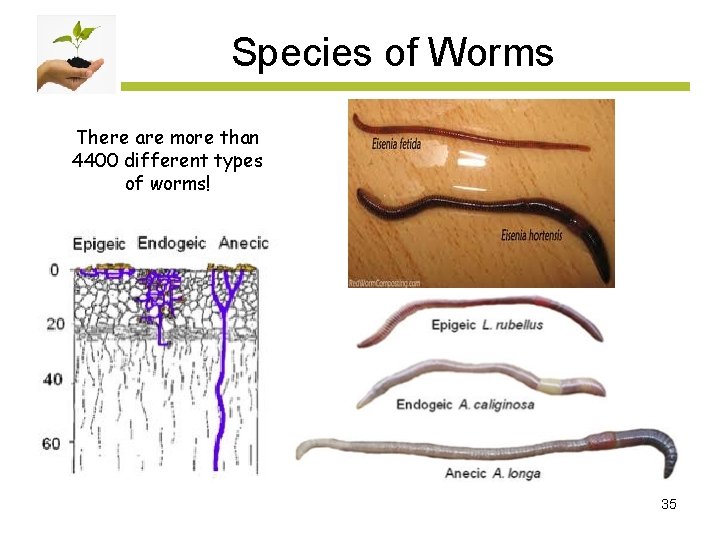
Species of Worms There are more than 4400 different types of worms! 35
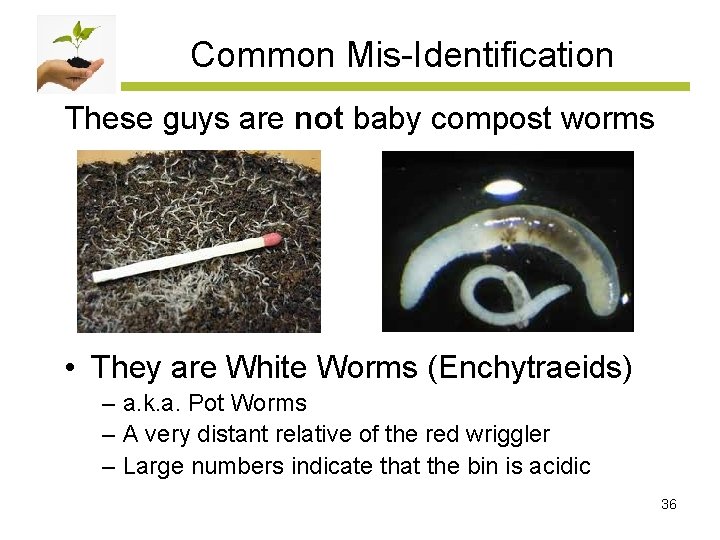
Common Mis-Identification These guys are not baby compost worms • They are White Worms (Enchytraeids) – a. k. a. Pot Worms – A very distant relative of the red wriggler – Large numbers indicate that the bin is acidic 36
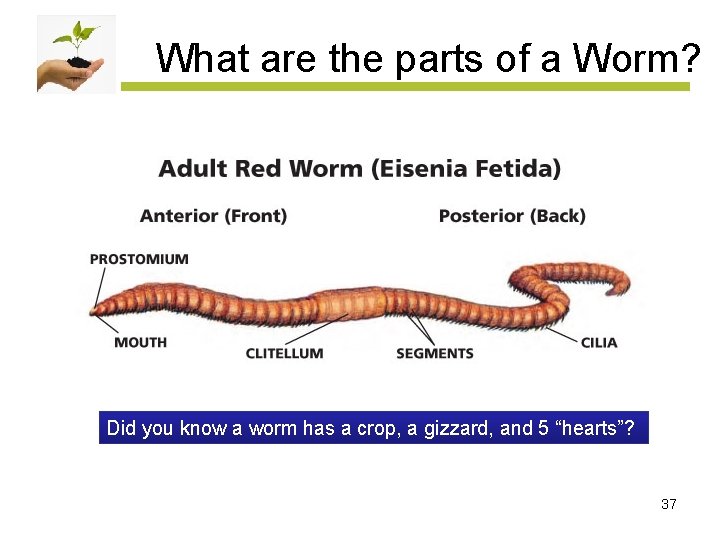
What are the parts of a Worm? Did you know a worm has a crop, a gizzard, and 5 “hearts”? 37
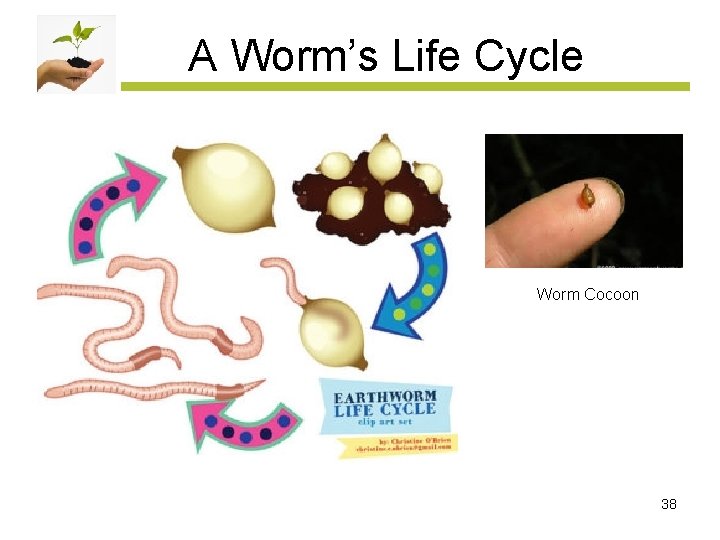
A Worm’s Life Cycle Worm Cocoon 38
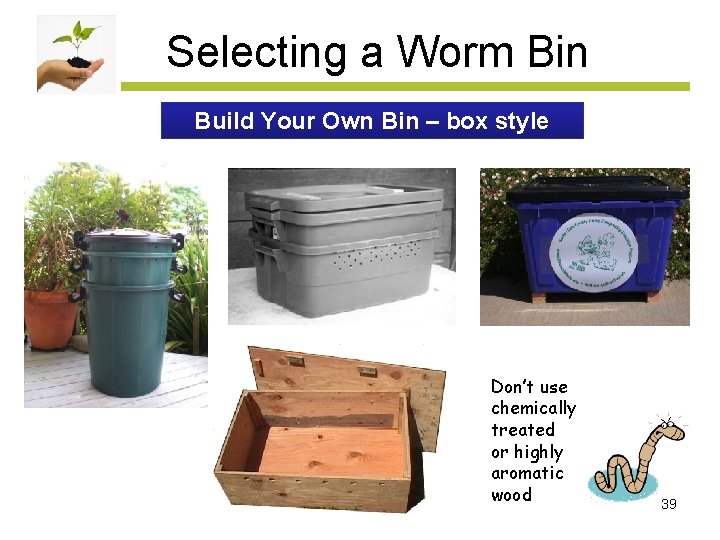
Selecting a Worm Bin Build Your Own Bin – box style Don’t use chemically treated or highly aromatic wood 39
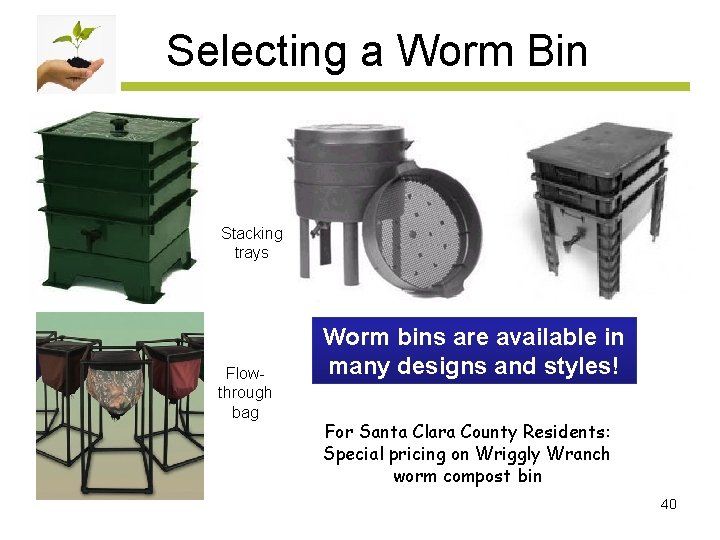
Selecting a Worm Bin Stacking trays Flowthrough bag Worm bins are available in many designs and styles! For Santa Clara County Residents: Special pricing on Wriggly Wranch worm compost bin 40
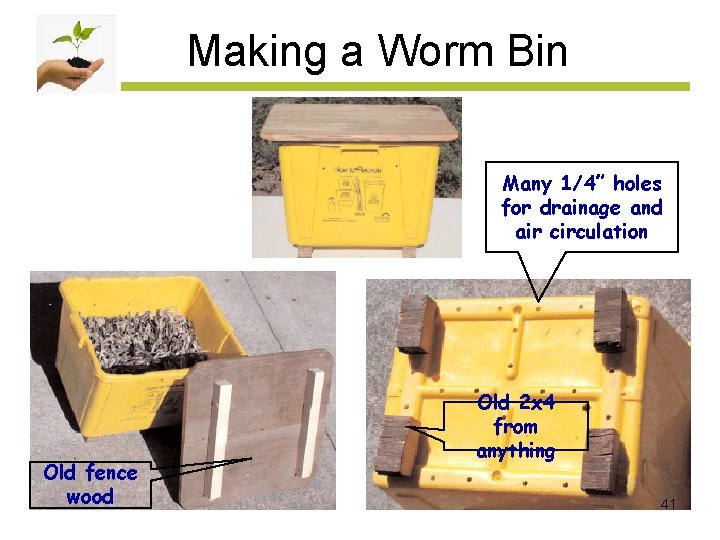
Making a Worm Bin Many 1/4” holes for drainage and air circulation Old fence wood Old 2 x 4 from anything 41
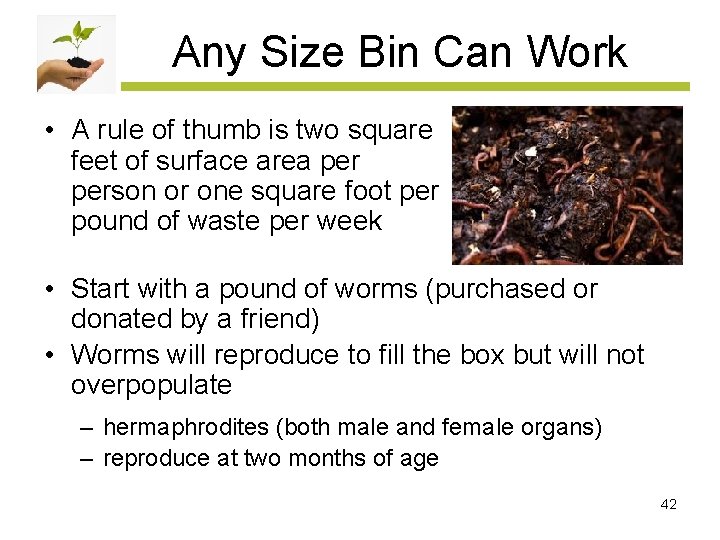
Any Size Bin Can Work • A rule of thumb is two square feet of surface area person or one square foot per pound of waste per week • Start with a pound of worms (purchased or donated by a friend) • Worms will reproduce to fill the box but will not overpopulate – hermaphrodites (both male and female organs) – reproduce at two months of age 42
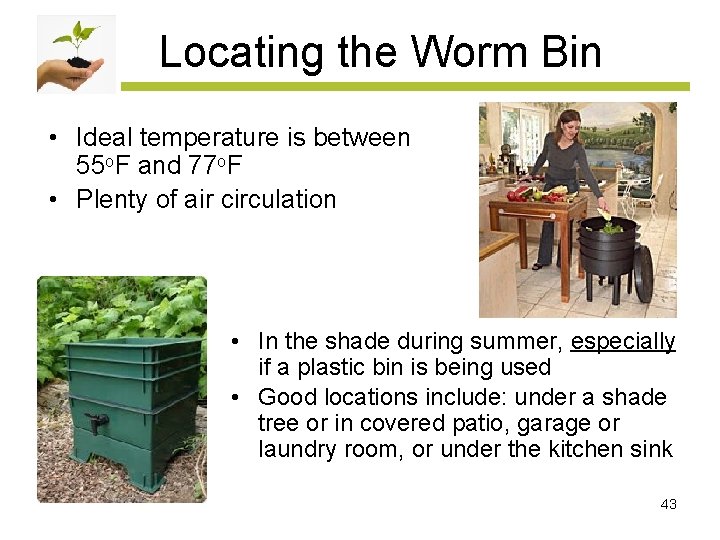
Locating the Worm Bin • Ideal temperature is between 55 o. F and 77 o. F • Plenty of air circulation • In the shade during summer, especially if a plastic bin is being used • Good locations include: under a shade tree or in covered patio, garage or laundry room, or under the kitchen sink 43
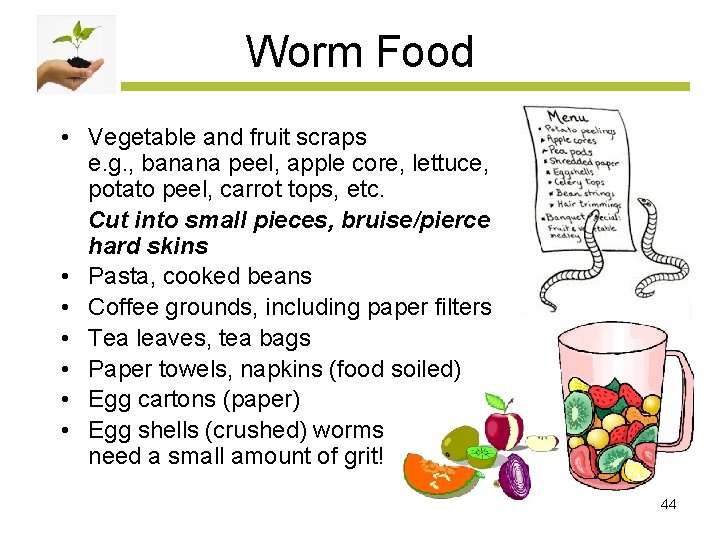
Worm Food • Vegetable and fruit scraps e. g. , banana peel, apple core, lettuce, potato peel, carrot tops, etc. Cut into small pieces, bruise/pierce hard skins • Pasta, cooked beans • Coffee grounds, including paper filters • Tea leaves, tea bags • Paper towels, napkins (food soiled) • Egg cartons (paper) • Egg shells (crushed) worms need a small amount of grit! 44
What to Avoid Animal products - meats, bones, fish, etc. Dairy products - cheese, milk, yogurt, etc. Pet wastes (from carnivores) Oils or plastics (petroleum products) Be careful with breads (for folks with mold allergies) Avoid seeds and nuts with hard hulls & shells – they break down slowly and may sprout later when conditions are right Avoid large amount of acidic or pungent produce – lemon, lime, orange, ginger, onion, garlic, etc. Yard clippings - may include herbicides, pesticides; branches & woody stems break down slowly, soft ‘edible’ leaves ok Soil (small amount ok) 45
Bedding Material • Shredded newsprint – Hand-shred or use paper shredder – “Spaghetti” shredder works best, cross-cut shredded paper tends to clump when moist – Avoid glossy inserts • Shredded cardboard – Pizza boxes, cores from paper towel & toilet paper rolls Cardboard is a valuable recyclable material, best in recycle bin – • Shredded office and junk mail paper – Use sparingly, mix with shredded newsprint – Can dry out faster than newsprint, or clump together – Some inks are petroleum-based, best avoided • Dried, partially-decomposed leaves – Avoid leaves that decompose slowly 46
Source of Worms The Worm Dude (San Jose) Jerry Gach – (408) 227 -5267 http: //www. thewormdude. com/ • One pound minimum order Sonoma Valley Worm Farm Worms are safe to ship in (800) 447 -6996 mild temperatures http: //www. sonomavalleyworms. com/index. php • Two pounds minimum order Tips for starting a new worm bin: • Set up the bin, add food & bedding • Wait 1 – 2 weeks before adding worms • Give worms a few days to recover from transportation and adjust to new environment 47
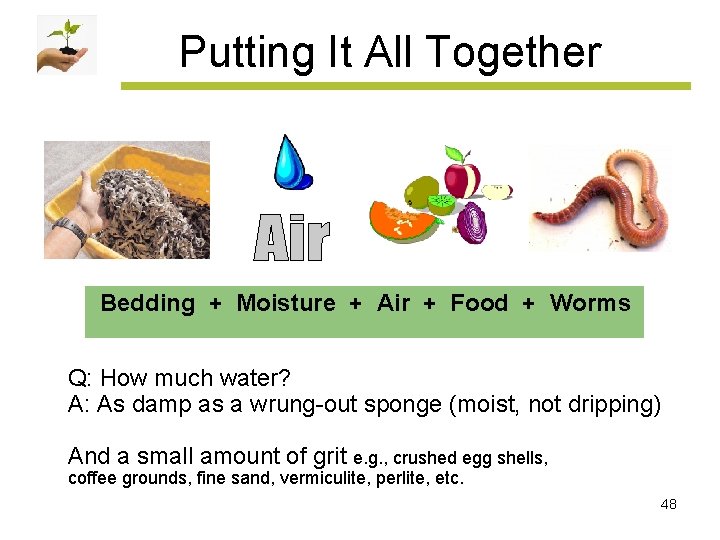
Putting It All Together Bedding + Moisture + Air + Food + Worms Q: How much water? A: As damp as a wrung-out sponge (moist, not dripping) And a small amount of grit e. g. , crushed egg shells, coffee grounds, fine sand, vermiculite, perlite, etc. 48
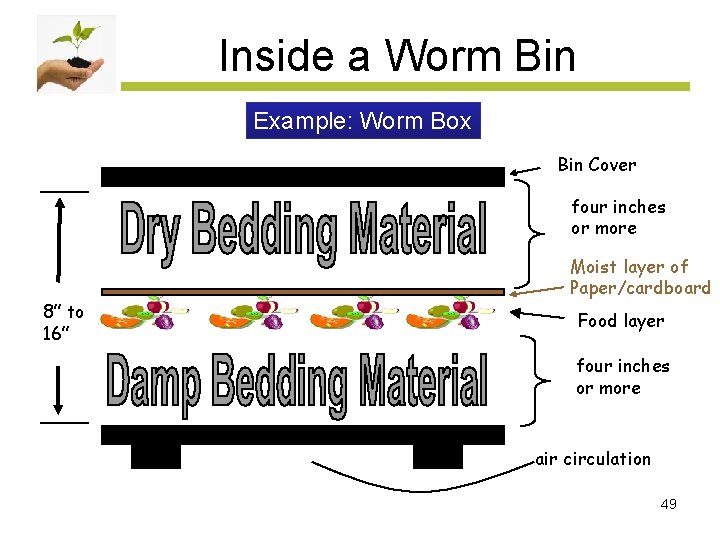
Inside a Worm Bin Example: Worm Box Bin Cover four inches or more 8” to 16” Moist layer of Paper/cardboard Food layer four inches or more air circulation 49
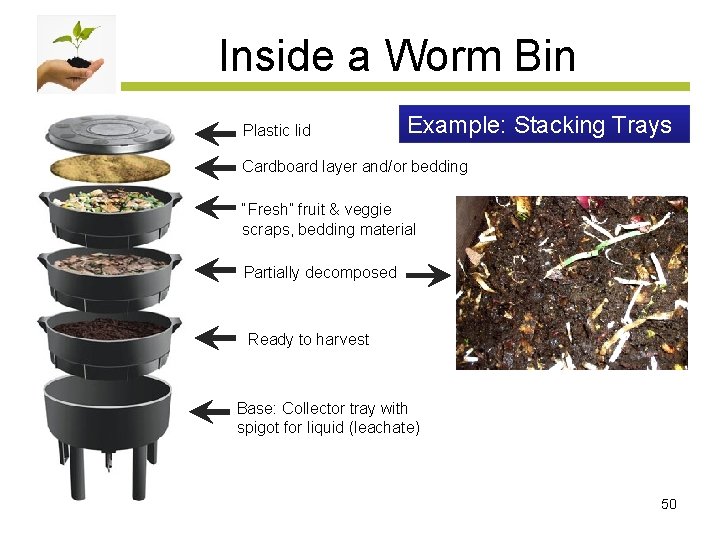
Inside a Worm Bin Plastic lid Example: Stacking Trays Cardboard layer and/or bedding “Fresh” fruit & veggie scraps, bedding material Partially decomposed Ready to harvest Base: Collector tray with spigot for liquid (leachate) 50
Maintaining Your Worm Bin • • • Check weekly (more often if temperatures are very low or very high) Move to a different location if needed Add food if previous batch is being eaten (disappearing) Don’t over-feed! Remove food if there’s too much (smelly) If bedding is dry -- add water (spray bottle) If bin is too moist -- add dry bedding & mix in to absorb Add moist bedding if bedding layer is thin Sprinkle a small amount of grit every month or so Preparing for vacation – Add extra food and moist bedding in thin layers (minimizes anerobic decomposition) and top with a thick layer of bedding – Creative long-lasting food can be: whole apple or potato with a small hole in skin, sprinkling of flour, cereal, raisins, etc. – Add extra moisture in summer time 51
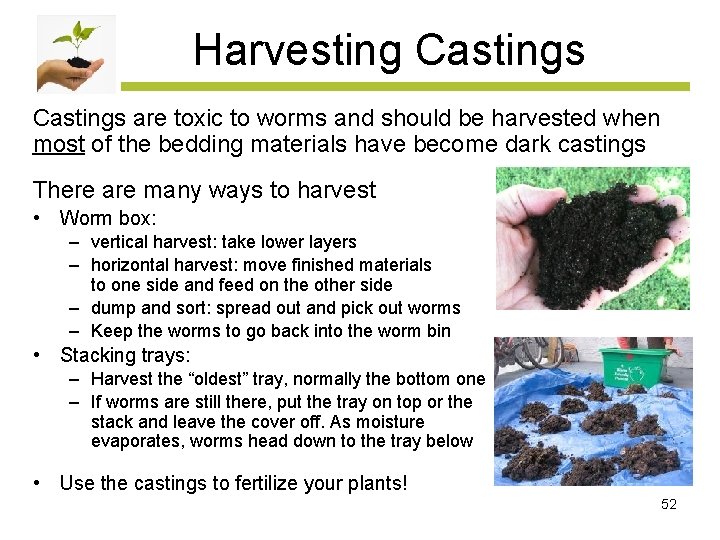
Harvesting Castings are toxic to worms and should be harvested when most of the bedding materials have become dark castings There are many ways to harvest • Worm box: – vertical harvest: take lower layers – horizontal harvest: move finished materials to one side and feed on the other side – dump and sort: spread out and pick out worms – Keep the worms to go back into the worm bin • Stacking trays: – Harvest the “oldest” tray, normally the bottom one – If worms are still there, put the tray on top or the stack and leave the cover off. As moisture evaporates, worms head down to the tray below • Use the castings to fertilize your plants! 52
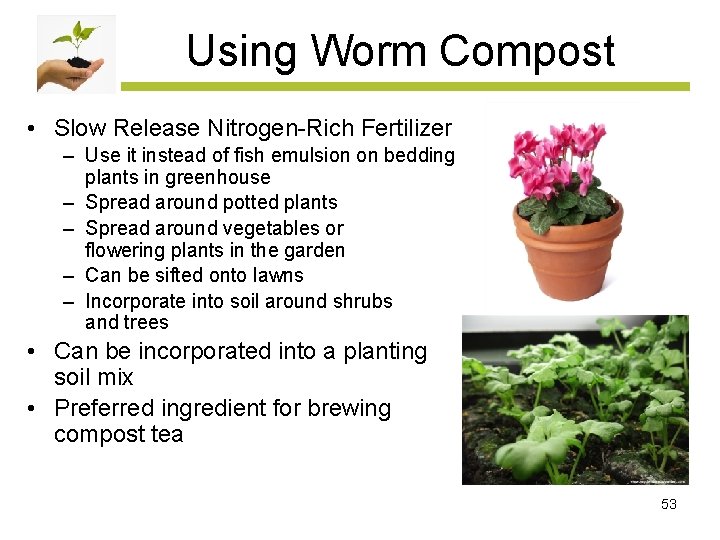
Using Worm Compost • Slow Release Nitrogen-Rich Fertilizer – Use it instead of fish emulsion on bedding plants in greenhouse – Spread around potted plants – Spread around vegetables or flowering plants in the garden – Can be sifted onto lawns – Incorporate into soil around shrubs and trees • Can be incorporated into a planting soil mix • Preferred ingredient for brewing compost tea 53
Troubleshooting a Worm Bin Fruit Flies in Worm Bin Worms Die • • Food scraps not adequately covered ❑ Add four or more inches of dry or slightly moist shredded paper over food scrap layer ❑ Set a bowl of vinegar in the bin on top of the shredded paper • Fruit flies already present in food scraps before adding to bin ❑ Store food scraps in covered container or freezer before adding to the worm bin ❑ ❑ ❑ • • • ❑ Worm box overheated (more than 100°F) common with plastic bins Keep worm bin in shady area Add a few ice cubes for quick cooling Consider using a wood worm bin if adequate shade can’t be found Bedding material has dried out Check moisture when feeding, add extra water on hot, dry days No food scraps have been added for long period of time (weeks/months) Don’t be mean to your pets, feed them as required! 54
Where Do I Get Help? The ROTLINE: (408) 918 -4640 http: //cesantaclara. ucanr. edu/Home_Composting_Education/ • United States Environmental Protection Agency (EPA), Composting At Home http: //www 2. epa. gov/recycle/composting-home • California, Cal. Recycle, Backyard Composting http: //www. calrecycle. ca. gov/organics/homecompost/ • Bay Area Eco-Gardens http: //bayareaecogardens. org/ • Libraries Santa Clara County Library District (sccl. org) or your city's library Search for "home composting" to find related books, magazines and videos Lots of Information Available! 55

Hands-On Demonstration
- Slides: 56