COMPARISON OF MPD VALUES FROM HIGHSPEED LASER MEASUREMENTS
- Slides: 28

COMPARISON OF MPD VALUES FROM HIGHSPEED LASER MEASUREMENTS WITH MPD FROM TWO STATIONARY DEVICES Rohan Perera, Ph. D, PE Soil and Materials Engineers, Inc. Plymouth, Michigan Larry Wiser Federal Highway Administration Mc. Lean, VA RPUG 2013, San Antonio, TX 1

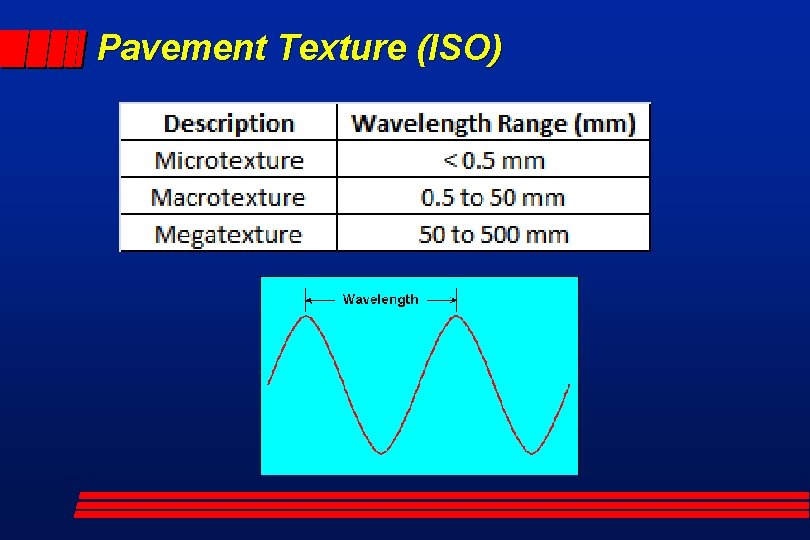
Pavement Texture (ISO)

Macrotexture l Friction. l Tire Pavement Noise. l Rolling Resistance. 3

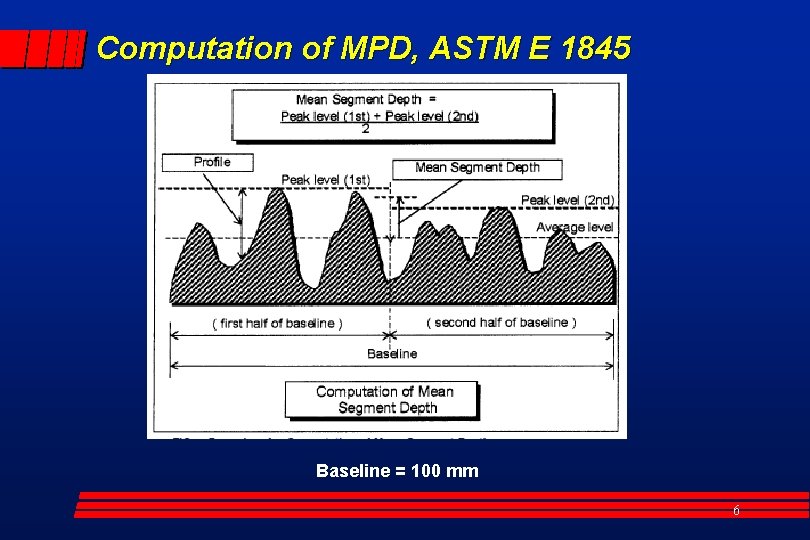
Measurement of Macrotexture l ASTM E 965, Sand Patch Test, Mean Texture Depth (MTD). l ASTM E 1845, Laser Measurements, Mean Profile Depth (MPD). l ASTM E 1845 has a regression equation to estimate MTD from MPD. 4

Measurement of Macrotexture at Network Level l Single point laser sensor installed on a vehicle. Compute MPD from collected data. l Simulate a digital sand patch on 3 D data (e. g. , Pavemetrics LCMS Data). 5

Computation of MPD, ASTM E 1845 = 100 mm Baseline = 100 mm 6

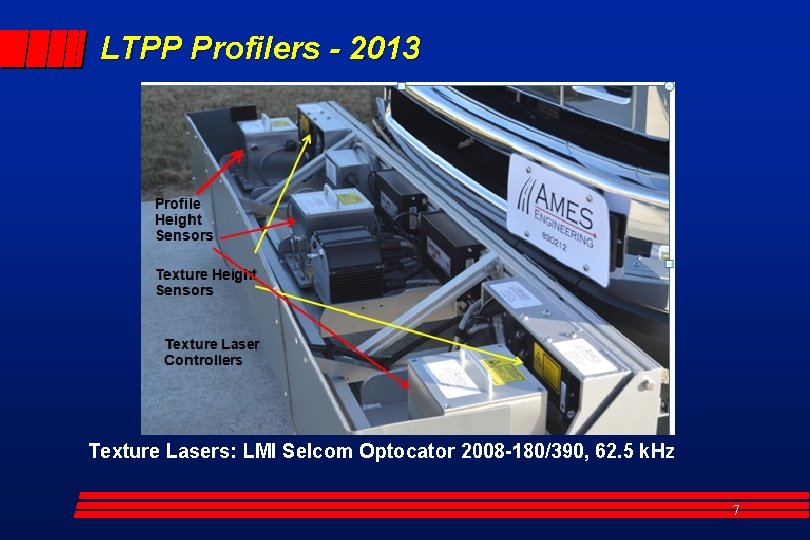
LTPP Profilers - 2013 Texture Lasers: LMI Selcom Optocator 2008 -180/390, 62. 5 k. Hz 7

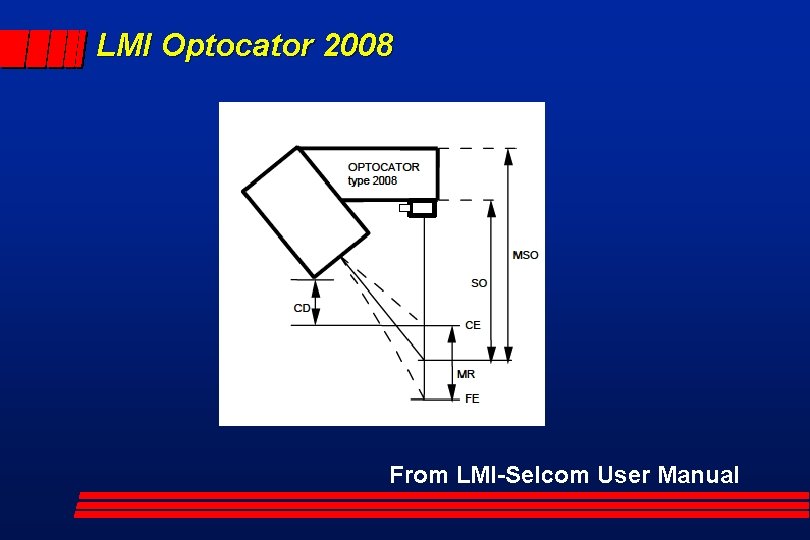
LMI Optocator 2008 From LMI-Selcom User Manual

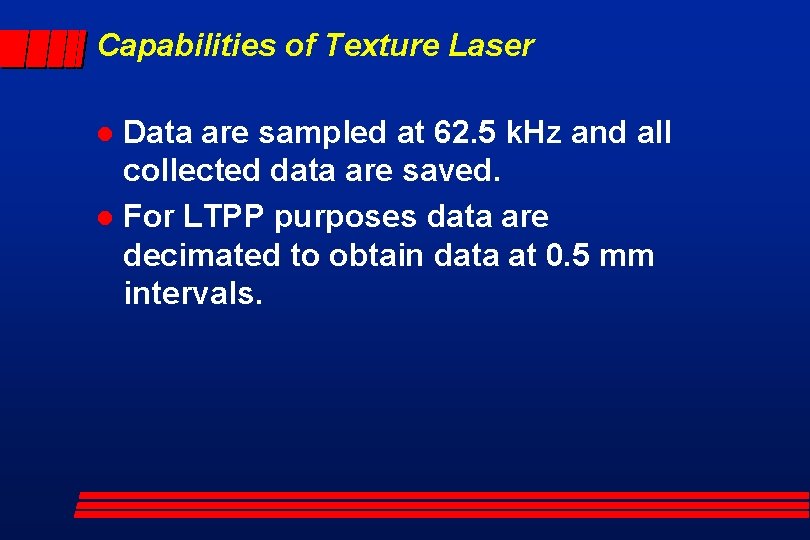
Capabilities of Texture Laser Data are sampled at 62. 5 k. Hz and all collected data are saved. l For LTPP purposes data are decimated to obtain data at 0. 5 mm intervals. l

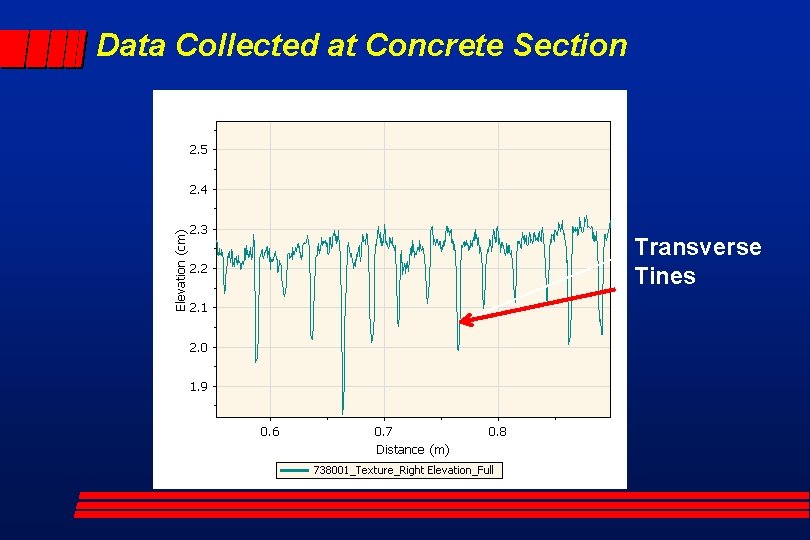
Data Collected at Concrete Section Transverse Tines

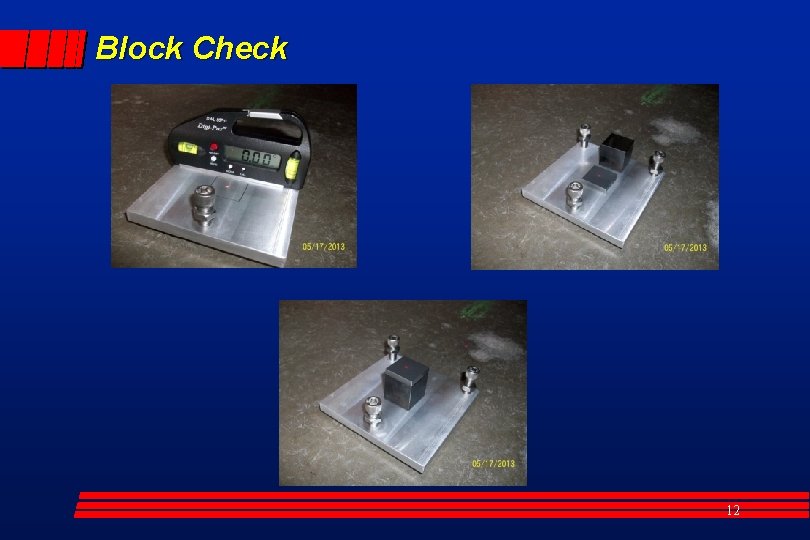
Checking Accuracy of Texture Laser l Block check. l Texture Reference Disk provided by Ames Engineering. 11

Block Check 12

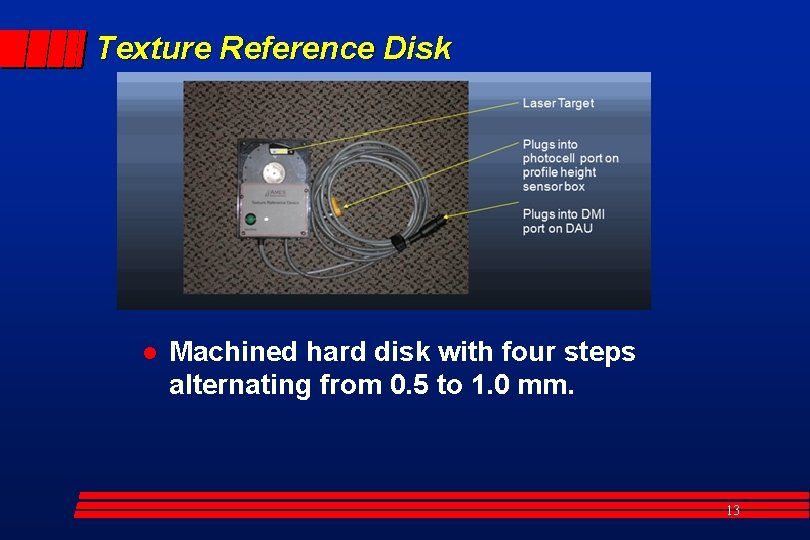
Texture Reference Disk l Machined hard disk with four steps alternating from 0. 5 to 1. 0 mm. 13

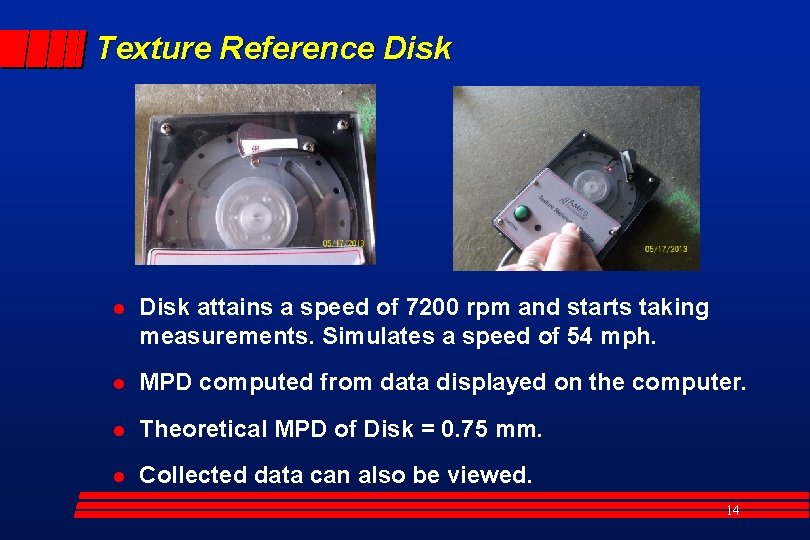
Texture Reference Disk l Disk attains a speed of 7200 rpm and starts taking measurements. Simulates a speed of 54 mph. l MPD computed from data displayed on the computer. l Theoretical MPD of Disk = 0. 75 mm. l Collected data can also be viewed. 14

Comparison of MPD From High-Speed Device with MPD From CT Meter and Ames Scanner 15

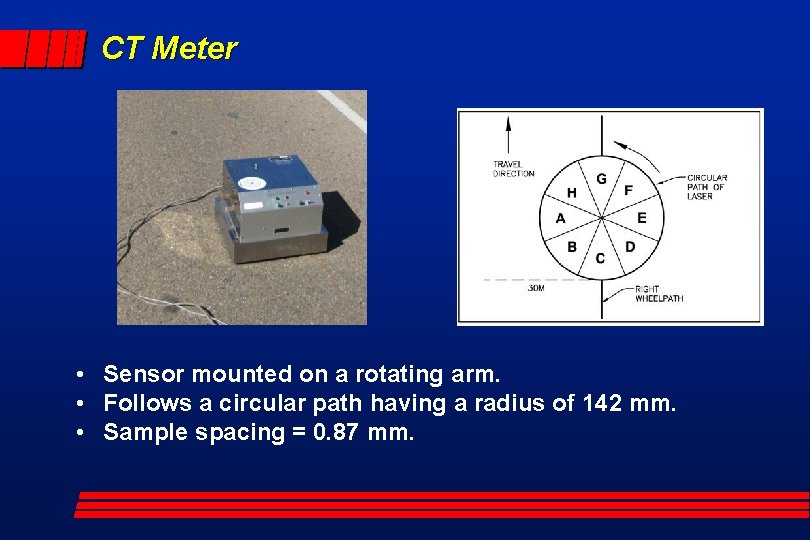
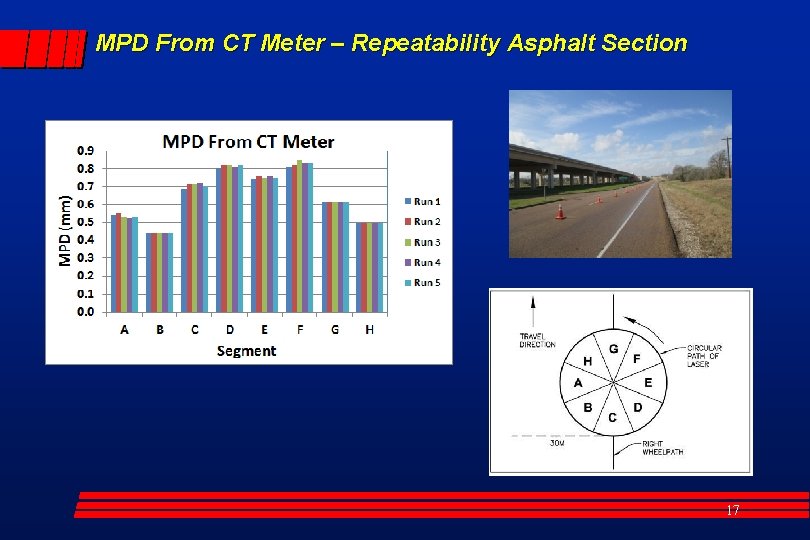
CT Meter • Sensor mounted on a rotating arm. • Follows a circular path having a radius of 142 mm. • Sample spacing = 0. 87 mm.

MPD From CT Meter – Repeatability Asphalt Section 17

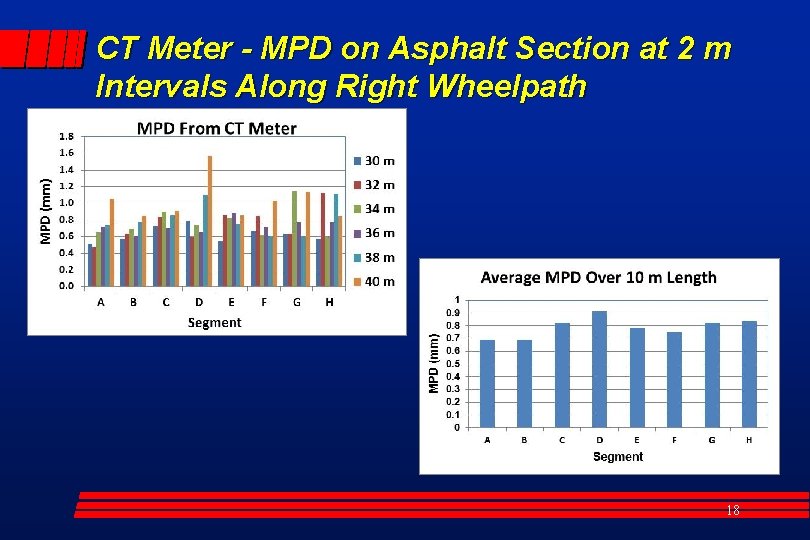
CT Meter - MPD on Asphalt Section at 2 m Intervals Along Right Wheelpath 18

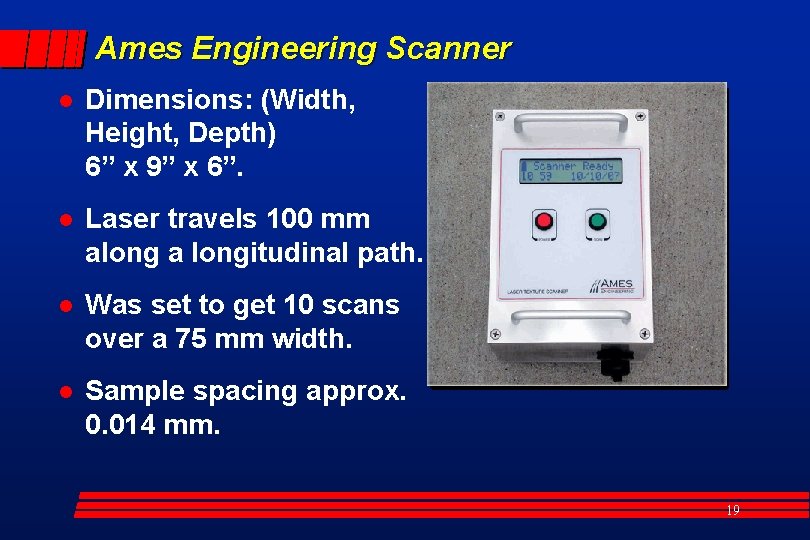
Ames Engineering Scanner l Dimensions: (Width, Height, Depth) 6” x 9” x 6”. l Laser travels 100 mm along a longitudinal path. l Was set to get 10 scans over a 75 mm width. l Sample spacing approx. 0. 014 mm. 19

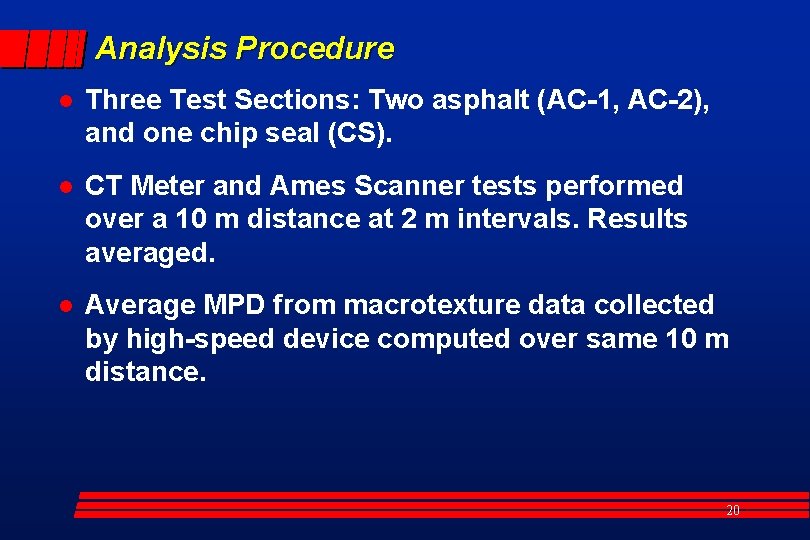
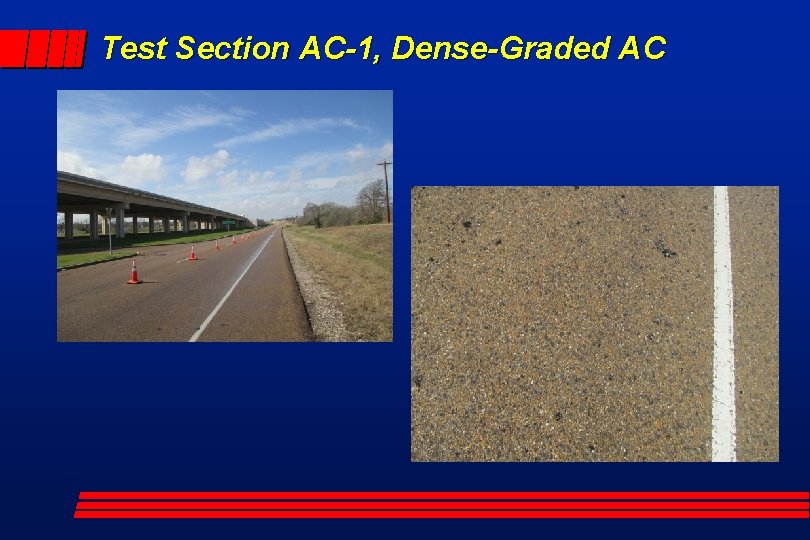
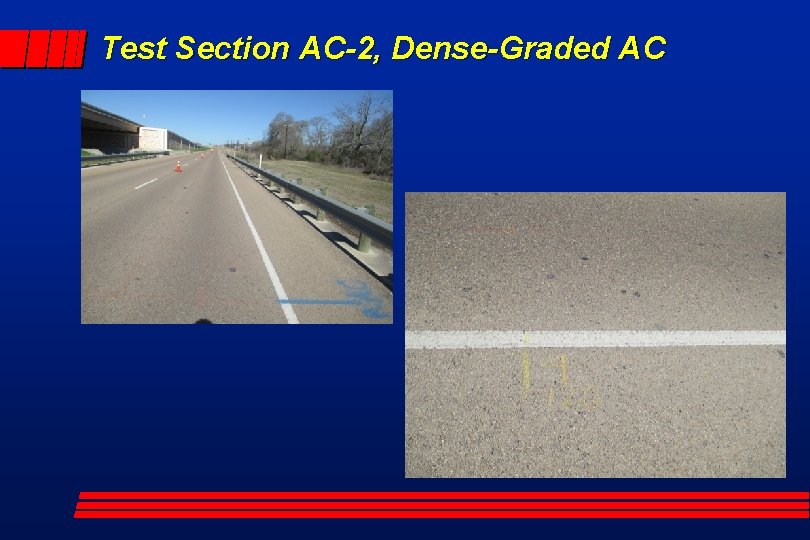
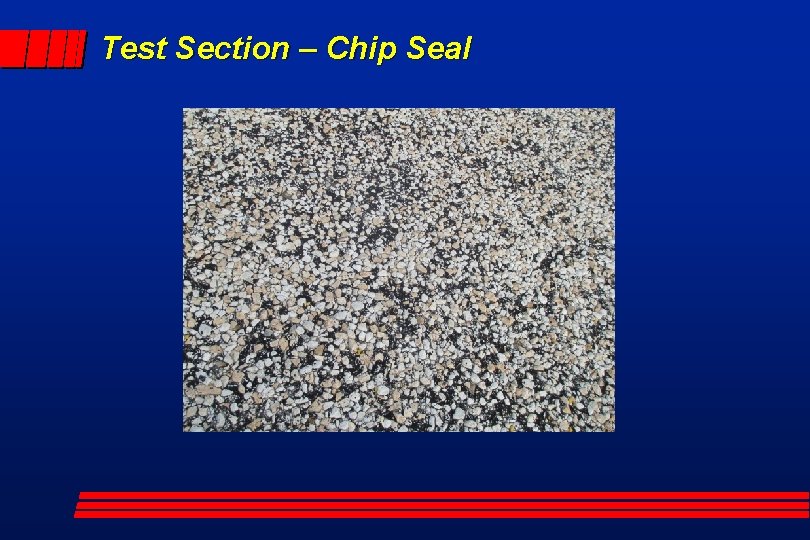
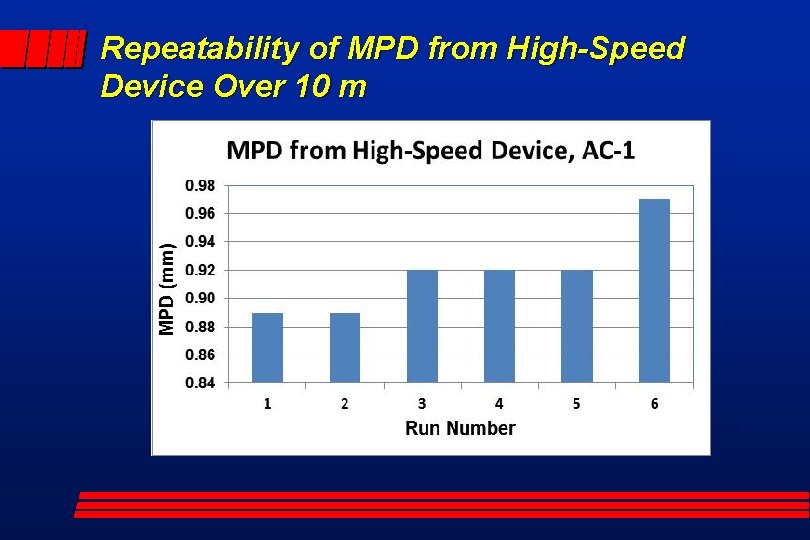
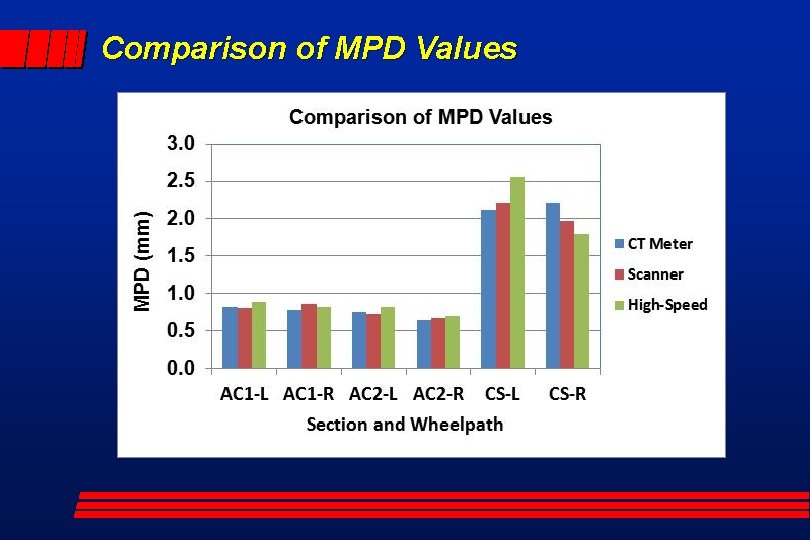
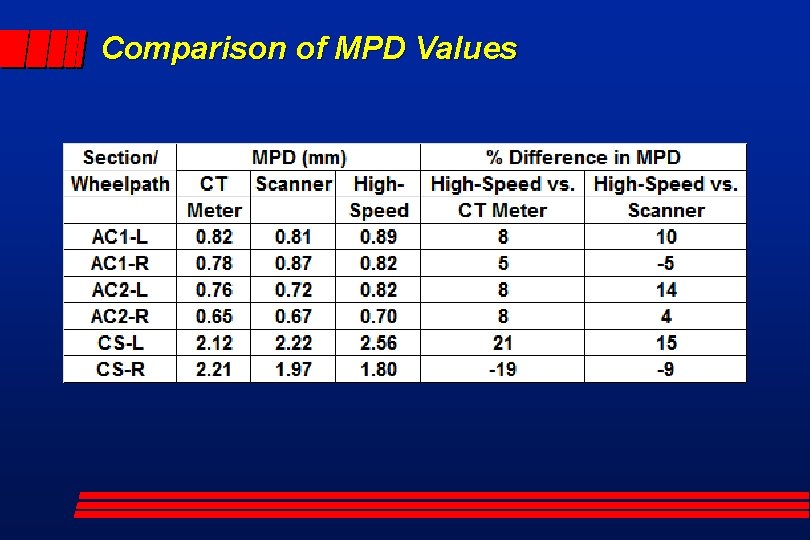
Analysis Procedure l Three Test Sections: Two asphalt (AC-1, AC-2), and one chip seal (CS). l CT Meter and Ames Scanner tests performed over a 10 m distance at 2 m intervals. Results averaged. l Average MPD from macrotexture data collected by high-speed device computed over same 10 m distance. 20

Test Section AC-1, Dense-Graded AC

Test Section AC-2, Dense-Graded AC

Test Section – Chip Seal

Repeatability of MPD from High-Speed Device Over 10 m

Comparison of MPD Values

Comparison of MPD Values

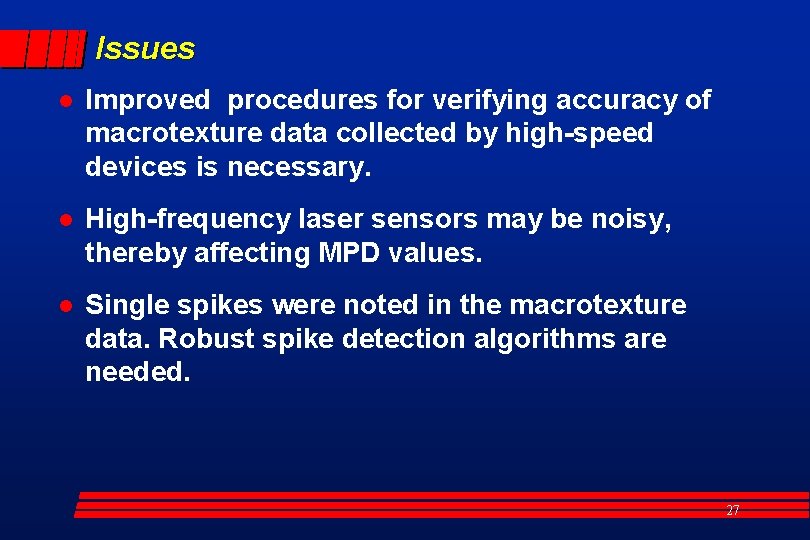
Issues l Improved procedures for verifying accuracy of macrotexture data collected by high-speed devices is necessary. l High-frequency laser sensors may be noisy, thereby affecting MPD values. l Single spikes were noted in the macrotexture data. Robust spike detection algorithms are needed. 27

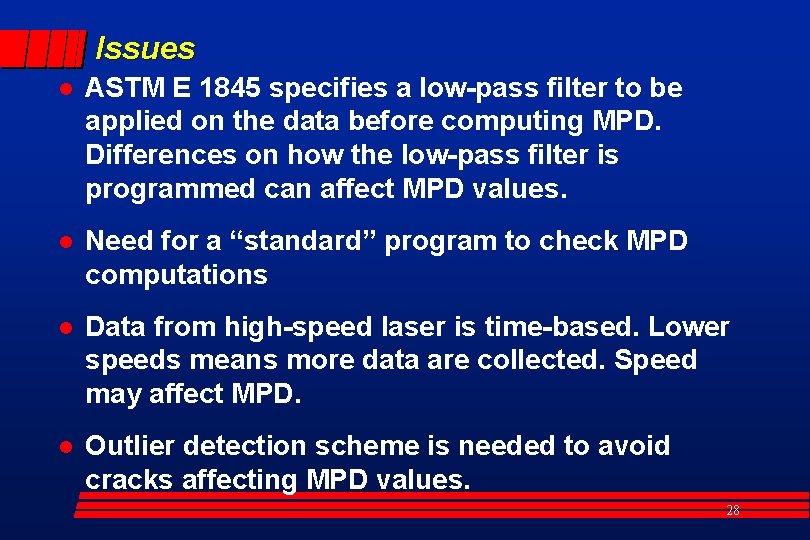
Issues l ASTM E 1845 specifies a low-pass filter to be applied on the data before computing MPD. Differences on how the low-pass filter is programmed can affect MPD values. l Need for a “standard” program to check MPD computations l Data from high-speed laser is time-based. Lower speeds means more data are collected. Speed may affect MPD. l Outlier detection scheme is needed to avoid cracks affecting MPD values. 28