Collecting Impressions as Evidence Impressions can be made

Collecting Impressions as Evidence

Impressions can be made by: l l Shoes and footprints Tires and tire tracks Tools Teeth

Collecting impressions l l Priority on preserving the impression and/or its reproduction. Photograph first, with scale, to show all observable detail – – – Shoot various angles Use side-lighting Show position in relation to scene

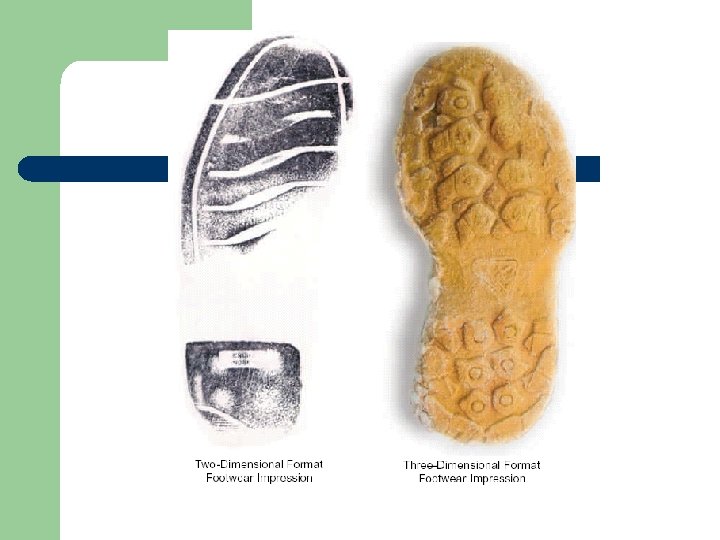
2 types of impressions: l Negative impressions – made by an object leaving a void in the substrate, i. e. stepping in a pool of blood and leaving a footprint in it l Positive impressions – made by an object leaving residue on a surface, i. e. leaving behind blood or dirt as one walks

Collecting impressions l l Preferable to collect the original impression (i. e. on glass, paper, floor tile) If the impression cannot be taken to the lab, a reproduction must be made. – – – Lifting tape Casting dental stone Electrostatic dust lifter Snow-Print-Wax Chemical developers

l Lifting tape – use as with fingerprints – – l Use lifting material large enough to cover whole print Good for lifting light dust or dirt Dental stone – gypsum mix, like plaster, that hardens into a solid 3 -D model

l Electrostatic dust lifter – – l Uses electrical charge and mylar sheets to create a static electrical charge that will lift dust/dirt marks Snow-Print-Wax – used for casting prints in snow – creates a wax layer to protect the print from the plaster

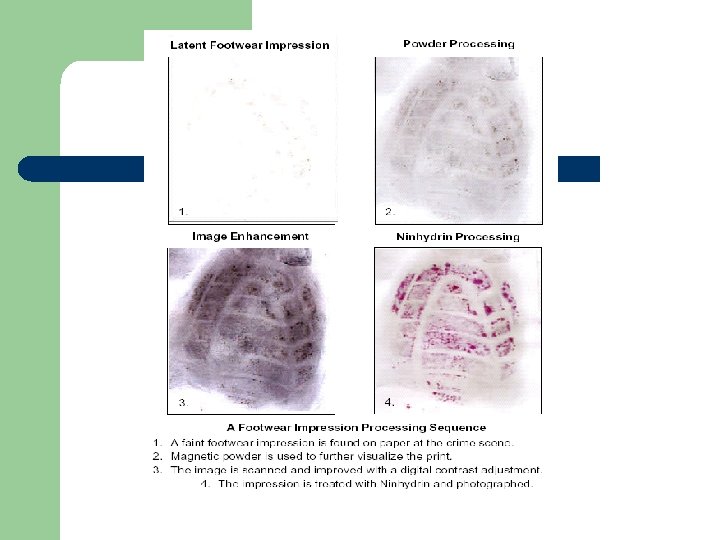
l Chemical developers – – As with fingerprints, ninhydrin and amido black can be used to enhance the appearance of prints.
- Slides: 11