CO 2 Dragster Cars Mr Sexton Engineering Technology


- Slides: 52

CO 2 Dragster Cars Mr. Sexton Engineering Technology

Purpose of CO 2 Activity • Understand how a CO 2 car works • Design your CO 2 car • Build your CO 2 car • Race your CO 2 car

Overview • Intro to Racing CO 2 cars • Engineering Principles • Student examples • Designing your CO 2 Car • Manufacturing your CO 2 Car

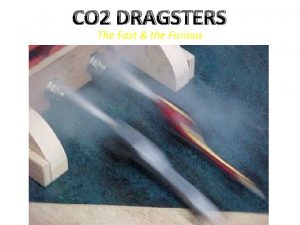
Intro to Racing CO 2 cars • 2 Cars are set up • Cars ride on guide wire from start of track to end of track • Co 2 cartridge is punctured –propelling car forward • Two cars race • Cars go through end gate • light goes for fastest car • Race time is recorded for each car

What do you use for the track? • Many times when people are new to CO 2 racing, they hear about cars running on a "track" and think that a track specially made for CO 2 cars is needed to race them. • We will race our cars on the floor. You can easily build a simple and inexpensive race track. Not as good, but a lot cheaper

CO 2 Racetrack • The only track required is 50# test fishing line. • Fishing line is used as a guide line that the eye hooks on the bottom of the cars attach to. • The fishing line runs between the start gate and the finish gate • We will likely run our races using only fishing line along the concrete floor of my lab. The smoother the surface, the faster the times will be.

length of the track • The length of the track is also important. You need to have at least 60 feet without any obstructions. Any shorter distance than this, and the cars will destroy themselves upon finishing a race. • The optimum track length is 66 feet (20 Meters), which is in scale with real dragstrip lengths of a quarter mile.

How fast are these things? • Up to 60 mph (100 kmh)

Engineering Principles The following Engineering Principles Relate to how and why a CO 2 car works • Newton’s Laws of Motion • Mass • Drag • Friction

Newton’s 2 nd Law of Motion • greater force = greater action. • Acceleration is dependent upon the mass and force of the car. F = ma – F = force – m = mass – a = acceleration • For a fast car, you need: – Big force – Light car (mass)

Mass • The Balancing Act: – Advantages: Cars with less mass go much faster. – Disadvantages: Cars with less mass are less stable and less durable. • Does takes more or less force to push 40 g than it does to push 130 g?

Mass • F = m* a • • • Assuming force is the same F = 40 *1 F = 130 * 1 F = 40 F = 130 F/40 F/130 F would be larger with the F/40. (A piece of cake divided by 40 parts or 130 parts, which gives you a bigger piece of cake? ) • Therefore, the smaller mass requires less force.

Acceleration • Acceleration is produced by the CO 2 gas cylinder. • The CO 2 canister produces thrust when you puncture it – propelling the CO 2 car forward • It works similar to sticking a pin in a balloon - The balloon is propelled around the room by the thrust created by the escaping gas.

Forces of Resistance • Drag (from air resistance) (FW) • Friction

Drag Take a piece of wood, slap wheels on it, shoot it down a track at 60 MPH and the air rushing over the body and wheels will try to slow it down. • Scientifically this is called drag: the resistance of wind moving over an object.

Minimizing DRAG The Balancing Act: – Advantages: Aerodynamically shaped cars have less drag so they go faster. – Disadvantages: Aerodynamically "clean" cars are more difficult to build, but worth the effort

Friction is a product of gravity • On a CO 2 car, Friction occurs primarily in three places: 1. Between the wheels & the ground. 2. Between the axles & the car body. 3. Between the eye-hook & the fishing line.

Minimizing Friction • Make sure the axle & tires freely rotate. • Make sure the wheels are not rubbing on the car body. • Be sure to install your eye-hooks properly. Poorly aligned eye-hooks are often the cause of a slow car.

What's the best design for a CO 2 car? • Your Car must meet the size and dimensional requirements of TSA. • The best design is the one that wins. There is no "one design" that is best. • Generally, the two best indicators of a good car are clean aerodynamics and high craftsmanship. Often, really good designs that are built poorly will loose to so-so designs built well.

Designing your CO 2 car • Step 1: Obtain the proper paper from me

Designing Your CO 2 Car • Step 2 – Brainstorming (think about what you want your car to look like) – Sketch 6 different possible design ideas – Create drawing on the lined paper – Remember, 1 square = 2 mm

Designing Your CO 2 Car • Step 3 – Complete technical drawing for CO 2 car – You must have a high quality, accurate drawing – Drawing must be 1: 1 scale (actual size) – Identify the axles – Check your car against the TSA specifications

Designing Your CO 2 Car • Step 4 – Get instructor to look over your drawing. – You must get instructor sign off before beginning to manufacture the car that you designed • Step 5 – Locate a piece of copy paper – Trace your design onto the copy paper. Use the light table to do this. • Step 6 – Cut-out the tracing that you made – Obtain a blank piece of balsa from me

Overview of the CO 2 Car Manufacturing Process • http: //co 2. technologyeducator. com/car s/babybro. htm - Sample CO 2 car being made • http: //co 2. technologyeducator. com/ste ps/steps 4. htm - Step by step overview

Manufacturing Your CO 2 Car • Step 7 – Transfer your design to the Balsa blank – Tape the cut-out onto the blank. – Trace the outline onto the car. Use a Sharpie. – Mark the axles.

Manufacturing Your CO 2 Car • Step 8 - drill the holes for the axles (using the drill press). – Make sure the axle holes are in the right spot and are straight – The holes should be perpendicular to the center line of the car and parallel with the bottom surface of the car. – * Take care to make sure these holes line up evenly and are drilled accurately. Crooked holes mean a slow car! Use a drill press and take your time! *

Manufacturing Your CO 2 Car • Step 9 - Using the Bandsaw, cut out your shape. • When using the band saw to cut curves, you must use relief cuts (or you will break the band). • Follow the shape that is on the template that is traced on your CO 2 car. • Follow all safety precautions. • Clean your mess

Manufacturing Your CO 2 Car • Step 10 – Shaping and Sanding – Use a rasp or wood file to remove band saw blade markings and to round corners and edges. – Also to begin the smoothing process. – Hand Sand your CO 2 car until you have removed the file marks with 100 grit sand paper. – Hand sand with fine sand paper (>150 grit) to remove all scratches. – Always clean your mess.

Manufacturing your CO 2 car • Step 11 – Finishing – Finish cars with the acrylic latex paint we have – Every brush must be cleaned out. – Loss of daily points if not done so

WCHS Policy • We will paint the car in class. • We will not assemble with wheels, screw eyes, etc. . Until right before the race.

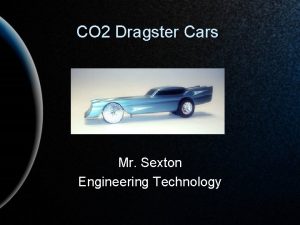
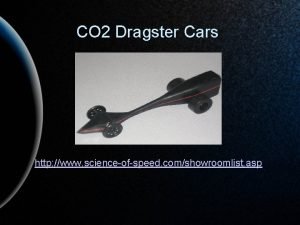
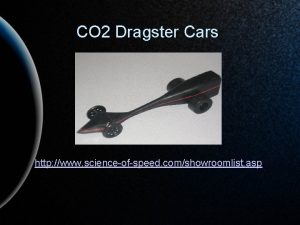
CO 2 Designs This car was created by John Vice, Mr. Sexton’s student teacher.

CO 2 Designs

CO 2 Designs

CO 2 Designs

CO 2 Designs

CO 2 Designs

CO 2 Designs

CO 2 Designs

CO 2 Designs

CO 2 Designs

CO 2 Designs

CO 2 Designs

CO 2 Designs

CO 2 Designs

CO 2 Designs

CO 2 Designs

CO 2 Designs

CO 2 Designs

CO 2 Designs

CO 2 Designs

Manufacturing your CO 2 car • Step 12 – Assembly before the race – Assemble all the parts of the CO 2 car – – – Wheels Axels Body Eyelets CO 2 cartridge

CO 2 Cars • If you need more info on the Design and Manufacturing Process check out: • http: //co 2. technologyeducator. com/steps/step s 1. htm
 Paul sexton hpra
 Sexton engineering
 Teardrop co2 car
 Dragster aerodynamics
 Dragster car designs
 Jill sexton
 Dr sexton vancouver
 Aerosol overcaps
 Whitney sexton
 Dan sexton civil service
 Rhonda sexton
 Vidhyadeep institute of engineering and technology
 Fcc office of engineering and technology
 Thakur college of engineering and technology
 Stevens institute of technology mechanical engineering
 Software engineering a layered technology
 Layered technology
 Fnu engineering courses
 Can technology replace social engineering
 Accreditation board for engineering and technology
 Hijjawi faculty for engineering technology
 Mandava institute of engineering and technology
 Detritus food chain
 Stevens institute of technology mechanical engineering
 Swedish college of engineering and technology
 What is system design in software engineering
 Forward engineering in software engineering
 Dicapine
 Elegant systems
 Reverse engineering vs forward engineering
 I would rather eat potatoes than eat rice
 Alton cars sheffield
 Cars research paper
 Picture of se hinton from 1960
 Static electricity photocopier
 Pinewood derby history
 Hobbytron rc cars
 Nanogears
 Chloe goldstein
 The street cars are like frosted cakes
 Open loop vs closed loop in cars
 Jeb likes cars but he cant drive yet
 Gm concept cars
 1950s concept cars
 Advantages and disadvantages of self driving cars
 Kubvan
 Car lemon law texas
 In this graphic, if both cars arrive at the same time
 Oodbms and ordbms
 A train is a dragon that roars through the dark.
 Cars checklist for research source evaluation
 Mercury switches in cars
 Credibility accuracy reasonableness and supported

