CLINIC MANAGEMENT SYSTEM APPOINTMENT SCHEDULING How will this


")


- Slides: 77
CLINIC MANAGEMENT SYSTEM APPOINTMENT SCHEDULING
How will this start? • Any schedules already built will not be carried over to the CMS Portal • You will build your providers and new schedules on Portal
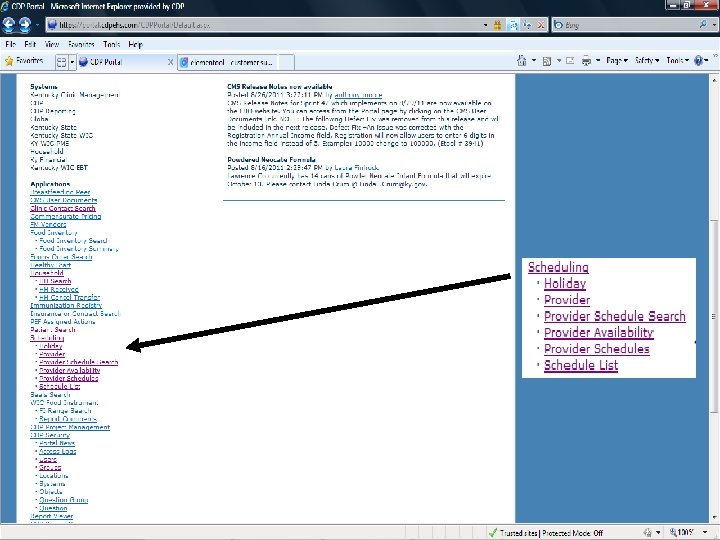
Scheduling • • • Holiday Providers Schedule search Provider Availability Provider Schedules Schedule List
Appointment Scheduling Holiday
Holiday Search The holiday search page allows the user to search for holidays or dates that have been blocked from the clinic’s schedule.
Once the results of the search are returned, the user has three options. ADD a new holiday or meeting, DELETE an existing holiday or meeting, or EDIT an existing holiday or meeting
New Holiday Page When adding a new holiday or meeting, the user must fill in the date, description, state holiday – yes or no, set for district, county or clinic, and set length of meeting. If ‘All Day’ is set to NO, you must enter start and end time. Once finished, click SAVE.
Appointment Scheduling Provider
Provider Search The provider search page allows the user to search for providers. These providers can be individuals or groups of providers. A NEW button is also available to build new providers.
Search results will be returned to the bottom of the page. To edit a provider, click the paper/pencil icon next to the provider.
Provider Edit screen
To build a new provider, you will click the NEW button located above the search results
New Provider screen
Appointment Scheduling Provider Schedule Search
Provider The Provider Schedule search page allows Schedule the user to search for schedules that have Search been built for a provider or the clinic.
Provider Schedule Search If the provider is left blank, then all providers that have schedules for the date entered will be returned. To edit the provider schedule, click the paper pencil icon next to the provider name To extend the provider schedule, click the copy icon next to the provider name
Provider Schedule Search If the provider is entered, only schedules built for that provider and that date will be returned. If a Monday date is entered, all schedules for that week will be returned. To edit the provider schedule, click the paper pencil icon next to the provider name To extend the provider schedule, click the copy icon next to the providers name
Appointment Scheduling Provider Availability
Provider Availability The Provider availability page allows the user to make adjustments to a provider’s schedule. They can add or subtract providers from a schedule.
Appointment Scheduling Provider Schedules
Schedule Search The Schedule search page allows the user to search for schedules that have been built for a provider or the clinic. This is an inquiry only search.
Schedule Search If the provider is left blank, then all providers that have schedules for the date entered will be returned. The time slots with a number besides zero under booked, if you hover the number with your mouse, it shows the name of the patient in that slot.
Schedule Search If the provider is entered, only schedules built for that provider and that date will be returned. The time slots with a number besides zero under booked, if you hover the number with your mouse, it shows the name of the patient in that slot.
Appointment Scheduling Appointment Schedule Page
Appointment Schedule Screen (Existing Patient)
Appointment Scheduling Screen • Demographic section – contains name, address, birth date and other patient info • Appointment History section – contains currently scheduled appointments and past appointment history • Appointment Scheduling section – this section is for searching for available appointments and scheduling.
Demographic section This section of the screen contains patient demographics. This information can be changed and it will update the patients record. The patient menu and member buttons are provided for navigation.
Appointment History section This section of the screen contains currently scheduled appointments. The scheduled appointments can be edited, voided, or rescheduled. The user can also view the patient’s past appointment history.
Appointment History Buttons • Edit – Edit existing appointments • Void – Void existing appointments • Reschedule – Reschedule existing appointments • History – Inquiry for previous appointments for patient
Edit Appointment If you click the EDIT button, you will receive the following screen. From this screen you can make changes to the scheduled appointment
Void Appointment If you click the VOID button, the following screen will pop up. If you wish to void the appointment, click OK, and the appointment will be voided. The CANCEL button will cancel the action.
Reschedule Appointment The reschedule screen looks the same as the appointment schedule screen. It will show the appointment you are rescheduling and the provider’s schedule that the current appointment is with. Find the appointment time you want, change the schedule time and click Schedule.
Appointment History The appointment history page will show the patient’s past appointments. It will show the appointment reason and if the appointment was met. From this screen, the user can reschedule missed appointments.
Search Appointment section The search appointment section allows the user to search for available appointments. Many filter are available to narrow down this search. However the user is required to enter the Appointment Reason, and the appointment length. Multiple appointment reasons can be entered for an appointment. Once filters have been set, the user will click SEARCH. Those schedules that match the search criteria will be returned to the bottom of the page.
Search Appointment section – cont. Once the page returns, it will contain the provider’s schedules that match the search criteria. The user will then set the provider and the time that for the time slot they want to schedule. They will then click SCHEDULE, and the appointment will be scheduled. The next slide will show the page will look after the appointment has been scheduled.
Search Appointment section – cont. Once the page returns, it will contain the provider’s schedules that match the search criteria. The user will then set the provider and the time that for the time slot they want to schedule. They will then click SCHEDULE, and the appointment will be scheduled. The next slide will show the page will look after the appointment has been scheduled.
Appointment Scheduled
Additional buttons The schedule appointment search page seen below, has three additional buttons. The RETURN button take you to a blank appointment search page. The REFRESH button allows the user to change search criteria and refresh the screen. The NEXT DAY button, keeps your search option but moves to the next date.
Scheduling appointments for patients in Households
From Portal page, click HH Search
Search for your household
From household member page, check patient needing an appointment and click PATIENT MENU
From PATIENT MENU, click Scheduling
You will then have the screen to schedule the appointment.
After scheduling is completed, you can click the MEMBER button to return to the Household page.
Scheduling appointments for patients NOT in a Household
From Portal page, click Patient Search
Search for your patient
From patient search page, click the Patient Menu Icon
From PATIENT MENU, click Scheduling
You will then have the screen to schedule the appointment.
After scheduling is completed, you can click the PATIENT MENU button to return to the patient menu page.
Scheduling an appointment for a brand new patient
From the Portal page, click Patient Search
Enter your search criteria, then click search.
Once the search is returned, if your patient is not found, click NEW APPOINTMENT
From this screen, you will enter the demographics for the patient and search for available appointments
Appointment Scheduling Schedule List
Schedule List Search The Schedule List search page allows the user to search and create reports of schedules. Below are the options for searching on the schedule. Once filled in, the user will click SEARCH.
Schedule List The Schedule List will show those individuals who have appointments that match the search criteria. The user will have many buttons available to work with this list. These buttons are explained in the next slides.
Edit Button The Edit button allows the user to edit the displayed appointment. The user will check the box next to the appointment to edit and then click the EDIT button
Reschedule Button The Reschedule button allows the user to reschedule the displayed appointment. The user will check the box next to the appointment to edit and then click the RESCHEDULE button
Transfer Button The Transfer allows the user to transfer appointments to another provider or another day for the same provider. The user can select multiple appointments by checking the box next to the appointment to transfer and then click the TRANSFER button
Flag No-Show Button The Flag No-Show allows the user to flagged all open appointments to a no-show status. The user does not have to select any patients, it will flag all open appointments as no-show. This function should be performed at the end of the day
Print Button The Print button allows the user to print out a schedule list.
Labels Button The Label button allows the user to create an appointment label for the selected appointment. The user will check the box next to the appointment and then click LABELS.
Autodialer Button The Autodialer button, when clicked will create a file to send to the autodialer. Those appointments on the screen are the appointments that will be sent to the autodialer.
Scheduling Day 32
To schedule a day 32 appointment, you will need to enter the appointment reason, appointment length and then click TICKLER
After clicking TICKLER, you will be prompted to enter the Month and Year for the appointment, once entered you will then click SCHEDULE
After clicking SCHEDULE, you will not receive a message that it has been saved. We will be adding messaging in a later release. You will have a report available to view.
Day 32 Report
From the portal page, click CDP Report Viewer
On the Report Viewer page, change the category to SCHEDULING from the drop down. The page will refresh and changed to show the scheduling reports.
Click the magnifying glass next to the Appointment Schedule Tickler
Appointment Schedule Tickler Report