Clay GLAZE A Gauger Objective You will define

Clay GLAZE A. Gauger

Objective: You will define and analyze qualities of glaze in order to follow procedures to apply glaze to your sculptures. DRILL: 1. 2. 3. 4. 5. What is glaze? What is underglaze? Tips/ Rules for glazing: List 3 ideas for how to use glaze? Create a space for your glaze log 5 or more pages. Where do you want your glaze log? With each artwork or a section in the back of sketchbook? BE EXTREMELY CAREFUL TOUCHING/ PAINTING THESE BONEDRY PIECES. Make sure your name is on the bottom and the date. GLAZE

What might happen if you touch it? • It might break WHY? • It is bone dry. • Most fragile state. • BE VERY CAREFUL!!! • How do you fix it? ? ? • After it is fired.

QUICK SIDE NOTE: • CLAY DOES NOT EVER, FOR ANY REASON, GO IN THE SINK. • There are 3 places it can go: – GOOD CLAY- back in clay bag in bucket – SOMEWHAT HARD/ SMALL DRIED STUFF-- – Dried clay- bin Slip cups in back under clay table

Glaze is clay paint.

Glaze Log Sculpture Name Pinch Pot Pod Drawing Glaze Name Date_______ Location on sculpture 1. Toad-ily Green 1. Top of dish 2. Peri-Twinkle 2. Back of dish Description after firing 1. Draw a picture. 2. Label the spaces with numbers 3. List the glaze color next to the number of the corresponding space.

Glaze • Glaze is clay paint. How do you use glaze? 1. Paint 3 or more coats. 2. NEVER PAINT THE BOTTOMstay away from bottom- of lids, too. 3. Shake it up or stir it. 4. Read to see if it is food safe. (fork and knife symbol) 5. It is a different color after it is fired. It is really light before. 6. Make a glaze log to remember what you use.

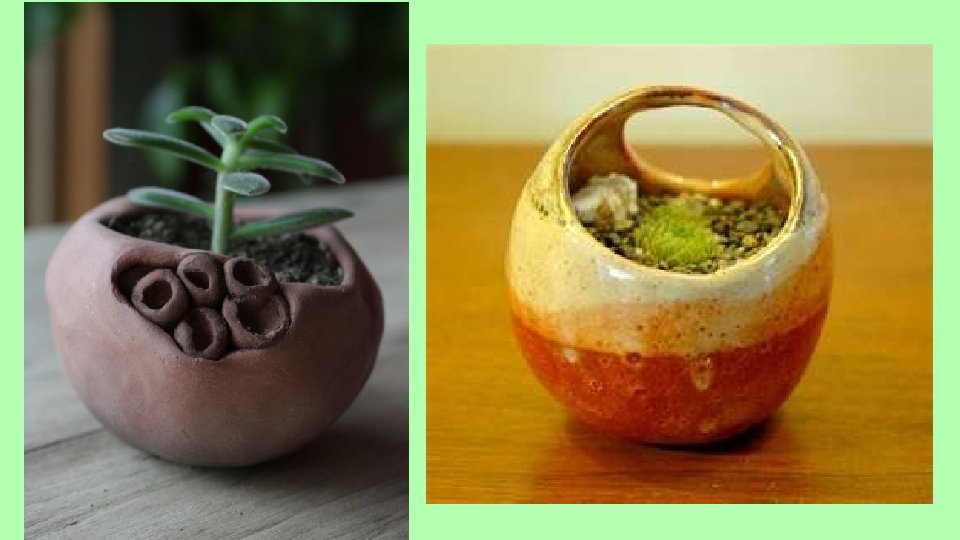
Before and After

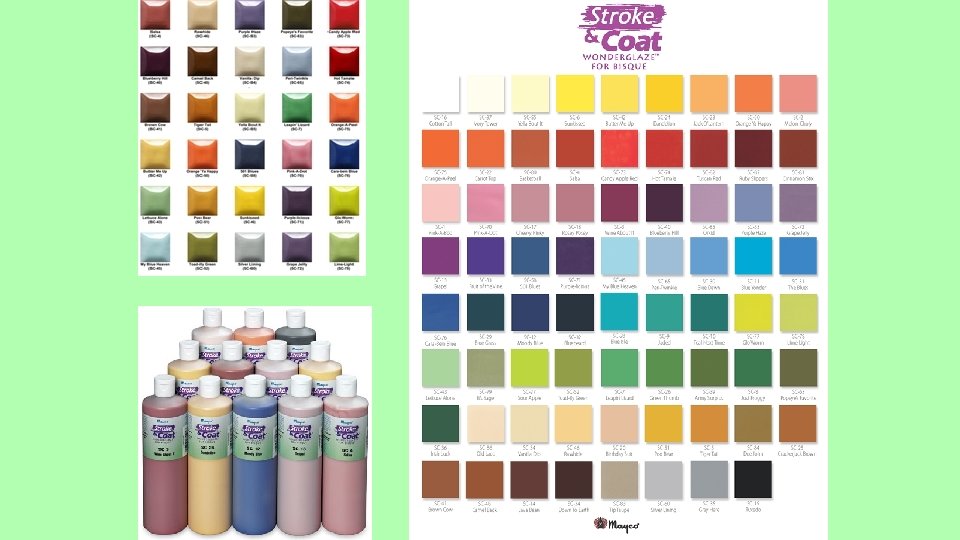
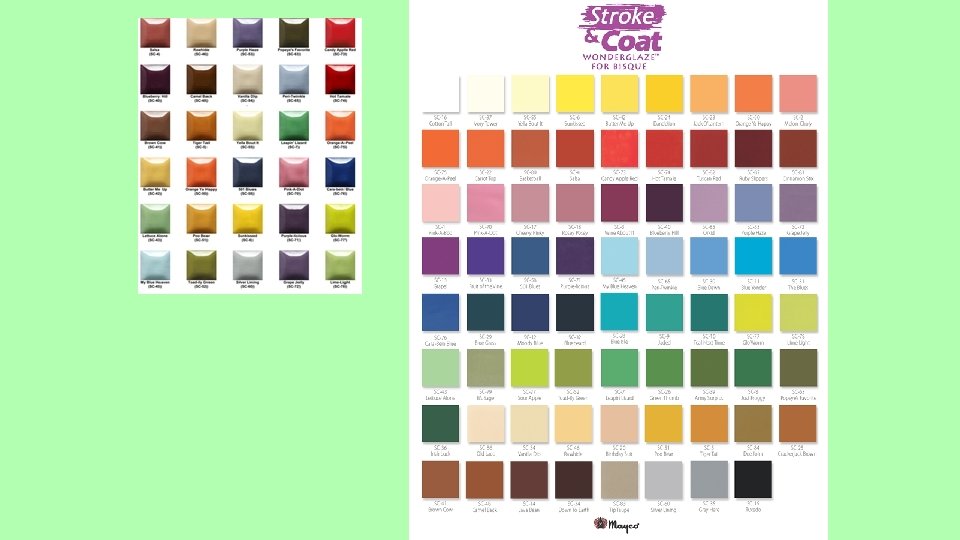
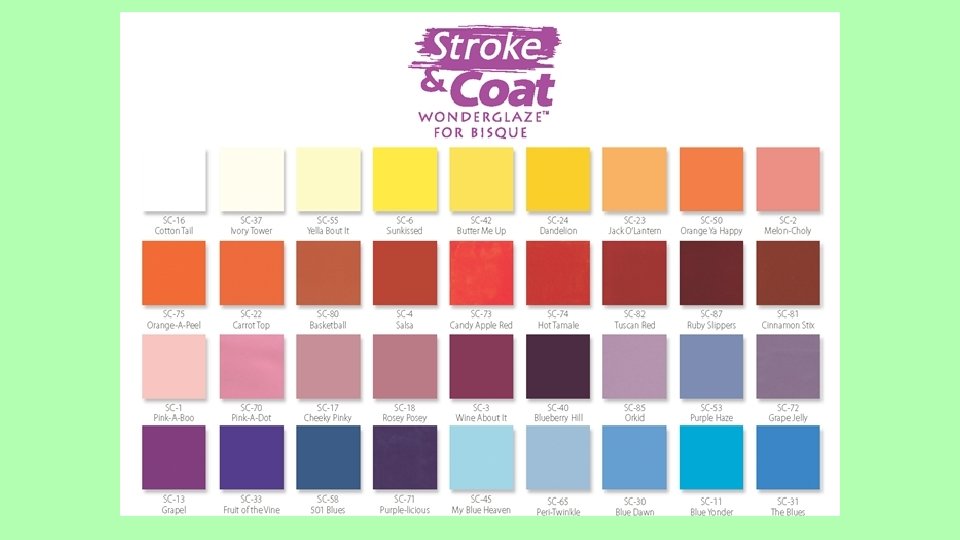
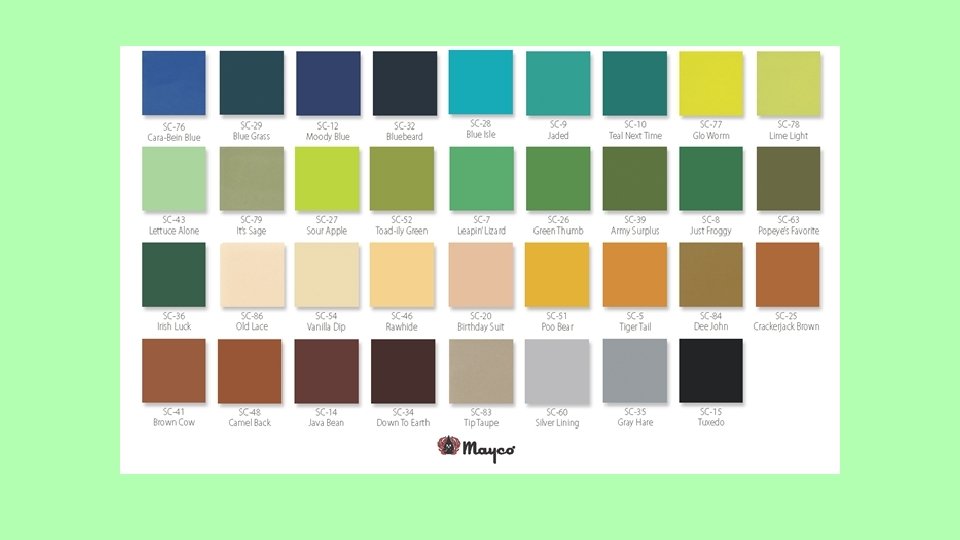
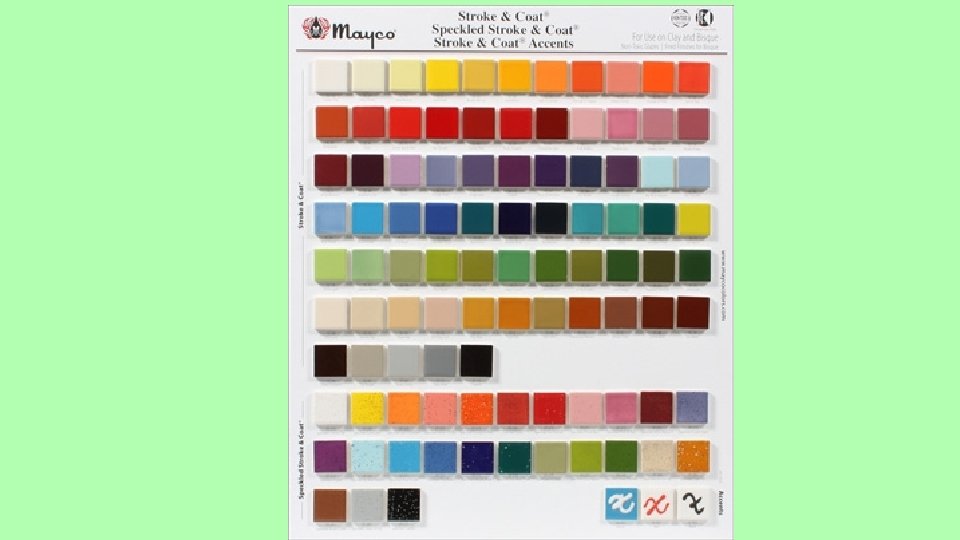
Glaze Samples:

Underglaze: Gets painted underneath as a design or image. IT IS NOT A FINAL GLAZE. Does not come out shiny. Must apply clear transparent on top of it.

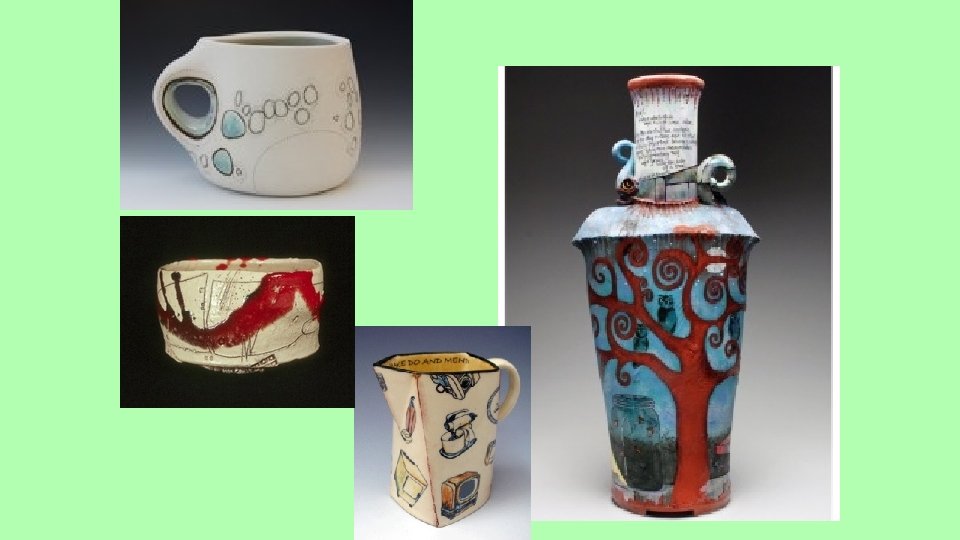
Ideas: 1. 2. 3. 4. More than one color. One inside, one outside. Stripes Drip the glaze; add a little water? ? 5. Combine and overlap a few for an abstract art effect.

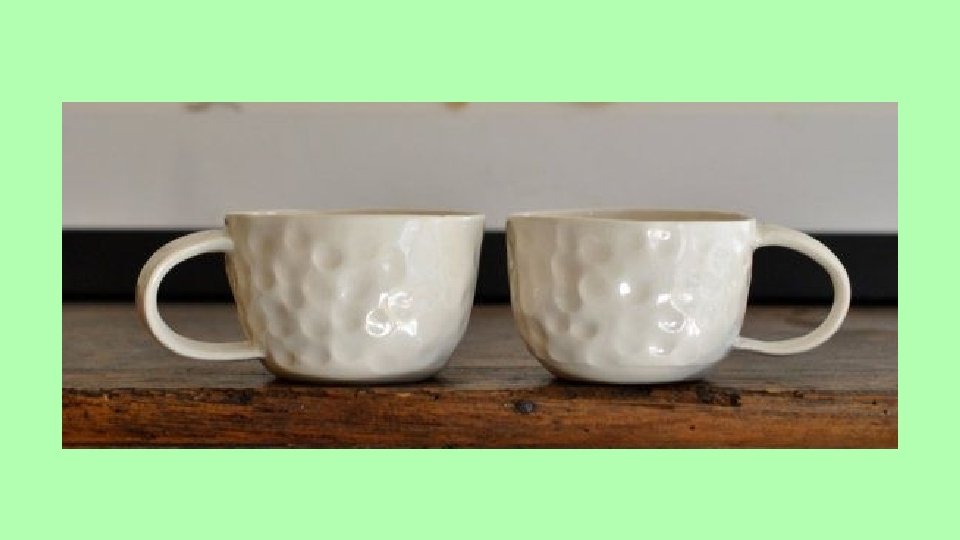
Clear Transparent makes it shiny. If you only use this, it is white and shiny.

Drip

Multicolor~ Overlap more than one color:

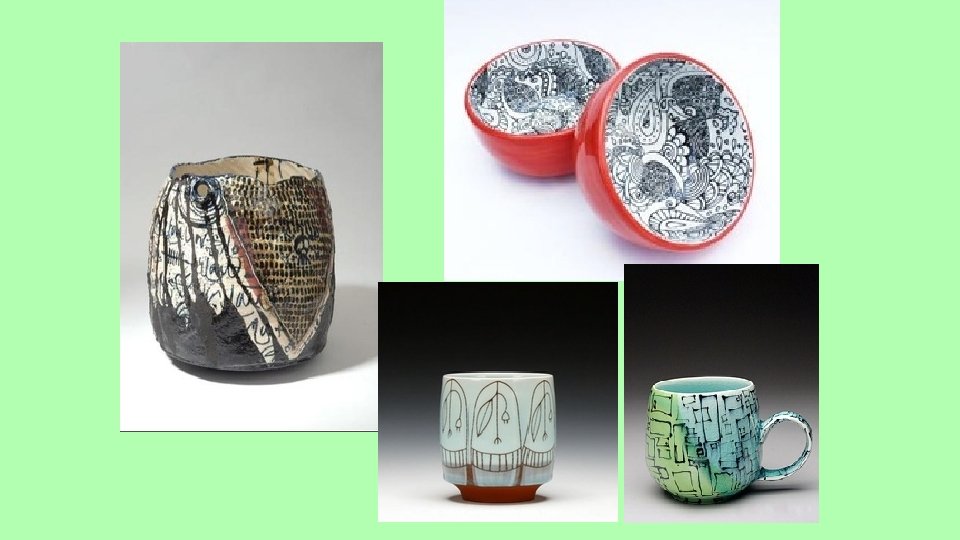
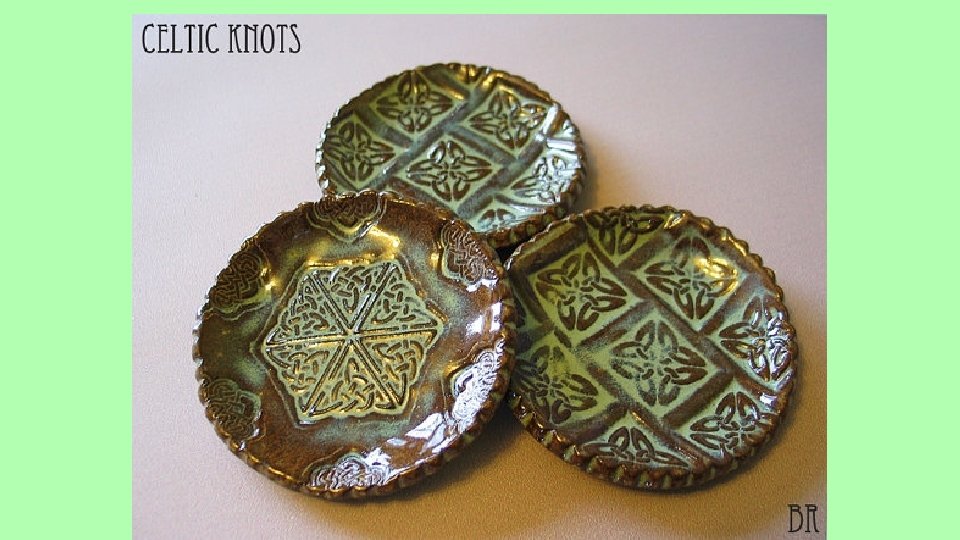
Stamps and designs look better with one color:

Underglaze pencils:

Glaze Pencil

Watercolor Glaze

To find a glaze color: • Look in glaze samples • Look at this power point. • Search online with company, number, and color. Cherry Bomb

Glaze Log Sculpture Name Pinch Pot Pod Drawing Glaze Name Date_______ Location on sculpture 1. Toad-ily Green 1. Top of dish 2. Peri-Twinkle 2. Back of dish Description after firing 1. Draw a picture. 2. Label the spaces with numbers 3. List the glaze color next to the number of the corresponding space.

Getting your glaze and putting it away: 1. Wide mouth bottles- dip brush in. 2. Small mouth glazes- pour into plastic cup. 3. Use a different brush for each glaze. 4. If it is dried up, add a LITTLE bit of water. 5. DEMO! 6. Clean up- Put glazes back in bins by sizes. 7. Use a spoon to pour extra glaze back into bottle. 8. Wash your glaze cup out completely.

Glaze • Glaze is clay paint. How do you use glaze? 1. Paint 3 or more coats. 2. NEVER PAINT THE BOTTOM. 3. Shake it up or stir it. 4. Read to see if it is food safe. (fork and knife symbol) 5. It is a different color after it is fired. It is really light before. 6. Make a glaze log to remember what you use.

Try multi-color or wipe off top layer:

New Glazes CR 823 Duncan Crackletone Celadon CR 906 Duncan Crystal Glaze, Peppered Raspberry CR 903 Duncan Crystal Glaze, Emerald Falls Mottled Burgundy

Duncan Crystal Glazes

Duncan French Dimensions

Glaze Samples Objective: You will analyze process steps in order to create glaze samples. Today- You will begin 2 glaze samples, then finish pinch pot pods. Get the supplies listed on the right. SUPPLIES YOU NEED: 1. Rolling pin 2. Clay 3. Stamp 4. Stylus 5. 2 glazes (for their name)

Glaze Samples STEPS: 1. Roll a slab. 2. Cut out 2+ rectangles- 4+ inches 3. Write 1, 2, 3, 4. Then stamp 4 stamps. Hole for string. 4. Write glaze name on back. 5. Write your name on back. 6. Sit it out to dry over weekend. 7. We will glaze on Wed.

Clean up grades- help and clean Gain points by helping. 25 pts a quarter. Starts as a zero. 5 pts a time that you help. Pull out supplies/ clay. Put them away. 50 pts for your supplies are left out. clean up. Starts at 50. Points deducted if table is messy or

Pinch Pot Ideas:


Prep for the wheel:

Make two forms with molds: • One for your stamps • One for sgraffito

Steps for Stamped Dish 1. Roll slab 2. Cut shape. 3. Stamp in a pattern design. 4. Place upside down on slump mold with paper under it. 5. Create a foot. 6. Smooth edges with water.

Slab sculpture~ glaze experiment Objective: You will create a glaze log in order to document how your glazes look. DRILL: 1. Draw your slab sculpture from the front and the back. 2. You may also get an i. Pad to document your glazes and look up colors of glaze. 3. Label the sections with numbers. 4. Make a glaze log for it. ~Today’s goal is to finish glazing pinch pots and use a variety of glazes on your slab sculpture. ~If you finish early, you can make a glaze sample for new glazes. ~Use crystalex glazes sparingly please.

Glaze Experiment. • Repeat experiment style at least 2 times. • Try at least 2 different glazes. • Things you can try: – – – Watercolor glaze Glaze pencil designs, images, words. Mix 2 or more glazes Use crystal glazes, but sparingly. Try colors you are curious about. Use up old glazes. • If you are finished- Make new glaze samples.

Glaze • Glaze is clay paint. How do you use glaze? 1. Paint 3 or more coats. 2. NEVER PAINT THE BOTTOM. 3. Shake it up or stir it. 4. Read to see if it is food safe. (fork and knife symbol) 5. It is a different color after it is fired. It is really light before. 6. Make a glaze log to remember what you use.

Glaze Log Sculpture Name Stamped Slab Dish Drawing Glaze Name Date_______ Location on sculpture 1. Toad-ily Green 1. Top of dish 2. Peri-Twinkle 2. Back of dish Description after firing

Firing Tonight • Place unfired slab sculpture on trays. • Place glazed pinched pots and glazed slab scultures on trays. • Any unfired stamps on trays.
- Slides: 50