CKS 3 Yr 7 Chemistry Unit 1 Me


 Flame (Inner Cone) Chimney Air Hole Heat")


")
")
 Step 1 – Think about the experiment (Make bullet")


 Evaluate (L 7) Judge")
- Slides: 24
CKS 3: Yr 7 Chemistry Unit 1 – Me the Scientist! Lesson number: 1. Lesson Title: Using the bunsen burner. Learning Outcomes How I did Targets Learning Outcome 1: To be able to use a bunsen burner safely. Level 5 Connector: Learning Outcome 2: To carry out an experiment to investigate the heating effect of different bunsen flames. Level 6 • Record your answers in a table. Extension activity: Using a bunsen burner for flame tests. • • Using the work sheet identify the safety hazards in the picture – there at least 17! 12: 59 Cro 2011
New Information for Task 1
BIG picture Key Question: How do you safely heat substances in a laboratory? What skills will you be developing this lesson? • HSW- by carrying out an investigation/ Interpreting data/ evaluating an experiment • Literacy- by writing explanations using correctly spelt keywords and by writing an instruction sheet • Numeracy- by plotting a graph • Team work- during a practical investigation • Creative thinking- by considering how to work safely in a laboratory • Participation- during a practical activity • Reflection- through self and peer assessment of each outcome 12: 59 How is this lesson relevant to every day life? We need to be able to identify hazards and then take appropriate action to work safely. Quick Discussion: What do you already know?
Keywords: Create sentences using the keywords to show that you know what they mean. Put your hand up if there is any key word from the list that you don’t understand. • laboratory • bunsen burner • chimney • air hole • • hazard • safety goggles • safety precautions 12: 59 tripod beaker thermometer gauze fair test control variables
New Information for Learning Outcome 1 • Visual: Demonstration • Audio: Demonstration • Kinaesthetic: Class experiment 12: 59
Using a Bunsen Burner Flame (Outer Cone) Flame (Inner Cone) Chimney Air Hole Heat Proof Mat Base Rubber tubing
The safe use of a bunsen burner
Using a Bunsen Burner Air hole open half-open Air hole closed Type of Flame When do we need to use this flame? Safety Flame Roaring Flame Blue Flame To heat things fast To heat things slowly When we are not using the bunsen but want to keep it on.
Using a Bunsen Burner Type of Flame When do we need to use this flame? Air hole open Air hole half-open Roaring Flame Blue Flame To heat things fast Air hole closed Safety Flame When we are not using the To heat things slowly Bunsen but want to keep it on.
Extended Learning task: Write a laboratory safety guide on how to use a Bunsen Burner. You should include: How to light a Bunsen burner How to adjust the flame Safety precautions Due date: Criteria for Level 5: – Basic description, basic detail. Criteria for Level 6: – Description with explanation and good level of detail. Criteria for Level 7: – Detailed description and in depth detailed explanation using examples to highlight points made. 12: 59
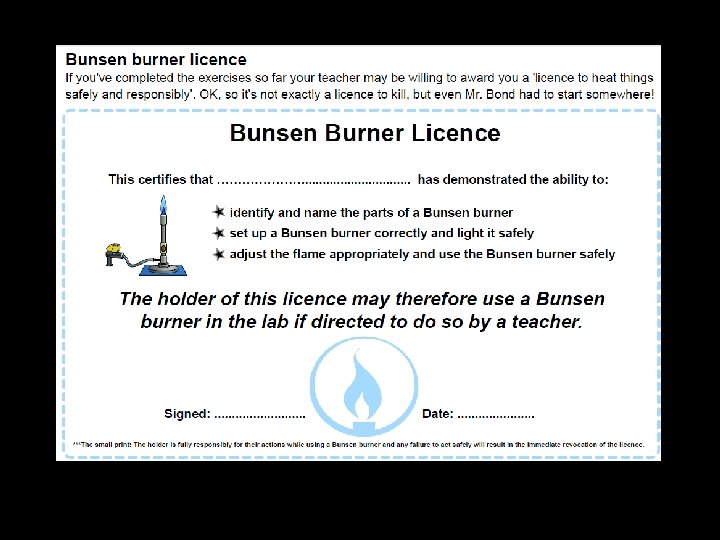
Demonstrate your Learning for Outcome 1 Create I am working at level. . because. . . Evaluate Apply (L 5) Did you get your bunsen burner licence? Analyse Apply Understand (L 4) Understand Remember 12: 59 Can you explain how to use a bunsen burner safely?
Learning Outcome 1: Review To be able to use a bunsen burner safely. Go back to your Learning Outcome grid and fill out the ‘How I did’ and the ‘Targets’ column. Learning Outcome 1: Level 5 12: 59 How I did Met? Partly met? Not met? Targets How can I improve on Learning Outcome 1?
New Information for Learning Outcome 2 thermometer beaker of water tripod bunsen burner heat proof mat What safety precautions must be taken when doing this test? http: //www. absorblearning. com/media/attachment. action? quick=t 1&att=2080
Investigating the heating effects of Bunsen burner flames Time Blue flame Roaring flame (s) temperature (o. C) 0 30 60 Method 1. Put 200 cm 3 of cold water into a glass beaker. 2. Measure the temperature of the water, and record it in a results table. 3. Light the Bunsen burner. 4. Adjust the Bunsen burner to the correct flame and start heating the water. 5. Start the timer. 6. Record the temperature every 30 s until the temperature reaches 65 o. C. 7. Repeat 1 -6 using a different bunsen flame. 8. Plot a graph showing both experiments on the same set of axes.
Investigating the heating effects of Bunsen burner flames Time Blue flame Roaring flame (s) temperature (o. C) 0 30 temperature (o. C) 60 65 0 0 time (s) Method 1. Put 200 cm 3 of cold water into a glass beaker. 2. Measure the temperature of the water, and record it in a results table. 3. Light the Bunsen burner. 4. Adjust the Bunsen burner to the correct flame and start heating the water. 5. Start the timer. 6. Record the temperature every 30 s until the temperature reaches 65 o. C. 7. Repeat 1 -6 using a different bunsen flame. 8. Plot a graph showing both experiments on the same set of axes.
Conclusion (Work with your neighbour) Step 1 – Think about the experiment (Make bullet point notes) • What were we trying to find out? • What was changed (indepenedent variable)? • What was measured (dependent variable)? • How was the experiment made to be a fair test (control variables)? • What was found out? Step 2 – Write your conclusion • Use your notes from Step 1 to help you. Some useful words: Firstly… Then …. Then…. . Finally consequently, because, whenever, depending upon, eventually, since/until
Conclusion – copy and complete In our experiments we measured the change in temperature of the water every 30 s until a temperature of 65 o. C was reached. We used two different Bunsen flames. To make our tests fair the control variables were the same: • Size beaker. • Volume of cold water. We found out that. .
Demonstrate your Learning for Outcome 2 I am working at level. . because. . . Create Evaluate To get to the next level I need to. . . Analyse (L 6) Apply (L 5) Analyse 1. Identify the control variables. Did you: 1. Complete the experiment ? Did you: Apply 2. Plot a graph? Understand Remember 12: 59 2. Write a sensible conclusion?
Learning Outcome 2: Review To carry out an experiment to investigate the heating effect of different bunsen flames. Go back to your Learning Outcome grid and fill out the ‘How I did’ and the ‘Targets’ column. Learning Outcome 2: Level 6 12: 59 How I did Met? Partly met? Not met? Targets How can I improve on Learning Outcome 2?
Review for Remembering • Stand up if you have met the lesson outcomes? • If not what do you need to do next in order to meet the outcome? Record this in your diary as part of your homework. • Is there any part of the lesson you think you need to go over again next lesson? • Tell the person next to you three things you have learnt this lesson. • How will you remember this for your exam? 12: 59
Learning Activities for Outcome 3 Extension – Using a bunsen burner for flame tests • Heating a metal compound in a bunsen flame and observing the colour can be used to identify the metal that is present. • The colours of fireworks are due to the presence of particular metal salts. Procedure: 1. Light the burner. 2. Take a wood splint , wet one end with water and then dip the soaked end into a solid sample. 3. Hold the end of the wood splint containing the crystals into a burner flame and observe the colors. 4. Place the wood splint in your beaker of water to extinguish it. 5. Record the colors in the chart. 6. Using a fresh wood splint each time, repeat the test with the other samples.
Technician’s list 250 ml glass beakers 0 -110 o. C thermometers Bunsens Tripods Gauzes Heat proof mats Splints & matches Chem 1 L 01 spot hazard worksheet Bunsen burner worksheet (http: //www. echalk. co. uk/Science/practical. Skills/Bunsen. Burner/Dn. D/Bunsen. Worksheet. pdf) Supply of elastic bands so students’ hair can be tied back Solid samples of salts containing the following metal ions for flame tests sodium – yellow-orange potassium – lilac lithium – red copper – green/blue barium – apple green
Keywords: Demonstrate your Learning for Outcome 1 Create (L 8) Evaluate (L 7) Judge Justify Defend Decide Agree Value Prove Check Criticise Recommend Support Test Create Evaluate Combine construct Develop Imagine Design Change Improve Discuss Create Invent Suppose Put together Make up Synthesise Analyse (L 6) Apply (L 5) Use Build Execute Develop Construct Identify Plan Select Solve Organise Apply Model Analyse Apply Remember (L 3) Understand Who What When Where Why Which How Match Define List Choose Name Spell Tell Describe Remember 12: 59 Take apart Compare Classify Examine List Distinguish Simplify Theme Conclude Motive Discover Understand (L 4) Explain what when where how Rephrase Demonstrate Summarise Contrast Show Predict Compare Clarify Illustrate Categorise