Chem Draw Stationery Files You should have with


 • Alternatively, open a new Table 1 stationery")


- Slides: 68
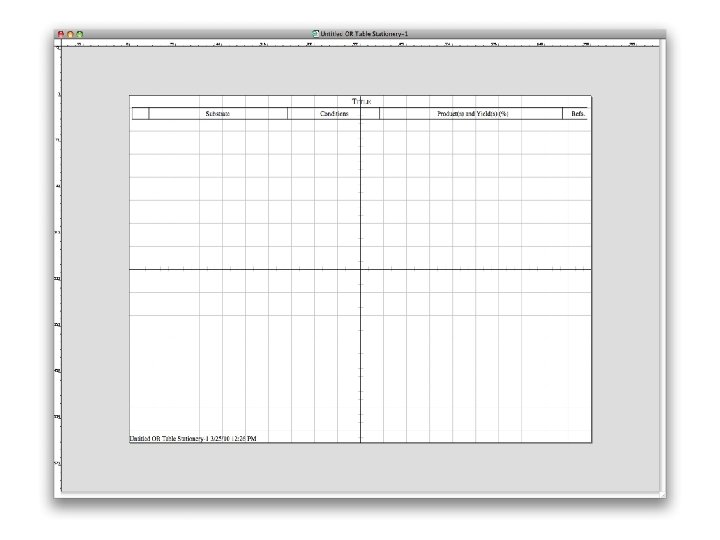
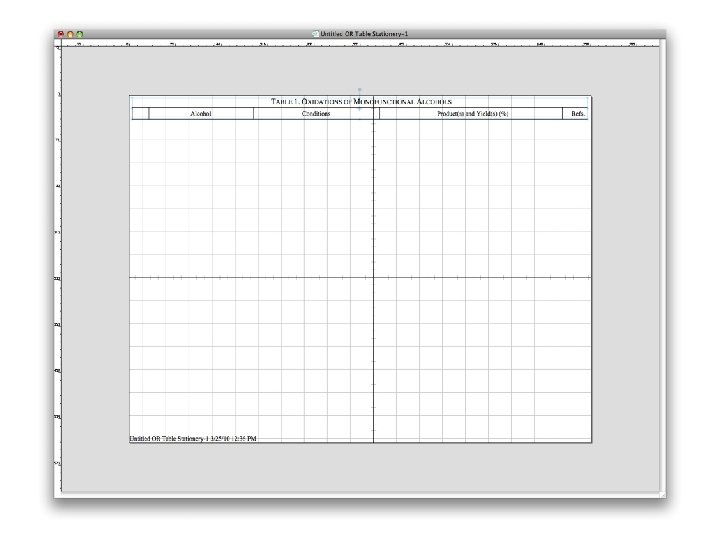
Chem. Draw Stationery Files • You should have with your OR Chapter Materials a Chem. Draw stationery file entitled “OR Table Stationery. cds” The OR Editorial Coordinator sent this file electronically when your chapter was commissioned. • This file has all the necessary settings illustrated in Appendix III of the Organic Reactions Manuscript Guide. Do not alter these settings. • The first slide shows what this file looks like when opened. Note that it will open as an “Untitled OR Table Stationery” file. • You will be instructed to save all Table header files as stationery files. Thus, while you are working in a given Table, an “untitled” copy of the header file will appear whenever you open a new document in Chem. Draw.
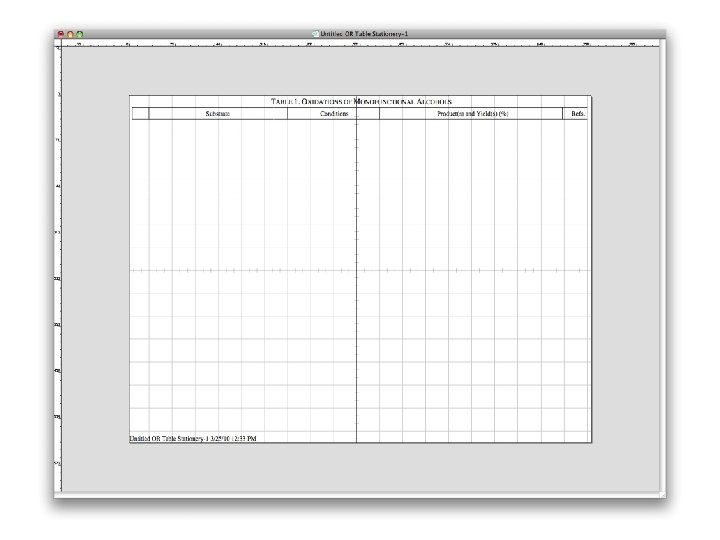
Constructing a Table-Specific Header • Create a stationery file for the Table using the OR Table Stationery. cds file provided by the Editorial Coordinator. • Give the Table a number and a title. The next slide shows the replacement of “TITLE” with the name of the Table. Number Tables using Arabic numerals. The first letter of each word in the title is in 12 -pt, and the remaining letters in 10 -pt, all CAPS. Subdivisions, if used, should be numbered 2 A, 2 B, etc.
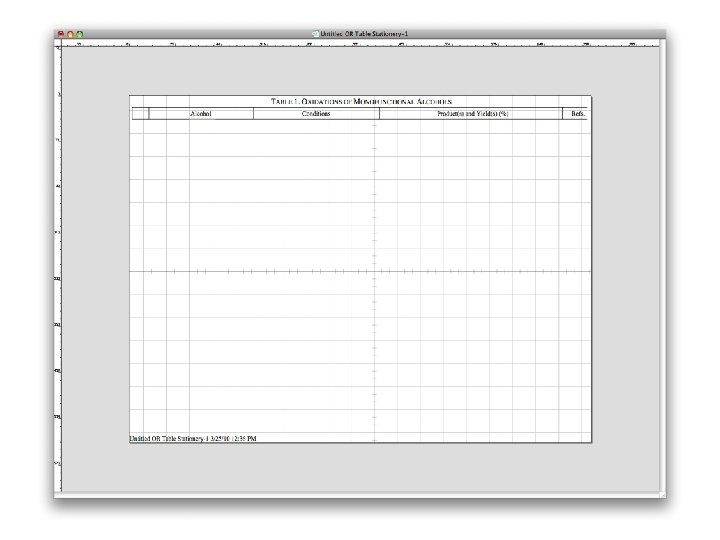
Customizing the Header for the Table Data • Adjust column widths to best accommodate the size of the anticipated entries. The vertical guidemarks for the left edges of the carbon-count, substrate, and reference columns must remain the same as in the original Organic Reactions stationery template. Once column widths are set, they must remain constant throughout a given Table. • The next slide shows that the substrate column was narrowed (vertical guide-marks moved), at the same time widening the conditions column. Widths were predetermined by assessing the space needed for the largest entries in the Table. • Define column headers. The substrate column header should be descriptive, e. g. , alcohol, amine, ketoester, etc. • Center the column headings.
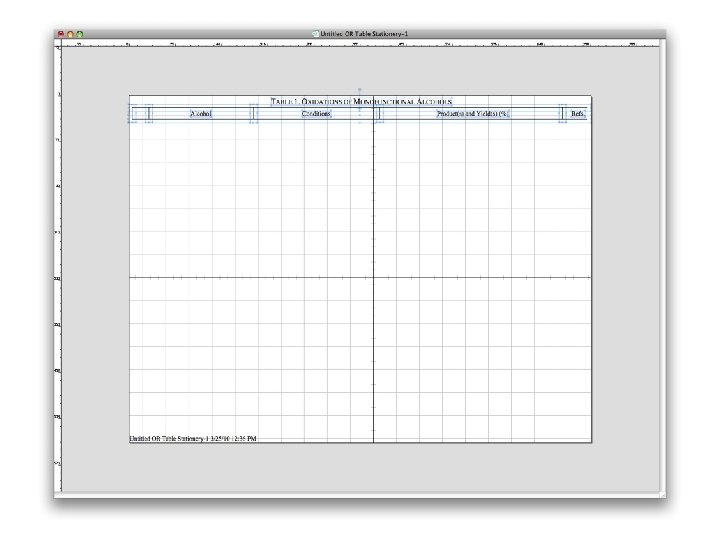
Finishing the Table Header • The next two slides show to group the Header elements. • The first slide shows how the elements appear after they are selected. Note that the multiple elements that comprise the header all have individual selection boxes. • The next slide shows the single selection box indicating that all the individual pieces have been grouped together. • “Grouping” of the header is desirable should you ever need to copy it and paste it into another document. Double-clicking on any single component will now select the header in its entirety.
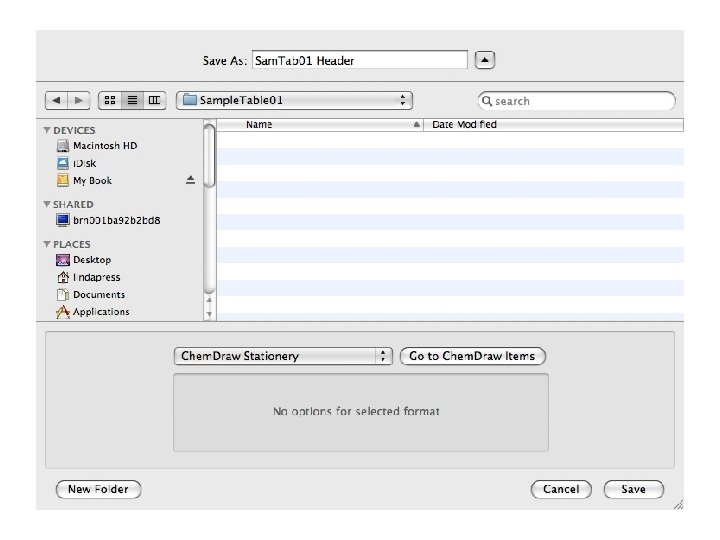
Saving the Table Header • The following slide shows the dialog box for saving the header file as a stationery file. • Go to “File/Save as…” to open the “Save” window. • Name the File. The file Name should have the format of Auth. Tab## Header, where “Auth is the first 3 or 4 letters of the author’s name, and Tab## is the Table number. Always use two digits with zero as a placeholder for numbers less than 10. In this example, I chose “Sam. Tab 01 Header. ” • Select “Chem. Draw Stationery” as the file type. The file extension should be “cds. ” • Select the save location. In this example, it is a folder named Sample. Table 01. • Save.
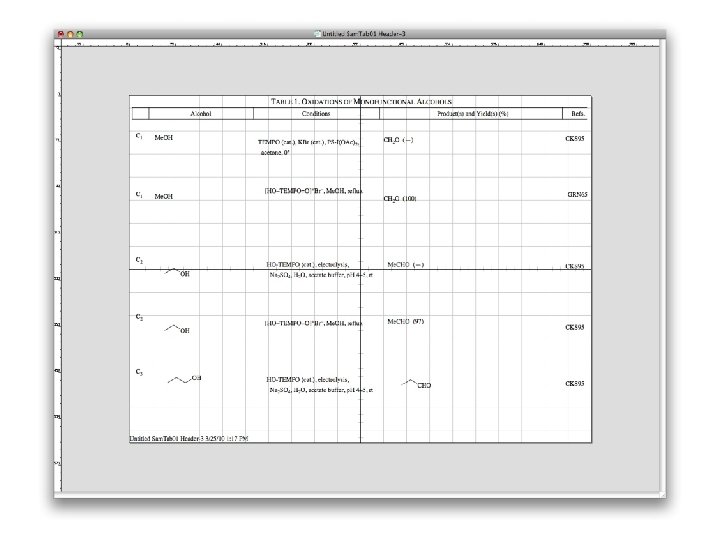
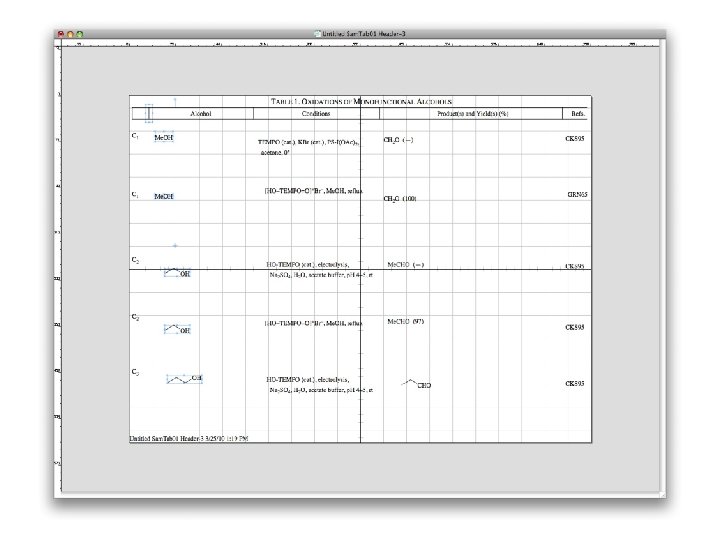
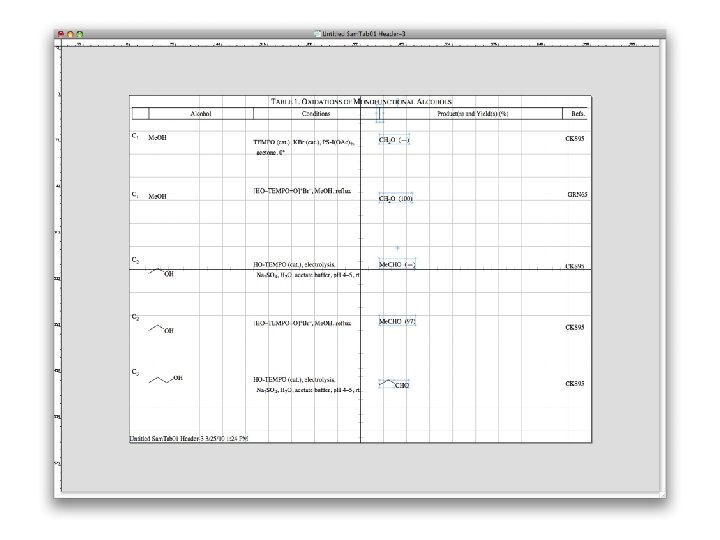
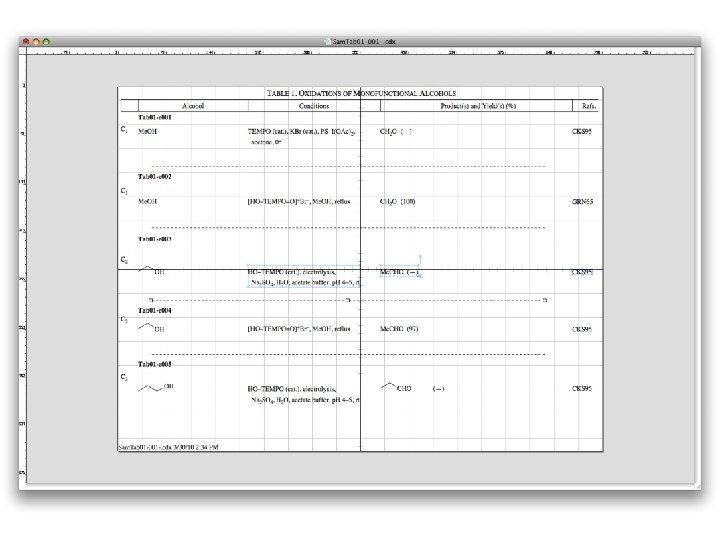
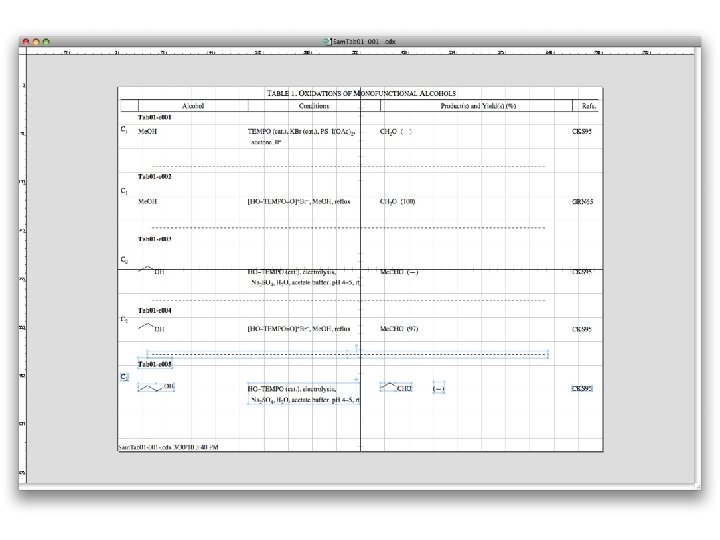
Adding Structures and Captions • Draw the structures and type the captions for each entry observing the style conventions described in the Organic Reactions Manuscript Guide. • Assign a carbon-count to each entry. • Use reference codes rather than consecutive numbers to allow for possible relocation of entries. Reference numbers will be added later. • If structures are imported from another document, be sure that the document settings for the stationery file are applied to those structures. (Chem. Draw may not do it automatically. ) • Check that all captions (conditions, yields, and reference codes) have 16 -pt line spacing. • Depending on the size of the structures, put 1– 5 entries per page. Leave enough space on the page to add an entry should that be necessary. • The following slide shows the addition of five entries to a Table 1 stationery file.
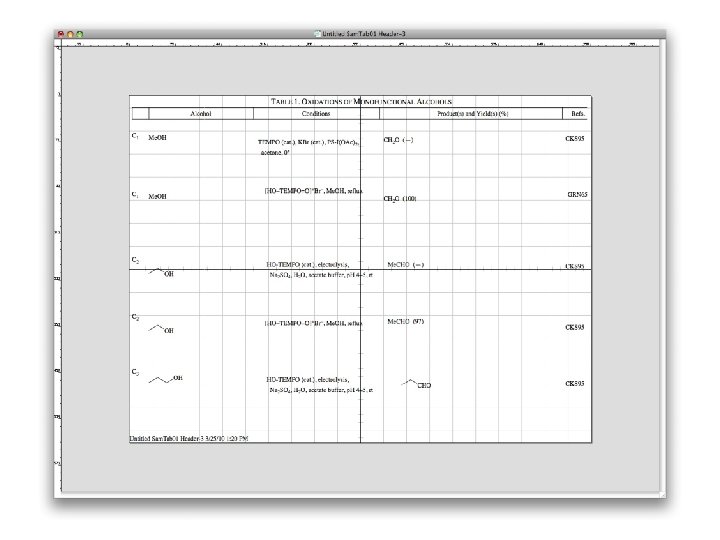
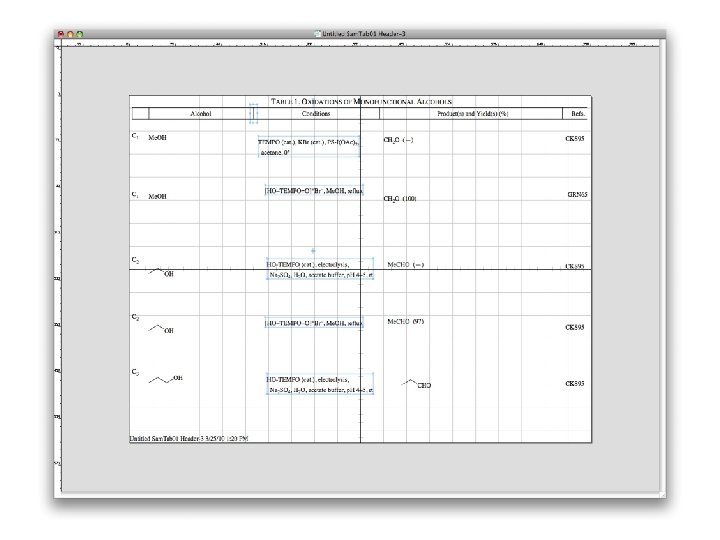
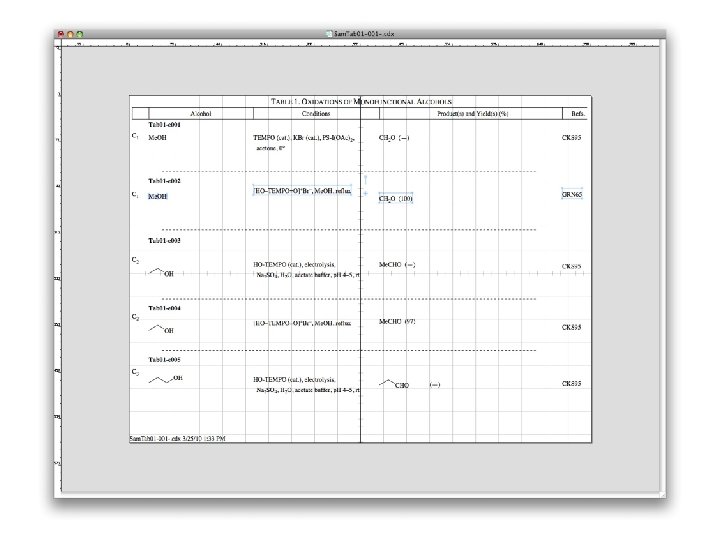
Aligning Entries and Columns • The next series of slides shows how to align the column contents. [While the compositor is also responsible for final alignments, the more our submission resembles the end product, the more facile the production process should be. ] • Vertical column alignments are achieved by selecting the column contents together with the left-most guide-mark (in the table header) for that column. Use the Chem. Draw command “Object/Align…Left edges. ” • NOTE: In Chem. Draw, to constrain the movement of selected objects to the horizontal or vertical direction, Shift+drag the selected objects. (See Chem. Draw Help )
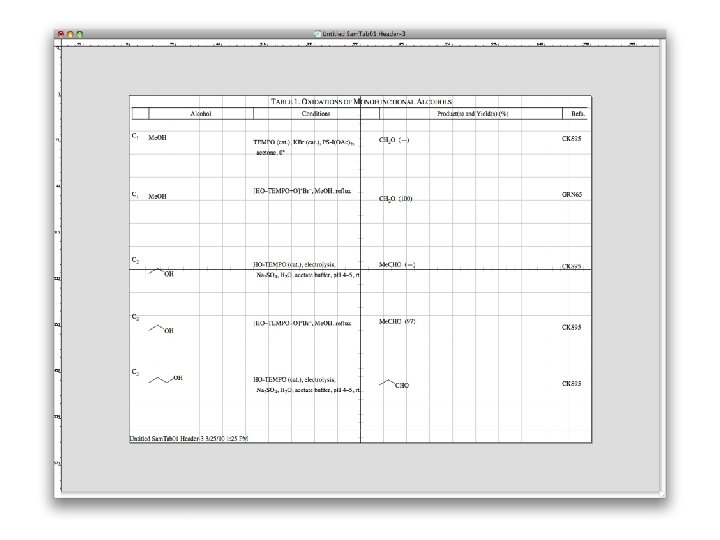
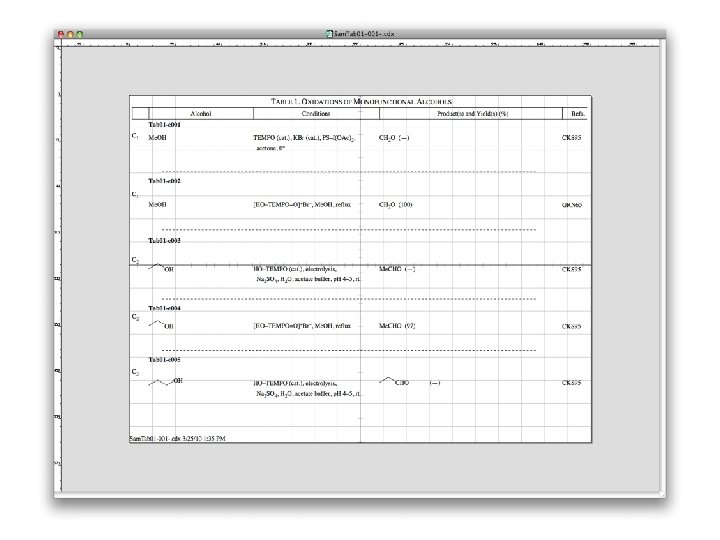
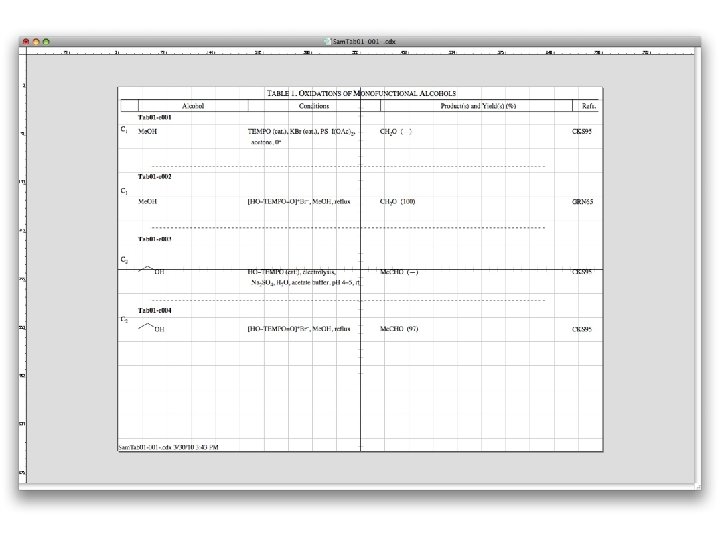
Corrections • Make any corrections as needed. The yield was inadvertently omitted in the last entry. It needed to be added prior to aligning the entry horizontally.
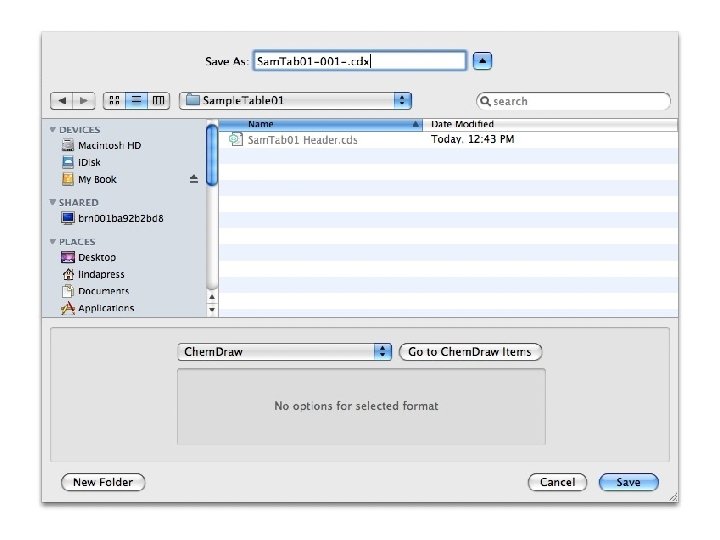
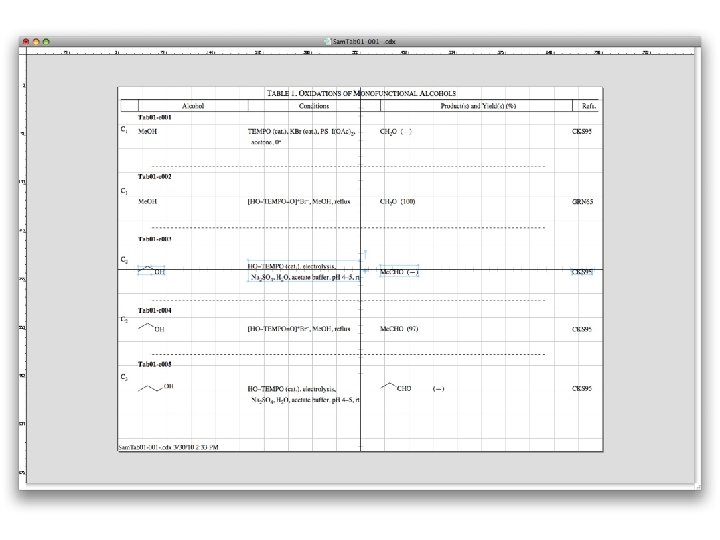
Saving the File • Be sure to save the file as a Chem. Draw document. While this can be done at the end, it would have been wiser to do it a bit earlier in the process so as to safeguard all the data that was entered! • Go to “Save as…” in the File menu. Name the file. Use the format “Auth. Tab##-###-”, where the first two digits are the table number, and the last three show the entry number for the first entry on that page. For example, this file is the first page of Table 1, so the first entry is 001. Thus, the chosen file name is “Sam. Tab 01 -001 -. ” The hyphen at the end indicates that “ 001” is the beginning of a range of entries on that page. Note that the next page in this series will have the file name “Sam. Tab 01 -006 -. ” • The Chem. Draw default save is as a “cdx” (document) file rather than a “cds” (stationery) file. However, be sure that the saved document has a “. cdx” extension.
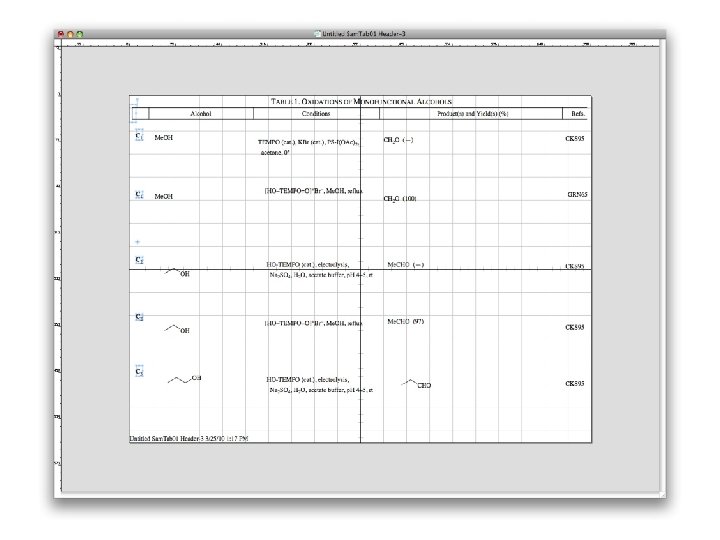
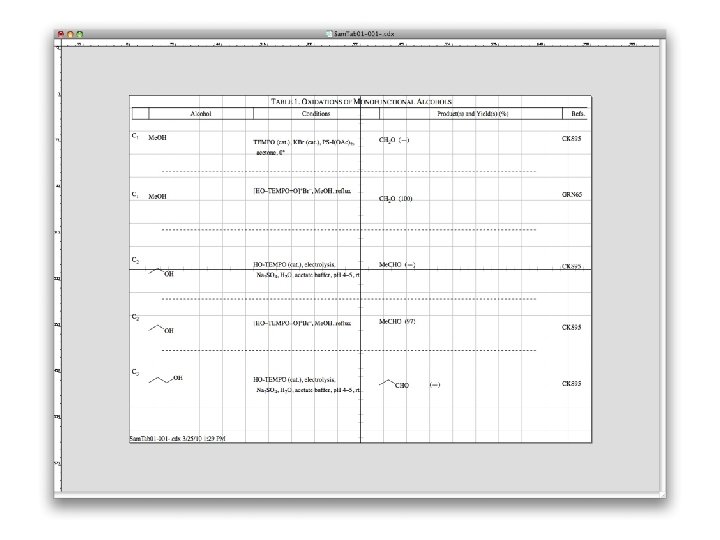
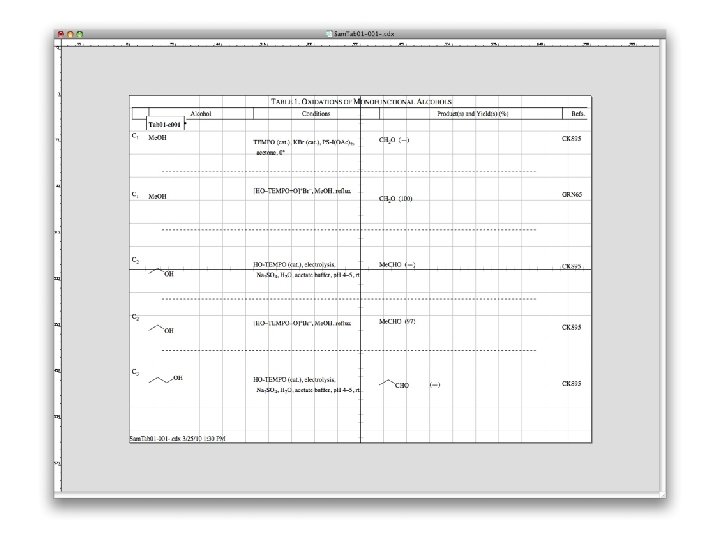
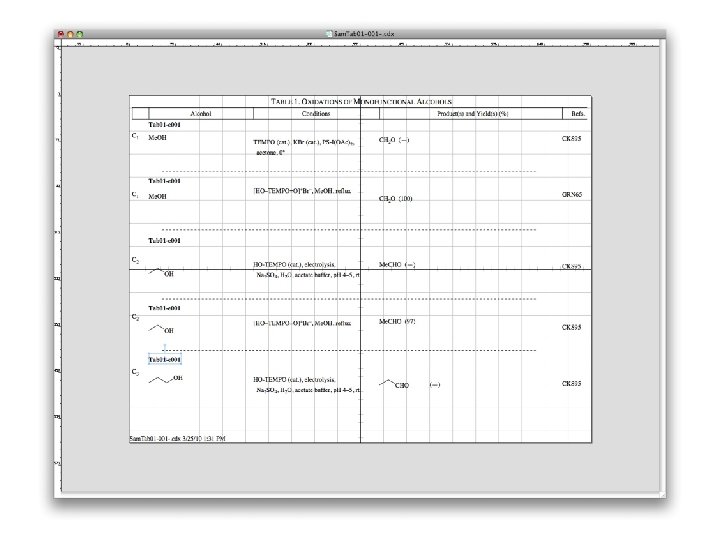
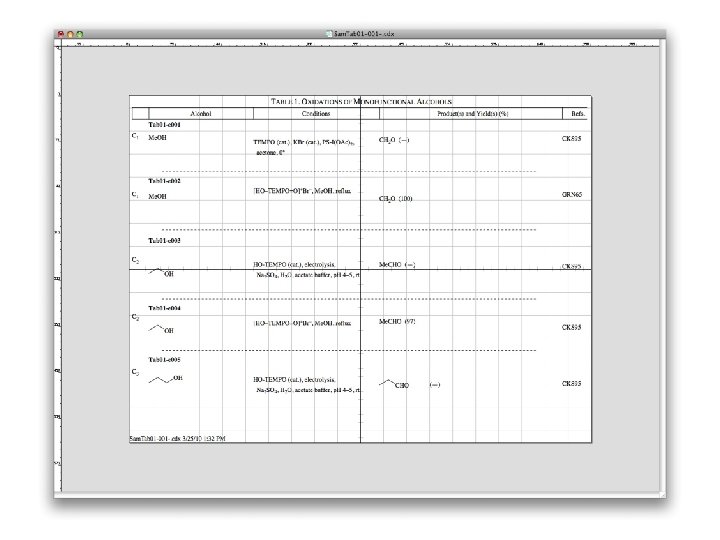
Identification of Entry Locations • The next several slides show entries are separated and marked according to where they belong in the table. This procedure is akin to that used for text graphics. • Using the Chem. Draw line tool, draw a dotted line across the page between the first and second entries. • Select, copy-drag, and drop the line between the next two entries. Repeat until all the entries are separated by a dotted line. • Add a caption above and to the left end of the first entry having the form “Tab 01 e 001. ” The caption indicates that this is the first entry to appear in Table 1. The following slides show that this caption was then copy-dragged and dropped for each successive entry, and then modified so that the numbers were sequential, making the task a bit simpler. However it is done, each entry must have a caption identifying its place in the Table.
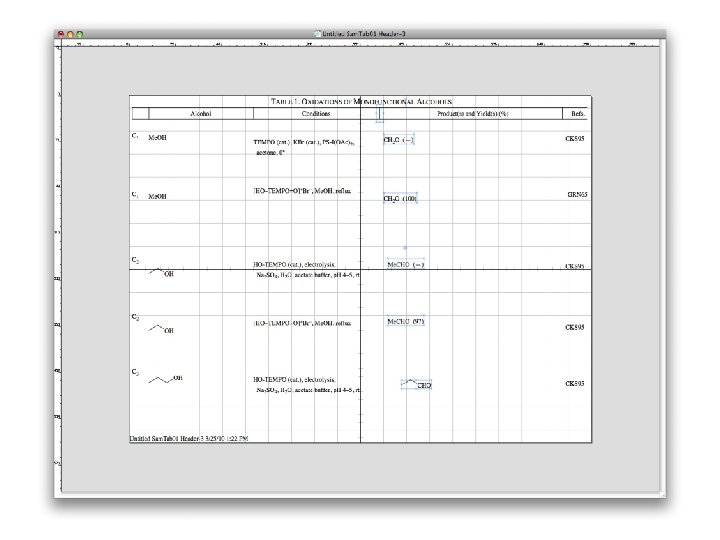
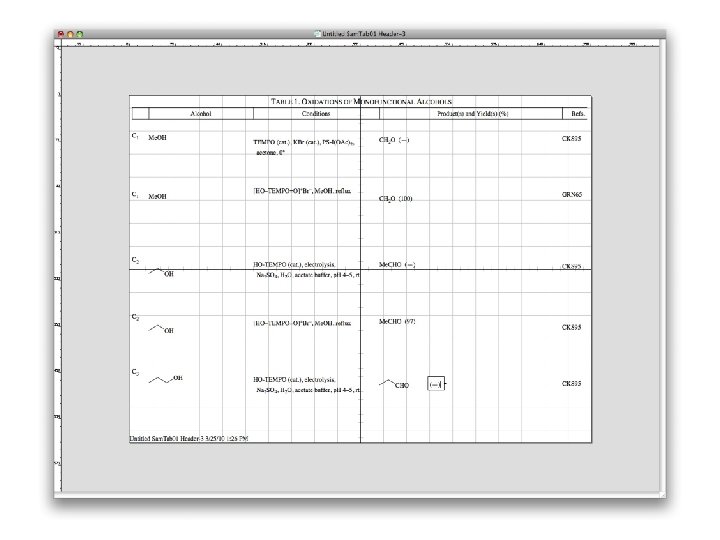
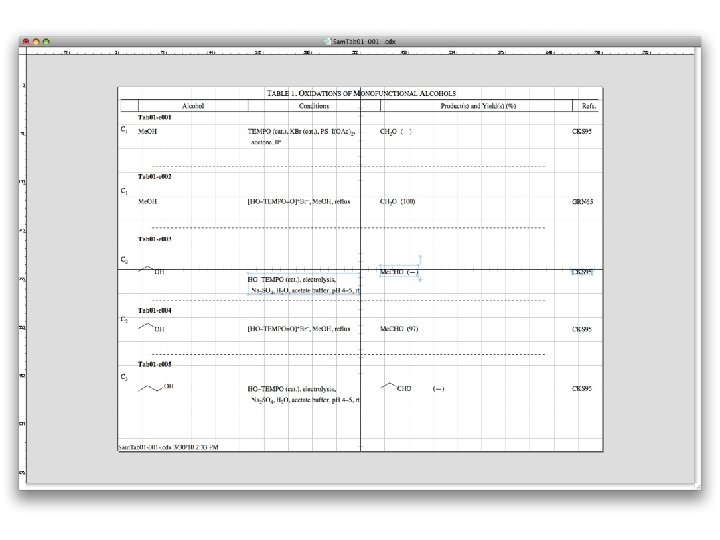
Final Alignments • The last step in the example is to do an alignment of the entry across the page. The next three slides illustrate how. • Select the entry. • Align using the “Align… T/B centers” from the “Object” menu. • The top line of two-line conditions should be aligned with the top of the yields(s) and reference code(s). After doing the T/B alignment, select and drag the conditions down until the top edge is lined up using the cross-hairs as the guide. Alternatively, drag the conditions down so that they are visibly below the top line of the yields, co-select the yield or reference caption (or both), and apply “Align… Top edges. ”
Voila! • The file is now complete… • Proofread the page. Ooops! One more check found two hyphens that needed to be en-dashes in the conditions. • The last slide shows the page in final form. • Prepare subsequent pages similarly, always starting with the stationery file for that Table. • The order of the steps can be varied according to what works best for the subject matter.
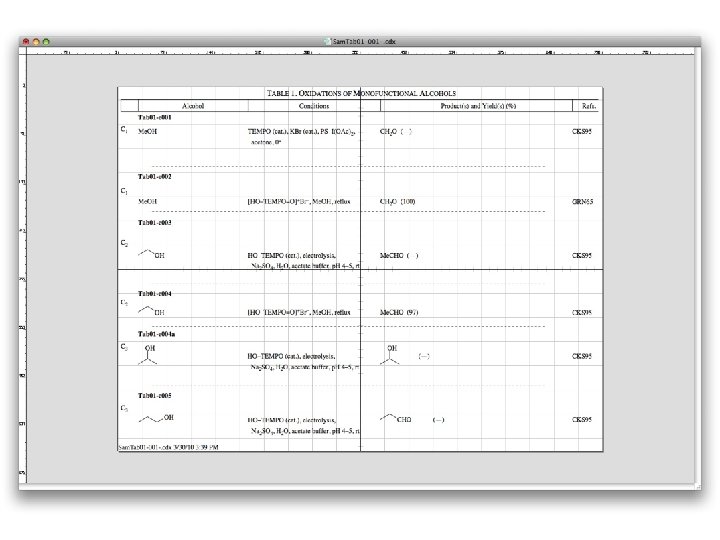
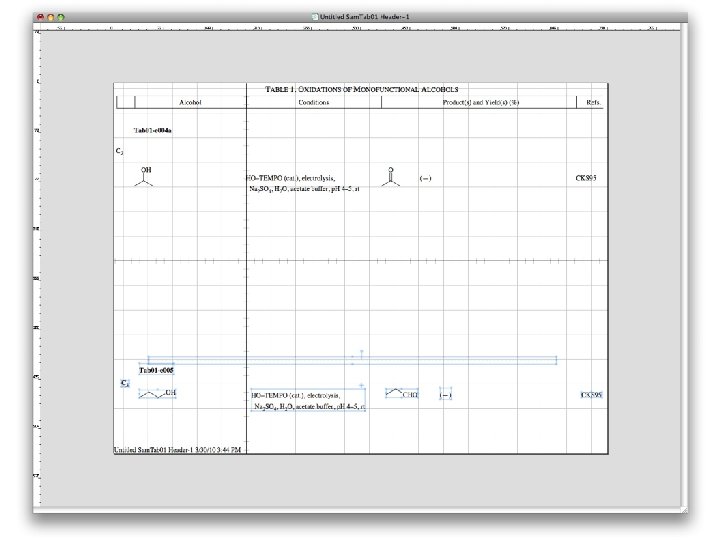
Adding or Deleting an Entry There are two ways to insert a new entry: • If there is room on the page where it belongs, select and move the other entries to make space, insert the entry and align it as necessary. • Separate the new entry using a dotted line, and identify its location using a sequential alphanumeric caption. • The next slide shows the insertion of a new entry labeled “Tab 01 e 004 a. ”
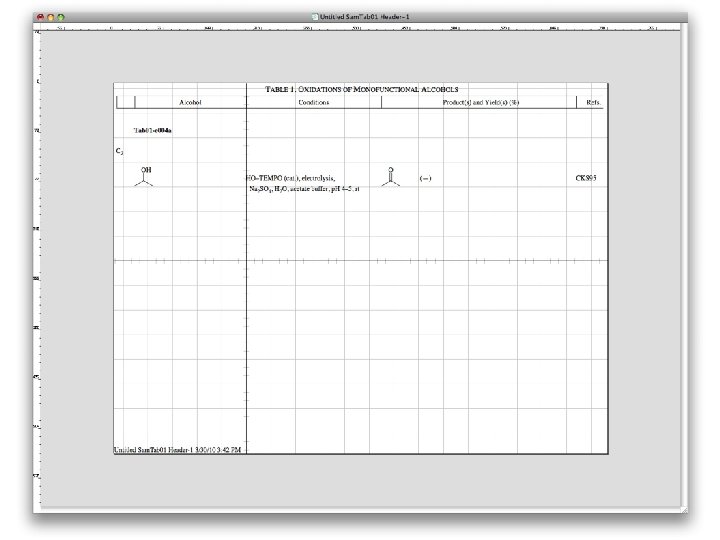
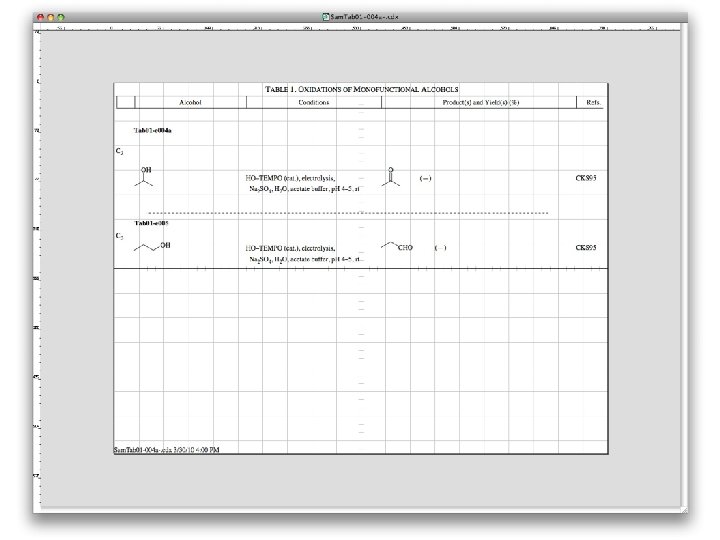
Adding or Deleting an Entry (continued) • Alternatively, open a new Table 1 stationery file and add the entry to that page. Label the new entry. • Move any subsequent entries from the page where the new entry would have been placed into the new file. • Name the file. In this example the new file name is “Sam. Tab 01 -004 a-. ” • The next few slides illustrate the maneuvers. • To remove an entry, simply delete it. No renumbering of the insertion codes is necessary.
Constructing Sub-Tables • The following slides illustrate the preparation of a sub-table according to the directions given in Appendix III of the Organic Reactions Manuscript Guide. • Sub-tables are useful for keeping related entries together, but should be limited as described in Appendix III. • Note that after the first column is complete, each additional column is created using “shift-dragcopy, ” which constrains the movement of the selected column to a horizontal direction. • Completed sub-tables can be located next to the products if there is room, or positioned under the entry, as in the following example.
Type information into the first column, then select that column.
Shift-drag-copy the column to the right.
Enter the data for the new column.
Center numerical data.
Select the column.
Shift-drag-copy the column to the right.
Enter the data for the new column.
Select the column.
Shift-drag-copy the column to the right.
Enter new data.
Shift-drag-copy the column to the right.
Enter the new data. Note that because the yield column has no header, a space must be added at the top.
Insert cursor at the top.
Add a “return. ”
Draw a line beneath the headers using the line tool, not a bond.
Select all the text boxes and the line.
Group the elements comprising the sub-table.
Position the sub-table. You’re done!