Check your ladder before you use it Before

Check your ladder before you use it Before starting a task, you should always carry out a ‘pre-use’ check to spot any obvious visual defects to make sure the ladder is safe to use. A pre-use check should be carried out: • Check the stiles – make sure they are not bent or damaged, as the ladder could buckle or collapse. • Check the feet – if they are missing, worn or damaged the ladder could slip. Also check ladder feet when moving from soft/dirty ground (eg dug soil, loose sand/ stone, a dirty workshop) to a smooth, solid surface (eg paving slabs), to make sure the foot material and not the dirt (eg soil, chippings or embedded stones) is making contact with the ground. • Check the rungs – if they are bent, worn, missing or loose the ladder could fail. Check any locking mechanisms – if they are bent or the fixings are worn or • damaged the ladder could collapse. Ensure any locking bars are engaged. • Check the stepladder platform – if it is split or buckled the ladder could become unstable or collapse. • Check the steps or treads on stepladders – if they are contaminated they could be slippery; if the fixings are loose on steps, they could collapse. • If you spot any of the above defects, don’t use the ladder and notify your employer.

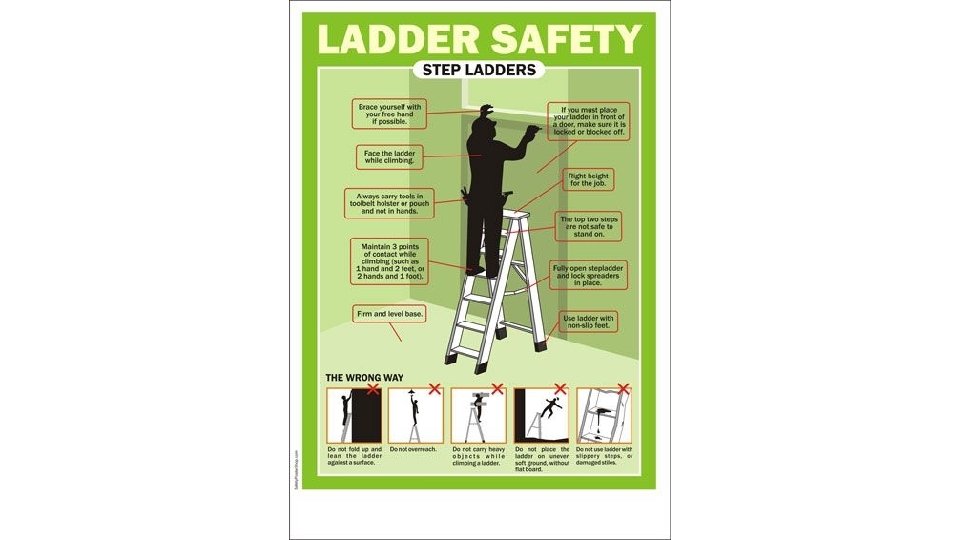
Stepladders When using a stepladder to carry out a task: • check all four stepladder feet are in contact with the ground and the steps are level; • don’t overreach; • don’t stand work on the top step • ensure rungs are in place • try to position the stepladder to face the work activity and not side on. • maintain three points of contact at the working p • osition. This means two feet and one hand, or when both hands need to be free for a brief period, two feet and the body supported by the stepladder (see Figure 1 and associated text). Figure 1 Example where two 4 hands need to be free for a brief period for light work. Keep two feet on the same step and the body (knees or chest) supported by the stepladder to maintain three points of contact. Make sure a safe handhold is available
- Slides: 9