Chapter 8 Hypothesis Testing Section 8 1 Steps


 • the value used to determine")


- Slides: 33
Chapter 8 Hypothesis Testing
Section 8 -1: Steps in Hypothesis Testing – Traditional Method • Learning targets – IWBAT understand the definitions used in hypothesis testing. – IWBAT state the null and alternative hypotheses. – IWBAT find critical values for the z-test
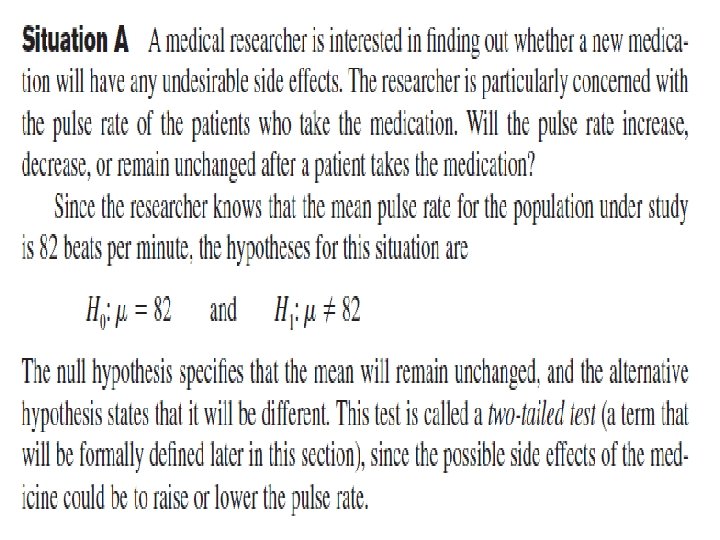
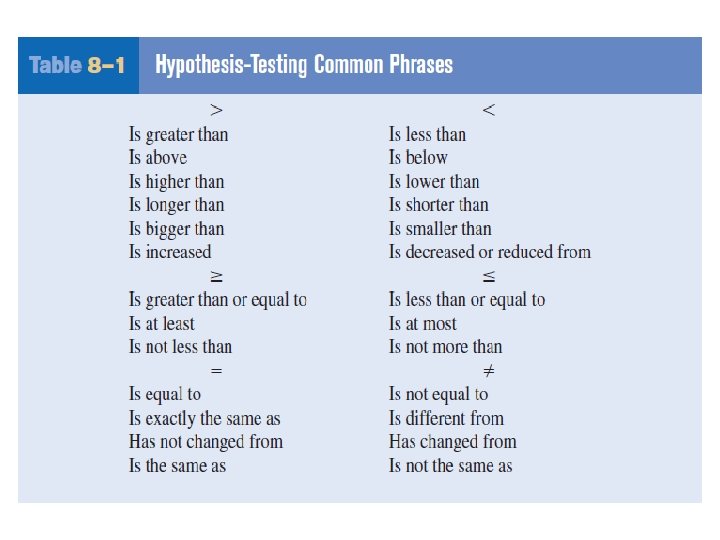
Vocabulary • Statistical hypothesis – a conjecture about a population parameter. This conjecture may or may not be true. • Null hypothesis – symbolized as H 0, is a statistical hypothesis that states that there is no difference between a parameter and a specific value, or that there is no difference between two parameters. • Alternative hypothesis – symbolized as H 1, is a statistical hypothesis that states the existence of a difference between a parameter and a specific value, or states that there is a difference between two parameters.
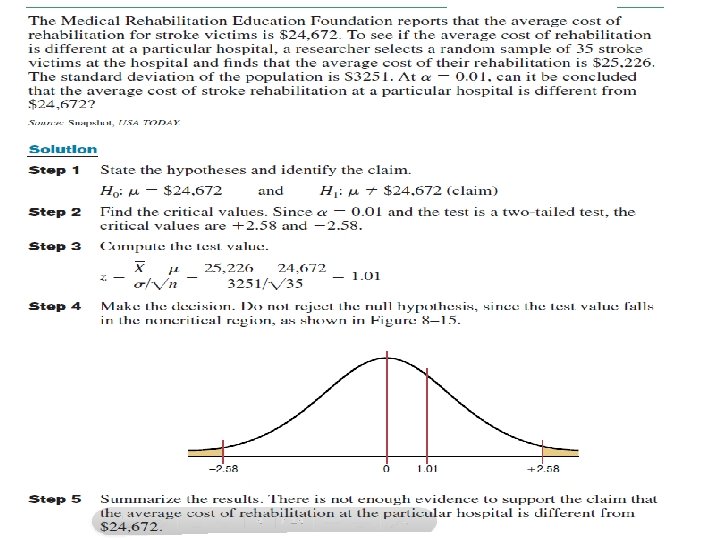
Practice Problems
Solutions
• A statistical test uses the data obtained from a sample to make a decision about whether the null hypothesis should be rejected. • The numerical value obtained from a statistical test is called the test value.
Errors In hypothesis testing there are 2 types of errors: - Type I Error – you reject the null hypothesis when it is true - Type II Error – you do not reject the null hypothesis when it is false Example: jury trial outcomes
Level of Significance • represented by alpha (α) • the value used to determine the critical value that helps determine whether or not to reject the null hypothesis • Also referred to as the P-value which is the area under the curve
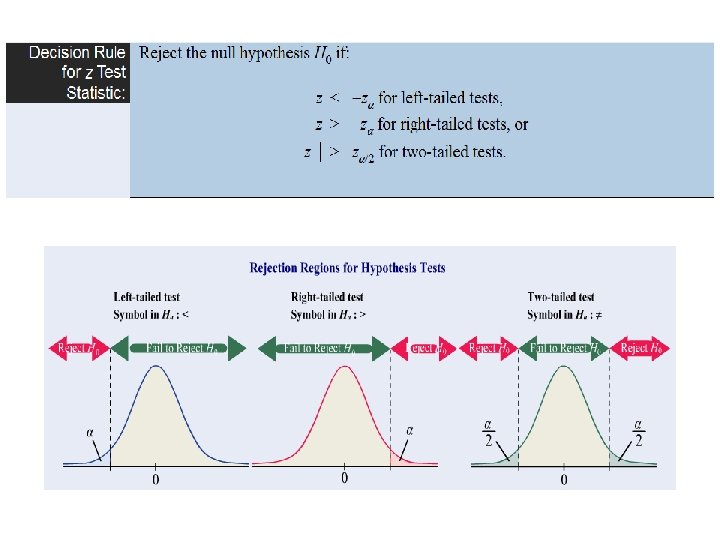
Critical Value and Region Critical value – the z-value that separates the critical region from the noncritical region (symbol C. V. ) Critical/rejection region – range of values of the test value that indicates that there is a significant difference and that the null hypothesis should be rejected Noncritical/nonrejection region – range of values of the test value that indicates that the difference was probably due to chance and the null hypothesis should not be rejected
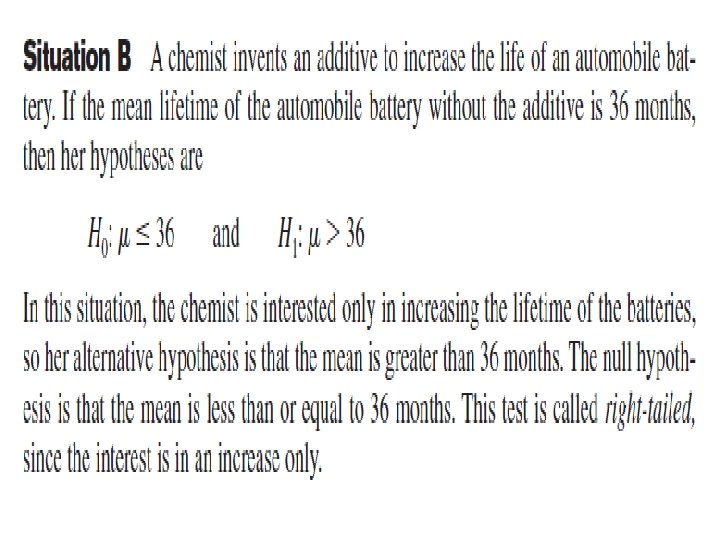
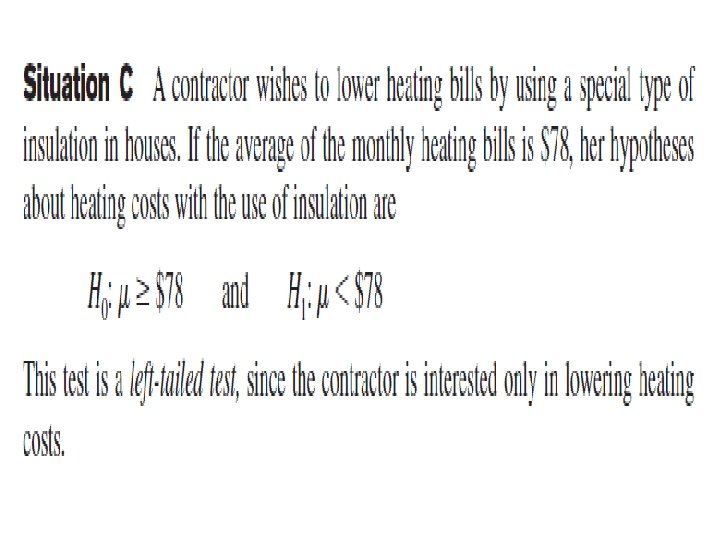
One-Tailed Test
Two-Tailed Test
This chart contains the z-scores for the most used α % Left-tailed Right-tailed Two-tailed . 20 80 -. 84 1. 28 . 15 85 -1. 03 1. 44 . 10 90 -1. 28 1. 645 . 05 95 -1. 645 1. 96 . 02 98 -2. 05 2. 33 . 01 99 -2. 33 2. 575 The z-scores are found the same way they were in Section 6 -1.
Practice Problems
Section 8 -2 Z Test for a Mean
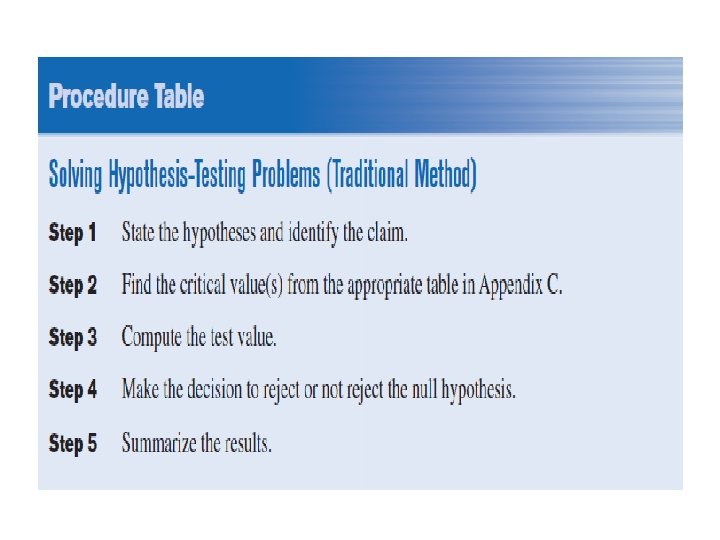
Steps 1. 2. 3. 4. 5. State null and alternative hypotheses. Find the critical values Compute the test value Make decision to reject or accept Summarize the results
Critical Value and Region Critical value – the z-value that separates the critical region from the noncritical region (symbol C. V. ) Critical/rejection region – range of values of the test value that indicates that there is a significant difference and that the null hypothesis should be rejected Noncritical/nonrejection region – range of values of the test value that indicates that the difference was probably due to chance and the null hypothesis should not be rejected
This chart contains the z-scores for the most used α % Left-tailed Right-tailed Two-tailed . 20 80 -. 84 1. 28 . 15 85 -1. 03 1. 44 . 10 90 -1. 28 1. 645 . 05 95 -1. 645 1. 96 . 02 98 -2. 05 2. 33 . 01 99 -2. 33 2. 575 The z-scores are found the same way they were in Section 6 -1.
Formula •
One-Tailed Test
Two-Tailed Test
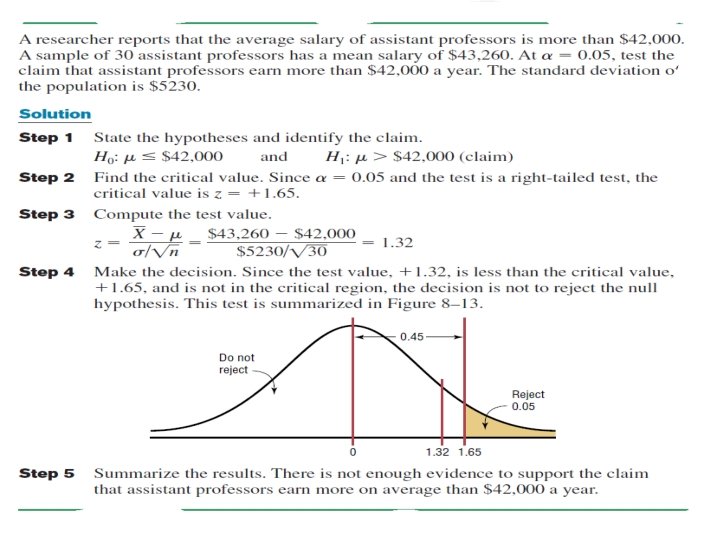
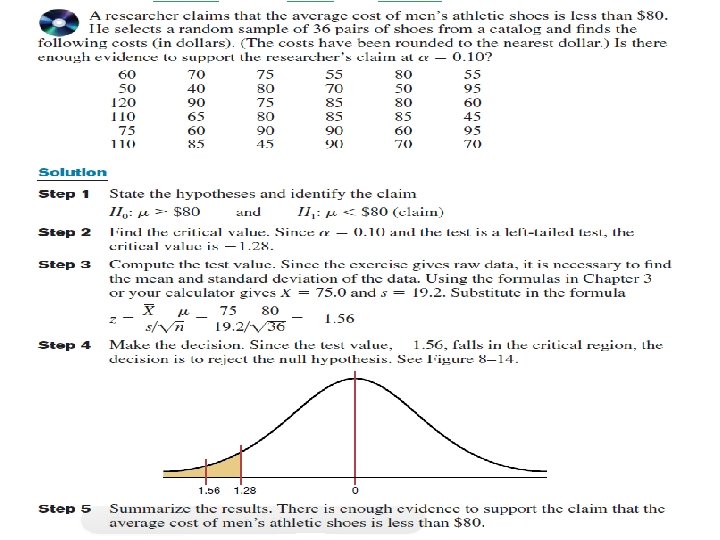
Summarize Results • To summarize the results you need to state whethere is or is not sufficient evidence to support the claim (the alternative hypothesis) - If we reject the null there is sufficient evidence to support the claim - If we fail to reject the null there is not sufficient evidence to support the claim. Example: There is sufficient evidence to support the claim that students will have an average score of 19 on the ACT.
Therefore, our decision is to reject the null hypothesis. Two-tailed with α=. 05, therefore critical region starts at 1. 96. Since the situation is two tailed, we have a tail to the right and a tail to the left. If we compare the two z-scores, we notice that the test statistic is greater than the critical value. Thus, there is sufficient evidence to support the claim that the valve does not perform to specifications.
Since we have rejected the null, we can conclude there is sufficient evidence to support the claim that the state employees earn on average less than the federal employees. Since the claim is “less than” the situation is one-tailed. The z-score critical value for α=. 01 is -2. 33 When we compare the two z-scores, we notice that the test statistic is less than the critical value and falls in the rejection region. Therefore, we will reject the null hypothesis.