Chapter 8 Convention Practice in Orthographic Writing TOPICS



- Slides: 49

Chapter 8 Convention Practice in Orthographic Writing

TOPICS l Definition l Purposes l Types of conventions - Alternate position of side view - Incompleted view - Aligned view - Enlarged view - Non-existing intersection line - Cylinder intersection

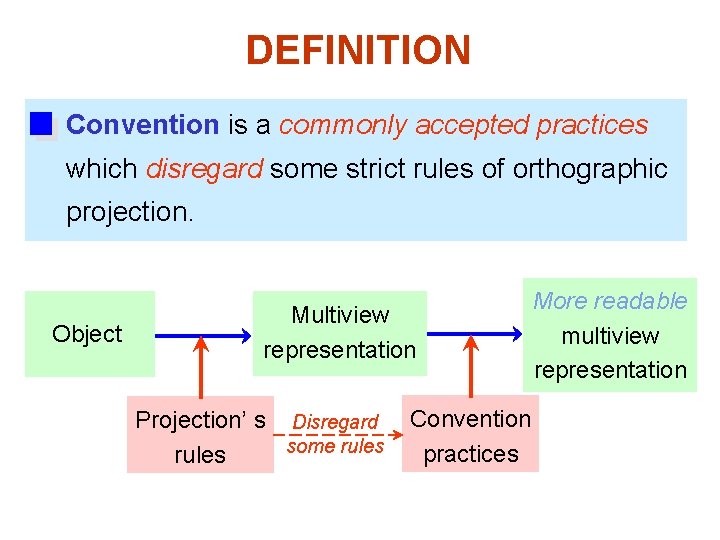
DEFINITION Convention is a commonly accepted practices which disregard some strict rules of orthographic projection. Object Multiview representation Projection’ s Disregard some rules Convention practices More readable multiview representation

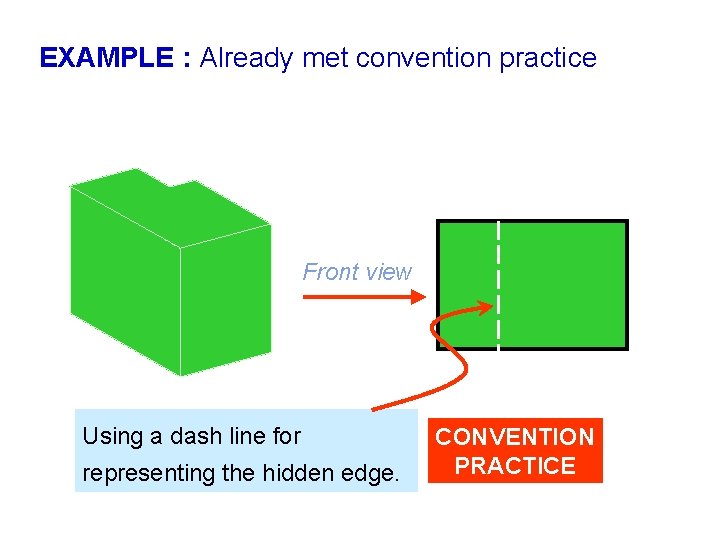
EXAMPLE : Already met convention practice Front view Using a dash line for representing the hidden edge. CONVENTION PRACTICE

PURPOSES To improve the clarity of a drawing. To facilitate the dimensioning. To reduce the drafting effort. To save or efficiently use a drawing space.

TYPES OF CONVENTION PRACTICE 1. Alternate position of side view 2. Incompleted view 2. 1 Incompleted side view 2. 2 Partial view 2. 3 Half view 2. 4 Local view

TYPES OF CONVENTION PRACTICE 3. Aligned view 4. Enlarged view 5. Non-existing intersection line 6. Intersection : Hole on a cylinder

ALTERNATE POSITION OF SIDE VIEW

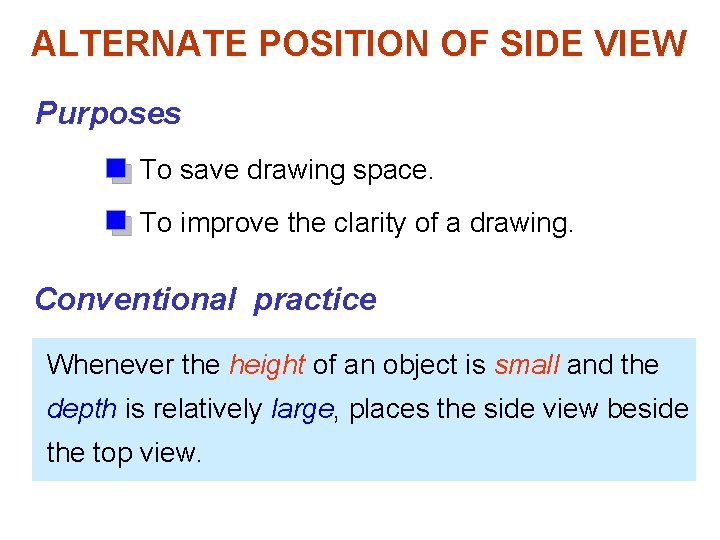
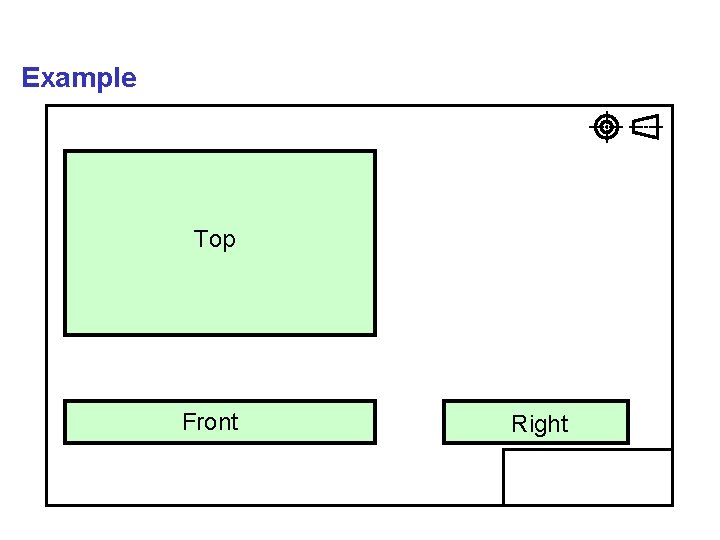
ALTERNATE POSITION OF SIDE VIEW Purposes To save drawing space. To improve the clarity of a drawing. Conventional practice Whenever the height of an object is small and the depth is relatively large, places the side view beside the top view.

Example Top Front Right

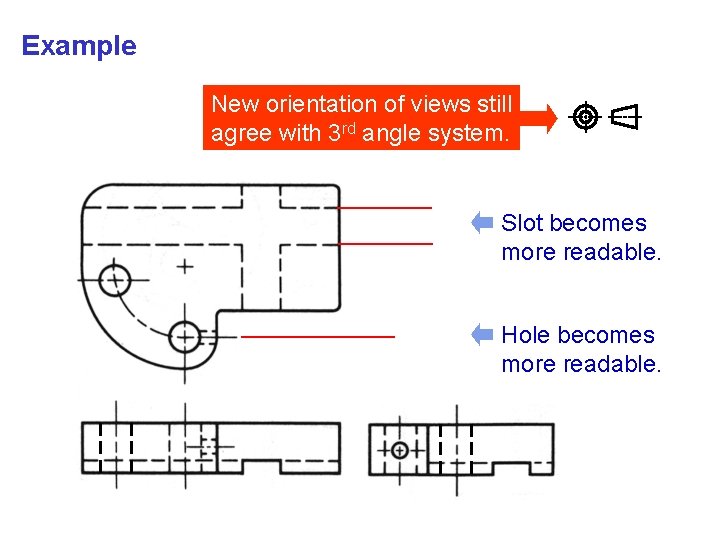
Example New orientation of views still agree with 3 rd angle system. Slot becomes more readable. Hole becomes more readable.

INCOMPLETED SIDE VIEW

DEFINITION Incompleted side views are side views that are eliminated a feature that can not clearly seen from a selected viewing direction.

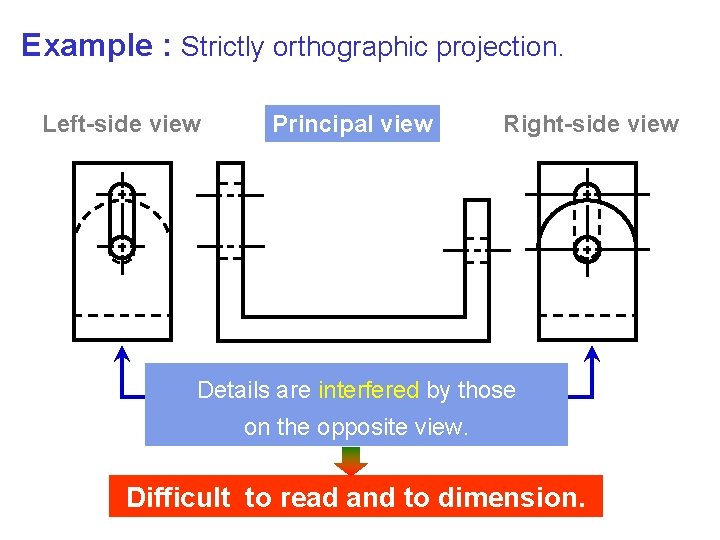
Example : Strictly orthographic projection. Left-side view Principal view Right-side view Details are interfered by those on the opposite view. Difficult to read and to dimension.

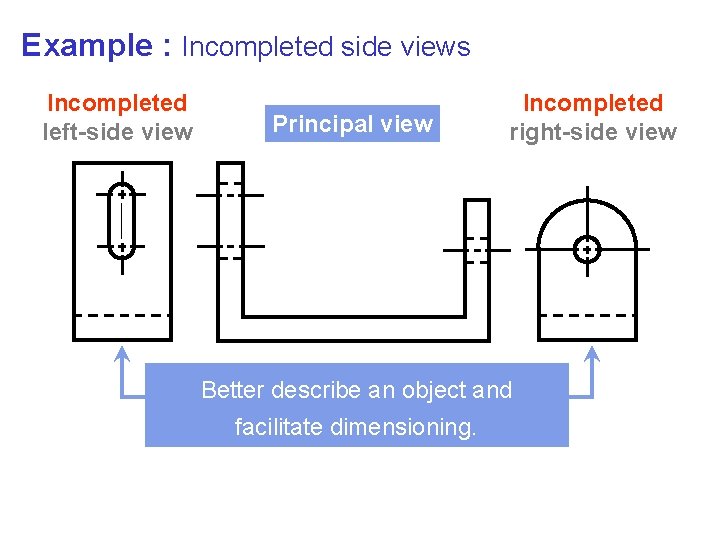
Example : Incompleted side views Incompleted left-side view Principal view Incompleted right-side view Better describe an object and facilitate dimensioning.

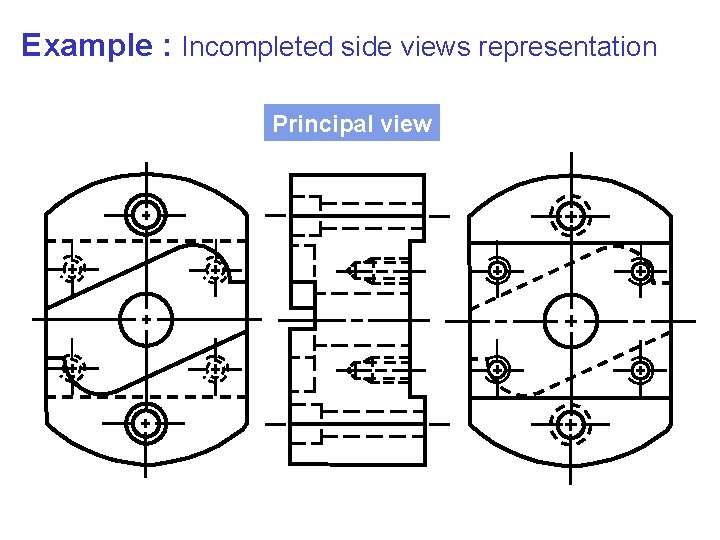
Example : Incompleted side views representation Principal view

PARTIAL VIEW HALF VIEW LOCAL VIEW

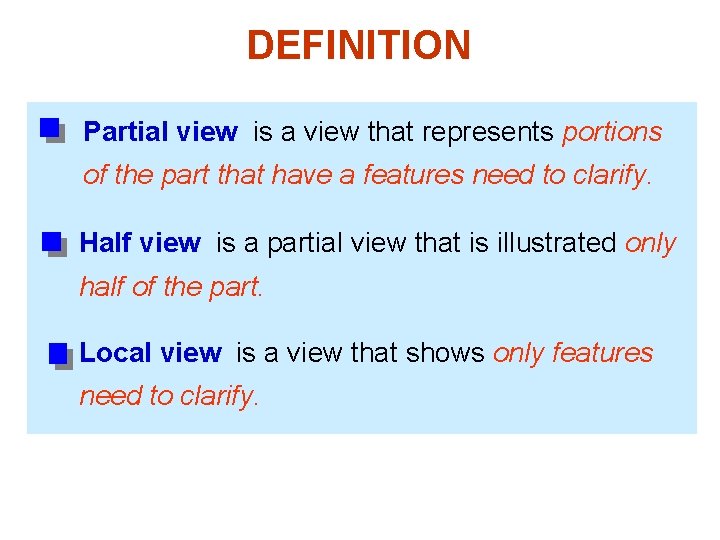
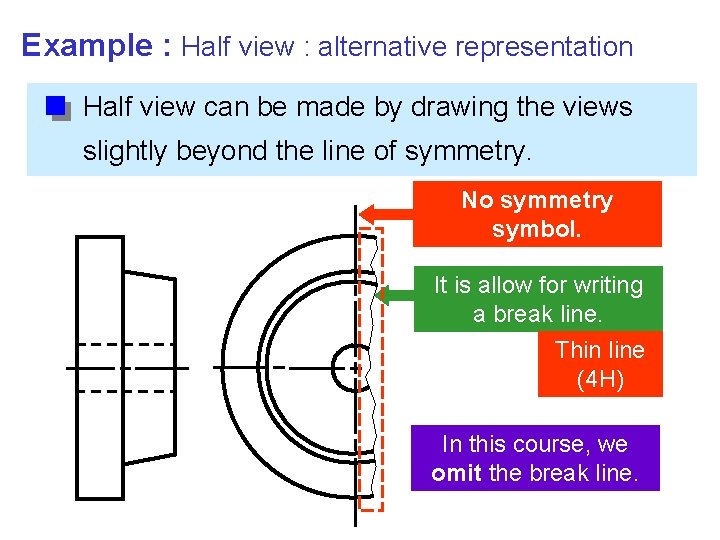
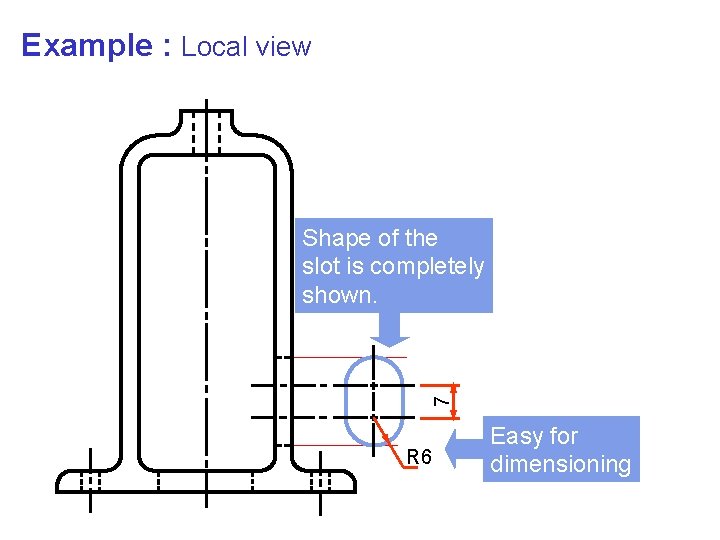
DEFINITION Partial view is a view that represents portions of the part that have a features need to clarify. Half view is a partial view that is illustrated only half of the part. Local view is a view that shows only features need to clarify.

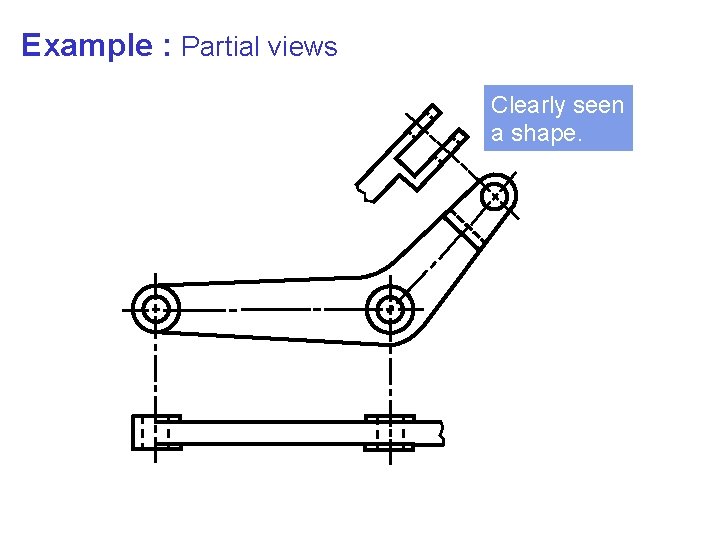
Example : Partial views Clearly seen a shape.

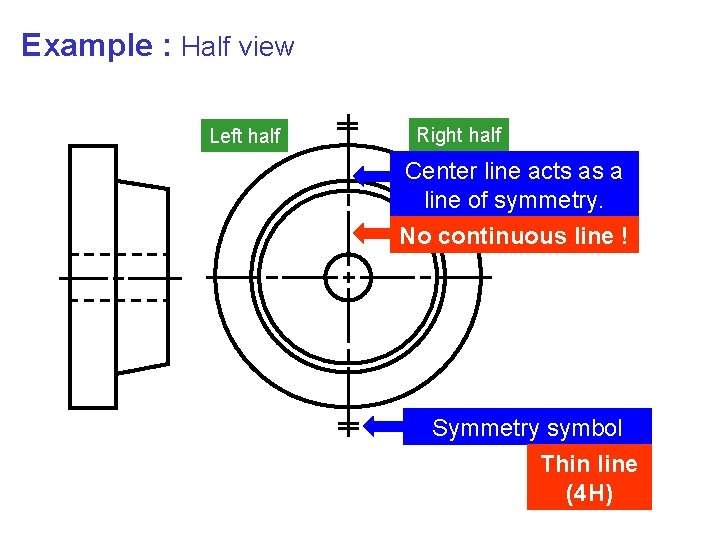
Example : Half view Left half Right half Center line acts as a line of symmetry. No continuous line ! Symmetry symbol Thin line (4 H)

Example : Half view : alternative representation Half view can be made by drawing the views slightly beyond the line of symmetry. No symmetry symbol. It is allow for writing a break line. Thin line (4 H) In this course, we omit the break line.

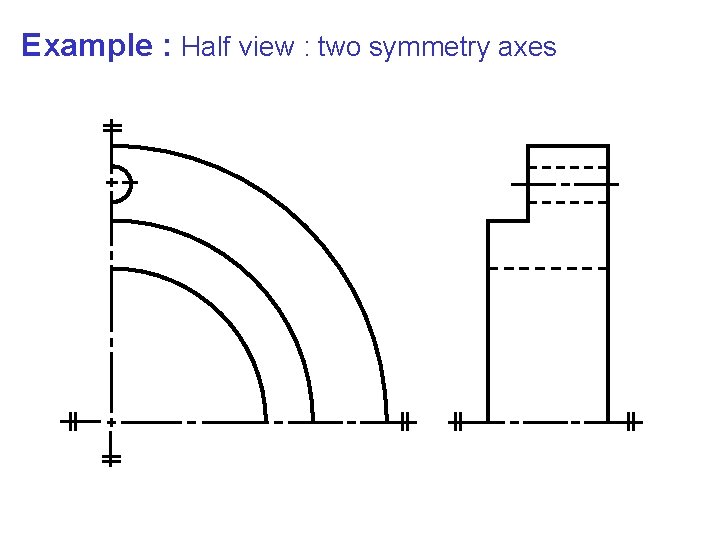
Example : Half view : two symmetry axes

Example : Local view 7 Shape of the slot is completely shown. R 6 Easy for dimensioning

ALIGNED VIEW

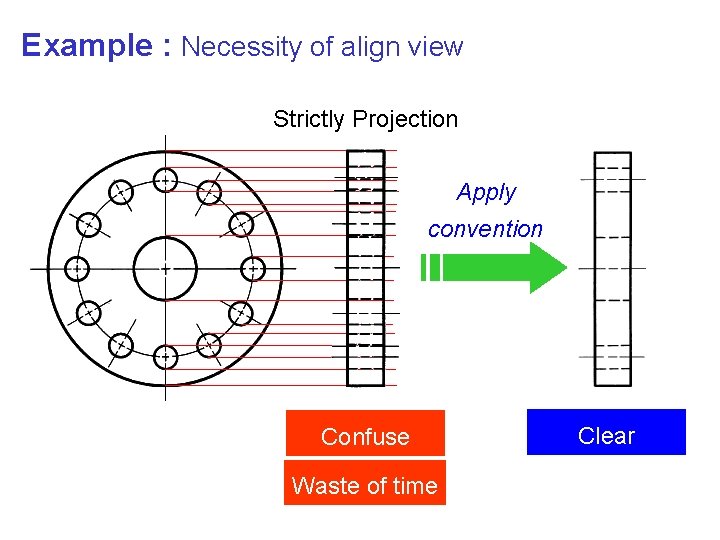
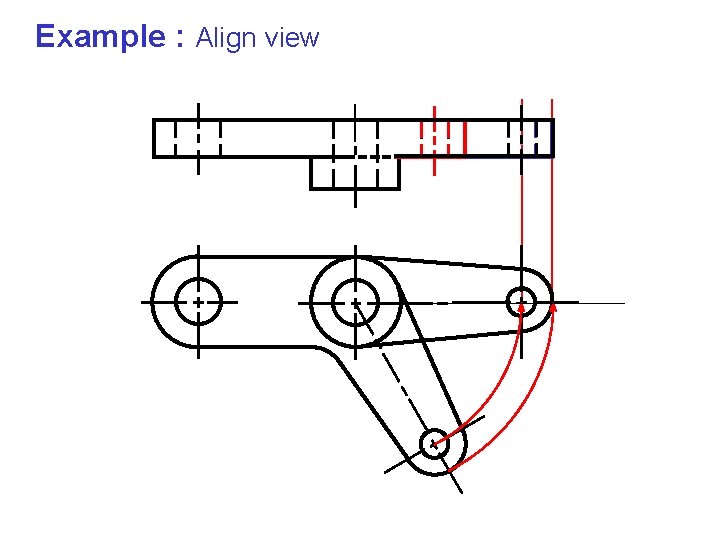
DEFINITION Align view is a view that is drawn by imaginarily rotating the object’s features, appeared in a principle view about symmetry axis.

Example : Necessity of align view Strictly Projection Apply convention Confuse Waste of time Clear

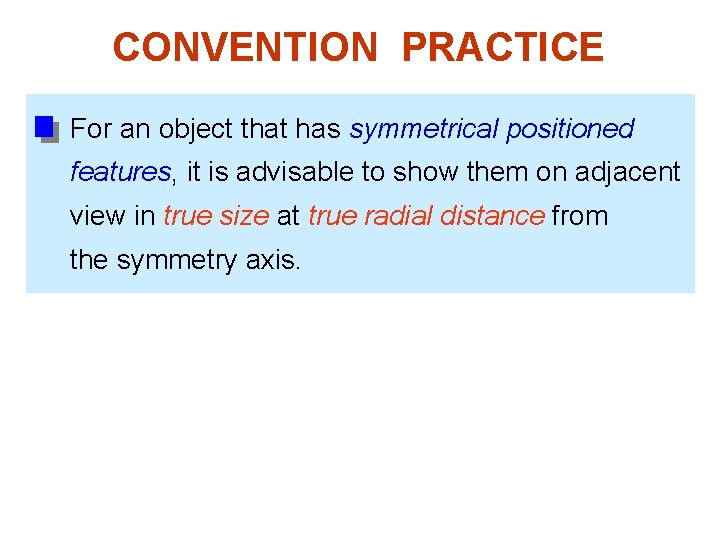
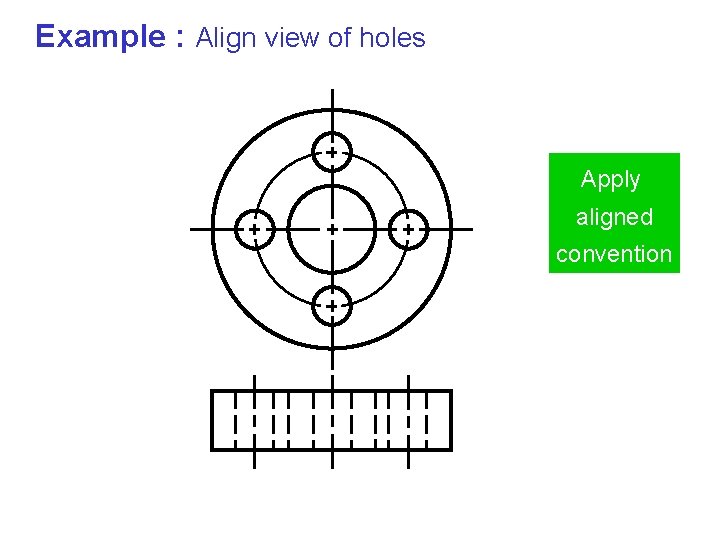
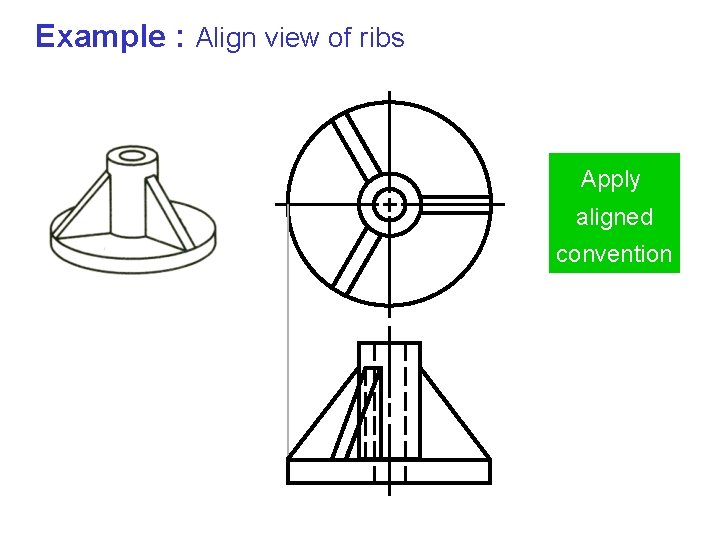
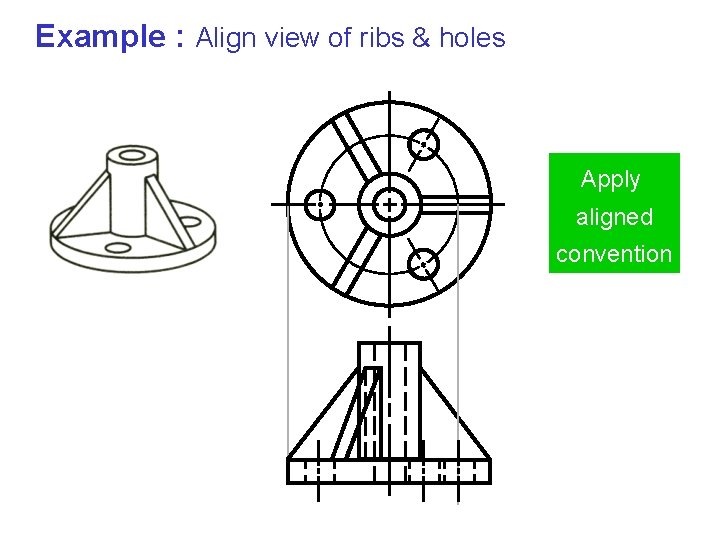
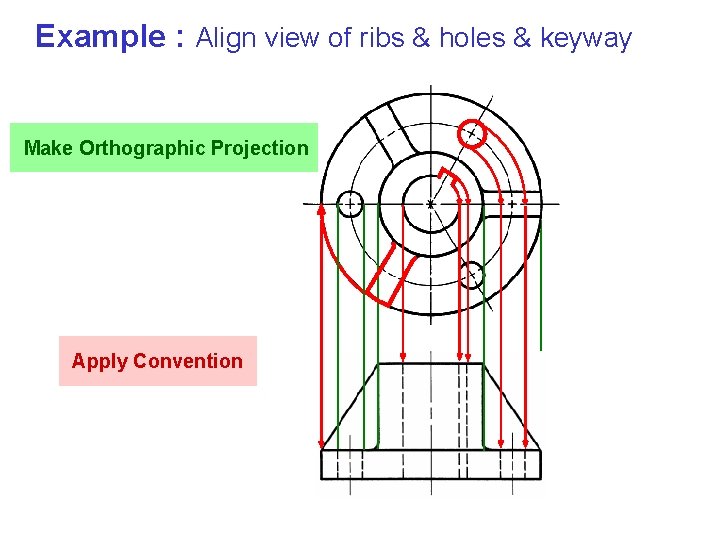
CONVENTION PRACTICE For an object that has symmetrical positioned features, it is advisable to show them on adjacent view in true size at true radial distance from the symmetry axis.

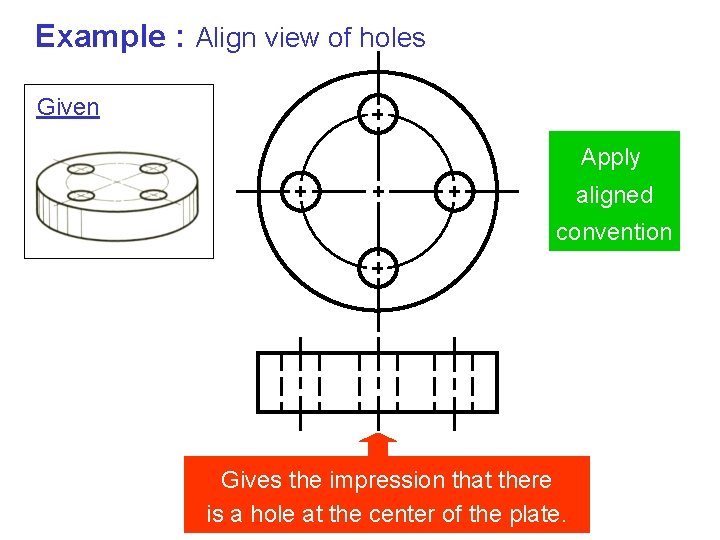
Example : Align view of holes Given Apply aligned convention Gives the impression that there is a hole at the center of the plate.

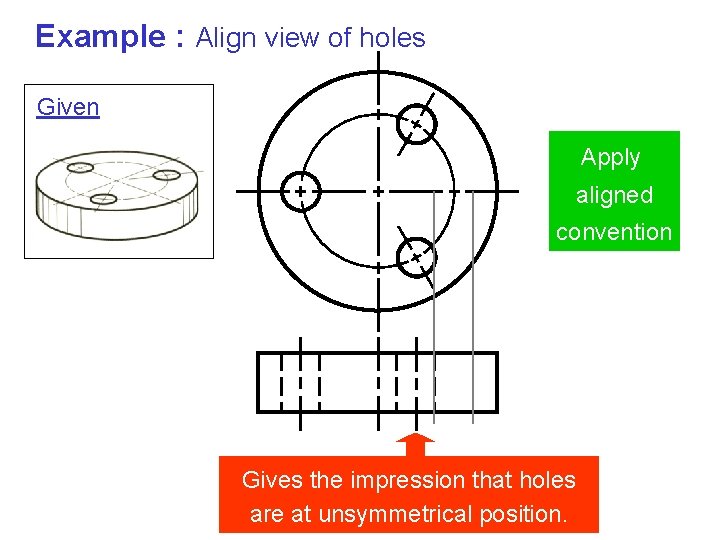
Example : Align view of holes Given Apply aligned convention Gives the impression that holes are at unsymmetrical position.

Example : Align view of holes Apply aligned convention

Example : : Align view of ribs Apply aligned convention

Example : Align view of ribs & holes Apply aligned convention

Example : Align view of ribs & holes & keyway Make Orthographic Projection Apply Convention

Example : Align view

ENLARGED VIEW

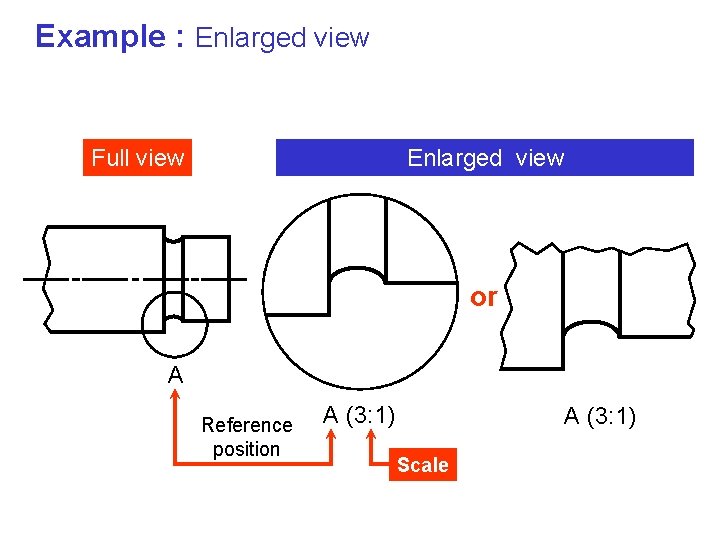
DEFINITION Enlarged view is a view partly selected from full view and is drawn with a larger scale. Conventional practice At full view, the selected portion is framed by continuous thin line and having a name. For an enlarged view, it must be specified both name and scale used.

Example : Enlarged view Full view Enlarged view or A Reference position A (3: 1) Scale

NON-EXISTING LINE OF INTERSECTION

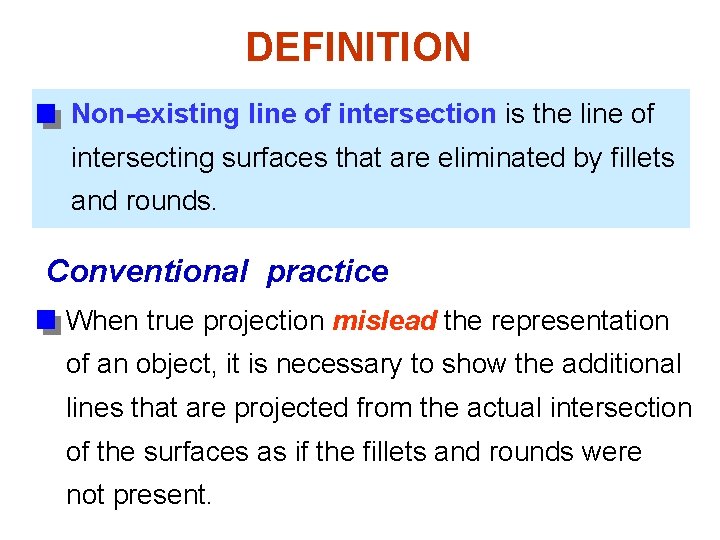
DEFINITION Non-existing line of intersection is the line of intersecting surfaces that are eliminated by fillets and rounds. Conventional practice When true projection mislead the representation of an object, it is necessary to show the additional lines that are projected from the actual intersection of the surfaces as if the fillets and rounds were not present.

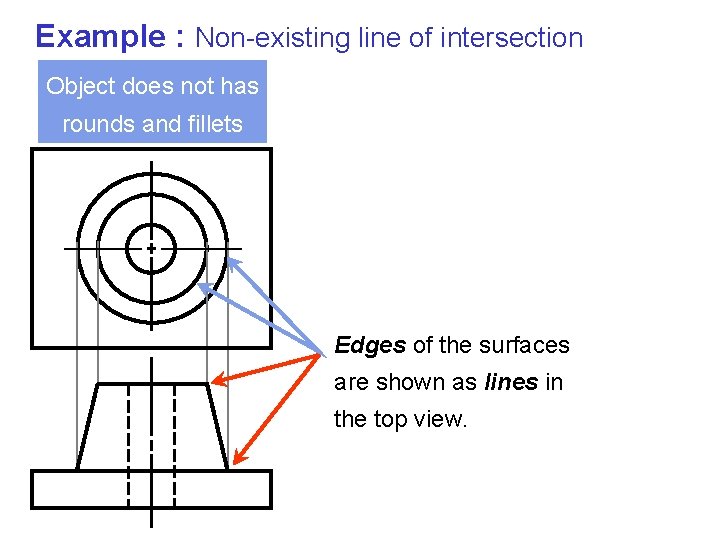
Example : Non-existing line of intersection Object does not has rounds and fillets Edges of the surfaces are shown as lines in the top view.

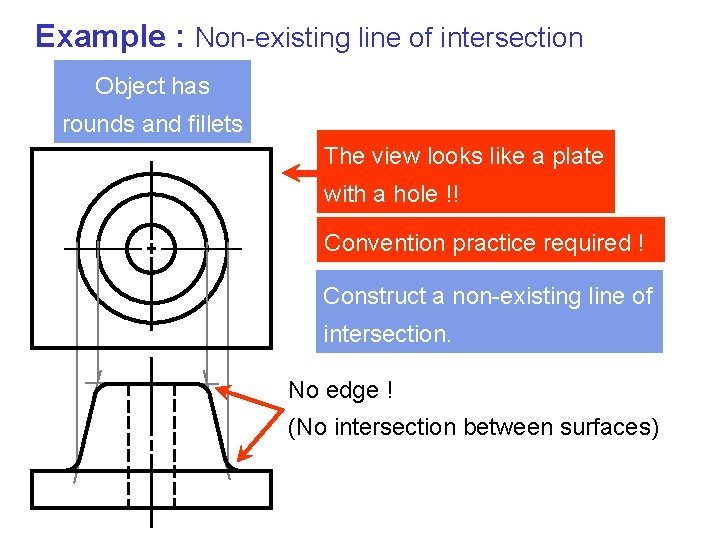
Example : Non-existing line of intersection Object has rounds and fillets The view looks like a plate with a hole !! Convention practice required ! Construct a non-existing line of intersection. No edge ! (No intersection between surfaces)

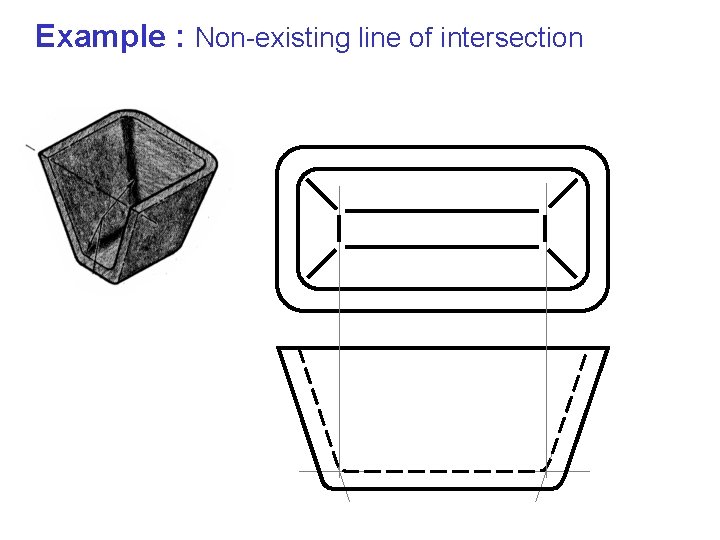
Example : Non-existing line of intersection

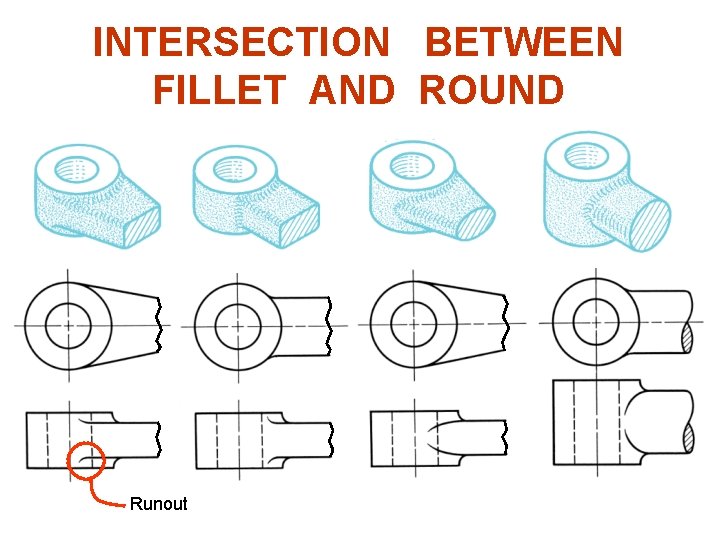
INTERSECTION BETWEEN FILLET AND ROUND Runout

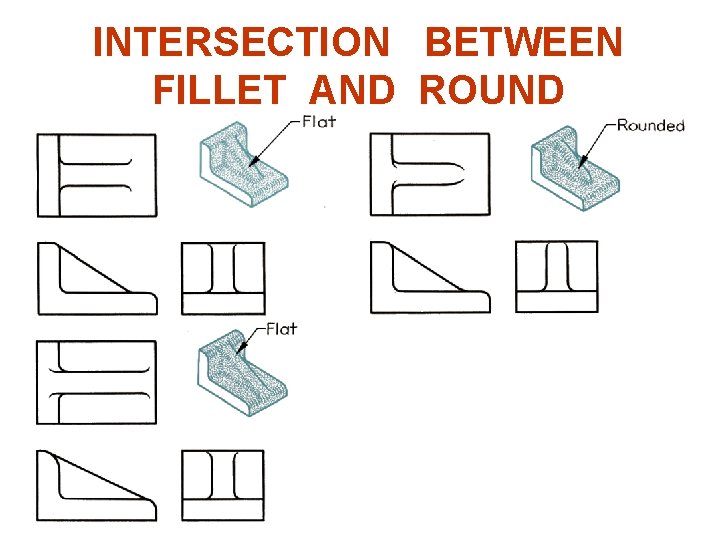
INTERSECTION BETWEEN FILLET AND ROUND

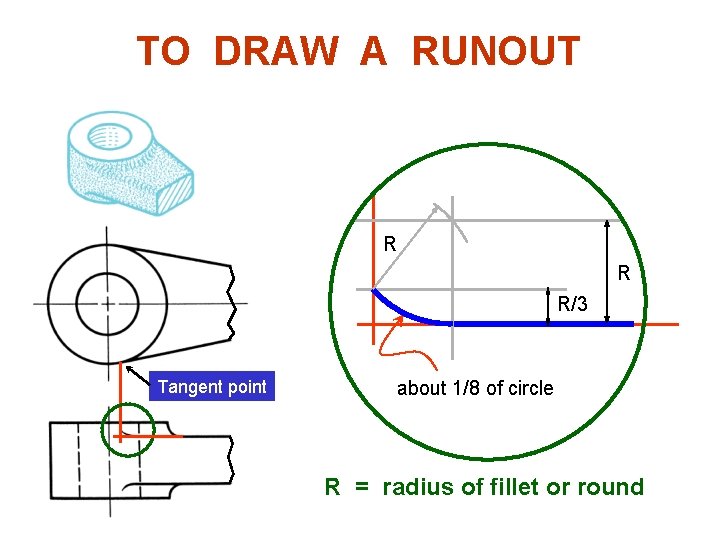
TO DRAW A RUNOUT R R R/3 Tangent point about 1/8 of circle R = radius of fillet or round

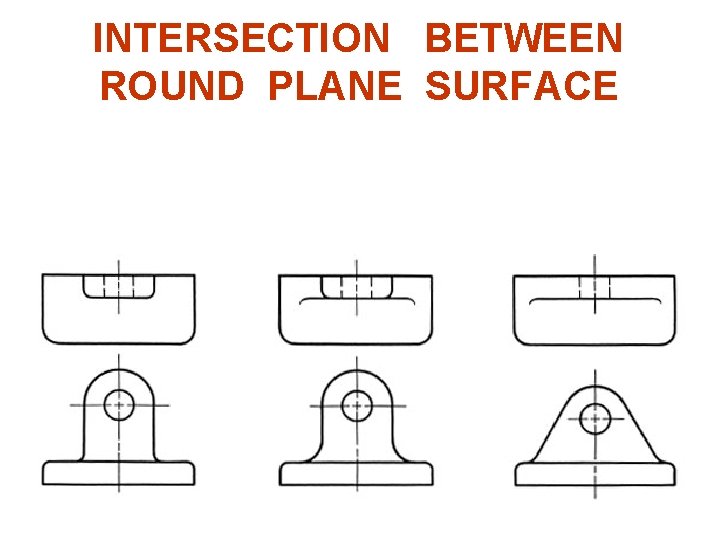
INTERSECTION BETWEEN ROUND PLANE SURFACE

INTERSECTION

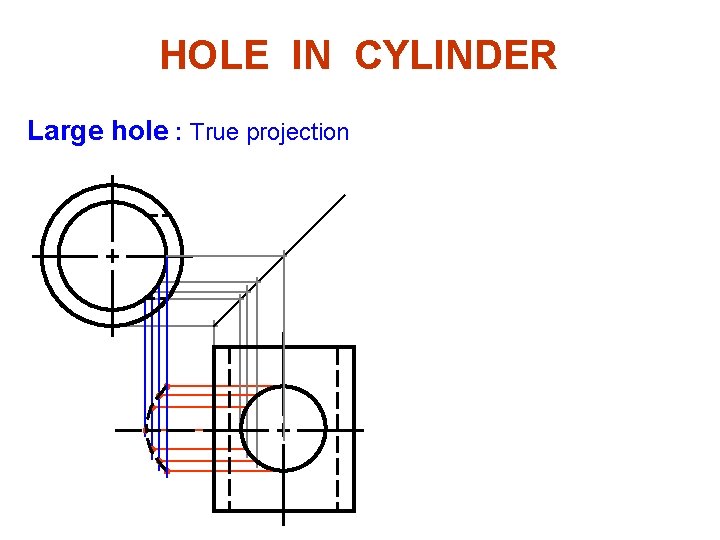
HOLE IN CYLINDER Large hole : True projection

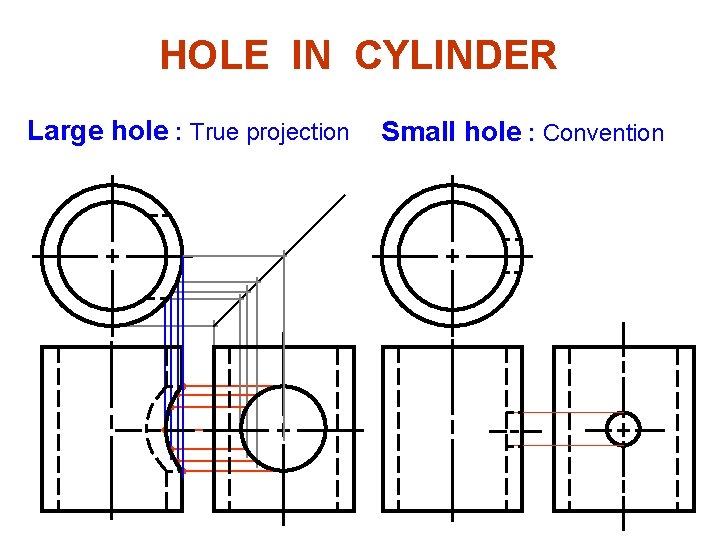
HOLE IN CYLINDER Large hole : True projection Small hole : Convention