Chapter 7 Professional Rescuer CPR National EMS Education


- Slides: 64

Chapter 7 Professional Rescuer CPR

National EMS Education Standard Competencies (1 of 5) Shock and Resuscitation Uses assessment information to recognize shock, respiratory failure or arrest, and cardiac arrest based on assessment findings and manages the emergency while awaiting additional emergency response.

National EMS Education Standard Competencies (2 of 5) Assessment Uses scene information and simple patient assessment findings to identify and manage immediate life threats and injuries within the scope of practice of the EMR.

National EMS Education Standard Competencies (3 of 5) Primary Assessment • Primary assessment for all patient situations – Level of consciousness – ABCs – Identifying life threats – Assessment of vital functions • Begin interventions needed to preserve life

National EMS Education Standard Competencies (4 of 5) Anatomy and Physiology Uses simple knowledge of the anatomy and function of the upper airway, heart, vessels, blood, lungs, skin, muscles, and bones as the foundation of emergency care.

National EMS Education Standard Competencies (5 of 5) Pathophysiology Uses simple knowledge of shock and respiratory compromise to respond to life threats.

Introduction (1 of 2) • Cardiopulmonary resuscitation consists of: – Airway (A) – Breathing (B) – Circulation (C) • Airway and breathing skills may be lifesaving for a patient whose heart is still beating.

Introduction (2 of 2) • To maintain or restore circulation manually, perform cardiac compressions. • To maintain both breathing and a heartbeat, rescue breathing and chest compressions must be done together. • Approximately 70% of patients in cardiac arrest are in a state of ventricular fibrillation.

Anatomy and Function of the Circulatory System (1 of 8) • The circulatory system consists of: – A pump (the heart) – A network of pipes (blood vessels) – Fluid (blood) • The heart – Located in the chest between the lungs – Consists of four chambers, two on the right side and two on the left side

Anatomy and Function of the Circulatory System (2 of 8) • The heart (cont’d) – Each upper chamber is called an atrium. – Each lower chamber is called a ventricle. – The four chambers work in a well-ordered sequence to pump blood to the lungs and to the rest of the body. – One-way valves allow the blood to flow in only one direction.

Anatomy and Function of the Circulatory System (3 of 8)

Anatomy and Function of the Circulatory System (4 of 8) • The arteries carry blood away from the heart at high pressure. • Smaller arteries eventually branch into the capillaries, the smallest pipes in the circulatory system. • Veins are thin-walled pipes that carry blood back to the heart.

Anatomy and Function of the Circulatory System (5 of 8) • Four major artery locations: – The neck (carotid arteries) – The wrist (radial arteries) – The arm (brachial arteries) – The groin (femoral arteries) • Use these arteries to measure pulse. – A pulse is generated when the heart contracts and sends a pressure wave through the artery.

Anatomy and Function of the Circulatory System (6 of 8)

Anatomy and Function of the Circulatory System (7 of 8) • Blood has several components. – Plasma – Red blood cells carry oxygen from the lungs to the body and bring carbon dioxide back to the lungs. – White blood cells devour bacteria and other disease-causing organisms. – Platelets start the blood-clotting process.

Anatomy and Function of the Circulatory System (8 of 8)

Cardiac Arrest (1 of 3) • Cardiac arrest occurs when the heart stops contracting and no blood is pumped through the blood vessels. • Without a supply of blood, the cells of the body will die. – Brain damage begins within 4 to 6 minutes.

Cardiac Arrest (2 of 3) • Causes of cardiac arrest – Heart and blood vessel diseases – Respiratory arrest, if untreated – Medical emergencies such as epilepsy, diabetes, allergic reactions, electrical shock, and poisoning – Drowning – Suffocation – Trauma and shock from massive blood loss

Cardiac Arrest (3 of 3) • A patient who has experienced cardiac arrest is unconscious and not breathing. – You cannot feel a pulse and the patient looks dead. – Regardless of the cause, the initial treatment is the same: providing CPR.

Components of CPR (1 of 4) • CPR requires three types of skills: – A (airway) skills – B (breathing) skills – C (circulation) skills • Airway and breathing skills – Determine whether the airway is open. – Correct a blocked airway with the head tilt–chin lift or jaw-thrust maneuver.

Components of CPR (2 of 4)

Components of CPR (3 of 4) • Airway and breathing skills (cont’d) – Determine whether the patient is breathing by using the look, listen, and feel technique. – Correct the absence of breathing by performing rescue breathing. • Circulation skills – Check the patient for a pulse. – If there is no pulse, perform external chest compressions.

Components of CPR (4 of 4) • CPR by itself cannot sustain life indefinitely. – It should be started as soon as possible to give the patient the best chance for survival. – Many patients will need defibrillation and medication to be successfully resuscitated.

The Cardiac Chain of Survival (1 of 2) • The links in the Chain of Survival include: – Early recognition of cardiac arrest and activation of the 9 -1 -1 system – Early bystander CPR – Early defibrillation by EMRs or other EMS personnel – Early advanced care by paramedics and hospital personnel

The Cardiac Chain of Survival (2 of 2) Source: American Heart Association

When to Start CPR (1 of 2) • CPR should be started on all non-breathing, pulseless patients, unless they are obviously dead or have a DNR order. • Signs of death – Decapitation: The head is separated from the rest of the body. – Rigor mortis: Temporary stiffening of muscles occurs several hours after death.

When to Start CPR (2 of 2) • Signs of death (cont’d) – Evidence of tissue decomposition: Actual flesh decay occurs only after a person has been dead for more than one day. – Dependent lividity: Red or purple color occurs on the parts of the patient’s body that are closest to the ground.

When to Stop CPR (1 of 2) • Discontinue CPR only when: – Effective spontaneous circulation and ventilation are restored. – Resuscitation efforts are transferred to another trained person who continues CPR. – A physician orders you to stop. – The patient is transferred to properly trained EMS personnel.

When to Stop CPR (2 of 2) • Discontinue CPR only when: (cont’d) – Reliable criteria for death are recognized. – You are too exhausted to continue resuscitation, environmental hazards endanger your safety, or continued resuscitation would place the lives of others at risk.

External Cardiac Compression (1 of 4) • First check and correct the airway, then check and correct the breathing, and finally check for circulation. – Check the carotid pulse and look for signs of coughing or movement. – If there is no carotid pulse in an unresponsive patient, begin chest compressions. – To perform adult chest compressions, see Skill Drill 7 -1.

External Cardiac Compression (2 of 4) • External chest compressions on an infant – Check and correct the airway. – Check for breathing by using the look, listen, and feel technique. – To check an infant’s circulation, feel for the brachial pulse on the inside of the upper arm.

External Cardiac Compression (3 of 4) • External chest compressions on an infant (cont’d) – If there is no pulse, begin chest compressions with your middle and ring fingers. – Place the infant on a solid surface or cradle the infant in your arm. – You will not need to use much force.

External Cardiac Compression (4 of 4) • External chest compressions on a child – Check the carotid pulse. – Begin chest compressions. – In smaller children, place the heel of one hand in the center of the chest, in between the nipples. – In larger children, use two hands.

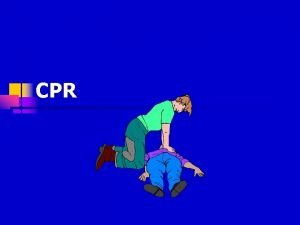
Adult CPR (1 of 2) • One-rescuer adult CPR – Follow the steps in Skill Drill 7 -2. – You must deliver chest compressions and rescue breathing at a ratio of 30: 2.

Adult CPR (2 of 2) • Two-rescuer adult CPR – To avoid fatigue, the rescuers should switch roles after every five cycles of CPR. – Follow the steps in Skill Drill 7 -3. – Switching positions should be accomplished as smoothly and quickly as possible. – CPR should not be interrupted for longer than 10 seconds.

Infant CPR (1 of 2) • One-rescuer infant CPR – Follow the steps in Skill Drill 7 -4.

Infant CPR (2 of 2) • Two-rescuer infant CPR – Use the two-thumb/encircling hands technique for chest compressions. – Compress the sternum at a rate of 100 compressions per minute. – Perform a compression-to-ventilation ratio of 15: 2.

Child CPR (1 of 3) • The steps for child CPR are essentially the same as for an adult. • Some variations include the following: – Use less force to ventilate the child. – In small children, use only one hand to depress the sternum. – Use less force to compress the child’s chest.

Child CPR (2 of 3) • Steps to administer CPR to a child – Establish the child’s level of responsiveness. – Turn the child on his or her back, as you support the head and neck. – Open the airway. – Check for breathing. – Give two effective breaths. – Check for circulation.

Child CPR (3 of 3) • Steps to administer CPR to a child (cont’d) – Begin chest compressions. – After 30 chest compressions, deliver two effective rescue breaths. – Continue compressions and ventilations. – Reassess the patient after five cycles of CPR and every 2 minutes thereafter.

Signs of Effective CPR • A second rescuer feels a carotid pulse while you are compressing the chest. • The patient’s skin color improves (from blue to pink). • The chest visibly rises during ventilations. • Compressions and ventilations are delivered at the appropriate rate and depth.

Complications of CPR (1 of 4) • Broken ribs – You may break a patient’s ribs while delivering a compression. – To prevent this problem, use proper hand positioning and do not let your fingers come in contact with the ribs. – If you hear a cracking sound, check and correct your hand position but continue CPR.

Complications of CPR (2 of 4) • Gastric distention – Occurs when too much air is blown too fast and too forcefully into the stomach – Often causes regurgitation – Ensure you have opened the airway completely and do not blow excessive amounts of air into the patient. – Turn the patient’s body to one side and press on the upper abdomen.

Complications of CPR (3 of 4) • Regurgitation – Common during CPR – To minimize the risk, minimize the amount of air that enters the stomach. – If the patient regurgitates during CPR: • Turn the patient onto his or her side. • Clear the patient’s mouth of remaining vomitus. • Use suction if it is available.

Complications of CPR (4 of 4) • Regurgitation (cont’d) – If the airway is not cleared, two problems may arise: • The patient may breathe in the vomitus into the lungs. • You may force vomitus into the lungs with the next artificial ventilation. – As soon as you have cleared away the vomitus, continue rescue breathing.

Creating Sufficient Space for CPR (1 of 2) • EMRs may find themselves alone with patients in cardiac arrest. • You must create or find a space when you can perform CPR. – You need 3′ to 4′ of space on all sides of the patient.

Creating Sufficient Space for CPR (2 of 2) • If there is not enough space around the patient, you have two options: – Quickly rearrange the furniture in the room or arrange objects at the scene to make space. – Quickly drag the patient into an area that has more room.

Early Defibrillation by EMRs (1 of 3) • More than 70% of all out-of-hospital cardiac arrest patients have an irregular heart electrical rhythm called ventricular fibrillation (V-fib). – V-fib is a rapid, disorganized, and ineffective vibration of the heart. – An electric shock applied to the heart will defibrillate it and reorganize the vibrations into effective heartbeats.

Early Defibrillation by EMRs (2 of 3) • Increasing numbers of EMS systems are equipping EMRs with automated external defibrillators (AEDs). – These machines identify ventricular fibrillation and advise the rescuer to deliver a shock if needed. Source: LIFEPAK® 1000 Defibrillator courtesy of Physio-Control. Used with permission of Physio-Control, Inc. , and according to the Material Release Form provided by Physio-Control.

Early Defibrillation by EMRs (3 of 3) • Performing automated external defibrillation – Follow the steps in Skill Drill 7 -5. – AEDs vary in their operation, so learn how to use your specific AED.

CPR Training • EMRs should: – Successfully complete a CPR course through a recognized agency – Regularly update their skills by completing a recognized recertification course • Your department should schedule periodic reviews of CPR theory and practice.

Legal Implications of CPR (1 of 2) • Advance directives and living wills are legal documents that specify the patient’s wishes regarding specified medical procedures. – CPR should be started on all patients unless signs of obvious death are present. – If a patient has an advance directive, the physician at the hospital will determine whether you should stop CPR.

Legal Implications of CPR (2 of 2) • Do not hesitate to start CPR on a pulseless, nonbreathing patient. – Without your help, the patient will die. • Abandonment – Discontinuation of CPR without the order of a licensed physician or without turning the patient over to someone who is at least as qualified as you are

Summary (1 of 4) • Cardiac arrest occurs when the heart stops contracting and no blood is pumped through the blood vessels. • The chain of survival—early access to care, early CPR, early defibrillation, and early advanced cardiac life support (ACLS)— includes steps essential to successful emergency cardiac care.

Summary (2 of 4) • Basic life support for adults and children follows the same general steps: Check responsiveness, airway, breathing, and circulation. Intervene at any point where the patient’s airway is obstructed, the patient is not breathing, or the patient has no circulation.

Summary (3 of 4) • The single most important cardiac arrest survival factor is early defibrillation. The indications for using an automated external defibrillator (AED) are that the patient is unresponsive, not breathing, and pulseless.

Summary (4 of 4) • Once turned on and attached to the patient’s bare chest, the AED will analyze the heart rhythm and advise whether a shock is indicated.

Review 1. A patient who is in cardiac arrest: A. does not require rescue breathing. B. does not have a pulse and is not breathing. C. should be considered dead after 10 minutes of CPR. D. requires treatment that is beyond the scope of practice of the EMR.

Review Answer: B. does not have a pulse and is not breathing.

Review 2. The majority of out-of-hospital cardiac arrest patients have an irregular heart electrical rhythm called ventricular fibrillation. How is this rhythm characterized? A. rapid, disorganized, and ineffective B. slow, disorganized, and ineffective C. rapid but effective D. no electrical activity at all

Review Answer: A. rapid, disorganized, and ineffective

Review 3. Which of the following is not a sign of effective CPR? A. Compressions are delivered at a rate of 50 per minute. B. You can feel a carotid pulse during chest compressions. C. The patient’s skin color turns pink (from blue). D. The chest visibly rises during ventilations.

Review Answer: A. Compressions are delivered at a rate of 50 per minute.

Credits • Opener: © Glen E. Ellman • Background slide image (ambulance): © Comstock Images/Alamy Images • Background slide images (non-ambulance): © Jones & Bartlett Learning. Courtesy of MIEMSS.
 Ems safety cpr
 National ems education standards
 Compulsive fixer-rescuer self-assessment
 Compression to ventilation ratio adults
 Rescuer
 Head tilt
 National ems advisory council
 Introduction to ems
 Ems systems chapter 1
 National model of professional learning
 Npep
Npep Texas engineering practice act
 Extracorporeal cpr
 3 prinsip sebelum cpr kecuali
 Perbedaan cpr dan mpr
 Infant cpr algorithm
 High quality cpr child
 Objectives of cpr
 Secondary survey sample
 Llf first aid
 Emotional cpr training
 Cpr hand placement sternum
 For adult
 Unresponsive child cpr
 Pulse check in child cpr
 Cpr e 281
 Adult chain of survival
 Dyrektywa cpr
 Cpr compression rate
 When to stop cpr
 Do not start cpr in the following situations:
 Components of high quality cpr
 Centrum powiadamiania ratunkowego bydgoszcz
 Cpr meaning medical
 Cpr adrenaline dose
 Cpr in schools training kit
 4 rs of cpr
 Skop pertolongan cemas
 Resuscitation cpr
 Cpr vocabulary
 Coronary perfusion pressure
 Cpr for beginners
 4 r's of cpr
 What does cabd stand for in cpr
 What does cabd stand for in cpr
 Cpr
Cpr Principles of cpr
 Titik tumpu cpr
 Hypertension vs hypotension
 Cpr anak
 Fireman lift method
 What does cpr stand for
 Cpr es audace
 Cpr rendelet
 Quadramed cpr
 How to use aed
 Early cpr and early defibrillation can: *
 Gambar ekg
 American heart association
 Fortalezas personales
 First aid abbreviations
 Bruce poole
 Cpr committee
 Aha cpr
 National unification and the national state
