Chapter 6 Performing Basic Vehicle Maneuvers 6 1

Chapter 6 Performing Basic Vehicle Maneuvers

6. 1 : Steering, Signaling, Changing Lanes, and Passing • This section presents the basic skills for steering, signaling, and changing lanes. Proper techniques for steering straight forward and backward are introduced. The proper uses of turn-signal devices and hand signals are presented. Instructions for safely changing lanes are also included. Following this section, I will be able to: 1. Explain how to steer straight forward and backward. 2. Describe the correct use of hand signals and explain when they might be used. 3. List the proper steps for changing lanes. 4. List the proper steps for passing other vehicles.

Steering Straight Forward • Aim far ahead into your intended path of travel. • Avoid looking down at your hands or feet.

Steering Straight Forward Use a comfortable, balanced hand position

Steering Straight Forward • Adjustments to steering will be small but very critical. • Be careful not to oversteer or understeer.

Steering Straight Backward • Check behind your vehicle before getting in. • Before backing, look to the front, both sides and the rear. • Hold brake pedal down and shift to REVERSE. • Turn your body to the right, place right arm over the back of passenger seat, and look through rear window. • Left hand at 12 o’clock on steering wheel.

Steering Straight Backward • Release brake pressure slightly to allow vehicle to go backward slowly. • Move the top of the steering wheel in the direction you want the back of vehicle to go as you look through the rear window. • Cover brake pedal while backing up while glancing to the front and sides to check traffic. Continue looking through back window as you brake to stop.

Backing a Stickshift Vehicle 1. Push brake and clutch pedals down. 2. Shift to REVERSE. 3. Release brake, let clutch pedal out slowly to the friction point. **Most stickshift vehicles can move slowly in REVERSE with the clutch at the friction point with no acceleration. Keep foot over brake pedal. To stop, push down clutch and brake for a smooth stop. Note: Backing a stickshift vehicle requires the skillful use of the clutch pedal.

Signaling 1. Left turn signal-

Signaling 2. Right turn signal-

Signaling 3. Slow or stop-
-front.")
Changing Lanes • Check zone in front and to the left (right)-front.

Changing Lanes • Check rear zones through rearview mirrors.

Changing Lanes • Check rear zones through rearview mirrors

Changing Lanes • Signal and make a blind-spot check over the shoulder in the direction that you are going.

Changing Lanes Note: A common mistake most beginning drivers make is tuning the wheel as the blind-spot check is made.

Changing Lanes • Increase speed and steer smoothly into next lane if it is clear. • Cancel your signal and adjust your speed.

6. 2 Making Turns and Turning the Vehicle Around This section focuses on making turns and turning the vehicle around. Hand-over-hand push-pull steering are explained. Procedures for making right and left turns, including use of the shared left-turn lane are included. Directions are also provided for backing left and right. Directions and precautions for turnabouts are presented. Following this section, I will be able to: 1. Describe hand-over-hand steering. 2. List the steps for making right and left turns. 3. Describe how to back left and right.

Hand-Over-Hand Steering • Pull, Cross 1. Use a balanced hand position just before the turn. 2. Place your right hand near the top of the steering wheel when beginning a left turn. 3. Start pulling down to the left with your left hand. Your right hand pushes the wheel toward the left about a quarter turn. 4. Release your left hand from the wheel and cross it over your right hand to grasp the wheel near the top.

Hand-Over-Hand Steering • Pull, Cross • Always prepare to straighten your vehicle after a turn by using hand over hand steering. Note: If you are driving a stickshift car downshift before entering the turn so you will have both hands free for turning.

Push-Pull Steering

Making Right and Left Turns • Making turns properly depends on steering control and speed control. • Make left and right turns only after checking all traffic. • Look for pedestrians, oncoming traffic, and check rear zones for a vehicle ready to pass you. • Plan turns well in advance. Be in the correct lane about a block before the turn. • Obey all traffic signs, signals, and roadway markings. Yield to oncoming traffic if making a left turn.

Procedures for Turning • Position your car into the correct lane. Signal about ½ a block before the turn. • Brake early to reduce speed. • Check your front zones for vehicles, pedestrians, and bicyclists. • Slow to about 10 mph just before crosswalk.

Left Turn • For a left turn, check traffic from the left, right, and then left again. Start your turn when the front of your vehicle reaches the center of the intersection. Keep car straight and wheels straight while waiting to turn. • Turn into the nearest lane of traffic going in your direction. Accelerate about ½ way through the turn as you straighten your steering wheel.

Right Turn • For a right turn, check traffic from the left and then look to the right. Begin turn when front bumper is even with curb-line. • Turn into the nearest lane of traffic going in your direction. Accelerate about ½ way through the turn as you straighten your steering wheel.
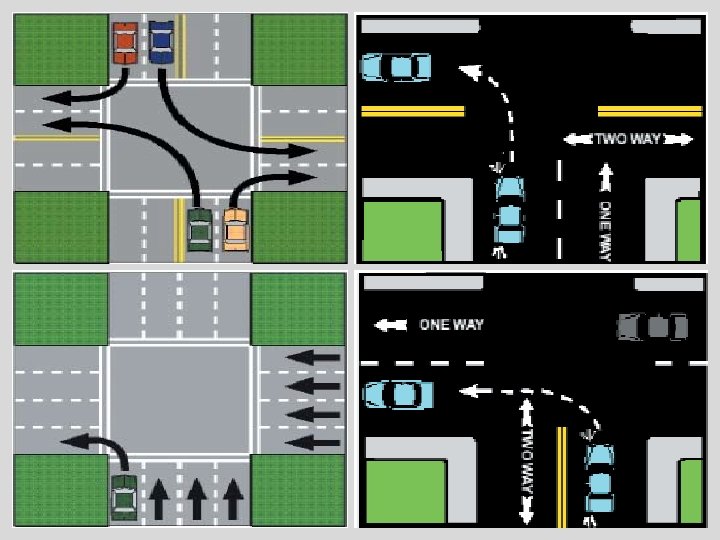

Shared Center Turn/Two-Way Left Turn Lane: These center lanes are reserved for vehicles making left turns in either direction from or into the roadway. These lanes cannot be used for passing and cannot be used for travel further than 300 feet.

Shared Center Turn/Two-Way Left Turn Lane: If another vehicle is already in the turn lane coming from the other direction, you may NOT enter if it will interfere with the other vehicle’s intended turn. When vehicles enter the turn lane from opposite directions, the first vehicle to enter the lane has the right-of-way.

Backing Left and Right • Check behind your vehicle before getting in • Hold brake pedal down and shift to REVERSE • Release parking brake • Both hands on steering wheel for H. O. H steering • Gradually release pressure on brake.

Backing Left and Right • If backing left, look left, checking right front danger point • If backing right, look right, checking left front danger point • When backing left or right pull the steering in the direction you intend to turn. • Look in the direction you are backing until stopping.

Turn the Vehicle Around • Turnabout- a maneuver to turn your vehicle around to go in the opposite direction. • A turnabout maneuver is risky because you cross or back into one or more lanes of traffic. • Be sure local laws permit a turnabout. • Must have at least 500’ visibility. • No turnabouts near hills or curves nor within 200’ of intersections. • Never attempt a turnabout in heavy or high-speed traffic. • Continually check all zones for pedestrians

Midblock U-turn

Back into Driveway on Right Side This turnabout is the safest because it allows you reenter traffic going forward.

Pull into Driveway on Left Side

Pull into Driveway on Right Side

Three-Point Turnabout A three-point turnabout is the most dangerous and should rarely be used.

Passing Other Vehicles Passing on the left requires the following safety precautions: • Stay well behind the vehicle you want to pass to allow yourself a better view of the road ahead. Check well ahead for a NO-PASSING ZONE and on-coming vehicles. • When overtaking and passing another vehicle traveling in the same direction on a two-lane road in the USA, you should pass only to the left of the vehicle. • Signal your intended move to the left and check your rearview and side-view mirrors before changing lanes.

Passing Other Vehicles • Check your blind spot • Move to the left • Complete your pass as soon as possible. • As a general rule, it is NOT SAFE to pass more than one vehicle at a time, although it is not illegal in Tennessee to pass multiple vehicles. • Take extra precautions during inclement weather and twilight hours. • Whenever possible, try to avoid passing at night, unless you are familiar with the road. • Passing on the Right: The driver may overtake and pass another vehicle on the right only when the conditions permit passing safely.

Chapter Review 6. 1 -6. 2 1. Signal and make a blind-spot check over the shoulder in the direction that you are going. 2. Use a comfortable, balanced hand position 3. Adjustments to steering will be small but very critical. 4. Be careful not to oversteer or understeer. 5. Check behind your vehicle before getting in. 6. Before backing, look to the front, both sides and the rear. 7. Hold brake pedal down and shift to REVERSE. 8. Turn your body to the right, place right arm over the back of passenger seat, and look through rear window. 9. Left hand at 12 o’clock on steering wheel. 10. Release brake pressure slightly to allow vehicle to go backward slowly. 11. Move the top of the steering wheel in the direction you want the back of vehicle to go as you look through the rear window. 12. Cover brake pedal while backing up while glancing to the front and sides to check traffic. Continue looking through back window as you brake to stop. 13. Note: Backing a stick shift vehicle requires the skillful use of the clutch pedal. 14. Left turn signal- - Right turn signal - Slow or stop 15 Check zone in front and to the left (right)-front. 16. Signal and make a blind-spot check over the shoulder in the direction that you are going.

Chapter Review 6. 1 -6. 2 1. Signal and make a blind ________over spot check the shoulder in the direction that you are going. 2. Use a comfortable, ______hand balanced position 3. Adjustments to steering will be _____but small very critical. 4. Be careful not to oversteer or understeer. 5. Check ____your vehicle before getting in. behind 6. Before backing, look to the front, both sides and the ______. rear brake pedal 7. Hold _______down and shift to REVERSE. 8. Turn your body to the right, place right arm over the back of passenger seat, and look through _______. rear window 9. Left hand at _______ on steering wheel. 12 o’clock 10. Release ____ brake pressure slightly to allow vehicle to go backward slowly. 11. Move the top of the steering wheel in the ______ direction you want the back of vehicle to go as you look through the rear window. 12. Cover brake pedal while backing up while glancing to the front and sides to check traffic. Continue looking through _______as you back window brake to stop. 13. Note: Backing a stick shift vehicle requires the skillful use of the ______. clutch pedal 14. Left turn signal- - Right turn signal - Slow or stop 15 First step in a lane change: Check zone in ____and front to the left (right)-front. 16. Signal and make a blind-spot check over the _____ shoulder in the direction that you are going.

Chapter Review 6. 1 -6. 2 17. Place your right hand near the top of the steering _______ wheel when beginning a left turn. 18. Release your left hand from the wheel and _____ cross it over your right hand to grasp the wheel near the top. 19. Always prepare to straighten your vehicle after a turn by using _________ hand over hand steering. 20. If you are driving a stick shift car downshift _____ before entering the turn so you will have both hands free for turning. 22. Position your car into the correct lane. Signal about ______before ½ block the turn. 23. Brake early ______ to reduce speed. pedestrians and bicyclists. 24. Check your front zones for vehicles, ______, 25. Slow to about _____just before crosswalk. 10 mph 26. For a left turn, check traffic from the left, right, and then _____again. Start your turn left when the front of your vehicle reaches the center of the intersection. straight while waiting to turn. 27. Keep car straight and wheels _____ nearest lane of traffic going in your direction. Accelerate about ½ way 28. Turn into the ____ through the turn as you straighten your steering wheel. 29. For a right turn, check traffic from the left and then look to the right. Begin turn when front bumper is even with _____. curb-line 30. If backing left, look left, checking _______ right front danger point 31. If backing right, look _______, right checking left front danger point direction you intend to turn. 32. When backing left or right pull the steering in the _____

17. Place your right hand near the top of the steering wheel when beginning a left turn. 18. Release your left hand from the wheel and cross it over your right hand to grasp the wheel near the top. 19. Always prepare to straighten your vehicle after a turn by using hand over hand steering. 20. If you are driving a stick shift car downshift before entering the turn so you will have both hands free for turning. 22. Position your car into the correct lane. Signal about ½ a block before the turn. 23. Brake early to reduce speed. 24. Check your front zones for vehicles, pedestrians, and bicyclists. 25. Slow to about 10 mph just before crosswalk. 26. For a left turn, check traffic from the left, right, and then left again. Start your turn when the front of your vehicle reaches the center of the intersection. Keep car straight and wheels straight while waiting to turn. 27. Turn into the nearest lane of traffic going in your direction. Accelerate about ½ way through the turn as you straighten your steering wheel. 28. For a right turn, check traffic from the left and then look to the right. Begin turn when front bumper is even with curb-line. 29. If backing left, look left, checking right front danger point 30. If backing right, look right, checking left front danger point 31. When backing left or right pull the steering in the direction you intend to turn.

6. 3 Parking • This section is devoted to all aspects of parking. Reference points are explained as a way to help drivers execute parking maneuvers. • Specific instructions for angle, perpendicular, and parallel parking are included. Instructions are given for parking on hills. Following this section, I will be able to: • Discuss reference points and how to use them as guides when parking your vehicle. • Describe the procedures for angle, perpendicular, and parallel parking. • Describe how to park uphill and downhill with and without a curb • Explain how to start from an uphill parking space without rolling backwards.

Parking • Parking your vehicle requires speed control, steering control, and accurate judgment. • Find a space with plenty of room. • Avoid spaces at the end of parking lanes or near large vehicles. • Avoid spaces with a poorly parked vehicle on either side to avoid being hit by the driver upon leaving. • Use reference points when executing parking maneuvers. • Always turn off engine, secure and lock your vehicle before leaving

Two Way Traffic Pattern

One Way Traffic Pattern

Two Way Traffic Pattern

Angle Parking • Position your vehicle at least six feet from the row of parked vehicles. • Creep forward and stop when you can look directly down the first line of the stall you want to enter.

Angle Parking • Turn wheels deep right and creep into parking space. Adjust steering as you enter to keep the car centered.

Angle Parking • Straighten the wheels when you are centered in the space. Use a forward reference point, like the driver's sideview mirror, to stop before the wheels strike the curb.

Perpendicular Parking • Use to park your vehicle at a right angle to the curb. • Position your vehicle at least eight feet from the row of parked vehicles, or as far to the left of the lane as possible. • Creep forward and stop when the right front wheel is even with the first line of the stall you want to enter.

Perpendicular Parking • Turn wheels deep right and creep into parking space. Adjust steering as you enter to keep the car centered

Perpendicular Parking • Straighten the wheels when you are centered in the space. Use a forward reference point, like the driver's side-view mirror, to stop before the wheels strike the curb.

Parallel Parking • Select a space that is five to six feet longer than your vehicle.

Parallel Parking • Flash brake lights, and signal a right turn.

Parallel Parking • Speed Adjustments: Approach at a slow enough speed so no one will misinterpret your signaling for a right turn.

Parallel Parking • Stop two to three feet away from the front vehicle with the two rear bumpers even.

Parallel Parking • Shift to REVERSE. Check traffic. Turn the steering wheel deep right. • Look back over your right shoulder and find the right corner of the parking space. • Back slowly until you center the car in the right-rear comer of the space

Parallel Parking Control speed with your foot brake.

Parallel Parking • Creep back until the car is centered with the corner of the space. • Stop, turn your wheels straight, and back toward the corner of the space.

Parallel Parking • Stop when your front bumper is even with the back bumper of the car in the space in front. • Steer deep left and creep back. The front of your car will move toward the curb and the back of your car will move away from the curb. • Creep back until your right rear wheel bumps curb or stop before you touch the vehicle behind.

Parallel Parking • At this point your car should be slightly crooked in the space. • Turn your steering wheel deep right and creep forward until the car is straight.

Parallel Parking • After positioning the car straight in the space you will need to center the car. • Turn your wheels straight and back the car until you are centered.

Parallel Parking • Leaving the space: Back straight slowly until your rear bumper almost touches the vehicle behind. Turn wheels sharply left as you stop.

Parallel Parking • Signal a left turn. Check your left blind spot and move forward slowly. • Check the right-front corner of your vehicle for clearance.

Parallel Parking • Turn your wheels slowly to the right when you are halfway out of the parking space. • Scan front zones and accelerate gently as you center your vehicle in the traffic lane.

Parallel Parking Scan front zones and accelerate gently as you center your vehicle in the traffic lane.

Parking on Hills • Always turn your front wheels and set the parking brake. • Follow these procedures for parking uphill or downhill on the right side of the road: • Uphill Parking with a Curb-left • Uphill Parking with No Curb-right • Downhill Parking with a Curb-right • Downhill Parking with No Curb-right Note: Starting on a Hill (automatic) - Move your foot to the accelerator, and accelerate until you feel the engine start to pull. Release the parking brake as you continue to accelerate.

Uphill Parking with a Curb-left • Turn wheels to the left, toward the roadway, shift to neutral and roll back to the curb.

Uphill Parking with No Curb -right • Turn wheels to the right, away from the roadway

Downhill Parking with a Curb-right • Turn wheels to the right, away from the roadway

NO PARKING ZONES • In front of a public or private driveway; • Within an intersection; • Within 15 feet of a fire hydrant; • Within 20 feet of a crosswalk or in the crosswalk marked area; • Within 20 feet of a fire station driveway on the same side of the street or on the other side of the street within 75 feet of the fire station driveway; • Within 30 feet of a traffic signal, stop sign or any other traffic control device; • Within 50 feet of a railroad crossing;

17. Place your right hand near the top of the steering wheel when beginning a left turn. 18. Release your left hand from the wheel and cross it over your right hand to grasp the wheel near the top. 19. Always prepare to straighten your vehicle after a turn by using hand over hand steering. 20. If you are driving a stick shift car downshift before entering the turn so you will have both hands free for turning. 22. Position your car into the correct lane. Signal about ½ a block before the turn. 23. Brake early to reduce speed. 24. Check your front zones for vehicles, pedestrians, and bicyclists. 25. Slow to about 10 mph just before crosswalk. 26. For a left turn, check traffic from the left, right, and then left again. Start your turn when the front of your vehicle reaches the center of the intersection. Keep car straight and wheels straight while waiting to turn. 27. Turn into the nearest lane of traffic going in your direction. Accelerate about ½ way through the turn as you straighten your steering wheel. 28. For a right turn, check traffic from the left and then look to the right. Begin turn when front bumper is even with curb-line. 29. If backing left, look left, checking right front danger point 30. If backing right, look right, checking left front danger point 31. When backing left or right pull the steering in the direction you intend to turn.

32. Turnabout ______- a maneuver to turn your vehicle around to go in the opposite direction. 33. A turnabout maneuver is risky because you ______ cross or ______ back into one or more lanes of traffic. Back 34. _______into driveway on right side turnabout is the safest because it allows you reenter traffic going forward. 35. A _______turnabout three-point is the most dangerous and should rarely be used. 36. Passing on the right: The driver may overtake and pass another vehicle on the right only when the ______permit passing safely. conditions 37. ______ Avoid spaces with a poorly parked vehicle on either side to avoid being hit by the driver upon leaving. engine 38. Before leaving a parked vehicle always turn off_____, secure and lock all doors. 39. When angle parking position your vehicle at least ______feet six from the row of parked angle to the curb. 40. Perpendicular Parking - Use to park your vehicle at a right______ vehicles. 41. Parallel Parking: Stop when your front bumper is even with the ______of back bumper the car in the space in front. Steer deep left and creep back. 42. Turn your wheels straight and back the car until you are ______. centered 43. When parking on a hill always turn your front wheels and set the parking brake. 44. When Uphill Parking with a curb turn wheels ______ left 45. Starting on a Hill (auto) - Move your foot to the accelerator, and accelerate until you start to pull Release the parking brake as you continue to accelerate. feel the engine _____. 46. Turn wheels to the left, toward the roadway, shift to neutral and roll back _____ to the curb.
- Slides: 74