CHAPTER 5 Programming Concepts and Job Planning Prepared
CHAPTER 5 Programming Concepts and Job Planning Prepared by: Ahmad Fairuz Bin Mansor Universiti Malaysia Perlis (Uni. MAP) 2017

Course Outcome 3 (CO 3) Ability to perform and evaluate CNC machining operations that include workpiece zero setting, tool setting, program editing and finally machining.
Essential Questions • What is the format of an NC part program? • What defines the functional areas found in all NC part programs? • What are some of the most commonly used G & M codes and what are their functions? • Why are modal commands used?

Essential Questions (cont’d. ) • What is the purpose of the safe line? • How is grammar associated with programming?
Programming with G & M Codes • G & M codes: – Simple instructions programmer writes to make the machine behave in a certain way – Just a few can get the work done • Others are enhancements to make programming more powerful and provide advanced machine functions. – Two types of codes: • First type: controls machine functions and settings • Second type: modifies and performs machining functions – A block is a single-line code of an NC part program
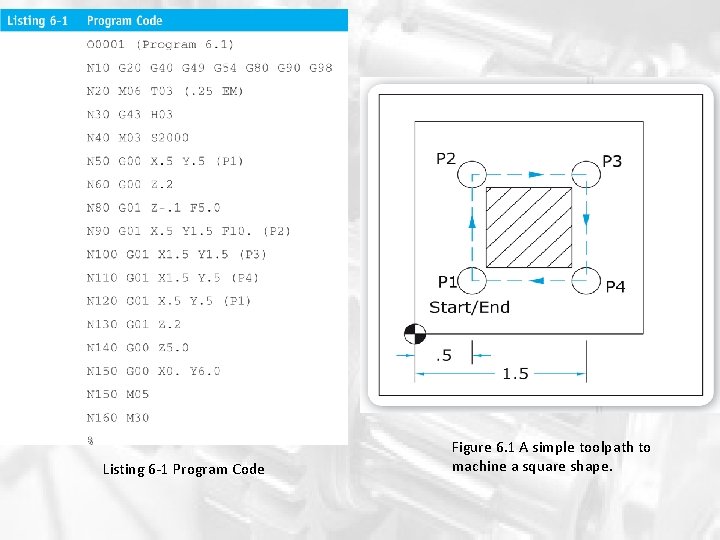
Listing 6 -1 Program Code Figure 6. 1 A simple toolpath to machine a square shape.
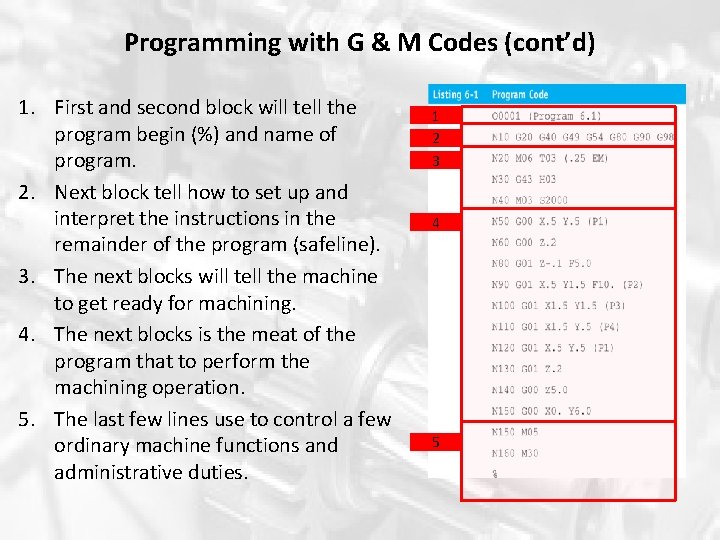
Programming with G & M Codes (cont’d) 1. First and second block will tell the program begin (%) and name of program. 2. Next block tell how to set up and interpret the instructions in the remainder of the program (safeline). 3. The next blocks will tell the machine to get ready for machining. 4. The next blocks is the meat of the program that to perform the machining operation. 5. The last few lines use to control a few ordinary machine functions and administrative duties. 1 2 3 4 5
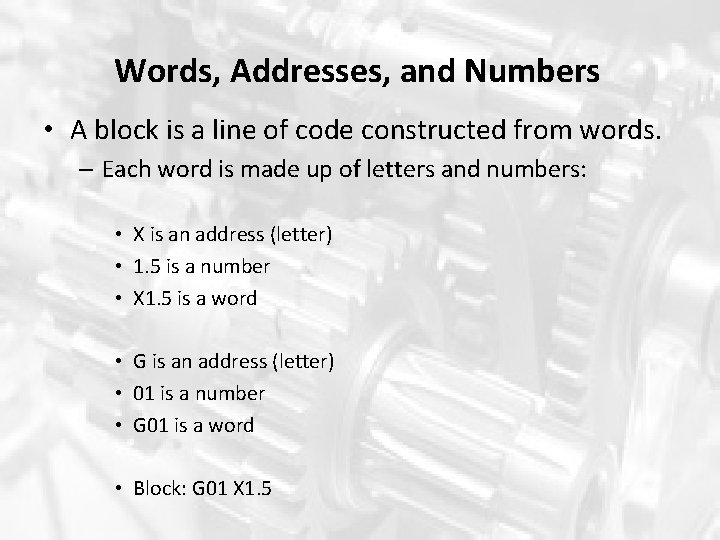
Words, Addresses, and Numbers • A block is a line of code constructed from words. – Each word is made up of letters and numbers: • X is an address (letter) • 1. 5 is a number • X 1. 5 is a word • G is an address (letter) • 01 is a number • G 01 is a word • Block: G 01 X 1. 5

Modal and Nonmodal Codes • Modal and non-modal are the terms used to describe the two classes of coded used in NC programming regarding their ability to remain in the MCU’s memory. • Non-modal codes: – Used just once and then discarded – Example : M 06 (tool change) • Modal commands: – Remain in active memory until changed by another code of value. – MCU treats most commands as modal commands – Advantage: do not need to enter the code if the code has not changed. – Most M-codes function non-modally.

Table 6. 2 G & M-Code Functional Groups
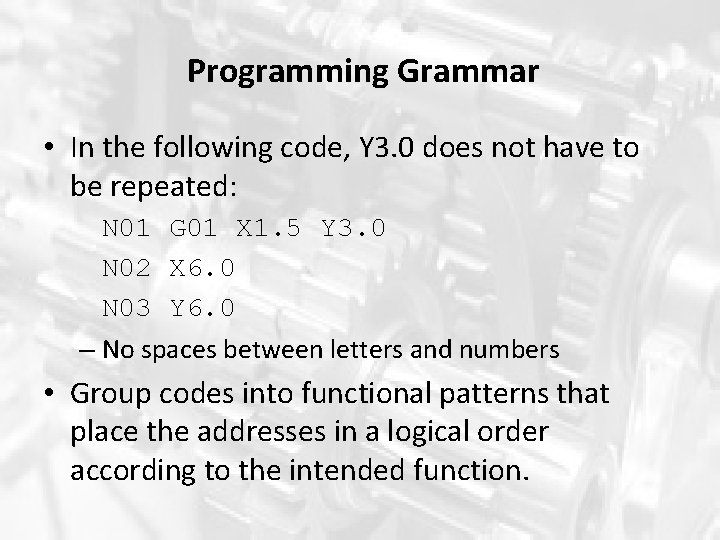
Programming Grammar • In the following code, Y 3. 0 does not have to be repeated: N 01 G 01 X 1. 5 Y 3. 0 N 02 X 6. 0 N 03 Y 6. 0 – No spaces between letters and numbers • Group codes into functional patterns that place the addresses in a logical order according to the intended function.
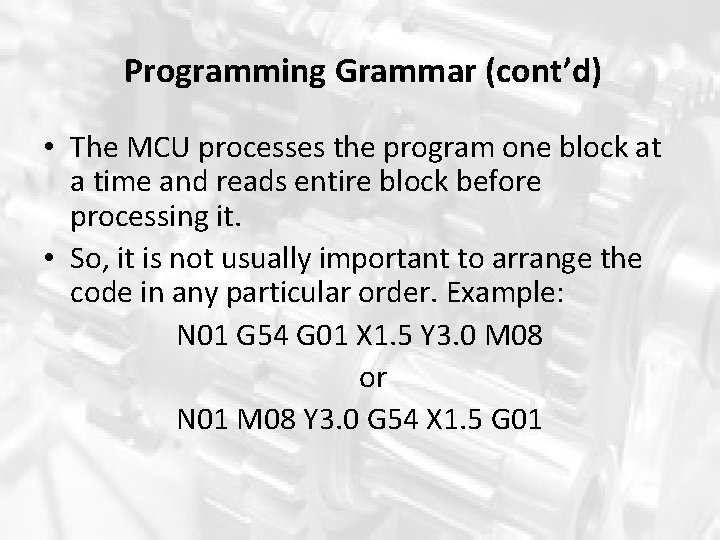
Programming Grammar (cont’d) • The MCU processes the program one block at a time and reads entire block before processing it. • So, it is not usually important to arrange the code in any particular order. Example: N 01 G 54 G 01 X 1. 5 Y 3. 0 M 08 or N 01 M 08 Y 3. 0 G 54 X 1. 5 G 01
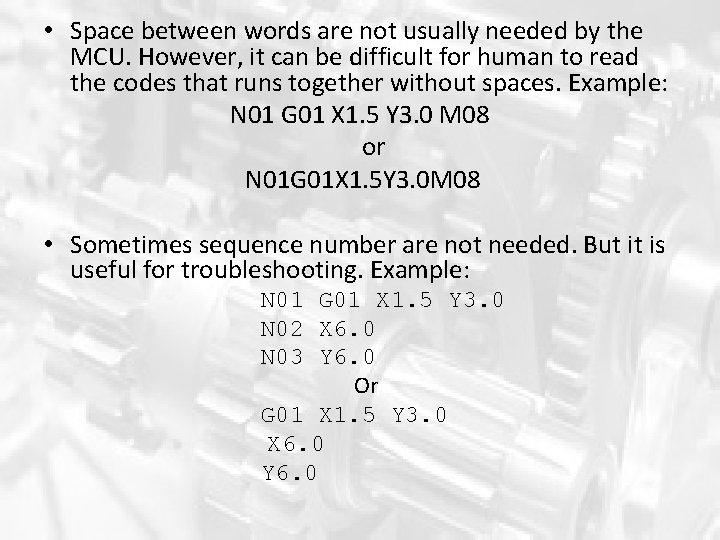
• Space between words are not usually needed by the MCU. However, it can be difficult for human to read the codes that runs together without spaces. Example: N 01 G 01 X 1. 5 Y 3. 0 M 08 or N 01 G 01 X 1. 5 Y 3. 0 M 08 • Sometimes sequence number are not needed. But it is useful for troubleshooting. Example: N 01 G 01 X 1. 5 Y 3. 0 N 02 X 6. 0 N 03 Y 6. 0 Or G 01 X 1. 5 Y 3. 0 X 6. 0 Y 6. 0
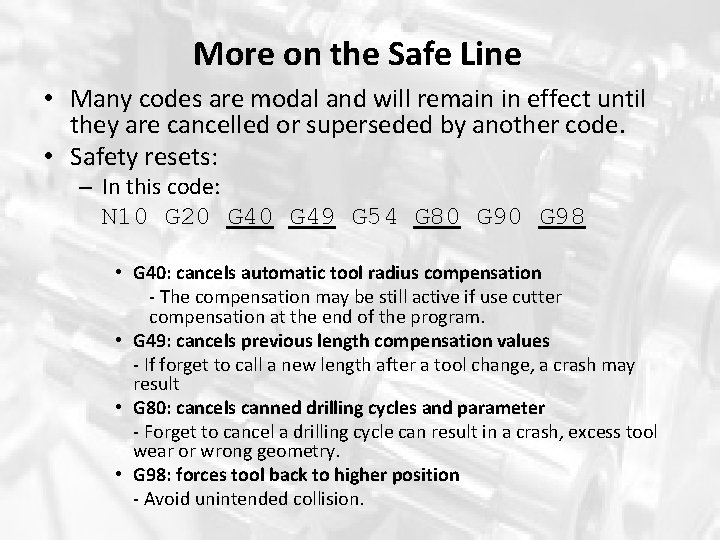
More on the Safe Line • Many codes are modal and will remain in effect until they are cancelled or superseded by another code. • Safety resets: – In this code: N 10 G 20 G 49 G 54 G 80 G 98 • G 40: cancels automatic tool radius compensation - The compensation may be still active if use cutter compensation at the end of the program. • G 49: cancels previous length compensation values - If forget to call a new length after a tool change, a crash may result • G 80: cancels canned drilling cycles and parameter - Forget to cancel a drilling cycle can result in a crash, excess tool wear or wrong geometry. • G 98: forces tool back to higher position - Avoid unintended collision.
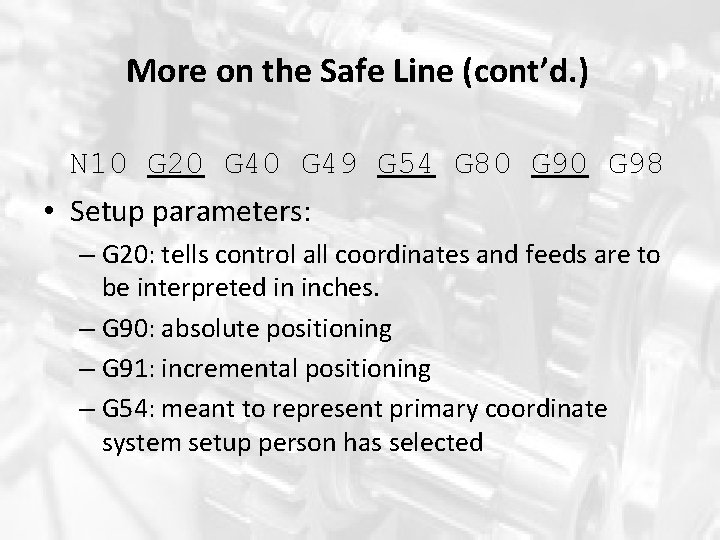
More on the Safe Line (cont’d. ) N 10 G 20 G 49 G 54 G 80 G 98 • Setup parameters: – G 20: tells control all coordinates and feeds are to be interpreted in inches. – G 90: absolute positioning – G 91: incremental positioning – G 54: meant to represent primary coordinate system setup person has selected
Program Annotation • Programs are often annoted with comments to make it easier for the other people who will have to use the program to understand. • Critical information that may be included: – – – – Location of work offset Style, length, and diameter of cutting tools Insert specifications Workholding information Warnings of past mistakes Customer part number, material information Individual processes within program Program information * See Example in Listing 6 -3, page: 155
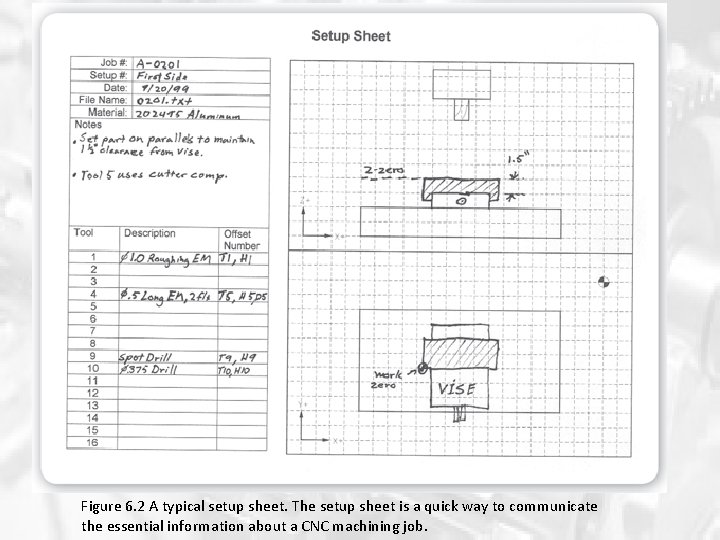
Figure 6. 2 A typical setup sheet. The setup sheet is a quick way to communicate the essential information about a CNC machining job.
Planning a CNC Machining Job Steps to planning and executing a CNC machining job: 1. 2. 3. 4. 5. Study the workpiece drawing. Plan the operations and setups. Determine which tools are available. Write the part program. Test and revise the program.
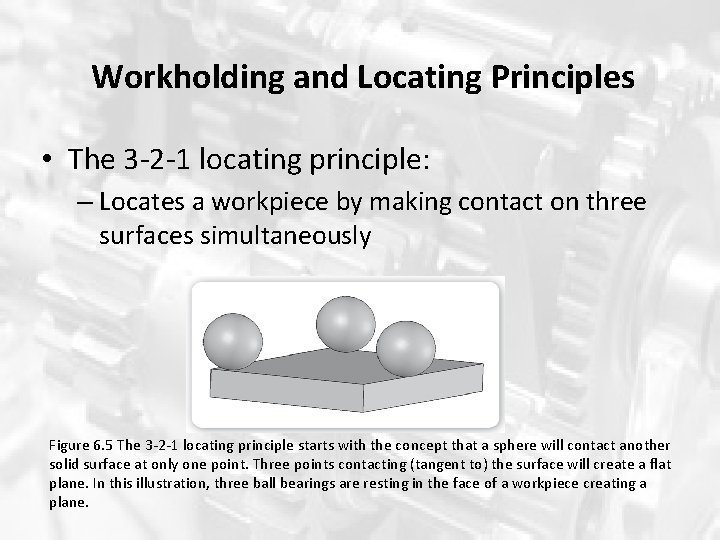
Workholding and Locating Principles • The 3 -2 -1 locating principle: – Locates a workpiece by making contact on three surfaces simultaneously Figure 6. 5 The 3 -2 -1 locating principle starts with the concept that a sphere will contact another solid surface at only one point. Three points contacting (tangent to) the surface will create a flat plane. In this illustration, three ball bearings are resting in the face of a workpiece creating a plane.
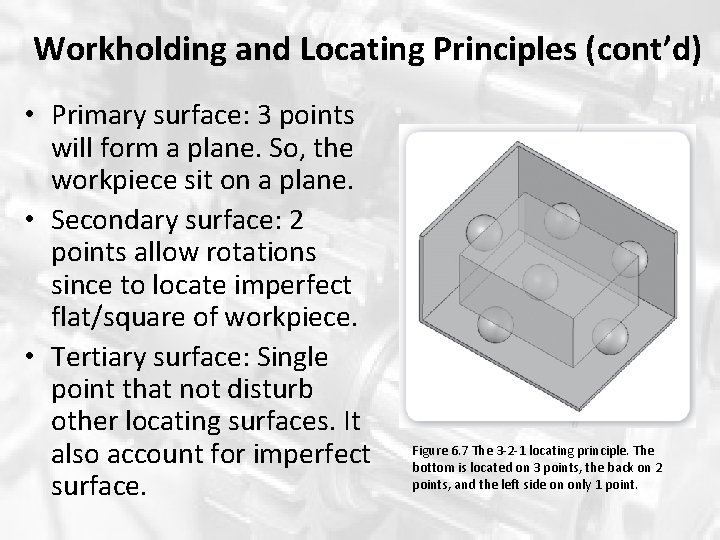
Workholding and Locating Principles (cont’d) • Primary surface: 3 points will form a plane. So, the workpiece sit on a plane. • Secondary surface: 2 points allow rotations since to locate imperfect flat/square of workpiece. • Tertiary surface: Single point that not disturb other locating surfaces. It also account for imperfect surface. Figure 6. 7 The 3 -2 -1 locating principle. The bottom is located on 3 points, the back on 2 points, and the left side on only 1 point.
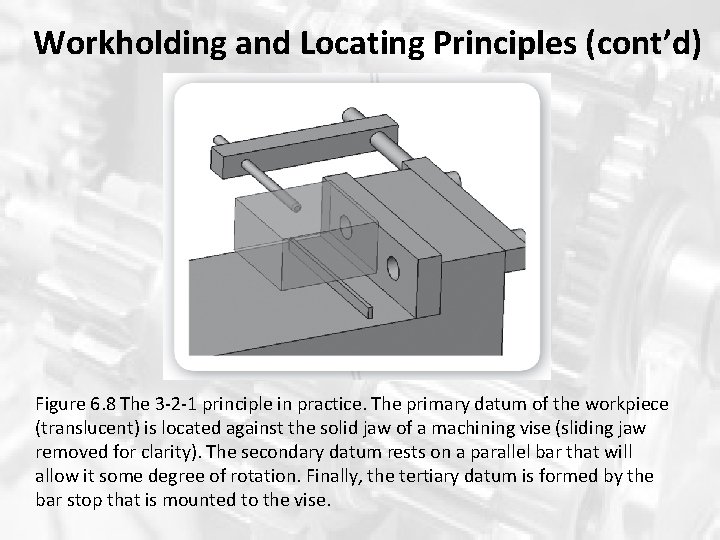
Workholding and Locating Principles (cont’d) Figure 6. 8 The 3 -2 -1 principle in practice. The primary datum of the workpiece (translucent) is located against the solid jaw of a machining vise (sliding jaw removed for clarity). The secondary datum rests on a parallel bar that will allow it some degree of rotation. Finally, the tertiary datum is formed by the bar stop that is mounted to the vise.
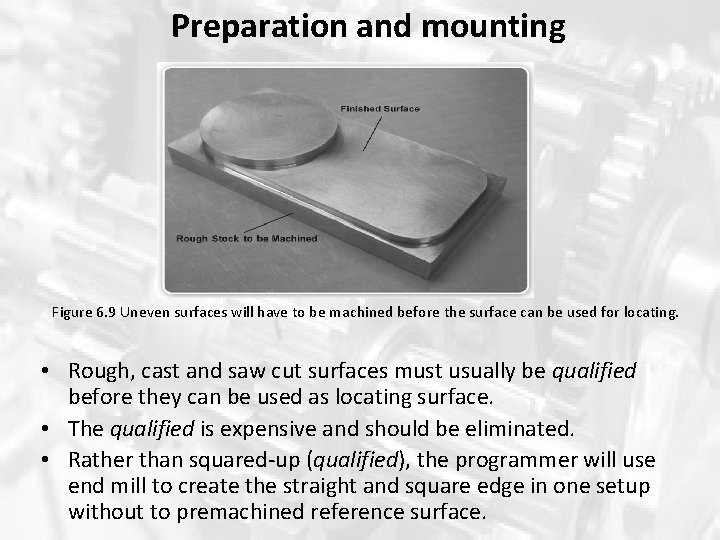
Preparation and mounting Figure 6. 9 Uneven surfaces will have to be machined before the surface can be used for locating. • Rough, cast and saw cut surfaces must usually be qualified before they can be used as locating surface. • The qualified is expensive and should be eliminated. • Rather than squared-up (qualified), the programmer will use end mill to create the straight and square edge in one setup without to premachined reference surface.
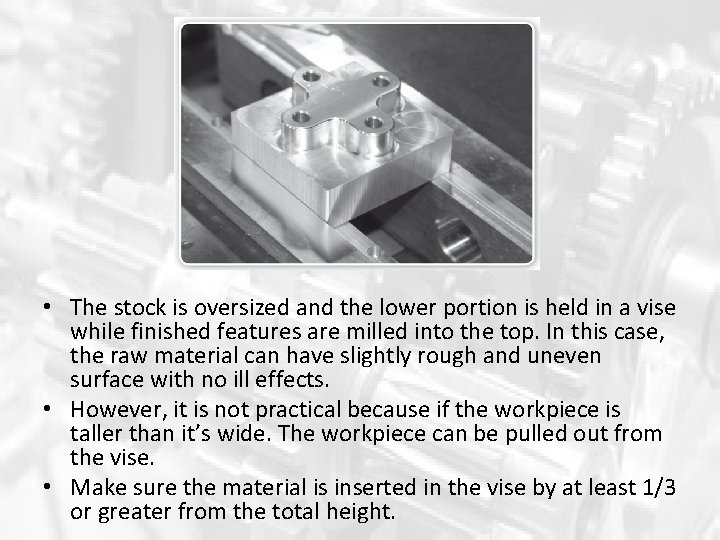
• The stock is oversized and the lower portion is held in a vise while finished features are milled into the top. In this case, the raw material can have slightly rough and uneven surface with no ill effects. • However, it is not practical because if the workpiece is taller than it’s wide. The workpiece can be pulled out from the vise. • Make sure the material is inserted in the vise by at least 1/3 or greater from the total height.
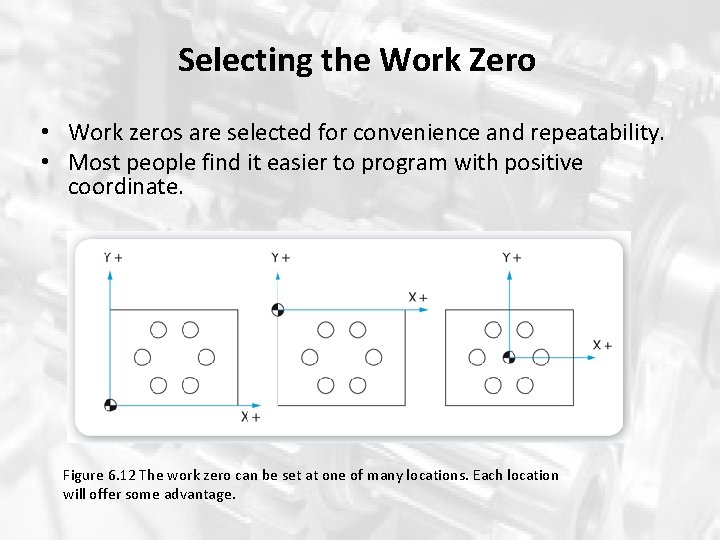
Selecting the Work Zero • Work zeros are selected for convenience and repeatability. • Most people find it easier to program with positive coordinate. Figure 6. 12 The work zero can be set at one of many locations. Each location will offer some advantage.
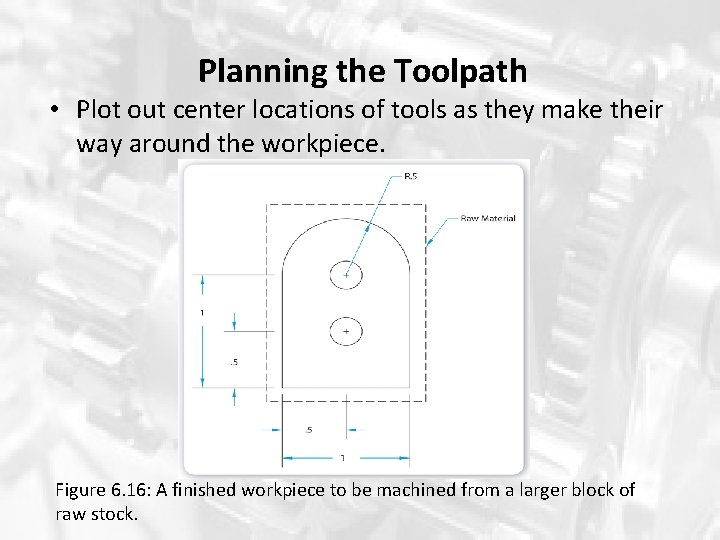
Planning the Toolpath • Plot out center locations of tools as they make their way around the workpiece. Figure 6. 16: A finished workpiece to be machined from a larger block of raw stock.
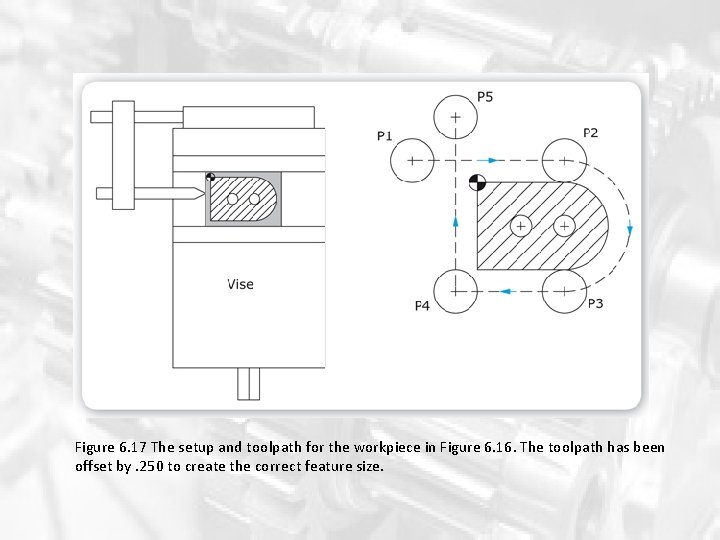
Figure 6. 17 The setup and toolpath for the workpiece in Figure 6. 16. The toolpath has been offset by. 250 to create the correct feature size.
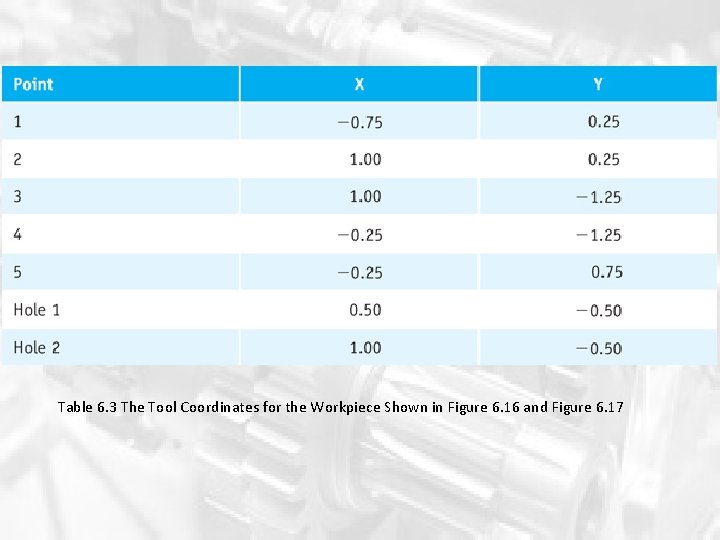
Table 6. 3 The Tool Coordinates for the Workpiece Shown in Figure 6. 16 and Figure 6. 17

The End Q&A
- Slides: 28