Chapter 3 Metrology Objectives Explain why traceable standards
Chapter 3 Metrology
Objectives § Explain why traceable standards in a metrology program are important for ensuring regulatory compliance § Define and contrast the following terms: § Standardization and calibration § Accuracy and precision § Specifications and tolerances § Define the regulatory requirements and guidances for ongoing metrology programs § Describe measurement traceability § Outline the elements of a metrology program § Describe a sample calibration process using a floor scale
An Overview of Metrology § What is involved in making and reporting a measurement? § What are the uses and limitations of the instruments used in the workplace? § What factors affect the uncertainty in the accuracy and precision of measurements? § Why are significant figures significant? § What are regulatory requirements to be followed in metrology as well as in all good manufacturing?
Metrology Fundamentals § A standard unit value of measurement is necessary to validate an unknown sample’s relative value § A method for assigning names of units and divisions, i. e. length, mass, heat, is essential § Determination of reliable measurements that are accurate and repeatable are essential to compare samples of unknowns
Outline of Fundamentals § § § § Units Measurements Base and Derived Units Calibration Accuracy and Uncertainty Specification & Tolerances Classification of Measurement Errors Measurement Traceability Standardization
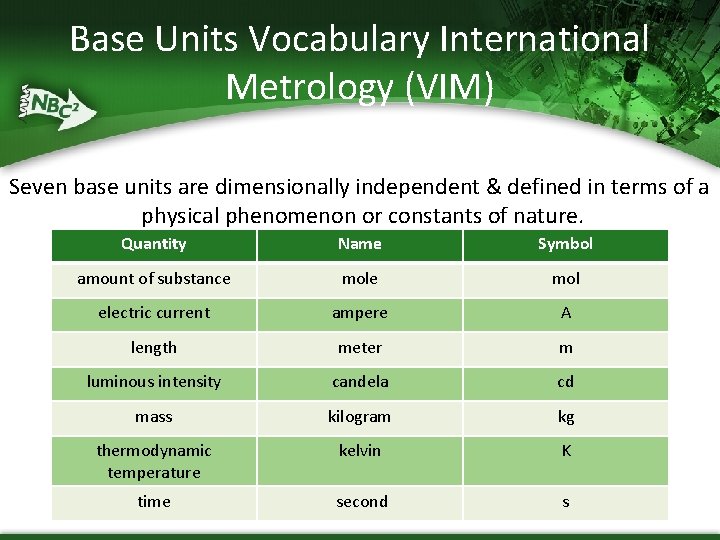
Base Units Vocabulary International Metrology (VIM) Seven base units are dimensionally independent & defined in terms of a physical phenomenon or constants of nature. Quantity Name Symbol amount of substance mol electric current ampere A length meter m luminous intensity candela cd mass kilogram kg thermodynamic temperature kelvin K time second s
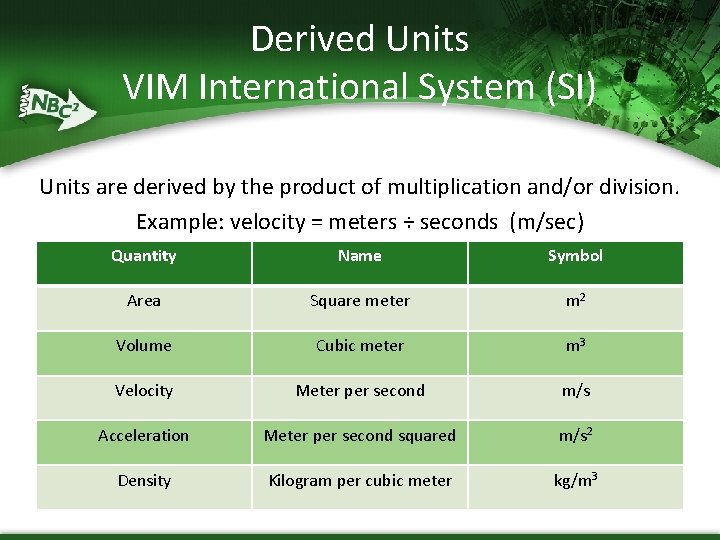
Derived Units VIM International System (SI) Units are derived by the product of multiplication and/or division. Example: velocity = meters ÷ seconds (m/sec) Quantity Name Symbol Area Square meter m 2 Volume Cubic meter m 3 Velocity Meter per second m/s Acceleration Meter per second squared m/s 2 Density Kilogram per cubic meter kg/m 3
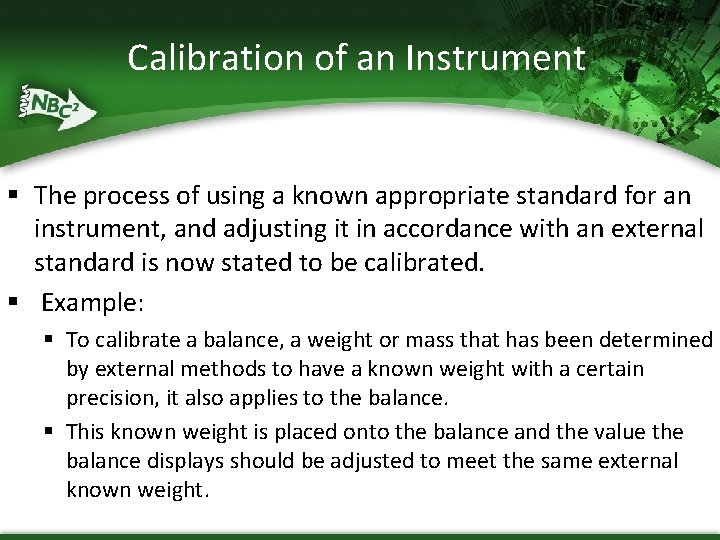
Calibration of an Instrument § The process of using a known appropriate standard for an instrument, and adjusting it in accordance with an external standard is now stated to be calibrated. § Example: § To calibrate a balance, a weight or mass that has been determined by external methods to have a known weight with a certain precision, it also applies to the balance. § This known weight is placed onto the balance and the value the balance displays should be adjusted to meet the same external known weight.
Calibration of Balances § Laboratories or work sites are often equipped with two types or more of different balances: § General use balances have readability § = 0. 1 g (less precise) § Analytical balances have readability § = 0. 0001 g (more precise) § Primary difference between these instruments is the precision of values given
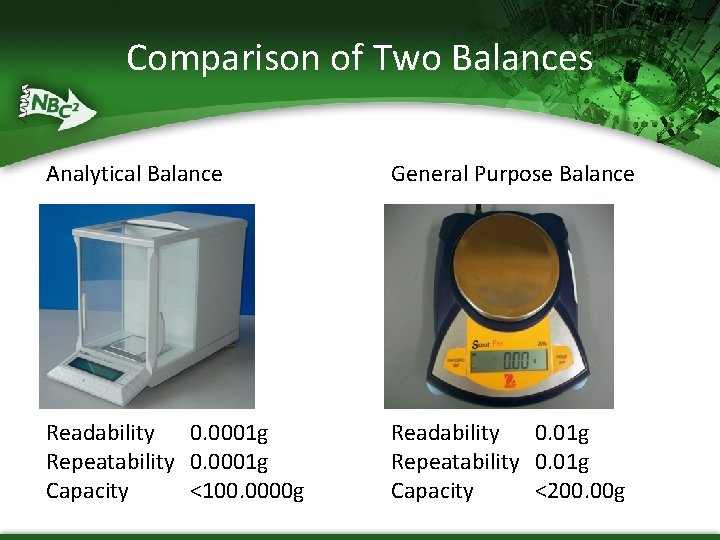
Comparison of Two Balances Analytical Balance General Purpose Balance Readability 0. 0001 g Repeatability 0. 0001 g Capacity <100. 0000 g Readability 0. 01 g Repeatability 0. 01 g Capacity <200. 00 g
Calibration of a Balance § Calibration of a balance uses a specific external standard of known weight or mass. § The value shown on balance is equal to a known standard. § Example: § A 200. 00 g external standard is placed on the balance according to the calibration standard operating procedure (SOP) § The balance is adjusted to a value equal to the standard 200. 00 g as displayed in the window
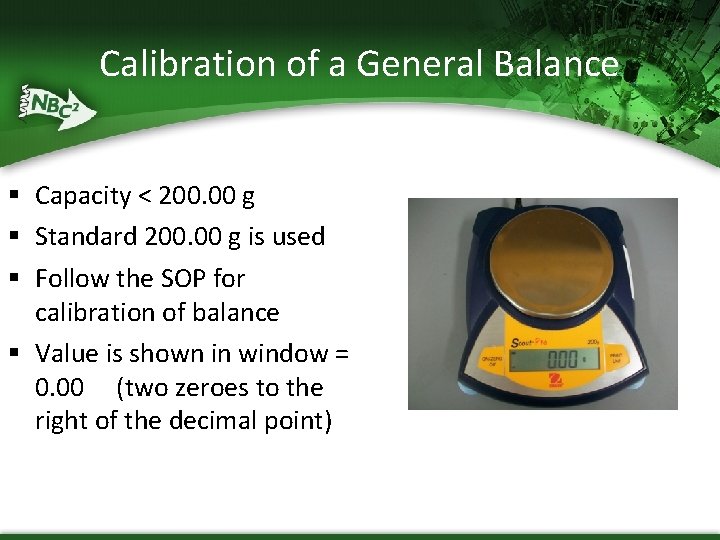
Calibration of a General Balance § Capacity < 200. 00 g § Standard 200. 00 g is used § Follow the SOP for calibration of balance § Value is shown in window = 0. 00 (two zeroes to the right of the decimal point)
Validation of Equipment § Validation is similar to calibration: An external standard is used to determine the accuracy of the measurement § However: It does not adjust the values of equipment to match a known standard
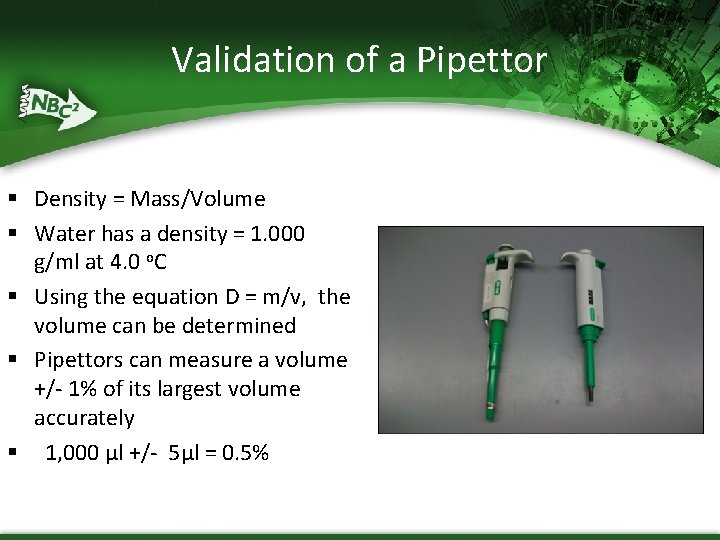
Validation of a Pipettor § Density = Mass/Volume § Water has a density = 1. 000 g/ml at 4. 0 o. C § Using the equation D = m/v, the volume can be determined § Pipettors can measure a volume +/- 1% of its largest volume accurately § 1, 000 µl +/- 5µl = 0. 5%
Validation of a Pipettor and Percent Error § Using a 1000 µl pipettor, measure 1000 µl of water and weigh it on a balance with precision of three decimal points, 1. 000 g § Density of water is 1. 003 g/1, 000 µl at 20 ⁰C § Solution: V = m x D § V = 1. 003 g x 1000 µl/1. 000 g § The actual volume = 1, 003µl § Pipettor deviates from ideal value by 0. 3%
Accuracy vs Precision in Values Accuracy Precision § Accuracy is determined by § Precision is a series of finding the average of all measurements taken values given and the close the values compared to the true, are to each other external value § This is called § If the measured value is repeatability close to the true value, it is called accurate
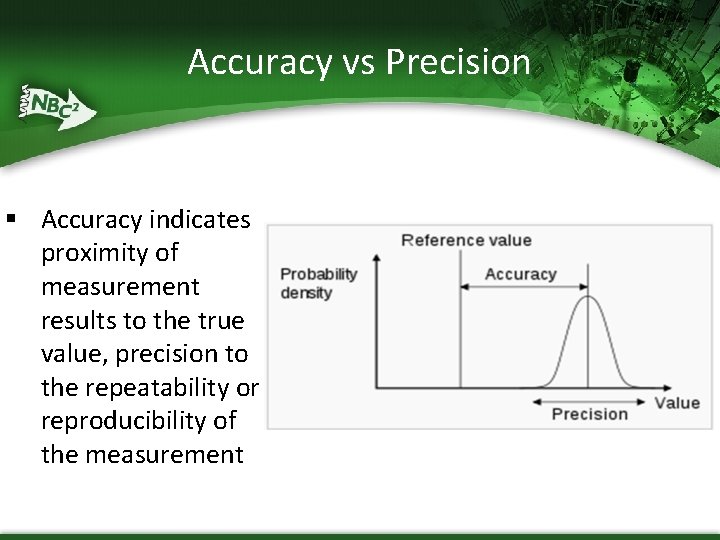
Accuracy vs Precision § Accuracy indicates proximity of measurement results to the true value, precision to the repeatability or reproducibility of the measurement
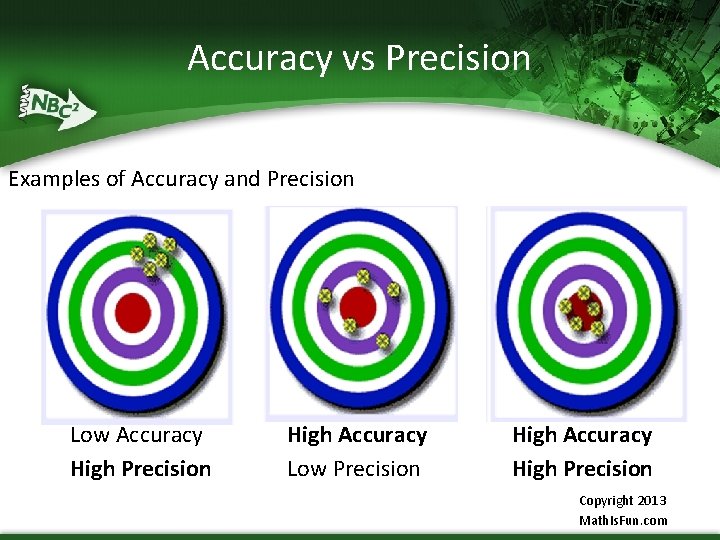
Accuracy vs Precision Examples of Accuracy and Precision Low Accuracy High Precision High Accuracy Low Precision High Accuracy High Precision Copyright 2013 Math. Is. Fun. com
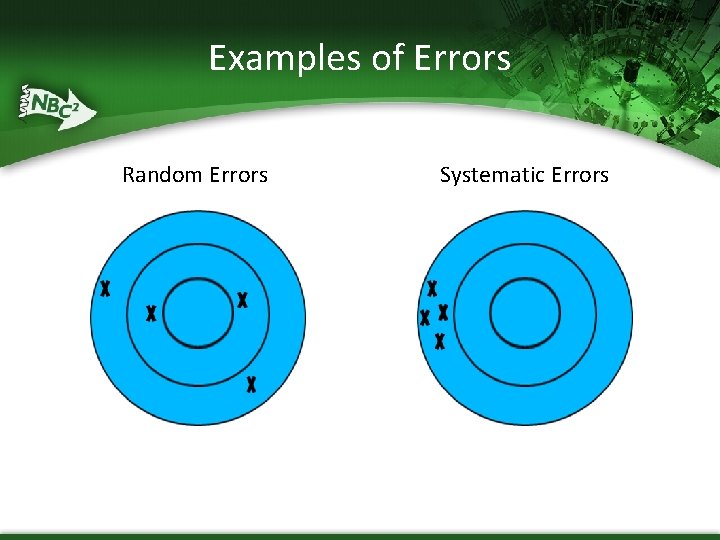
Examples of Errors Random Errors Systematic Errors
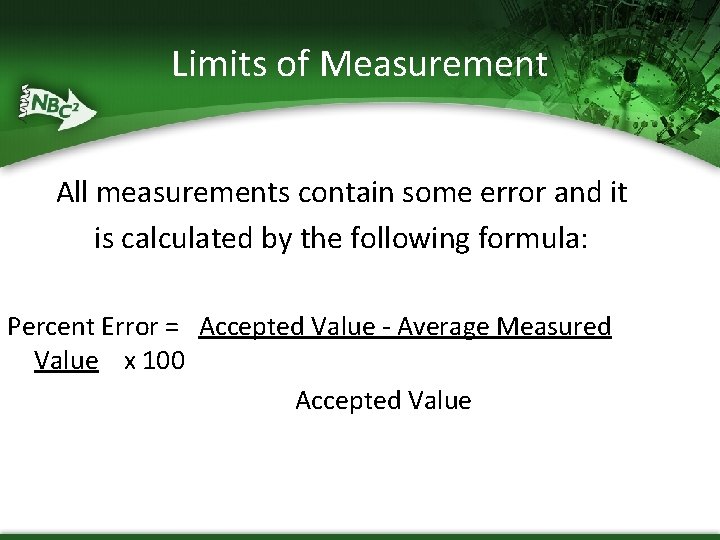
Limits of Measurement All measurements contain some error and it is calculated by the following formula: Percent Error = Accepted Value - Average Measured Value x 100 Accepted Value
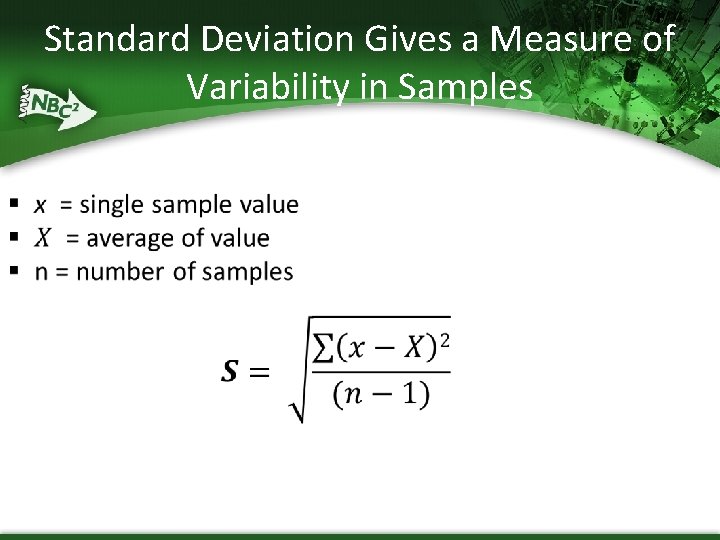
Standard Deviation Gives a Measure of Variability in Samples •
What are Significant Figures? § The necessary number of figures (digits) required to express the result of a measurement or calculation so that only the last digit in the number is in doubt. § Measuring gives significance (or meaning) to each digit in the number produced.
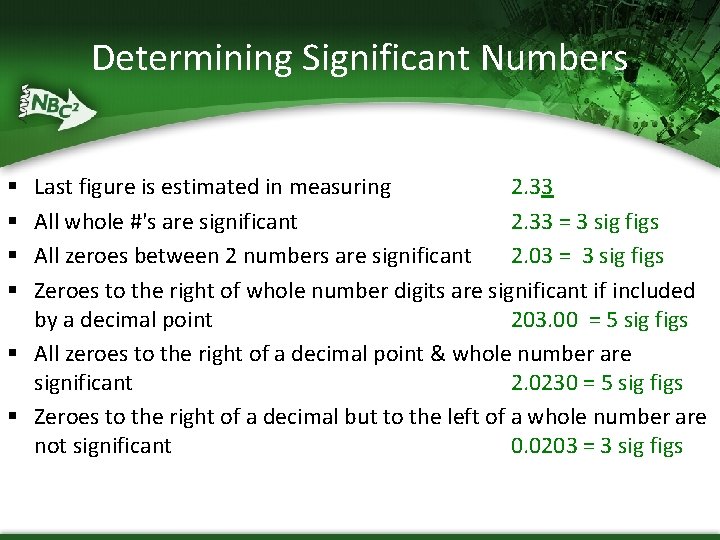
Determining Significant Numbers Last figure is estimated in measuring 2. 33 All whole #'s are significant 2. 33 = 3 sig figs All zeroes between 2 numbers are significant 2. 03 = 3 sig figs Zeroes to the right of whole number digits are significant if included by a decimal point 203. 00 = 5 sig figs § All zeroes to the right of a decimal point & whole number are significant 2. 0230 = 5 sig figs § Zeroes to the right of a decimal but to the left of a whole number are not significant 0. 0203 = 3 sig figs § §
Measurement & Traceability § Traceability is unbroken measurements for calibration starting with a calibration of a single device to national or international standards. § Reverse traceability is the inverse which may require all instruments calibrated with a national standard to be recalled if it is defective
Test for Uncertainty Ratio (TUR) & Standardization § TUR is the ratio of the stated accuracy of the measurement standard to the stated accuracy of the measured instrument under test. A 4: 1 ratio is acceptable but 10: 1 is best. § Standardization is similar to calibration but is adjusted frequently with an exterior standard. § Instruments and test equipment also must undergo assessment of uncertainty and standardization. § Test equipment (TE), measuring & test equipment (M&TE) § Test, measurement, and diagnostic equipment (TMDE) § Device Under Test (DUT) and Unit Under Test (UUT)
Documentation is Essential in Metrology: FDA Regulation § All of the procedures, equipment testing and standardization, calibration, etc. must be written and kept to be available for audits by FDA § Adequate calibration of equipment + standards § Audit requirements § Calibration procedures: intervals of implementing, quality of schedule § Computer software validation, environmental controls, personnel requirements § Labeling, records, supplier control § Measurement traceability
Standards & Procedures for Metrology § Found in industries and government areas § Written standard operating procedures (SOP) § Certain requirements are generally accepted § Competence of Testing and Calibration § Requirements for the above § Pharmaceutical and biomanufacturing are outlined in the code of federal regulations (CFR) § FDA outlines regulations in 21 CFR Parts 11, 5 § Good Manufacturing Practice in 21 CFR 210 -211
Adequacy of Calibration § Calibration equipment is not compromised: § Calibrated references, standards, range of standards § adequate accuracy, stability, is also specified by tolerance limits, personnel use of equipment and traceability § Audit requirements: § Function of the audit members, frequency of audits, description of methods, documentation § Calibration procedures and intervals: § Documentation of SOP or work instruction § Intervals are often done quarterly and documented
Calibration Quality § Calibration reliability: kept in tolerance in time period § Deviation from reliability level: adjustment, SOP revision, removal and replacement, of instrument etc. § Nonconformance: when calibration is not calibrated correctly and in a timely manner § Measurement uncertainty: may show poor readouts, drift, sampling errors, during calibration of an instrument § Measurement assurance: check standards with statistical process control, prompt, root cause analysis § Risk assessment: identifies potential risks for each process, and determine the reliability target
Calibration Quality (continued) § Computer software validation: requires calibration- management, validation, maintenance and test use § Environmental controls: include temperature, humidity, air pressure, vibration, electrical power, emf § Labels: unique ID of measuring and test equipment, date and when due for next calibration, attached to it § Measurement traceability: maintains that measurements are traceable to national or international standards § Personnel requirements: competency of personnel evaluated to determine their ability in calibrating
Calibration in Biomanufacturing § A scale can be used to demonstrate of the calibration process using a massmeasuring instrument 1. Perform a visual inspection of the unit 2. Obtain necessary SOP for calibration of this unit 3. Determine where the scale is located 4. Find leveling indicators and verify it is level 5. Verify that the unit has been energized for 30 minutes 6. Zero the instrument reading by pressing the appropriate key 7. Perform the required tests using 0 kg and 200 kg, documenting values on the instrument data sheet the values allowing the scale to stabilize 8. Record calibration standard weight, and the unit in the appropriate space on the data sheet
Calibration of Scale (continued) 9. Compare the calibration standard to the values on display readings to determine the error of each weight 10. Unit errors less than or equal to the Calibration Tolerance do not need to be adjusted 11. Follow scale SOP for calibrating this scale 12. If adjusted, repeat steps 6 -9 while recording the values in the appropriate As. Left section of the instrument calibration data sheet 13. Verify completion of the instrument calibration on data sheet and review accuracy 14. Sign and date the instrument data sheet 15. Place a completed CALIBRATION label in a visible location on the unit
- Slides: 32