Chapter 3 Assoc Prof Dr Adem ATMACA Gaziantep
- Slides: 40

Chapter 3 Assoc. Prof. Dr. Adem ATMACA Gaziantep University 1

PROJECTION METHOD

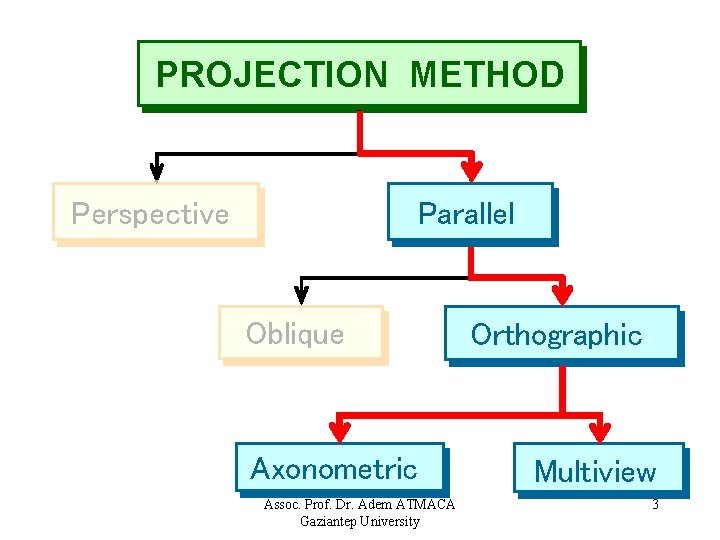
PROJECTION METHOD Perspective Parallel Oblique Axonometric Assoc. Prof. Dr. Adem ATMACA Gaziantep University Orthographic Multiview 3

Types of Technical Drawings Technical drawings are based on the fundamental principles of projections. A projection is a drawing or representation of an entity on an imaginary plane or planes. This projection planes serves the same purpose in technical drawing as is served by the movie screen. A projection involves four components, 1. The actual object that the drawing or projection represents 2. The eye of the viewer looking at the object 3. The imaginary projection plane 4. Imaginary lines of sight called Projectors The two broad types of projections, both with several sub. Assoc. Prof. Dr. Adem ATMACA 4 classifications, are parallel projection and perspective projection Gaziantep University

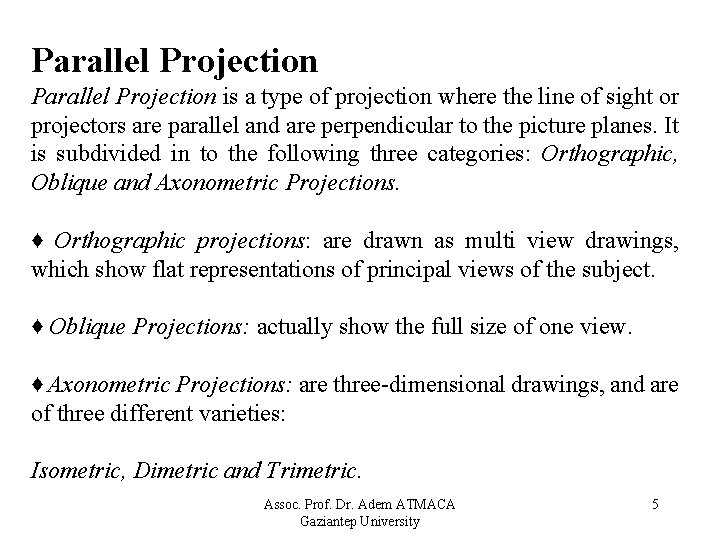
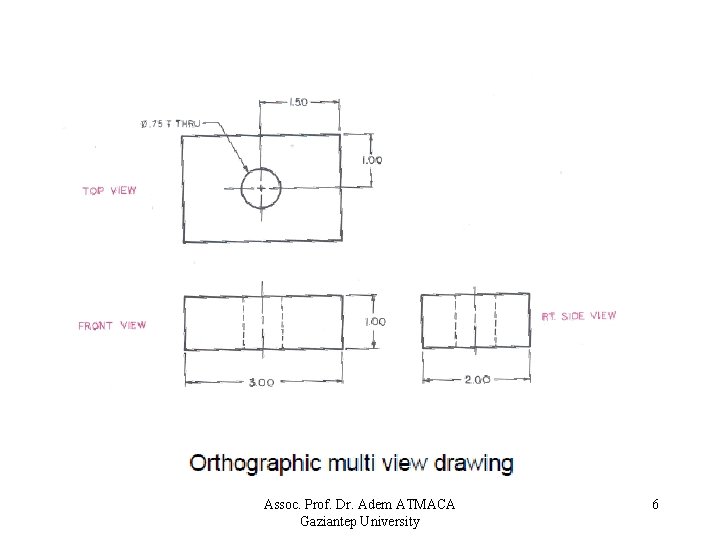
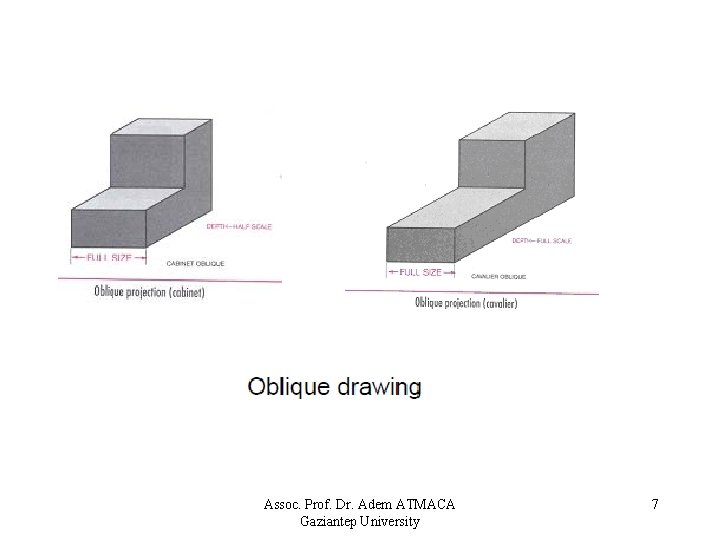
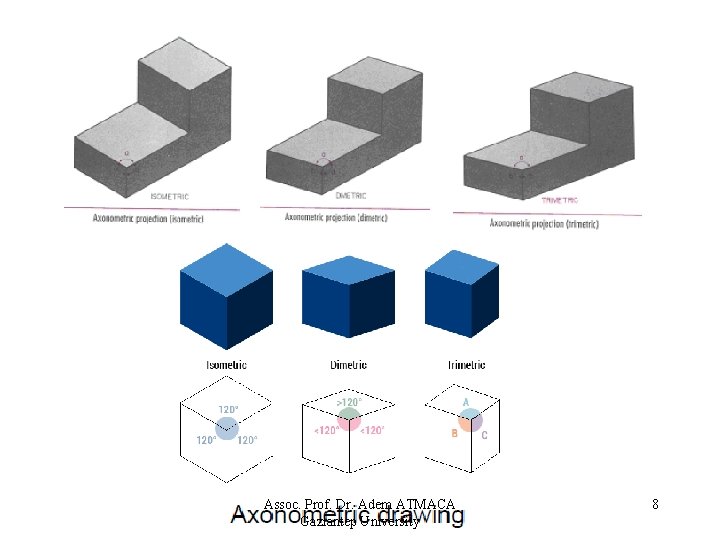
Parallel Projection is a type of projection where the line of sight or projectors are parallel and are perpendicular to the picture planes. It is subdivided in to the following three categories: Orthographic, Oblique and Axonometric Projections. ♦ Orthographic projections: are drawn as multi view drawings, which show flat representations of principal views of the subject. ♦ Oblique Projections: actually show the full size of one view. ♦ Axonometric Projections: are three-dimensional drawings, and are of three different varieties: Isometric, Dimetric and Trimetric. Assoc. Prof. Dr. Adem ATMACA Gaziantep University 5

Assoc. Prof. Dr. Adem ATMACA Gaziantep University 6

Assoc. Prof. Dr. Adem ATMACA Gaziantep University 7

Assoc. Prof. Dr. Adem ATMACA Gaziantep University 8

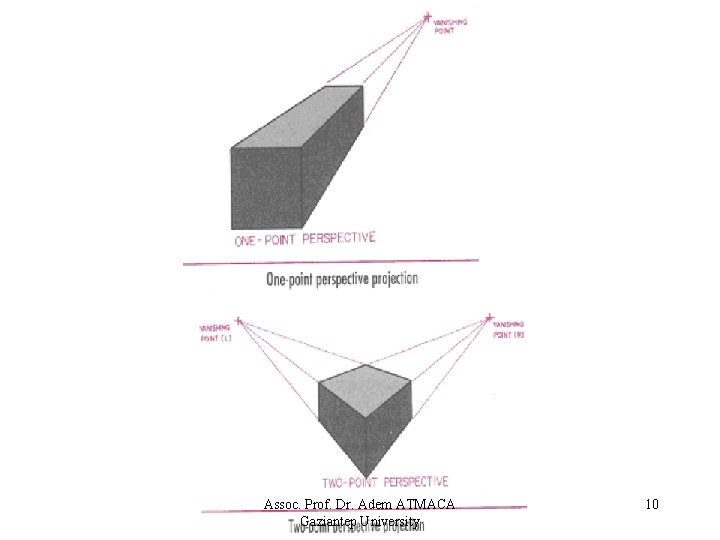
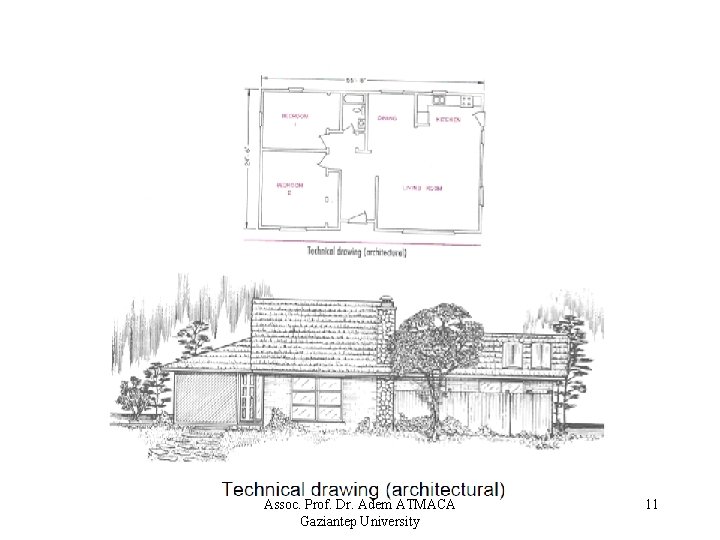
Perspective Projection Perspective projections are drawings which attempt to replicate what the human eye actually sees when it views an object. There are three types of perspective projections: Onepoint, Two-point and Three-point Projections. Assoc. Prof. Dr. Adem ATMACA Gaziantep University 9

Assoc. Prof. Dr. Adem ATMACA Gaziantep University 10

Assoc. Prof. Dr. Adem ATMACA Gaziantep University 11

PROJECTION THEORY The projection theory is used to graphically represent 3 -D objects on 2 -D media (paper, computer screen). The projection theory is based on two variables: 1) Line of sight 2) Plane of projection (image plane or picture plane) Assoc. Prof. Dr. Adem ATMACA Gaziantep University 12

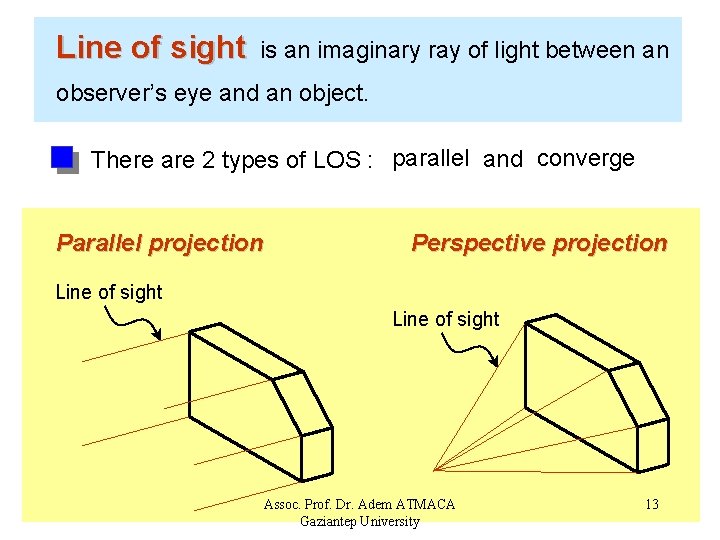
Line of sight is an imaginary ray of light between an observer’s eye and an object. There are 2 types of LOS : parallel and converge Parallel projection Perspective projection Line of sight Assoc. Prof. Dr. Adem ATMACA Gaziantep University 13

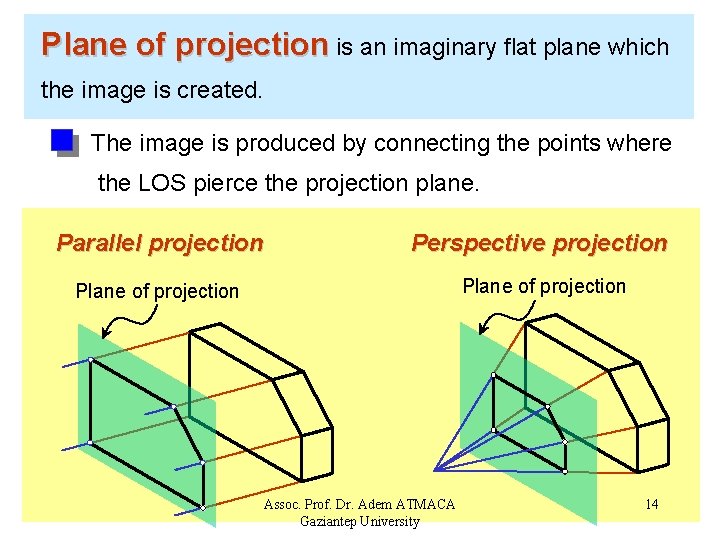
Plane of projection is an imaginary flat plane which the image is created. The image is produced by connecting the points where the LOS pierce the projection plane. Parallel projection Perspective projection Plane of projection Assoc. Prof. Dr. Adem ATMACA Gaziantep University 14

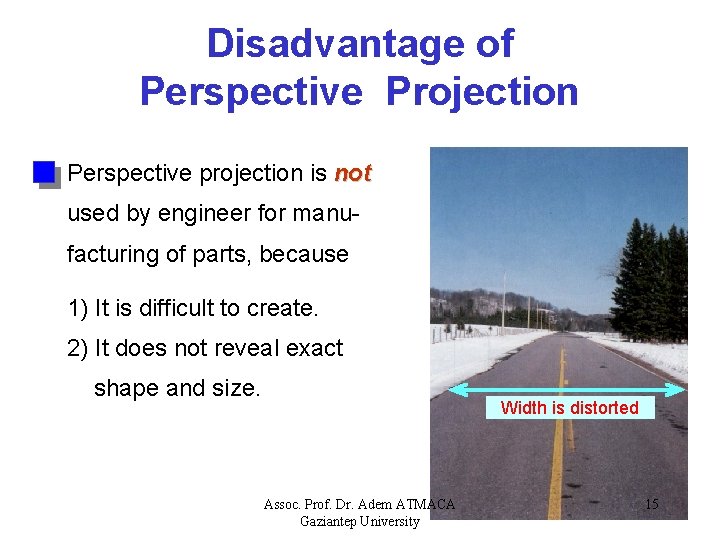
Disadvantage of Perspective Projection Perspective projection is not used by engineer for manufacturing of parts, because 1) It is difficult to create. 2) It does not reveal exact shape and size. Width is distorted Assoc. Prof. Dr. Adem ATMACA Gaziantep University 15

Orthographic Projection

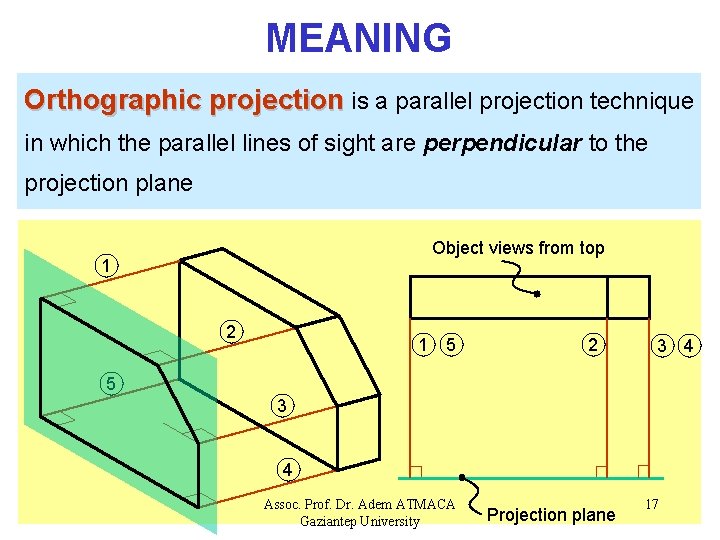
MEANING Orthographic projection is a parallel projection technique in which the parallel lines of sight are perpendicular to the projection plane Object views from top 1 2 1 5 2 3 4 5 3 4 Assoc. Prof. Dr. Adem ATMACA Gaziantep University Projection plane 17

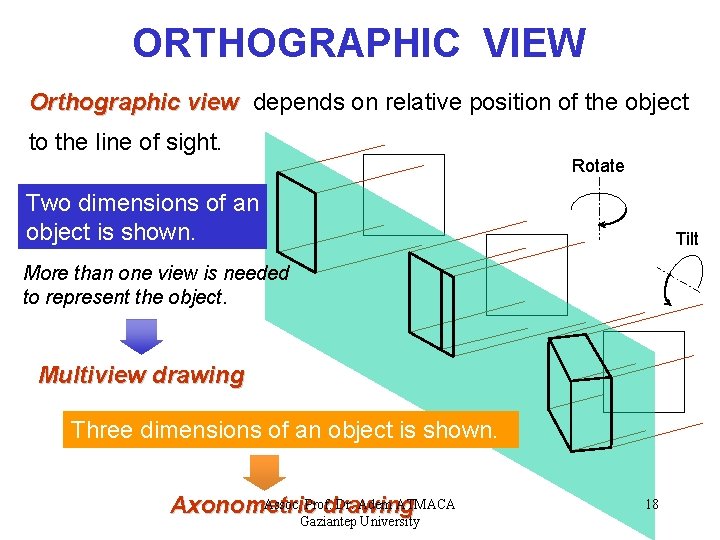
ORTHOGRAPHIC VIEW Orthographic view depends on relative position of the object to the line of sight. Rotate Two dimensions of an object is shown. Tilt More than one view is needed to represent the object. Multiview drawing Three dimensions of an object is shown. Assoc. Prof. Dr. Adem ATMACA Axonometric drawing Gaziantep University 18

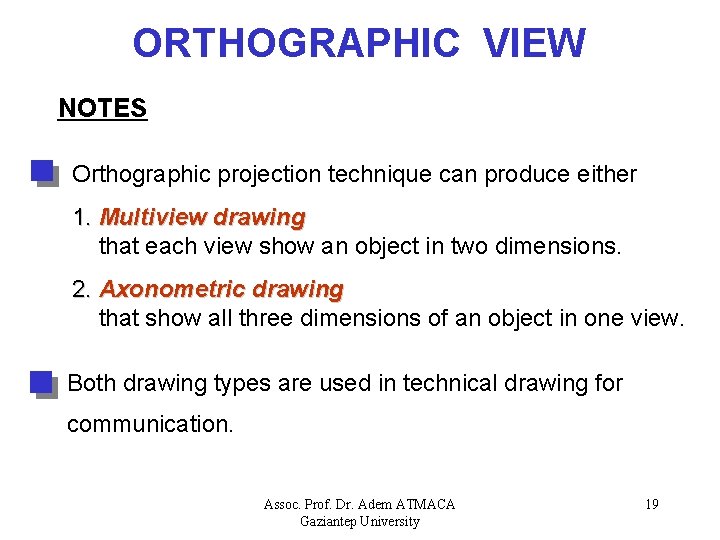
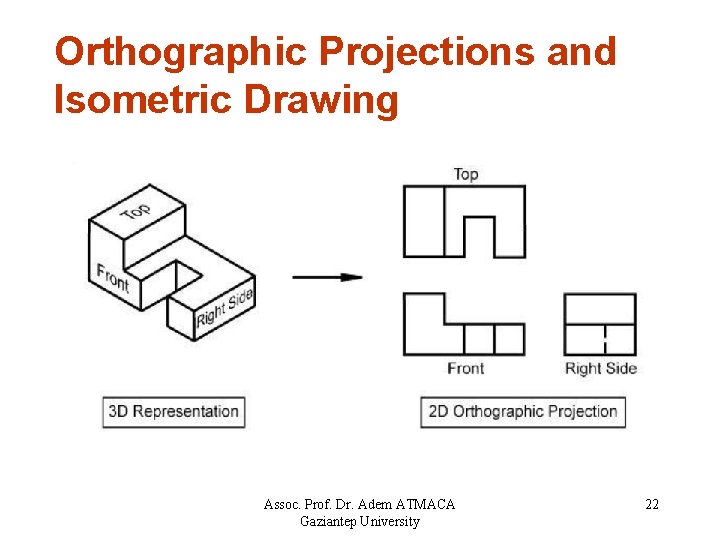
ORTHOGRAPHIC VIEW NOTES Orthographic projection technique can produce either 1. Multiview drawing that each view show an object in two dimensions. 2. Axonometric drawing that show all three dimensions of an object in one view. Both drawing types are used in technical drawing for communication. Assoc. Prof. Dr. Adem ATMACA Gaziantep University 19

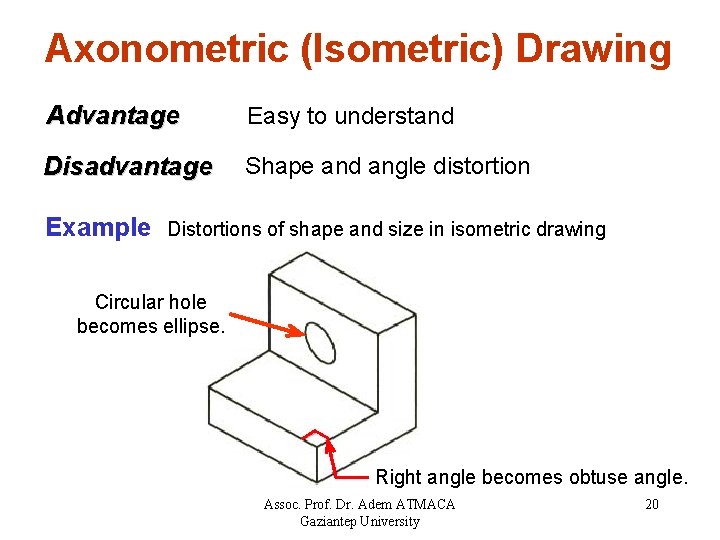
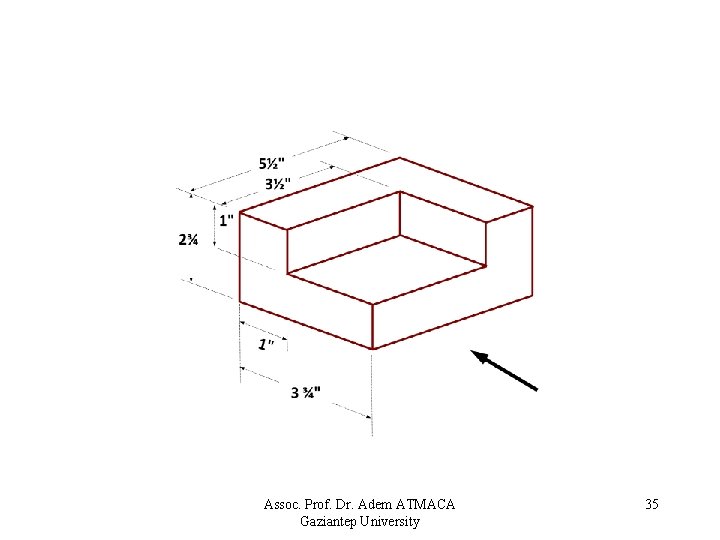
Axonometric (Isometric) Drawing Advantage Easy to understand Disadvantage Shape and angle distortion Example Distortions of shape and size in isometric drawing Circular hole becomes ellipse. Right angle becomes obtuse angle. Assoc. Prof. Dr. Adem ATMACA Gaziantep University 20

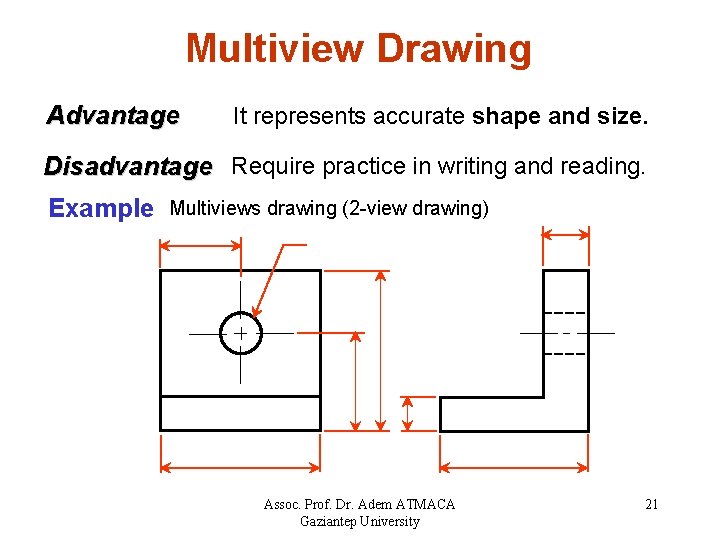
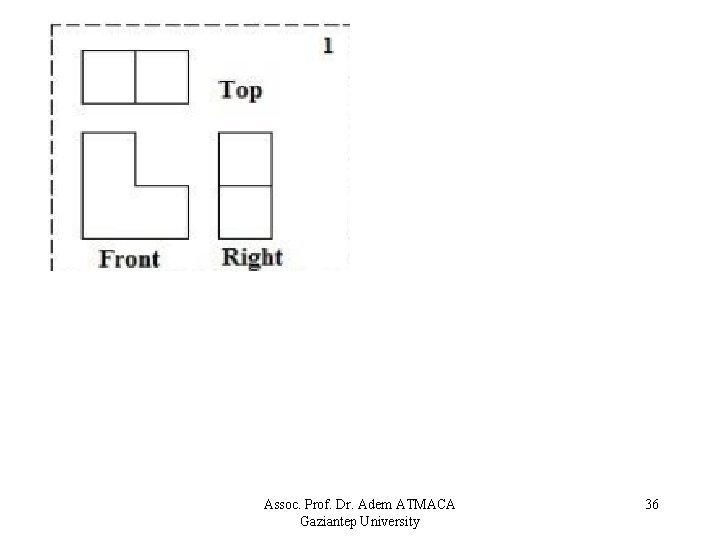
Multiview Drawing Advantage It represents accurate shape and size. Disadvantage Require practice in writing and reading. Example Multiviews drawing (2 -view drawing) Assoc. Prof. Dr. Adem ATMACA Gaziantep University 21

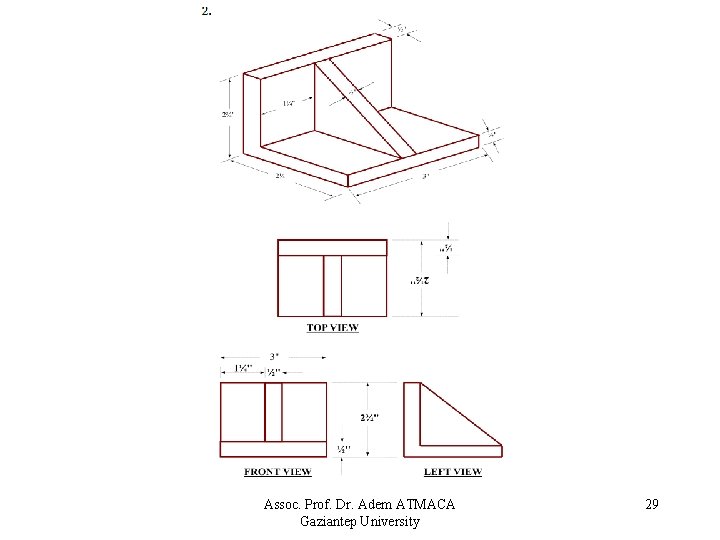
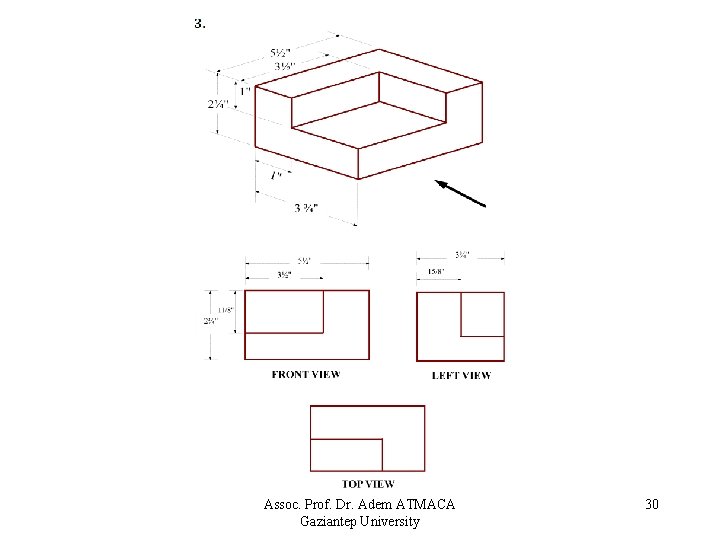
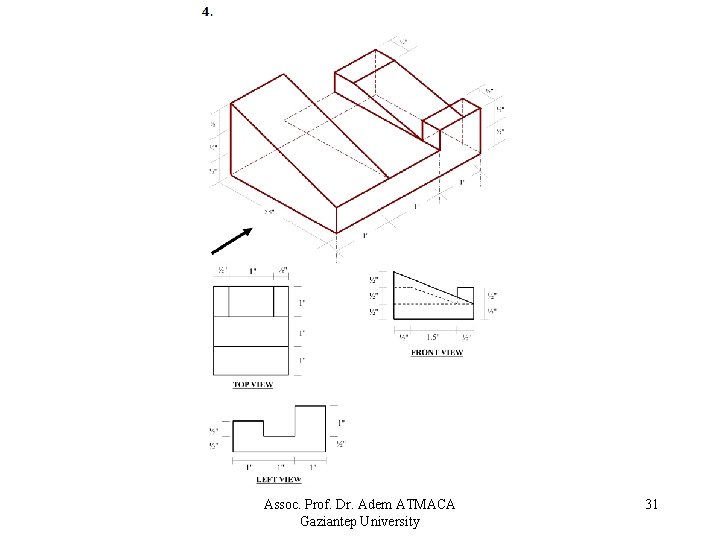
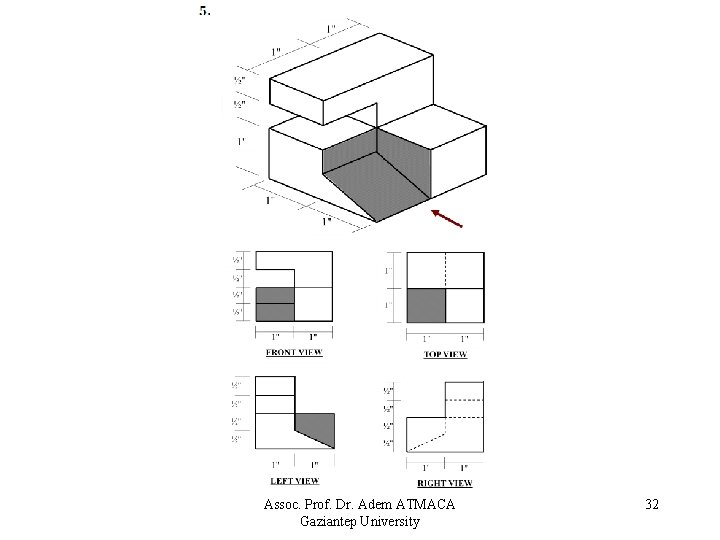
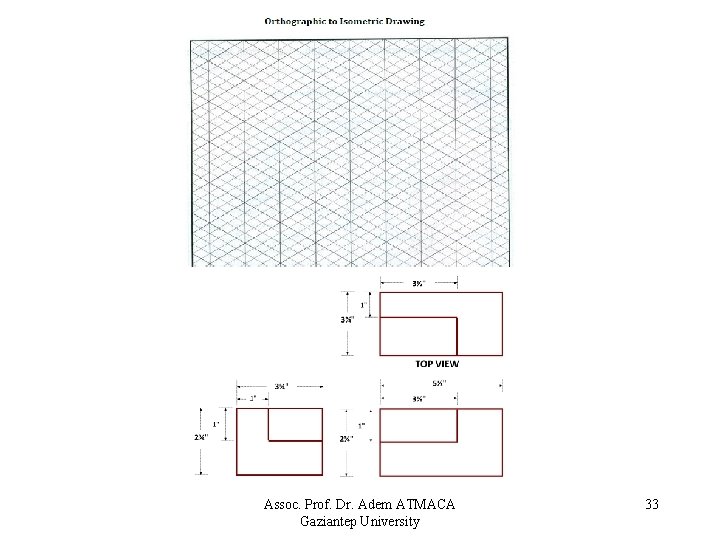
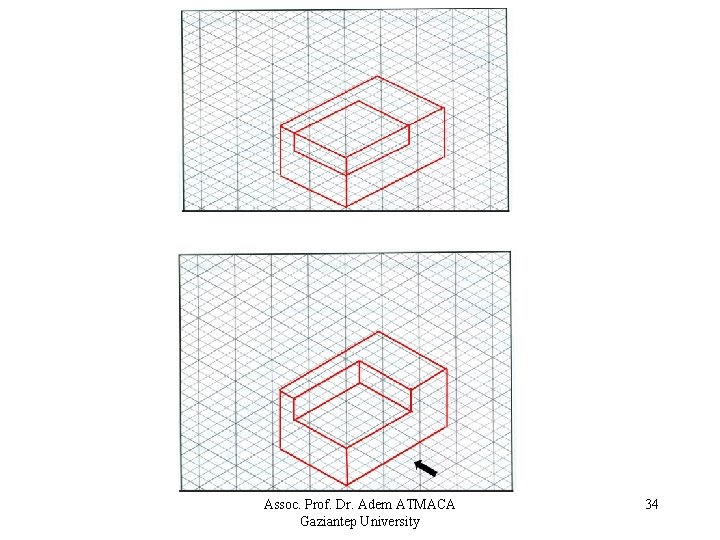
Orthographic Projections and Isometric Drawing Assoc. Prof. Dr. Adem ATMACA Gaziantep University 22

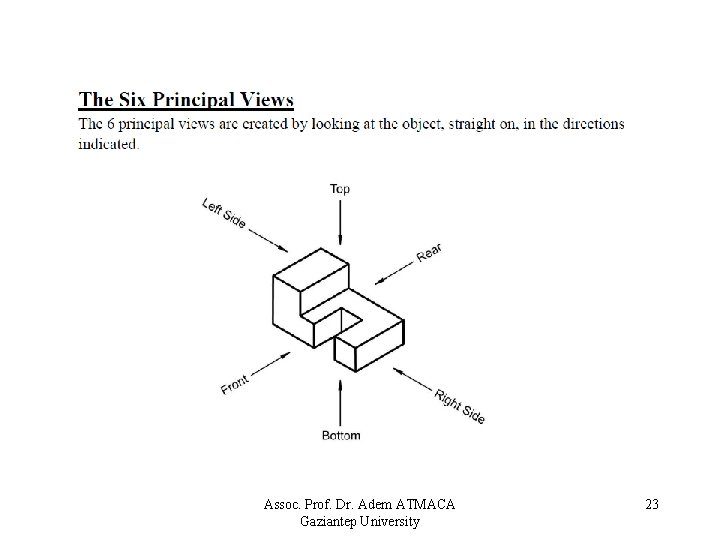
Assoc. Prof. Dr. Adem ATMACA Gaziantep University 23

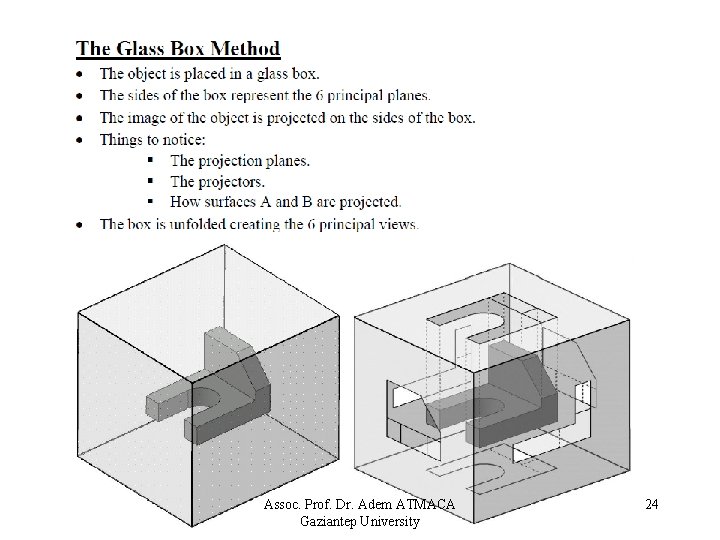
Assoc. Prof. Dr. Adem ATMACA Gaziantep University 24

Assoc. Prof. Dr. Adem ATMACA Gaziantep University 25

Assoc. Prof. Dr. Adem ATMACA Gaziantep University 26

Assoc. Prof. Dr. Adem ATMACA Gaziantep University 27

Assoc. Prof. Dr. Adem ATMACA Gaziantep University 28

Assoc. Prof. Dr. Adem ATMACA Gaziantep University 29

Assoc. Prof. Dr. Adem ATMACA Gaziantep University 30

Assoc. Prof. Dr. Adem ATMACA Gaziantep University 31

Assoc. Prof. Dr. Adem ATMACA Gaziantep University 32

Assoc. Prof. Dr. Adem ATMACA Gaziantep University 33

Assoc. Prof. Dr. Adem ATMACA Gaziantep University 34

Assoc. Prof. Dr. Adem ATMACA Gaziantep University 35

Assoc. Prof. Dr. Adem ATMACA Gaziantep University 36

Assoc. Prof. Dr. Adem ATMACA Gaziantep University 37

Assoc. Prof. Dr. Adem ATMACA Gaziantep University 38

Assoc. Prof. Dr. Adem ATMACA Gaziantep University 39

Assoc. Prof. Dr. Adem ATMACA Gaziantep University 40