Chapter 16 Section Views Copyright The Mc GrawHill

- Slides: 23

Chapter 16 Section Views Copyright © The Mc. Graw-Hill Companies, Inc. Permission required for reproduction or display.

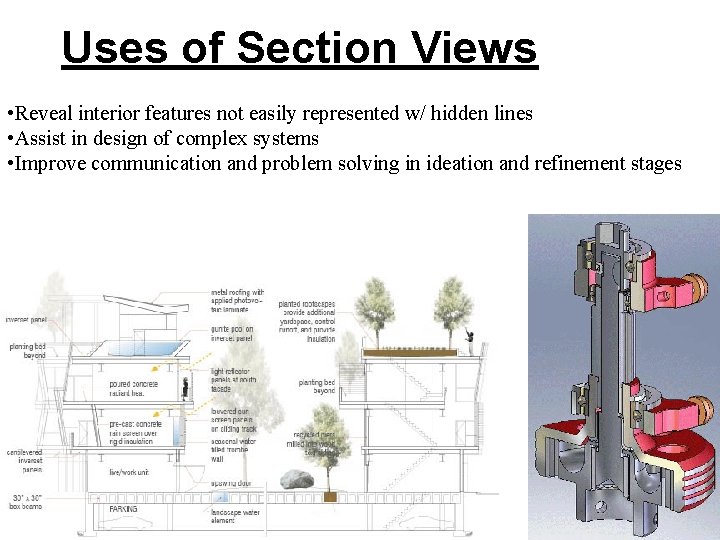
Uses of Section Views • Reveal interior features not easily represented w/ hidden lines • Assist in design of complex systems • Improve communication and problem solving in ideation and refinement stages

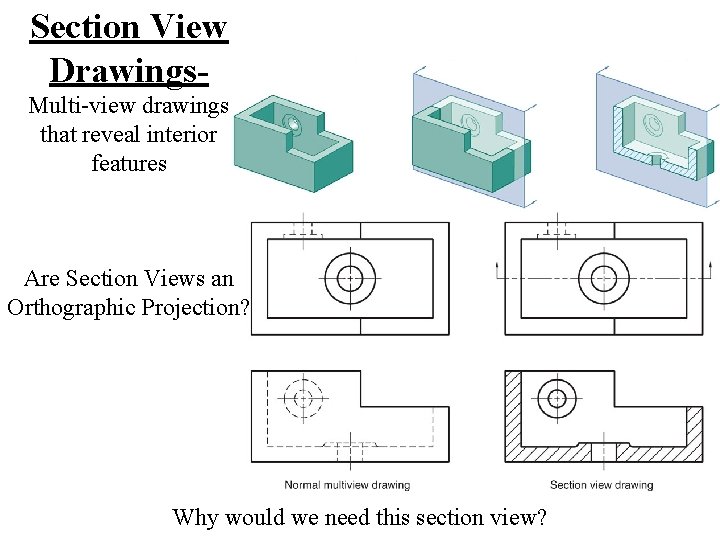
Section View Drawings. Multi-view drawings that reveal interior features Are Section Views an Orthographic Projection? Why would we need this section view?

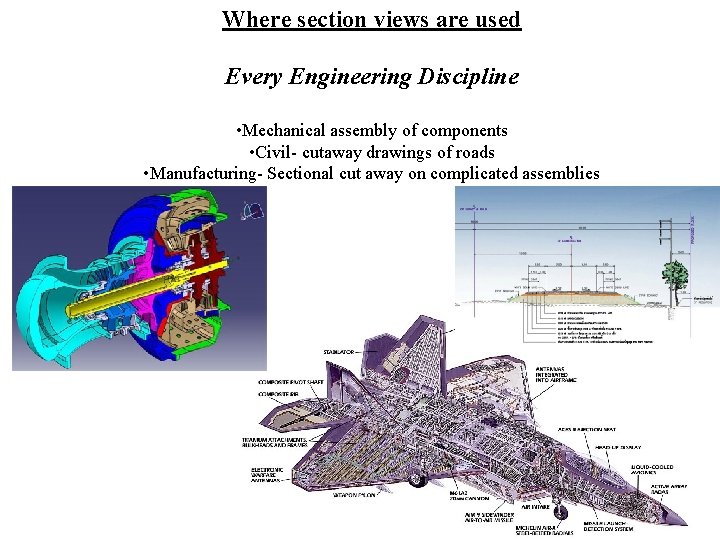
Where section views are used Every Engineering Discipline • Mechanical assembly of components • Civil- cutaway drawings of roads • Manufacturing- Sectional cut away on complicated assemblies

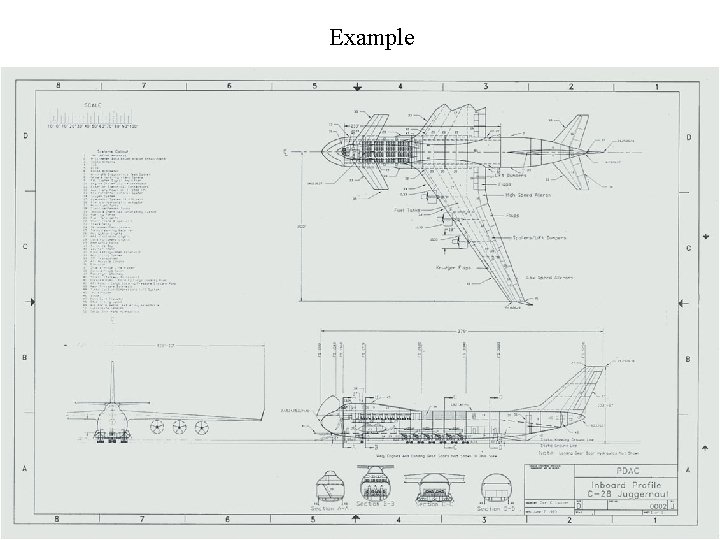
Example

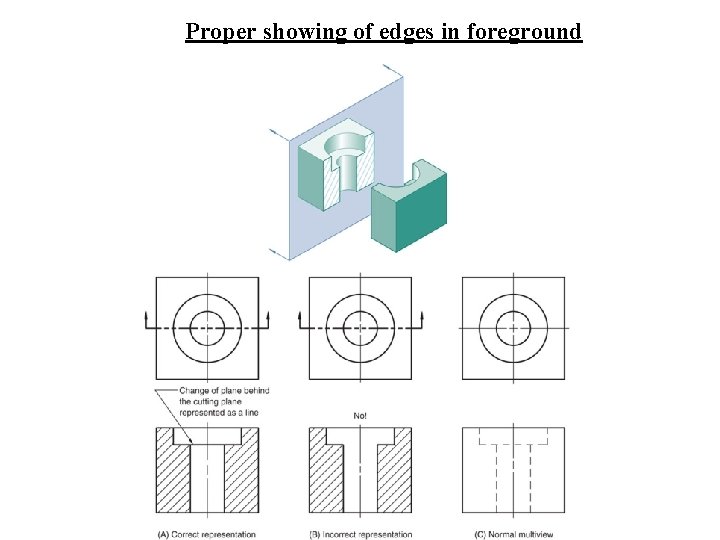
Proper showing of edges in foreground

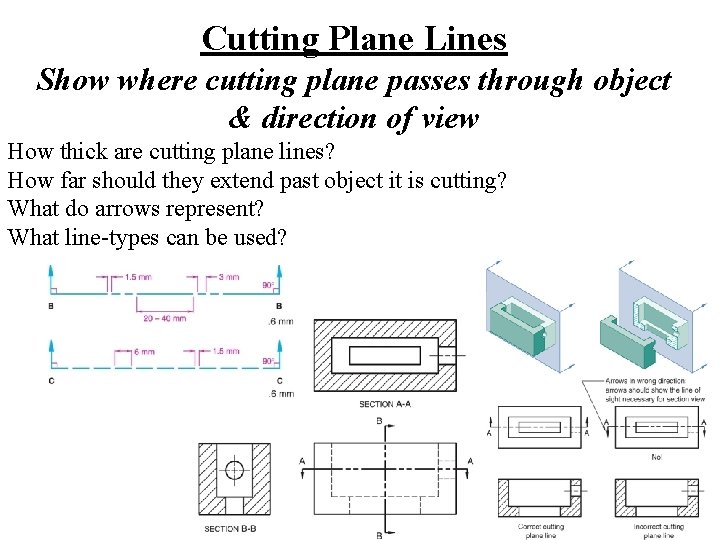
Cutting Plane Lines Show where cutting plane passes through object & direction of view How thick are cutting plane lines? . 6 mm How far should they extend past object it is cutting? ¼” What do arrows represent? Direction of viewing What line-types can be used? Dashed lines/ One long, two short dashes

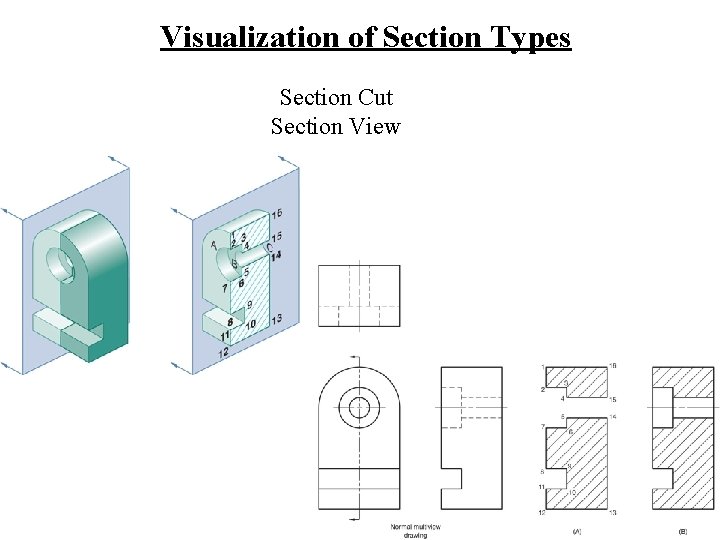
Visualization of Section Types Section Cut Section View

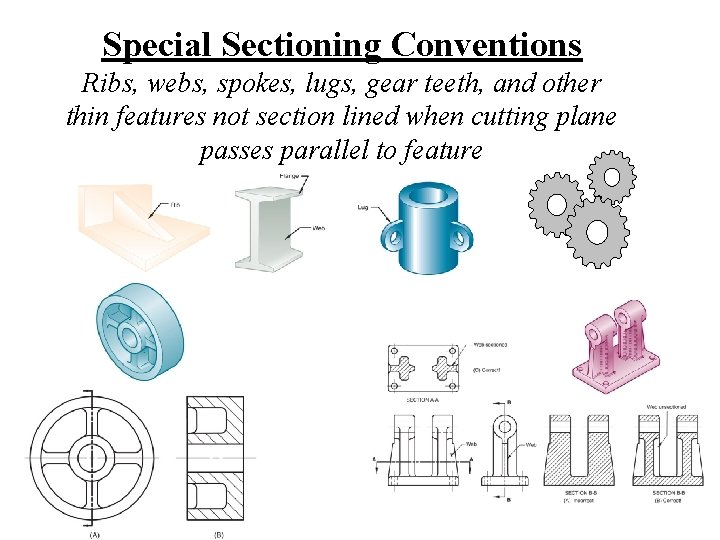
Special Sectioning Conventions Ribs, webs, spokes, lugs, gear teeth, and other thin features not section lined when cutting plane passes parallel to feature

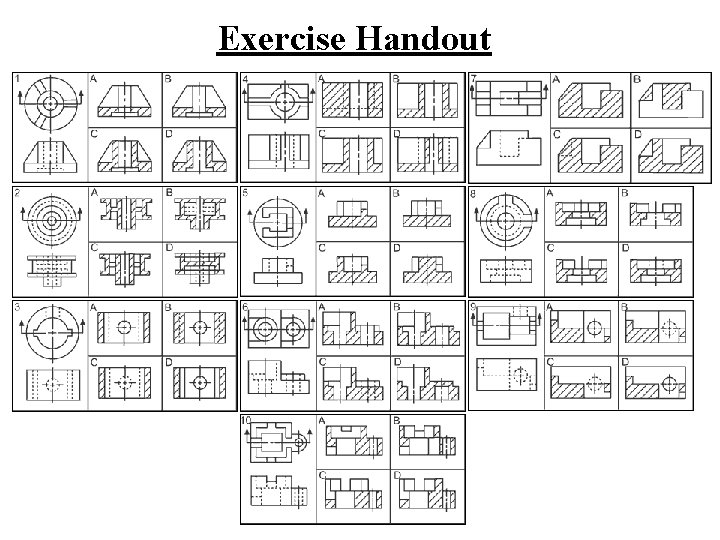
Exercise Handout

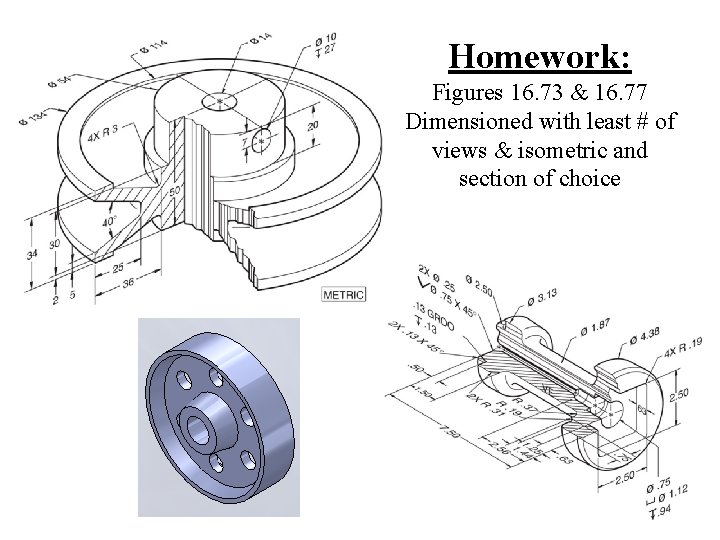
Homework: Figures 16. 73 & 16. 77 Dimensioned with least # of views & isometric and section of choice

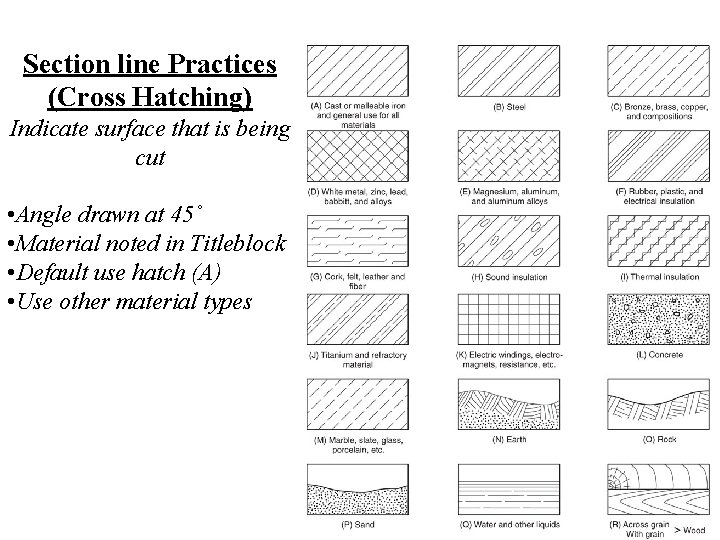
Section line Practices (Cross Hatching) Indicate surface that is being cut • Angle drawn at 45˚ • Material noted in Titleblock • Default use hatch (A) • Use other material types

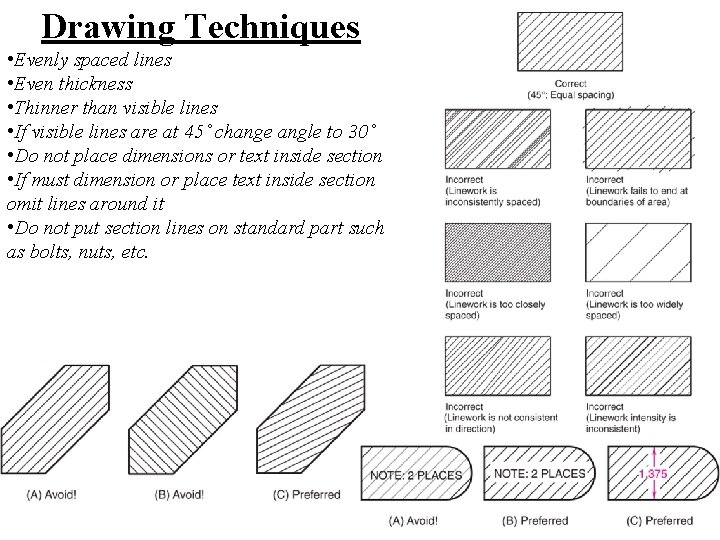
Drawing Techniques • Evenly spaced lines • Even thickness • Thinner than visible lines • If visible lines are at 45˚ change angle to 30˚ • Do not place dimensions or text inside section • If must dimension or place text inside section omit lines around it • Do not put section lines on standard part such as bolts, nuts, etc.

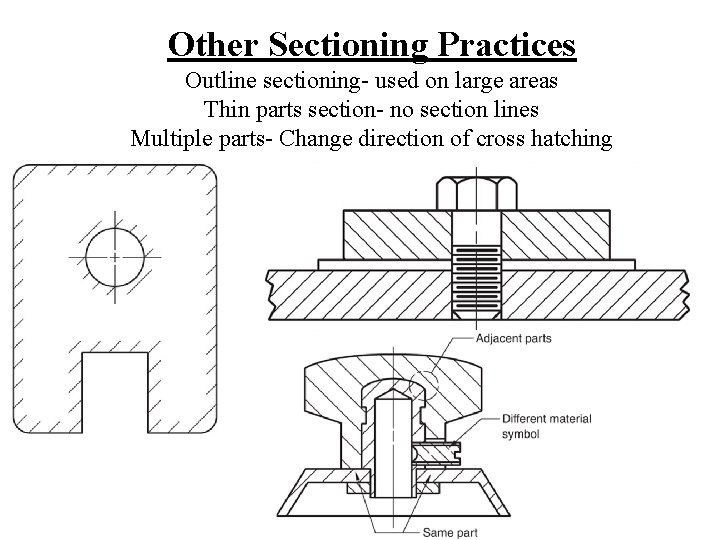
Other Sectioning Practices Outline sectioning- used on large areas Thin parts section- no section lines Multiple parts- Change direction of cross hatching

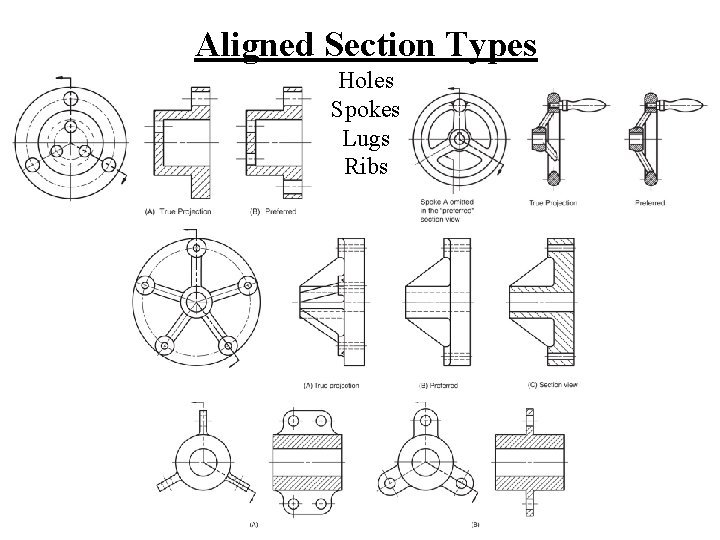
Aligned Section Types Holes Spokes Lugs Ribs

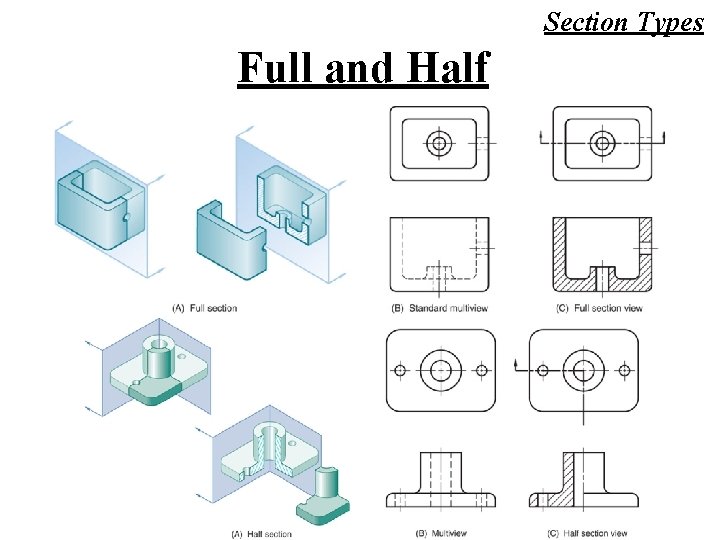
Section Types Full and Half

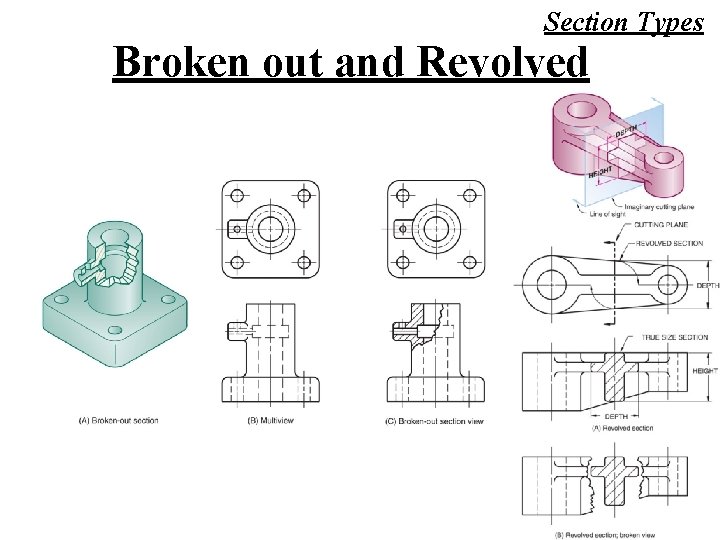
Section Types Broken out and Revolved

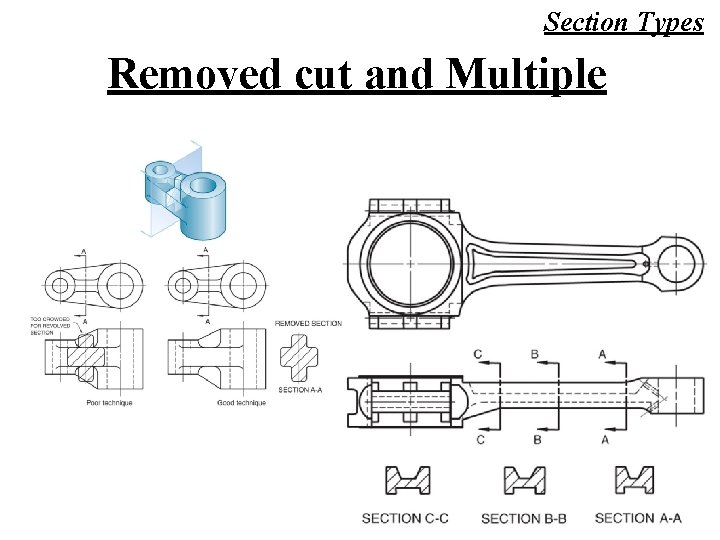
Section Types Removed cut and Multiple

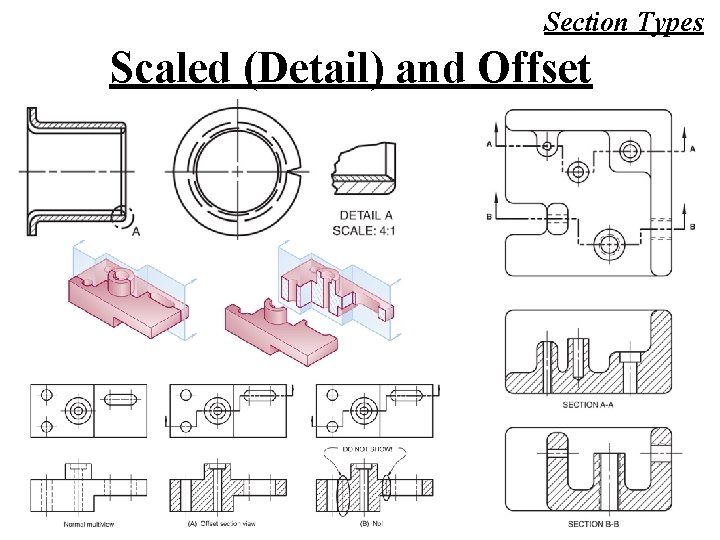
Section Types Scaled (Detail) and Offset

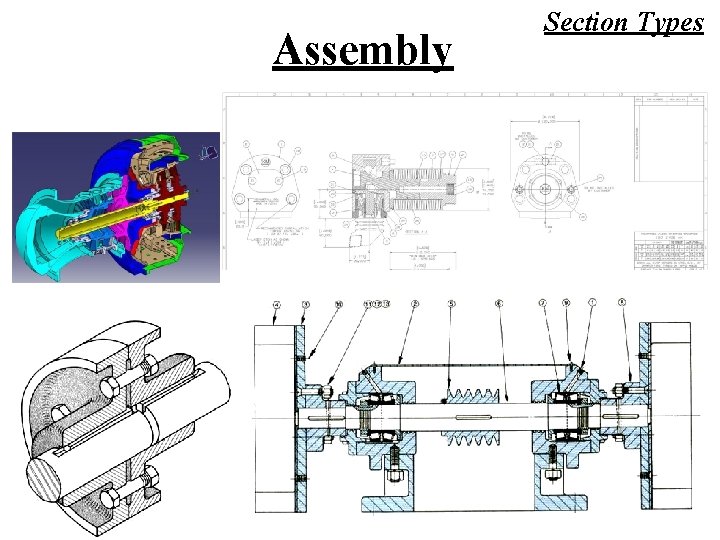
Assembly Section Types

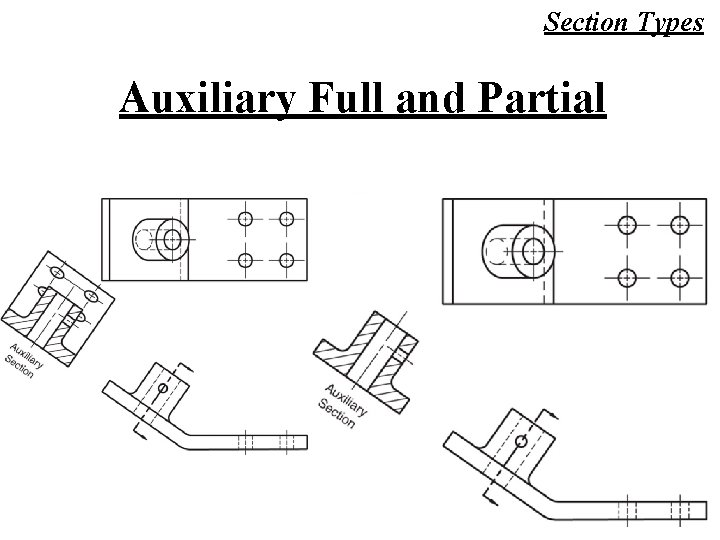
Section Types Auxiliary Full and Partial

Translucency Section Types

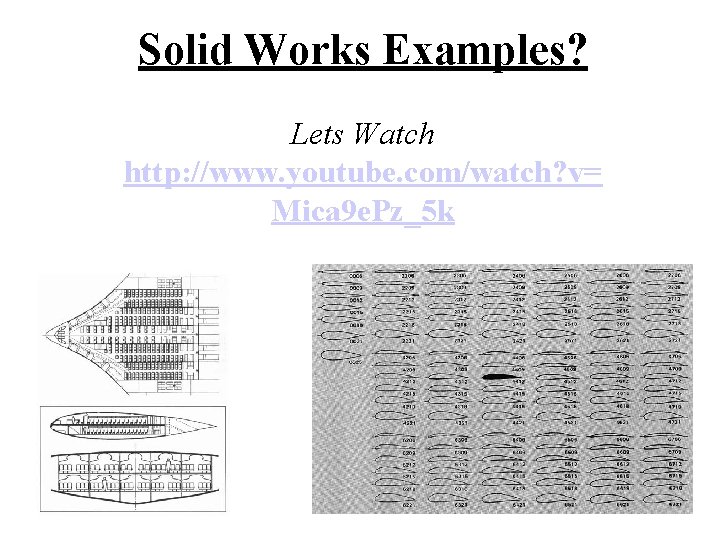
Solid Works Examples? Lets Watch http: //www. youtube. com/watch? v= Mica 9 e. Pz_5 k