Chapter 11 Engineering Graphics I Dr Simin Nasseri

- Slides: 26

Chapter 11 Engineering Graphics I Dr Simin Nasseri Southern Polytechnic State University © Copyright 2010 © Dr Simin Nasseri Southern Polytechnic State University 1 Copyright © The Mc. Graw-Hill Companies, Inc. Permission required for reproduction or display.

Objectives: 1. Define axonometric, isometric, dimetric, and trimetric. 2. Explain the difference between an isometric projection and an isometric drawing. 3. Create an isometric drawing. 4. Use true ellipse, four-center, or an ellipse template to draw a circle in an isometric drawing. 5. Apply theory of oblique projection to create oblique drawings and sketches. © Dr Simin Nasseri Southern Polytechnic State University 2

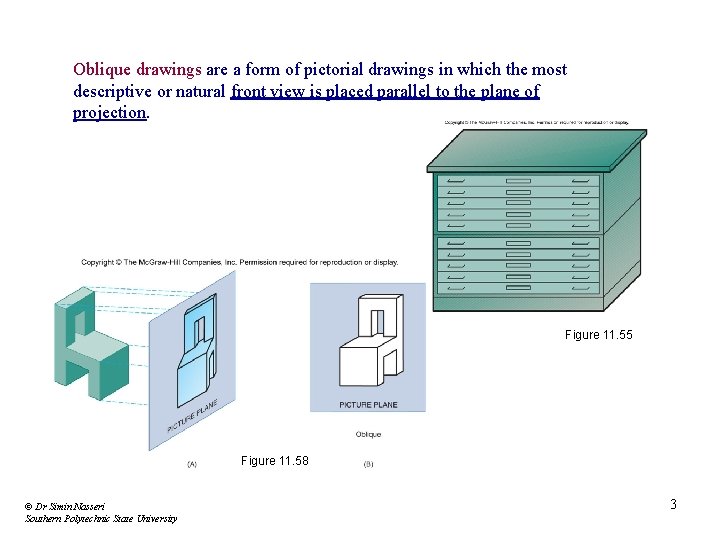
Oblique drawings are a form of pictorial drawings in which the most descriptive or natural front view is placed parallel to the plane of projection. Figure 11. 55 Figure 11. 58 © Dr Simin Nasseri Southern Polytechnic State University 3

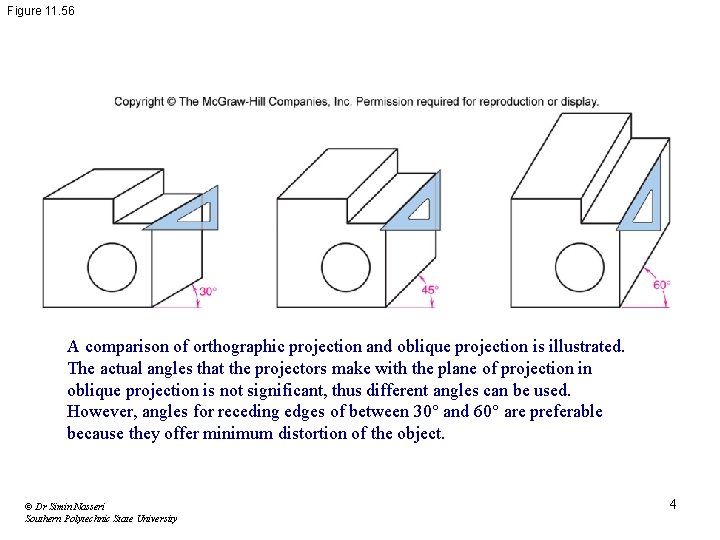
Figure 11. 56 A comparison of orthographic projection and oblique projection is illustrated. The actual angles that the projectors make with the plane of projection in oblique projection is not significant, thus different angles can be used. However, angles for receding edges of between 30° and 60° are preferable because they offer minimum distortion of the object. © Dr Simin Nasseri Southern Polytechnic State University 4

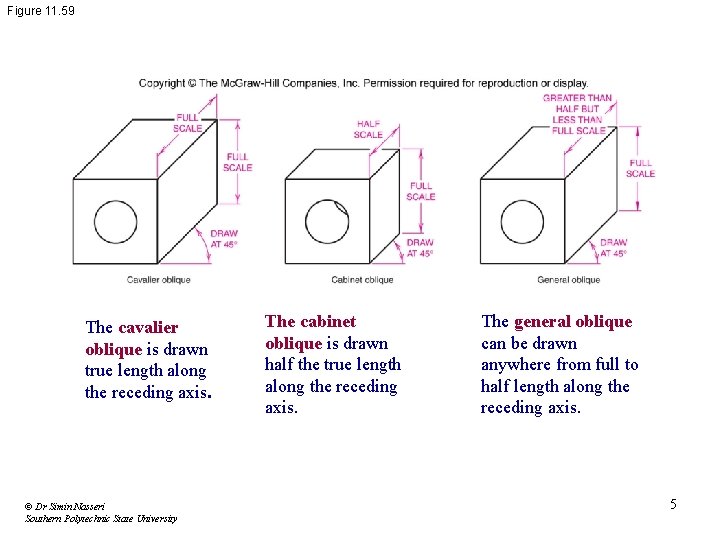
Figure 11. 59 The cavalier oblique is drawn true length along the receding axis. © Dr Simin Nasseri Southern Polytechnic State University The cabinet oblique is drawn half the true length along the receding axis. The general oblique can be drawn anywhere from full to half length along the receding axis. 5

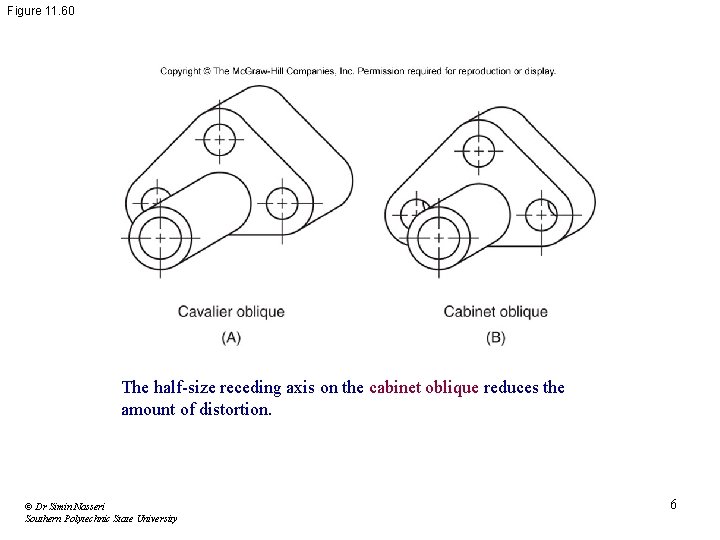
Figure 11. 60 The half-size receding axis on the cabinet oblique reduces the amount of distortion. © Dr Simin Nasseri Southern Polytechnic State University 6

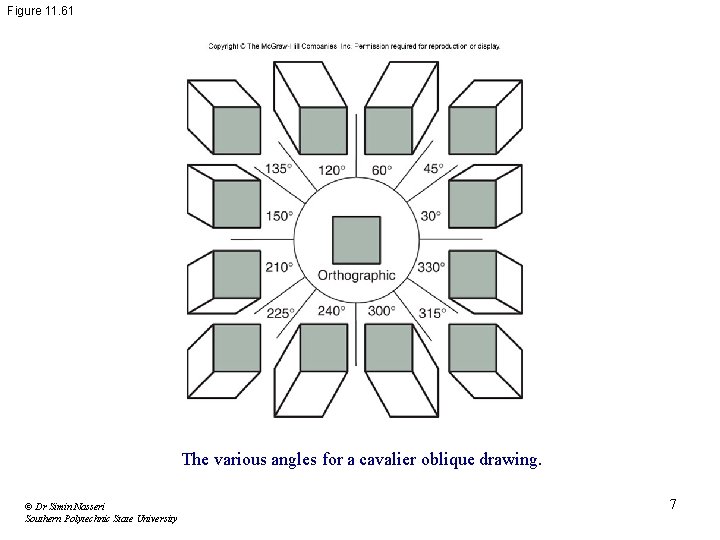
Figure 11. 61 The various angles for a cavalier oblique drawing. © Dr Simin Nasseri Southern Polytechnic State University 7

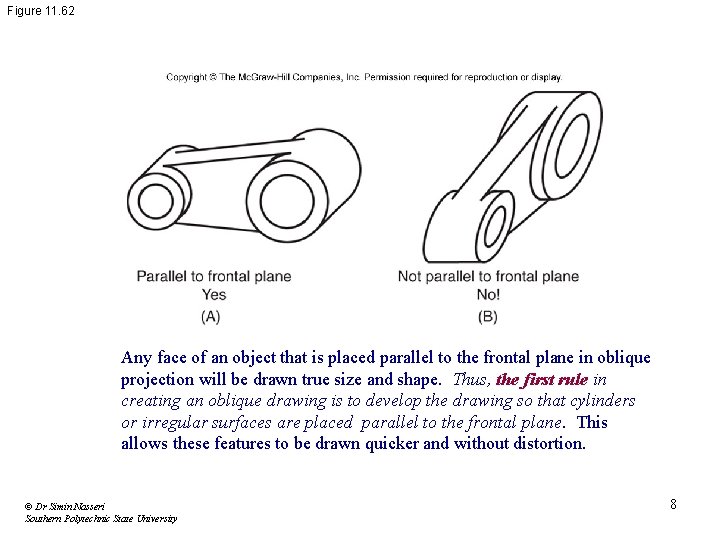
Figure 11. 62 Any face of an object that is placed parallel to the frontal plane in oblique projection will be drawn true size and shape. Thus, the first rule in creating an oblique drawing is to develop the drawing so that cylinders or irregular surfaces are placed parallel to the frontal plane. This allows these features to be drawn quicker and without distortion. © Dr Simin Nasseri Southern Polytechnic State University 8

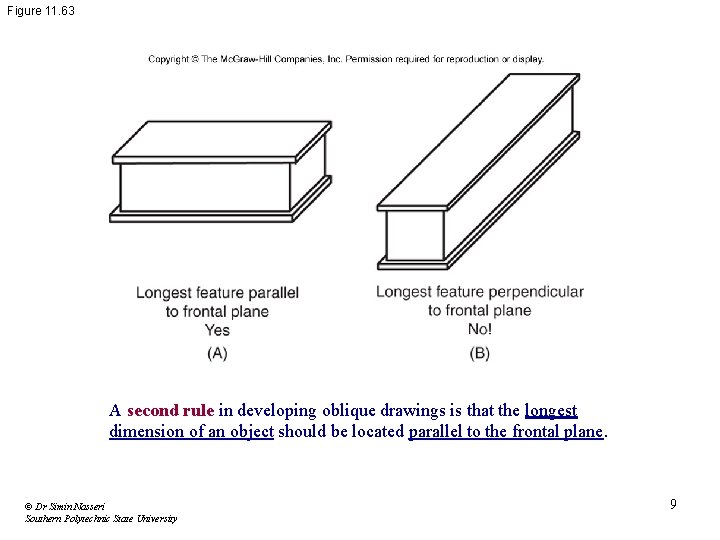
Figure 11. 63 A second rule in developing oblique drawings is that the longest dimension of an object should be located parallel to the frontal plane. © Dr Simin Nasseri Southern Polytechnic State University 9

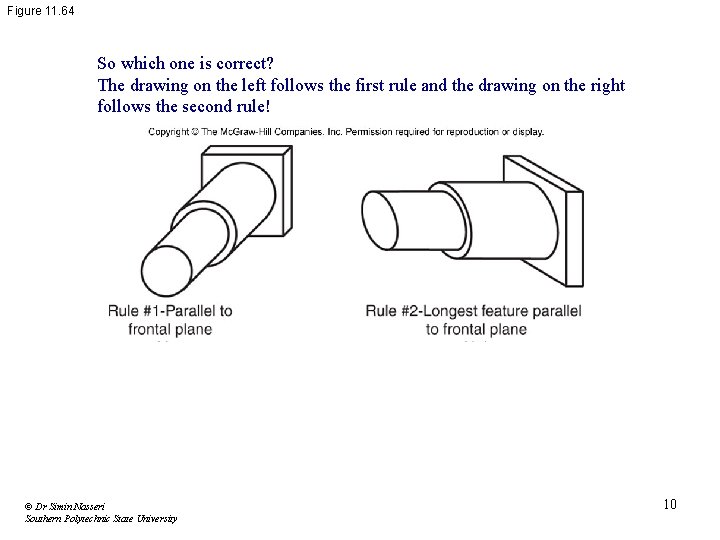
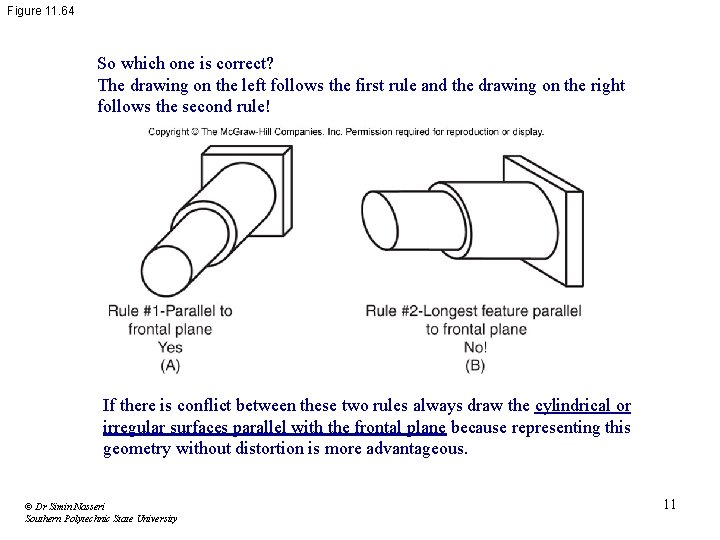
Figure 11. 64 So which one is correct? The drawing on the left follows the first rule and the drawing on the right follows the second rule! © Dr Simin Nasseri Southern Polytechnic State University 10

Figure 11. 64 So which one is correct? The drawing on the left follows the first rule and the drawing on the right follows the second rule! If there is conflict between these two rules always draw the cylindrical or irregular surfaces parallel with the frontal plane because representing this geometry without distortion is more advantageous. © Dr Simin Nasseri Southern Polytechnic State University 11

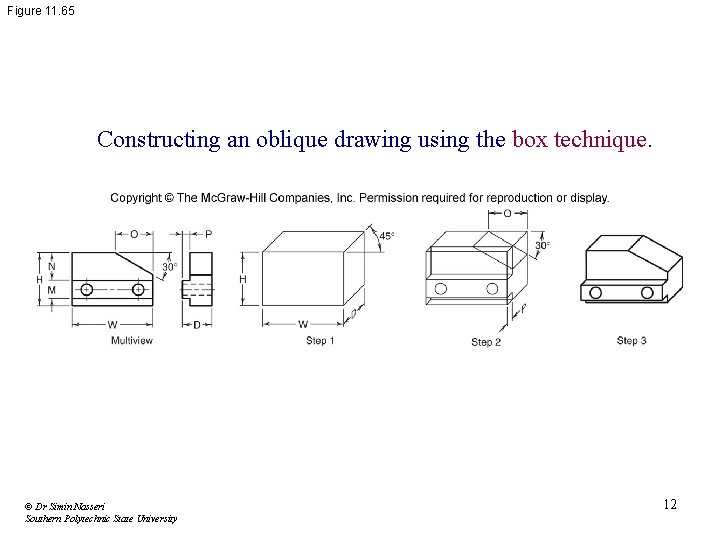
Figure 11. 65 Constructing an oblique drawing using the box technique. © Dr Simin Nasseri Southern Polytechnic State University 12

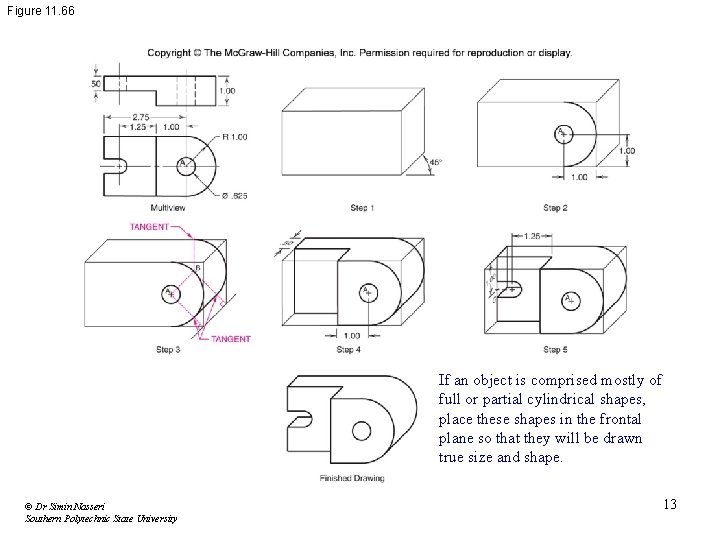
Figure 11. 66 If an object is comprised mostly of full or partial cylindrical shapes, place these shapes in the frontal plane so that they will be drawn true size and shape. © Dr Simin Nasseri Southern Polytechnic State University 13

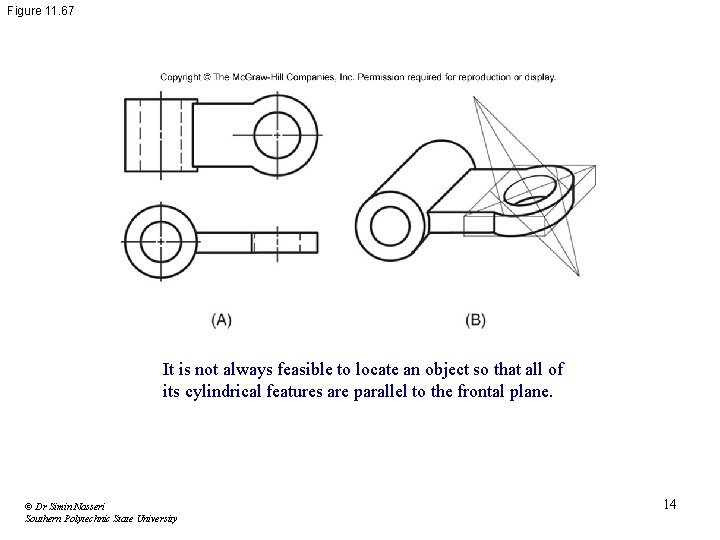
Figure 11. 67 It is not always feasible to locate an object so that all of its cylindrical features are parallel to the frontal plane. © Dr Simin Nasseri Southern Polytechnic State University 14

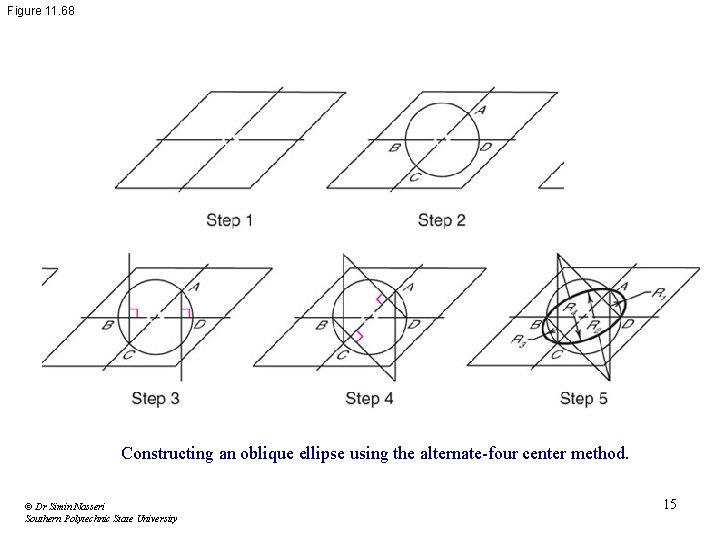
Figure 11. 68 Constructing an oblique ellipse using the alternate-four center method. © Dr Simin Nasseri Southern Polytechnic State University 15

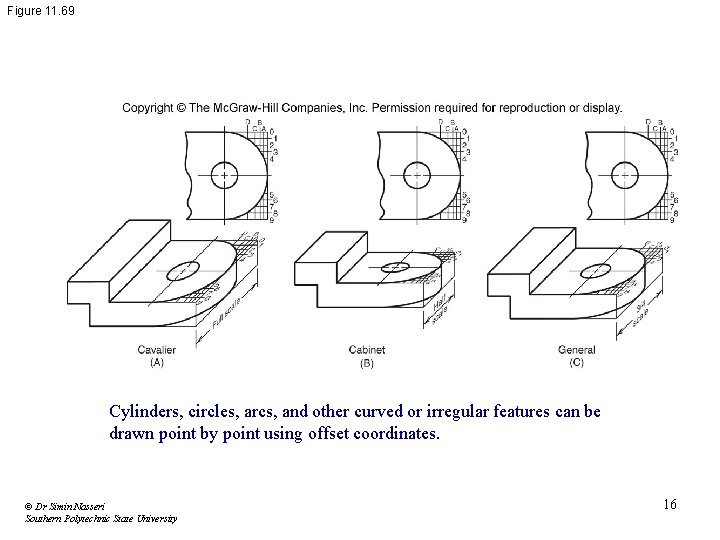
Figure 11. 69 Cylinders, circles, arcs, and other curved or irregular features can be drawn point by point using offset coordinates. © Dr Simin Nasseri Southern Polytechnic State University 16

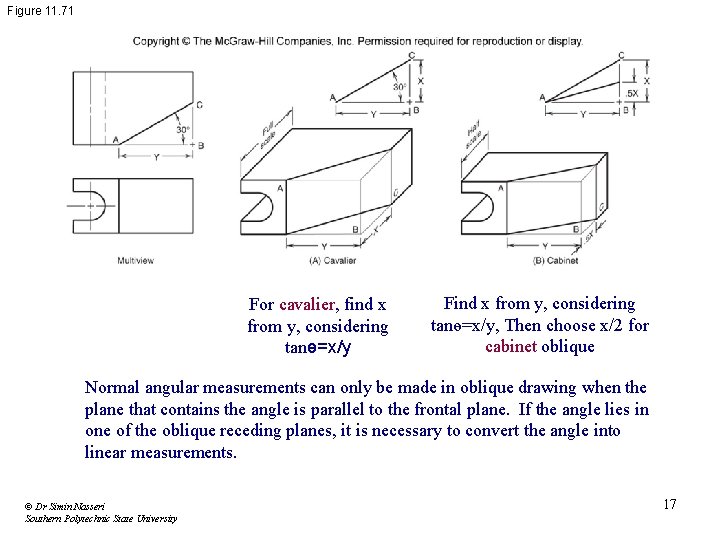
Figure 11. 71 For cavalier, find x from y, considering tanө=x/y Find x from y, considering tanө=x/y, Then choose x/2 for cabinet oblique Normal angular measurements can only be made in oblique drawing when the plane that contains the angle is parallel to the frontal plane. If the angle lies in one of the oblique receding planes, it is necessary to convert the angle into linear measurements. © Dr Simin Nasseri Southern Polytechnic State University 17

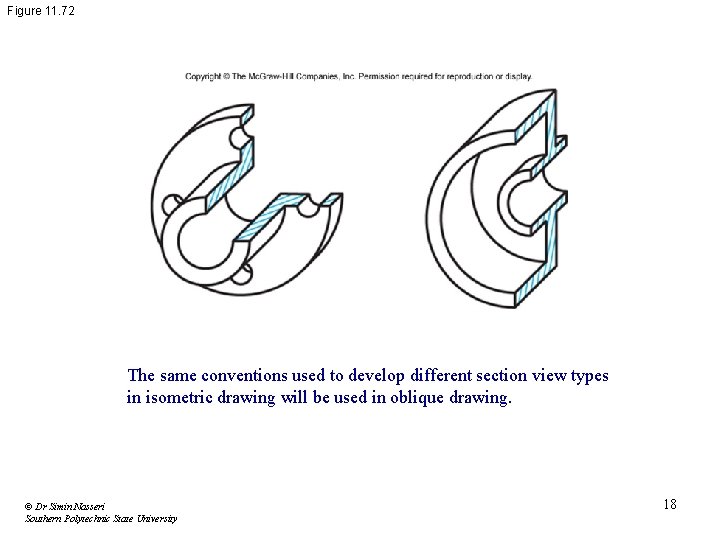
Figure 11. 72 The same conventions used to develop different section view types in isometric drawing will be used in oblique drawing. © Dr Simin Nasseri Southern Polytechnic State University 18

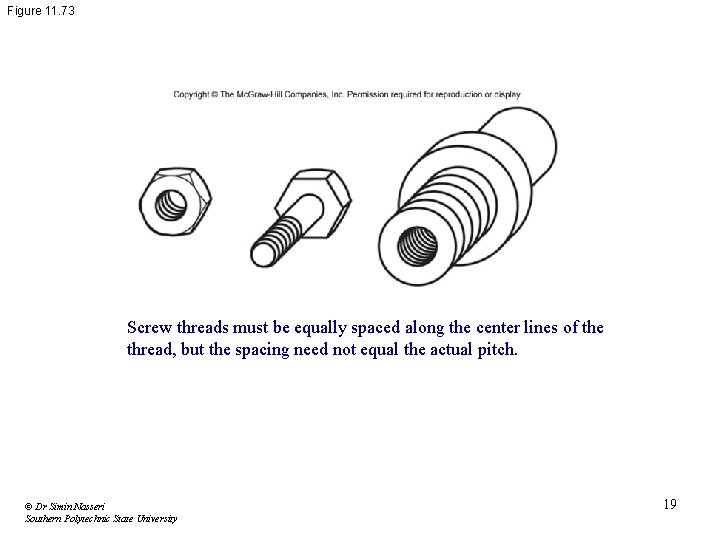
Figure 11. 73 Screw threads must be equally spaced along the center lines of the thread, but the spacing need not equal the actual pitch. © Dr Simin Nasseri Southern Polytechnic State University 19

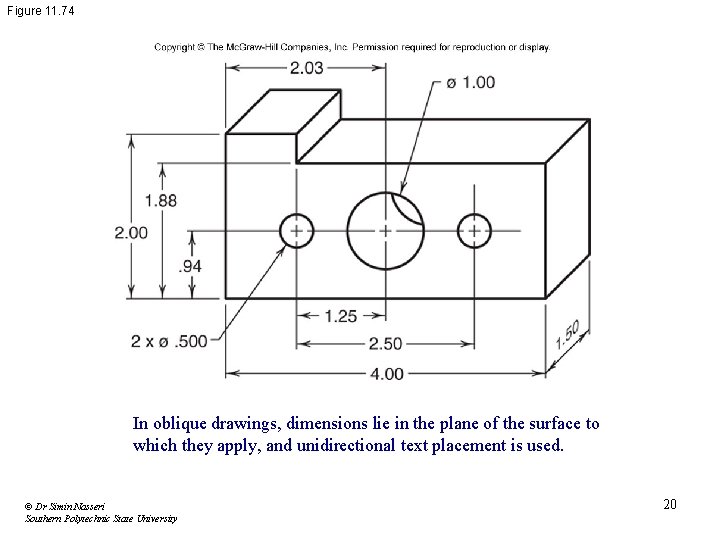
Figure 11. 74 In oblique drawings, dimensions lie in the plane of the surface to which they apply, and unidirectional text placement is used. © Dr Simin Nasseri Southern Polytechnic State University 20

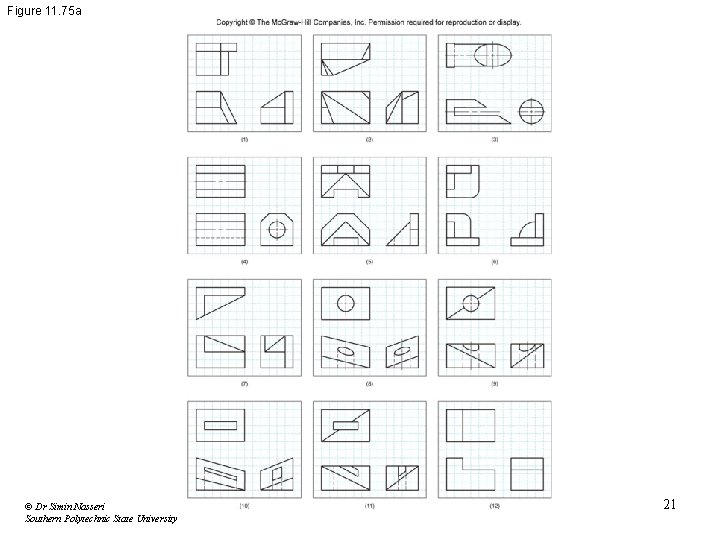
Figure 11. 75 a © Dr Simin Nasseri Southern Polytechnic State University 21

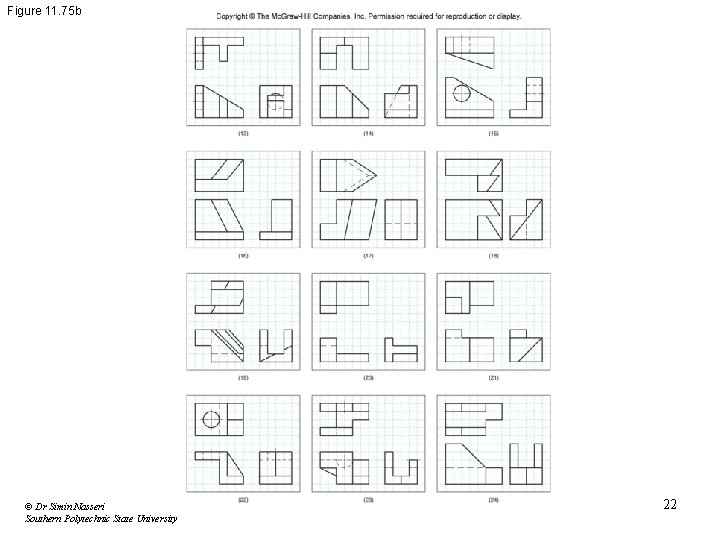
Figure 11. 75 b © Dr Simin Nasseri Southern Polytechnic State University 22

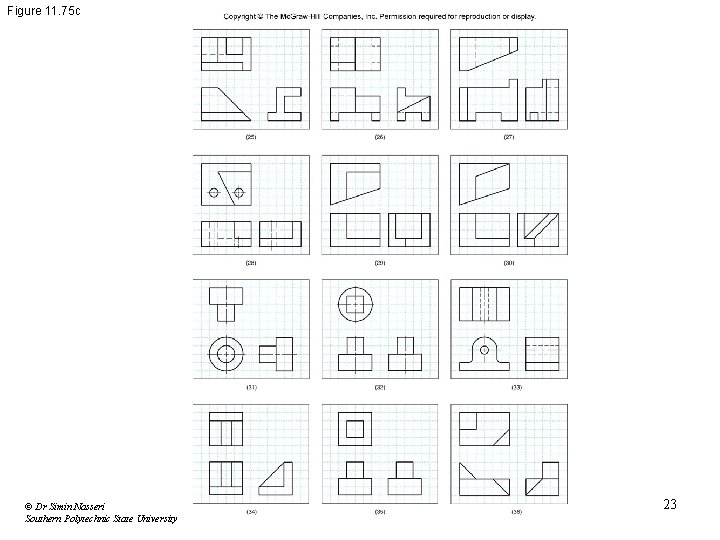
Figure 11. 75 c © Dr Simin Nasseri Southern Polytechnic State University 23

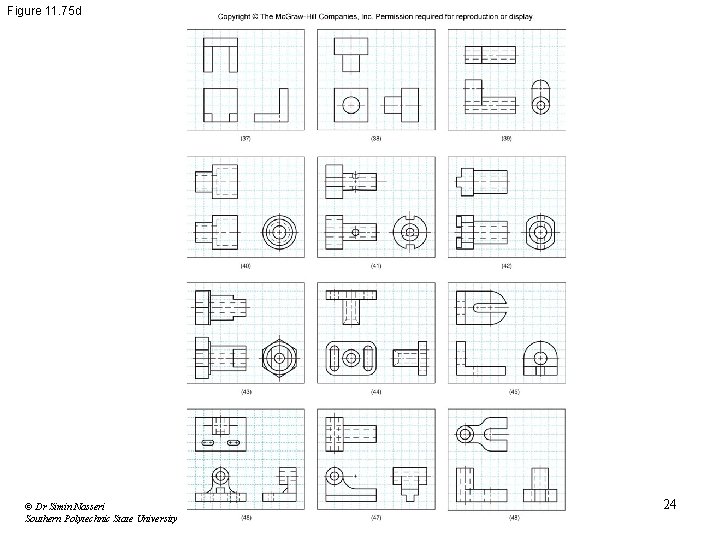
Figure 11. 75 d © Dr Simin Nasseri Southern Polytechnic State University 24

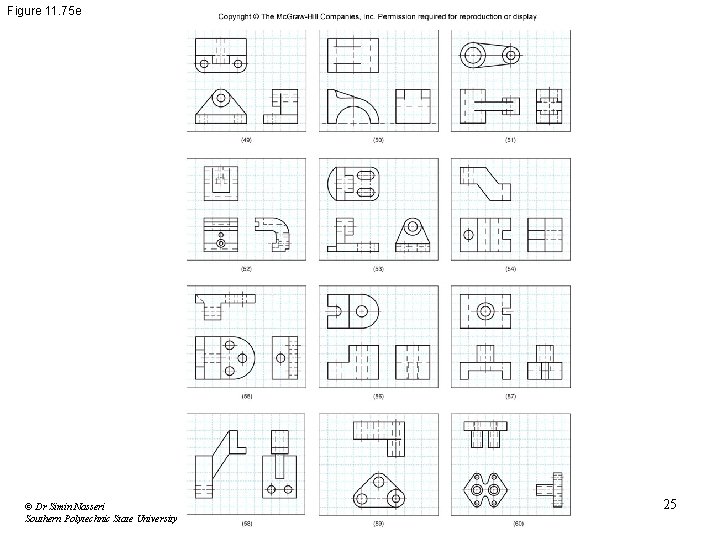
Figure 11. 75 e © Dr Simin Nasseri Southern Polytechnic State University 25

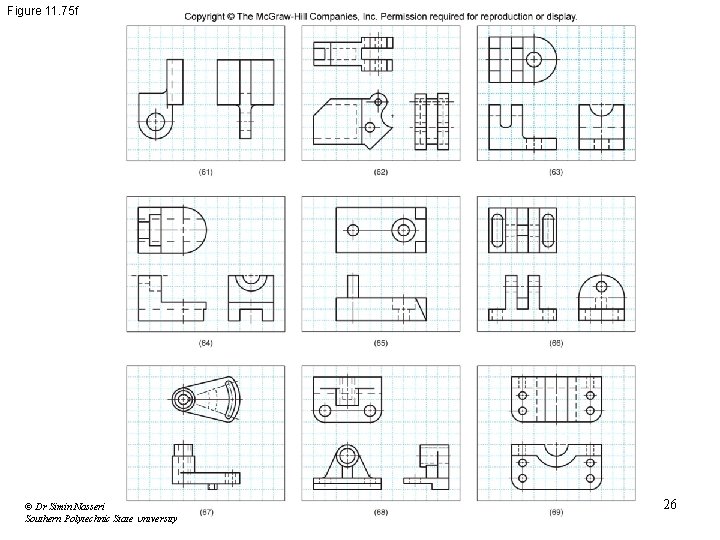
Figure 11. 75 f © Dr Simin Nasseri Southern Polytechnic State University 26