
CHAPTER 10 Engine Mechanical Testing Introduction Mechanical condition



- Slides: 53
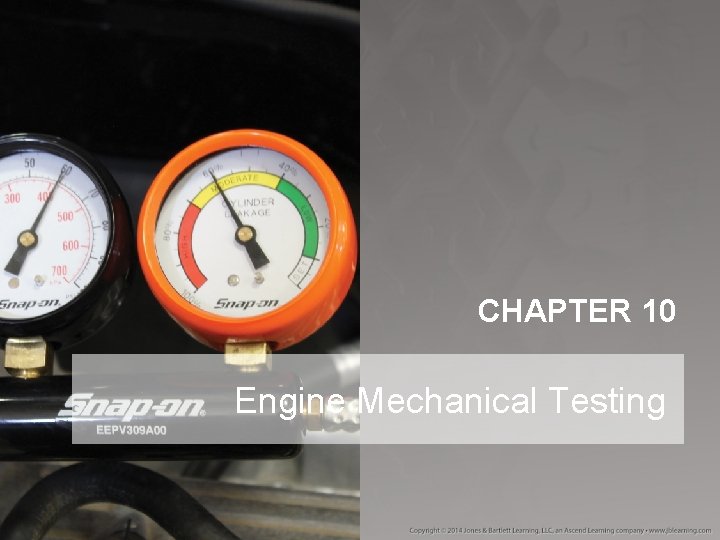
CHAPTER 10 Engine Mechanical Testing
Introduction • Mechanical condition of engine must be in good working order for engines to work properly and efficiently. • Mechanical testing is performed to: – Diagnose major work needed – Better advise customers on repairs
Engine Mechanical Testing (1 of 8) • Series of tests to assess mechanical condition of engine – Start broad and narrow down. – Identify location and cause of fault.
Engine Mechanical Testing (2 of 8) • Start with good visual inspection. • Next use tools and equipment.
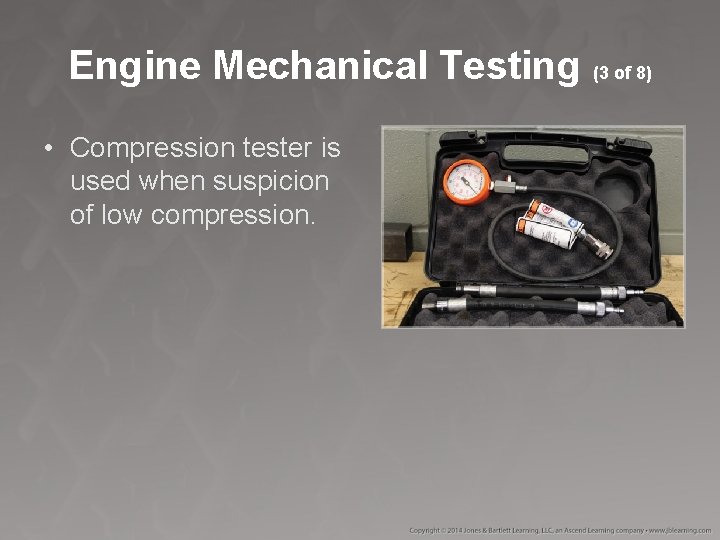
Engine Mechanical Testing (3 of 8) • Compression tester is used when suspicion of low compression.
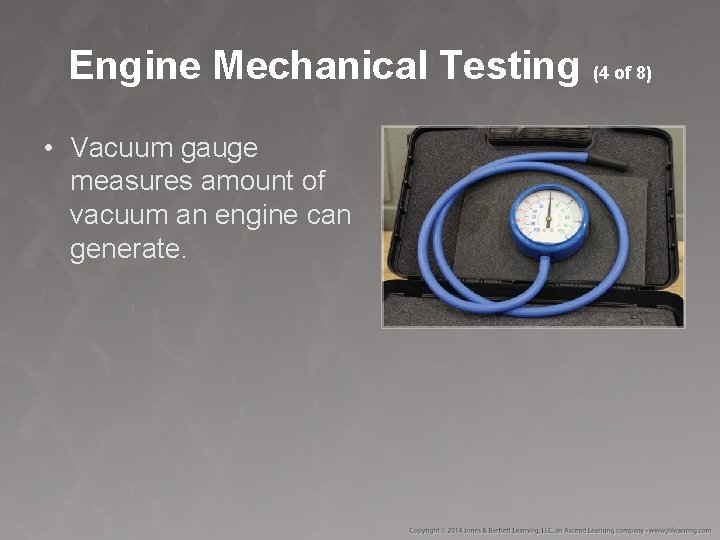
Engine Mechanical Testing (4 of 8) • Vacuum gauge measures amount of vacuum an engine can generate.
Engine Mechanical Testing (5 of 8) • Pressure transducer measures engine vacuum or pressure. – Displays graphically
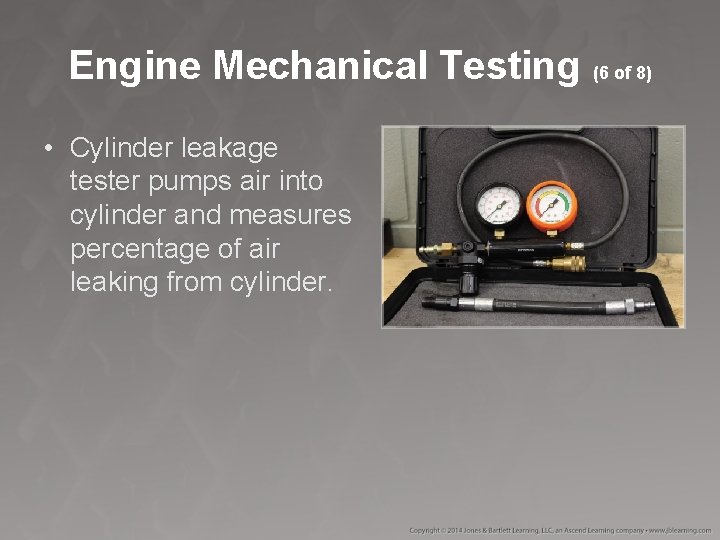
Engine Mechanical Testing (6 of 8) • Cylinder leakage tester pumps air into cylinder and measures percentage of air leaking from cylinder.
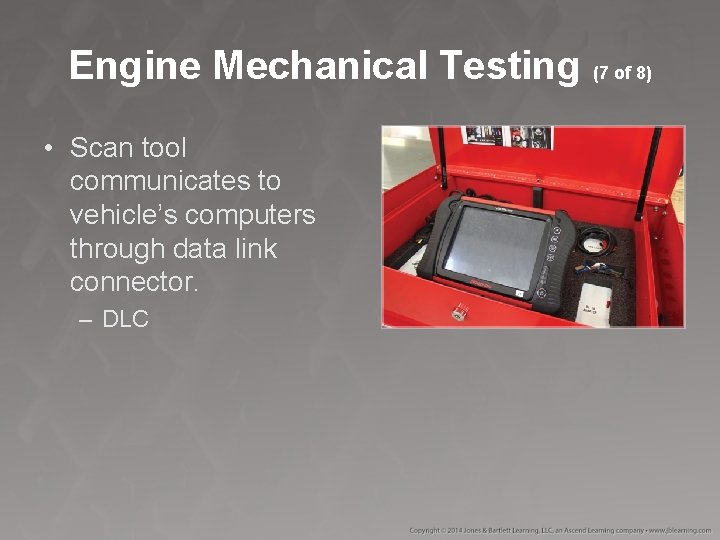
Engine Mechanical Testing (7 of 8) • Scan tool communicates to vehicle’s computers through data link connector. – DLC
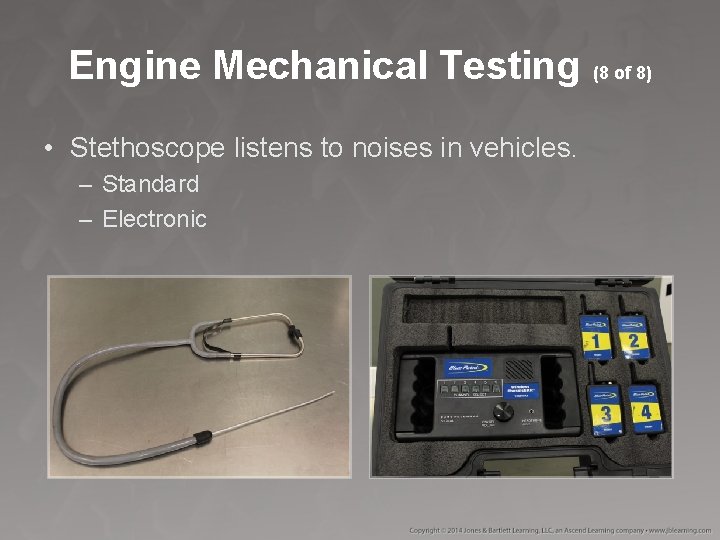
Engine Mechanical Testing (8 of 8) • Stethoscope listens to noises in vehicles. – Standard – Electronic
Fluid Leaks (1 of 8) • Checking happens during all routine maintenance. – Customer often complains of fluid spots. – Inspect engine for leaks before engine repair.
Fluid Leaks (2 of 8) • Color of leak clue to source – Black fluid could be engine oil or gear lube. – Reddish-orange or green fluid could be anti-freeze. – Red fluid could be transmission or power steering fluid.
Fluid Leaks (3 of 8) • Smell also provides clues. – Fuel and brake fluid have different scents.
Fluid Leaks (4 of 8) • Gravity causes fluid to be pulled downward. – Always inspect all the way up.
Fluid Leaks (5 of 8) • Several processes can be used to discover origin of leak. – Pressure wash, clean, and reinspect. – Use fluorescent dye. – Pressure test cooling system if coolant leak suspected.
Fluid Leaks (6 of 8) • Most leaks can be found via a thorough visual inspection. – – Light and mirror Top of engine, under the hood Under vehicle Remove covers/heat shields.
Fluid Leaks (7 of 8) • After leak is identified, start engine and perform visual inspection again. – Be extremely careful around moving parts.
Fluid Leaks (8 of 8) • Use of fluorescent dye might be needed. – Once the dye has circulated, inspect engine for leaks. – Special glasses might be required to enhance the fluorescent dye.
Cranking Sound Diagnosis Overview (1 of 3) • Noises offer insight into engine’s condition. – Cranking sound diagnosis can identify whether compression is the same across all cylinders. • Compression is one of five critical requirements for cylinders to operate properly.
Cranking Sound Diagnosis Overview (2 of 3) • Disassemble engine before performing cranking sound diagnosis. • Noise could be: – – Misaligned starter Spun crankshaft Low-compression cylinder No-compression condition • Bent valves • Broken timing belt
Cranking Sound Diagnosis Overview (3 of 3) • Engine will make rhythmic cranking sound if compression is same on all cylinders. – Train your ear to pick up different compression sounds.
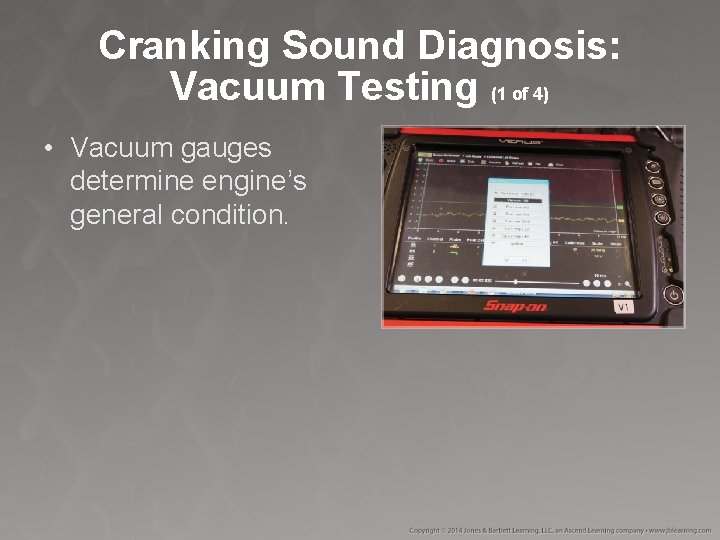
Cranking Sound Diagnosis: Vacuum Testing (1 of 4) • Vacuum gauges determine engine’s general condition.
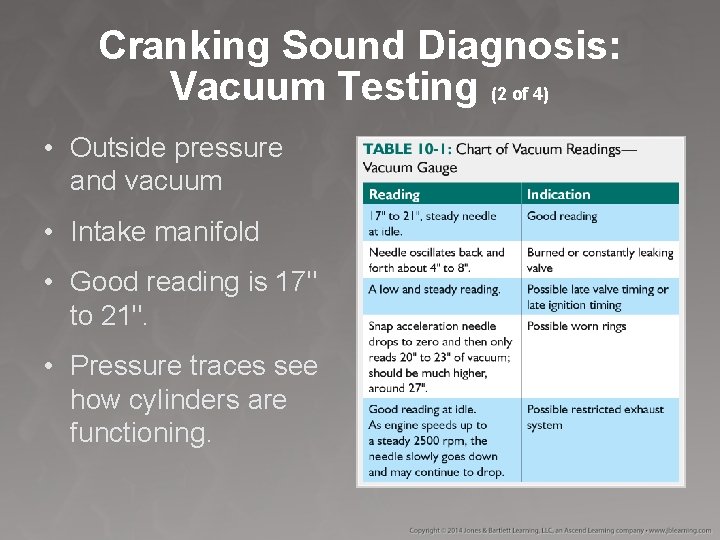
Cranking Sound Diagnosis: Vacuum Testing (2 of 4) • Outside pressure and vacuum • Intake manifold • Good reading is 17" to 21". • Pressure traces see how cylinders are functioning.
Cranking Sound Diagnosis: Vacuum Testing (3 of 4) • Vacuum gauges, instructions, and readings are calibrated at sea level. • Must compensate when testing above sea level • Vacuum depends on piston rings, valves, ignition timing, and fuel.
Cranking Sound Diagnosis: Vacuum Testing (4 of 4) • Pressure transducer and lab scope are similar to vacuum gauge. – More accurate – View graphically
Cylinder Power Balance Test Overview (1 of 3) • Two purposes – Identifies which cylinders are not operating properly – General indicator of overall health of cylinders
Cylinder Power Balance Test Overview (2 of 3) • After problem isolated, next determine issue. – Mechanical – Related to compression or ignition – Fuel-related
Cylinder Power Balance Test Overview (3 of 3) • Several ways to perform power balance test – Easiest determined by PCM, ease of accessing required components, and tools available. – Determine whether to disable the ignition or fuel to each cylinder. • Shutting down fuel is preferable if working on engine.
Cranking and Running Compression Tests (1 of 8) • High-pressure hose is hand-threaded in spark plug hole, tested, then connected to compression gauge. • Engine is cranked over or started, depending on test. – Crank at least five compression pulses to get accurate reading.
Cranking and Running Compression Tests (2 of 8) • Compression gauge reads amount of pressure piston is producing. – Compresses air in cylinder
Cranking and Running Compression Tests (3 of 8) • Misfiring or dead cylinder is not caused by ignition or fuel problem. • Measures air pressure as it is compressed in cylinder • Cylinders should all measure within 10% to 15% of each other.
Cranking and Running Compression Tests (4 of 8) • Engine at operating temperature, spark plugs removed, battery fully charged, throttle held wide open, and at least five compression pulses made on each cylinder – Will help create maximum compression and accurate readings
Cranking and Running Compression Tests (5 of 8) • Engine is running during compression test. • Checks engine’s ability to move air into and out of cylinder – Engine’s ability to breathe
Cranking and Running Compression Tests (6 of 8) • Test performed in two parts: – Idle – Snap throttle
Cranking and Running Compression Tests (7 of 8) • Idle: engine running, throttle closed, compression pressure half of cranking compression pressure • Snap throttle: engine idling, throttle snapped open and then closed quickly – No change to rpm
Cranking and Running Compression Tests (8 of 8) • Test is performed leaving all spark plugs in engine except for cylinder being tested. • Schrader valves use lighter-weight springs than tire Schrader valves. – Not interchangeable
Cylinder Leakage Test Overview (1 of 5) • Cylinder leakage test is performed on cylinder with low compression to determine severity of compression leak and leak’s location.
Cylinder Leakage Test Overview (2 of 5) • Compressed air is applied to cylinder to show amount of leakage. – Ideal reading is 0%. – Up to 20% is acceptable.
Cylinder Leakage Test Overview (3 of 5) • Small leakage past piston rings is okay. • Leakage past one of the valves or the head gasket is not okay. – Leakage = major mechanical engine issue
Cylinder Leakage Test Overview (4 of 5) • Several critical steps to ensure tests are accurate – Engine near operating temperature • Ensures oil has been circulated to piston rings – Loosen each spark plug about one turn.
Cylinder Leakage Test Overview (5 of 5) – Run engine at 1500 rpm for 10 to 15 seconds. • Blows out chunks of carbon straddling spark plug – Cylinder leakage is measured when piston is on top dead center on compression stroke. – Turn crankshaft to position pistons before pressurizing system.
Diagnosing Engine Noise and Vibrations (1 of 3) • Running engines are relatively quiet. • Noises can indicate small issues as well as something majorly wrong. • Investigate unusual noises and build on your experience.
Diagnosing Engine Noise and Vibrations (2 of 3) • Mechanic’s stethoscope helps to locate engine noise. – Mechanical or electronic – Mechanical is most common. – Electronic enhances selected sound frequencies.
Diagnosing Engine Noise and Vibrations (3 of 3) • Vibrations can be difficult to pinpoint. – From engine or drive train • Best clue is to determine if vibration occurs with engine running irrespective of vehicle movement.
Diagnosing Oil Consumption, Coolant Consumption, and Exhaust Color (1 of 3) • Coolant should not have consumption if cooling system is working properly. • Engine oil can have small amount of consumption and be considered normal.
Diagnosing Oil Consumption, Coolant Consumption, and Exhaust Color (2 of 3) • Consumption of oil or coolant could be diagnosed by color of exhaust. – Bluish tint: engine oil burning – Blue constant while engine running: rings not sealing due to worn rings or cylinder walls – Blue only when start engine: likely valve steam seal or valve guide issue
Diagnosing Oil Consumption, Coolant Consumption, and Exhaust Color (3 of 3) • Consumption diagnosed by color of exhaust (cont’d) – Black: excessively rich fuel mixture – White after engine warmed up: coolant leaking into exhaust • Blown head gasket • Blown intake gasket • Cracked cylinder head • Leaky exhaust gas recirculation cooler on some vehicles
Summary (1 of 5) • Appropriate service information is needed to make an accurate diagnosis. • The best source for vehicle service information is the vehicle manufacturer. • Major vehicle components often have identification numbers.
Summary (2 of 5) • A systematic mechanical testing and verification process is needed to diagnose and repair an engine problem. • Engine mechanical testing tools include: a compression gauge, vacuum gauge, cylinder leakage tester, and scan tool. • The color of a leaking fluid can assist in identifying the source of a leak.
Summary (3 of 5) • During engine cranking, the engine will make an even cranking sound if the compression is even between the cylinders. • A vacuum gauge is used to determine the general condition of an engine. • A cylinder power balance test is used to determine whether all of the engine cylinders are working properly.
Summary (4 of 5) • A cranking compression test measures the compressed air pressure in the cylinder. • A running compression test checks the engine’s breathing ability. • A cylinder leakage test is performed on a cylinder with low compression.
Summary (5 of 5) • A stethoscope can be used to isolate an engine noise. • Exhaust smoke can indicate the source of an engine problem. • An odor can help diagnose an engine problem. • Engine tests must be properly interpreted to correct an engine problem.
Credits • Unless otherwise indicated, all photographs and illustrations are under copyright of Jones & Bartlett Learning.