CAP Module 5 Supraglottic Airways SGA GHEMSV 11292018
 GHEMS_V 11292018")

 Identify the")


 at the")


- Slides: 49
CAP – Module 5 Supraglottic Airways (SGA) GHEMS_V 11292018
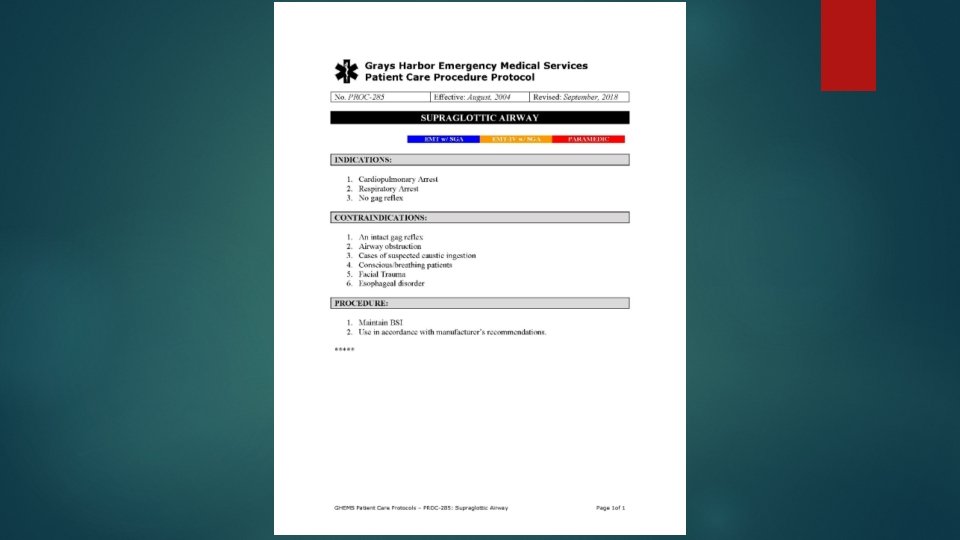
SUPRAGLOTTIC AIRWAYS Definition: Devices that are inserted through the mouth to sit on top of the larynx. This skills may be performed by both certified Paramedics and EMTs who hold a Washington State Supraglottic Airway Training endorsement.
OBJECTIVES Identify the indications, contraindications and side effects of supraglottic airways (SGA) Identify the equipment necessary for the placement of a SGA Discuss the steps necessary to prepare for SGA placement Discuss the methods of SGA placement Identify and discuss the problems associated with SGA placement Identify the anatomy of the upper airway
OBJECTIVES Psychomotor Perform ventilation with a bag-valve mask Perform insertion of: Combitube King LTSD i-gel Perform insertion of: Nasopharyngeal Oropharyngeal airway
Anatomy © Jones & Bartlett Learning.
Additional Anatomy Structures that help us breathe Diaphragm Chest wall muscles Accessory muscles of breathing Nerves from the brain and spinal cord to those muscles
Upper Airway © Jones & Bartlett Learning. Nasopharynx Filters out dust and small particles Warms and humidifies air as it enters the body
Anatomy of the Lower Airway © Jones & Bartlett Learning.
Lung Capacity Total lung volume Tidal volume Approximately 500 cc Dead air space Approximately 150 cc Anatomic dead space Physiologic dead space Minute volume Adult male, 6 liters (tidal volume – dead space volume) x respiratory rate Functional reserve capacity
Respiration Actual movement of oxygen and carbon dioxide in the alveoli and tissues of the body Oxygen and carbon dioxide both diffuse until the partial pressures in the air and the blood are equal. Partial pressure: the amount of gas in the air or dissolved in fluid (blood)
Ventilation Physical act of moving air into and out of the lungs 2 step process involving: Inhalation (active) Exhalation (passive)
Adequate Breathing • Between 12 and 20 breaths/min • Regular pattern of inhalation and exhalation • Bilateral clear and equal lung sounds • Regular, equal chest rise and fall • Adequate depth (tidal volume)
Abnormal Breathing • Fewer than 12 or more than 20 breaths/min • Irregular rhythm • Diminished, absent, or noisy auscultated breath sounds • Unequal or inadequate chest expansion • Increased effort of breathing • Accessory muscle use • Skin that is pale, cyanotic, cool or moist
Treatments Opening airway FBAO – abdominal thrusts Head tilt-chin lift Jaw-thrust Suctioning Recovery position Airway adjuncts NPA OPA
COMBITUBE SUPRAGLOTTIC AIRWAY
What is a Combitube? It is designed to be inserted blindly. The double lumen design allows effective ventilations to be provided regardless of whether esophageal or tracheal placement is accomplished Distal balloon Pharyngeal balloon
Combitube Esophageal Placement IF THE COMBITUBE IS PLACED IN THE ESOPHAGUS, THE DISTAL BALLOON WILL OCCLUDE THE ESOPHAGUS. VENTILATIONS ARE THEN PROVIDED THROUGH PERFORATIONS IN THE SIDE OF THE PHARYNGEAL TUBE. STOMACH CONTENTS CAN THEN BE SAFELY EXPELLED VIA THE HOLE IN THE END OF THE TUBE.
Combitube Tracheal Placement IF PLACED IN THE TRACHEA, IT FUNCTIONS AS AN ENDOTRACHEAL TUBE, WITH THE DISTAL BALLOON PREVENTING ASPIRATION. VENTILATIONS ARE THEN PROVIDED VIA THE HOLE IN THE END OF THE TUBE AS IN AN ENDOTRACHEAL TUBE. STOMACH CONTENTS CAN THEN BE SAFELY EXPELLED VIA PERFORATIONS IN THE SIDE OF THE PHARYNGEAL TUBE.
Combitube Insertion Confirmation If auscultation of breath sounds is absent and gastric inflation is positive, then begin ventilation through the shorter clear tube labeled #2
SPO 2 and ET CO 2 During ventilation observe endtidal CO 2 monitor and/or pulseoximetry to confirm oxygenation
KING LTS-D SUPRAGLOTTIC AIRWAY ™
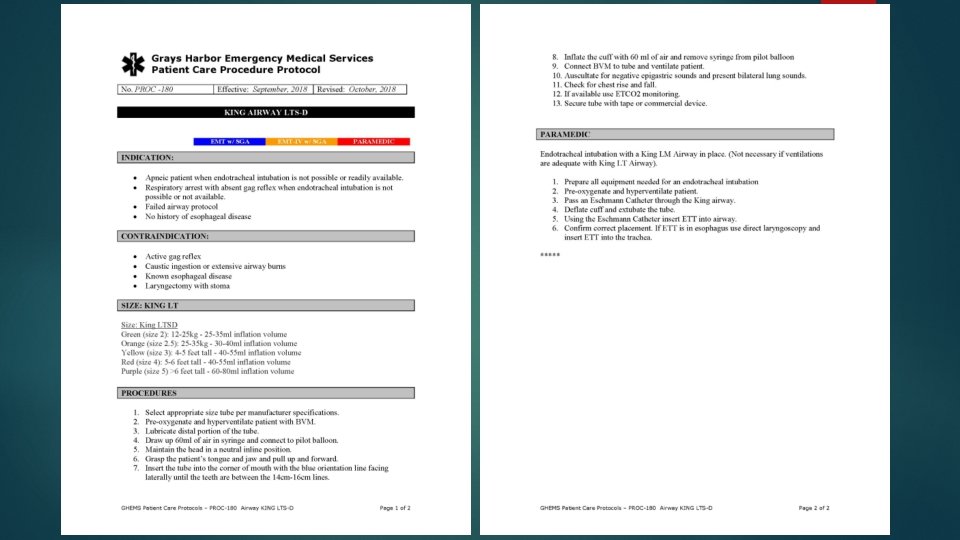
King Tube It is designed to be inserted blindly. The dual lumen design allows effective ventilations, and offers the ability to pass a gastric tube through the second channel of the airway into the stomach for aspiration protection.
King LTS-D Design: Proximal Opening of Gastric Access Lumen cm Depth Markings Orientation / X-ray Line Primary Ventilatory Opening Multiple Distal Ventilatory Openings Distal Tip and Cuff Anatomically shaped to assist in passage behind the larynx and into the normally collapsed esophagus. Distal Opening of Gastric Access Lumen Bilateral Ventilation Eyelets
King LTS-D Design Tube Exchange Catheter Ventilation Outlets Distal tip and cuff flattened for more anatomical fit behind the larynx Bilateral Eyelets Multiple ventilation outlets and bilateral eyelets for best ventilation Ramp helps direct tube exchange catheter out Primary Ventilatory Opening
King LTS-D Curved Design: 60° curvature • The King LTS-D supraglottic airways are designed with a straightened, beveled distal tip that assists in directing the airways posterior to the larynx and into the upper esophagus. • Due to this unique configuration, there is minimal risk of the tip entering the trachea.
King LTS-D Insertion 1. Insert connector to the teeth 2. Inflate balloons (60 ml for typical adult) 3. Assess ventilation and if necessary withdraw until ventilation is easy and free flowing 4. Adjust balloon inflation if necessary 5. Use gastric access port to decompress stomach as needed
King LTS-D Insertion Guide, Step 1: Hold the King LTS-D at the connector with dominant hand. With non-dominant hand, hold mouth open and apply chin lift, unless contraindicated by C-spine precautions for patient position. Using a lateral approach, introduce tip into corner of mouth. Blue Orientation Line
King LTS-D Insertion Guide, Step 2: Advance the tip behind the base of the tongue while rotating tube back to midline so that the blue orientation line faces the chin of the patient.
King LTS-D Insertion Guide, Step 3: Without exerting excessive force, advance tube until base of connector is aligned with teeth or gums.
King LTS-D Insertion Guide, Step 4: Inflate cuffs to 60 cm H 2 O or to “just seal” volume. Typical inflation volumes are as follows: King LTS-D Size 0 Size 1 Size 2. 5 Size 3 Size 4 Size 5 10 ml 25 -35 ml 30 -40 ml 40 -55 ml 50 -70 ml 60 -80 ml
King LTS-D Insertion Guide, Step 5: Attach the breathing circuit/resuscitator bag to the King LTS-D. While gently bagging the patient to assess ventilation, withdraw the King LTS-D until ventilation is easy and free flowing (large tidal volume with minimal airway pressure). If necessary, additional volume to cuffs to maximize seal of the airway.
King LTS-D Insertion Confirmation Assess proper placement by auscultation, chest movement and verification of CO 2 by capnography.
King LTS-D One inflation line for both balloons Gastric access opening Ventilatory openings Vocal cords Distal gastric access opening Distal balloon seals upper esophagus Proximal balloon seals oropharynx
SPO 2 and ET CO 2 During ventilation observe endtidal CO 2 monitor and/or pulseoximetry to confirm oxygenation
I-GEL ™ SUPRAGLOTTIC AIRWAY
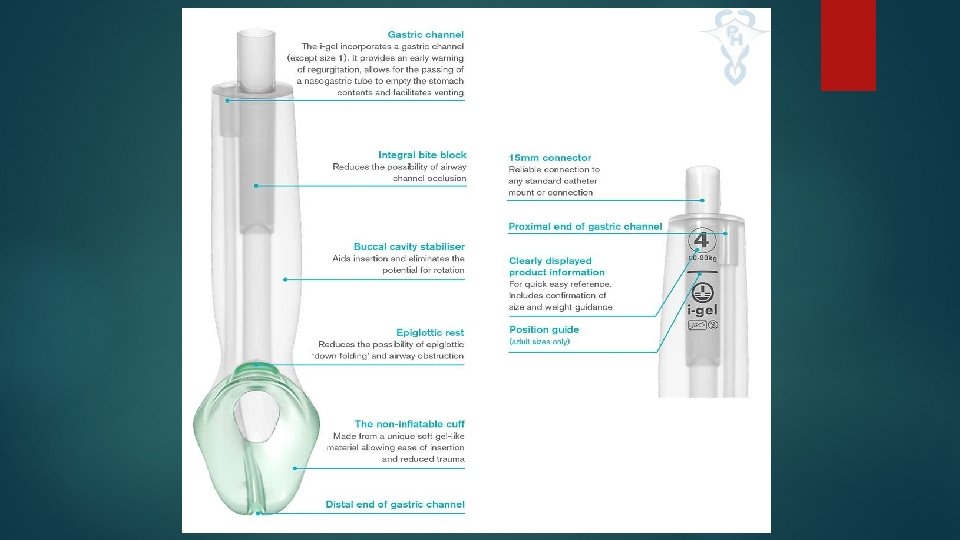
I-GEL Single use Integral gastric channel Epiglottis blocking ridge Moulding feature Easy and fast to insert Reduced trauma to the airway Integral bite block
Insertion Steps 1. Open the I-GEL package, and on a 4. Grasp the I-GEL with the flat surface take out the protective opposite (free) hand along the cradle containing the device. integral bite block and lubricate the back, sides and front of the cuff with a thin layer of lubricant. 2. Remove the I-GEL and transfer it to the palm of the same hand that is holding the protective cradle, 5. Inspect the device carefully, supporting the device between the confirm there are no foreign thumb and index finger. bodies or a bolus of lubricant obstructing the distal opening. Place the I-GEL back into the 3. Place a small bolus of a waterprotective cradle in preparation based lubricant onto the middle of for insertion. smooth surface of the protective cradle.
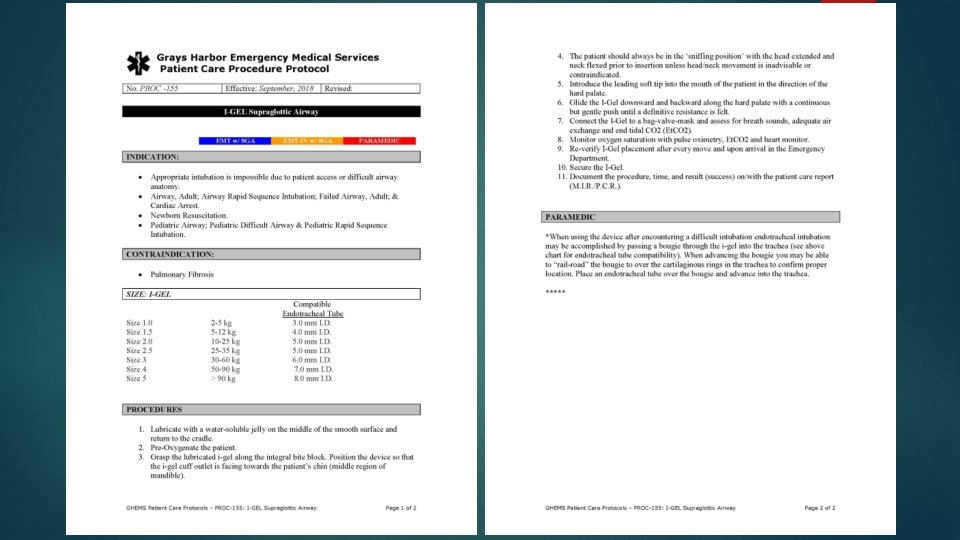
More steps…. 6. Remove the I-GEL from the protective cradle. Grasp the lubricated I-GEL firmly along the integral bite block. Position the device so that the I-GEL cuff outlet is facing towards the chin of the patient. The patient should be in the ‘sniffing the morning air’ position with head extended and neck flexed. The chin should be gently pressed down before proceeding. Introduce the leading soft tip into the mouth of the patient in a direction towards the hard palate
7. Glide the device downwards and backwards along the hard palate with a continuous but gentle push until a definitive resistance is felt. The tip of the airway should be located into the upper esophageal opening and the cuff should be located against the laryngeal framework. The incisors should be resting on the integral bite block. Tape the I-GEL from maxilla to maxilla.
Correct Position A horizontal line (Adult sizes 3, 4 and 5 only) at the middle of the integralbite-block represents the correct position of the teeth. If the teeth are located lower than the distal tip of the bite block, then it is likely the device has been incompletely inserted. In this instance, remove the I-GEL and reinsert with a gentle jaw thrust applied by an assistant. If that does not resolve the problem, use one size smaller IGEL. The pediatric sizes of I-GEL (sizes 1 to 2. 5) do not have a horizontal line on the integral bite block. This is due to the greater variability in the length of the oro-pharyngeal-laryngeal arch in children. As a result, insertion should continue, as with the adult sizes, until definitive resistance is felt. Once it has been established that ventilatory parameters are satisfactory and there is no leak through the gastric channel (except size 1 which does not contain a gastric channel), the I-GEL should be held in place whilst the device is secured with tape ‘maxilla to maxilla’.
I-GEL Insertion Confirmation Confirm proper position by auscultation, chest movement and verification of CO 2 by capnography. If excessive air leak 1. Hand ventilate the patient with gentle and slow squeezing of the reservoir bag. 2. Limit tidal volume to no more than 5 ml/kg. 3. Assess the depth of anaesthesia and muscle relaxation. If all of the above fail then change to one size larger I-GEL.
SPO 2 and ET CO 2 During ventilation observe endtidal CO 2 monitor and/or pulseoximetry to confirm oxygenation
Questions ? ? ?