BUILDING A DRAWING STEP BY STEP Demonstration Drawing

BUILDING A DRAWING STEP BY STEP

Demonstration – Drawing a bee The information in this presentation is not just about drawing bees – it is a set of steps you can use to draw anything! The most important things to remember are: 1. Look closely; 2. Always start with the most important shapes; 3. Keep working over the whole drawing to refine it a little more each time.

To start your drawing you will need: • A photograph or object to draw • A piece of paper • A pencil

Look closely at your object and identify the most important shapes This photograph of a bee is being used as an example. To make the shapes clear, draw onto another photo – a triangle for the head, a circle for the thorax and a parallelogram for the abdomen. photograph - https: //image. shutterstock. com/image-photo/bee-isolated-on-white-600 w-94154692. jpg

Begin by drawing those key shapes onto your paper GENTLY. To draw gently your pencil grip is important. Hold the pencil about 50 cms back from the point and use a very light or soft grip.

Then look at some of the other lines. For the bee you might want to choose the wings and the legs as the next most important lines.

The next step is to round off those shapes – keep looking at your subject (in this case the bee), to make the shapes more like the ones you are looking at.

Pressing on a little harder you can start adding more of the other lines that make up the shape. Add the eye, the bands on the abdomen and some hairy bits.

Adding more information At each step, start again. In this case working from the head through the thorax to the tip of the abdomen. This time add a little more detail and some dark areas. IT IS VERY IMPORTANT TO KEEP LOOKING AT YOUR SUBJECT. This time you can see that the base of the wing needed to be moved forward and the bands on the abdomen altered.

Going through the whole drawing again adding more detail and gradually increasing pencil pressure in the dark areas.

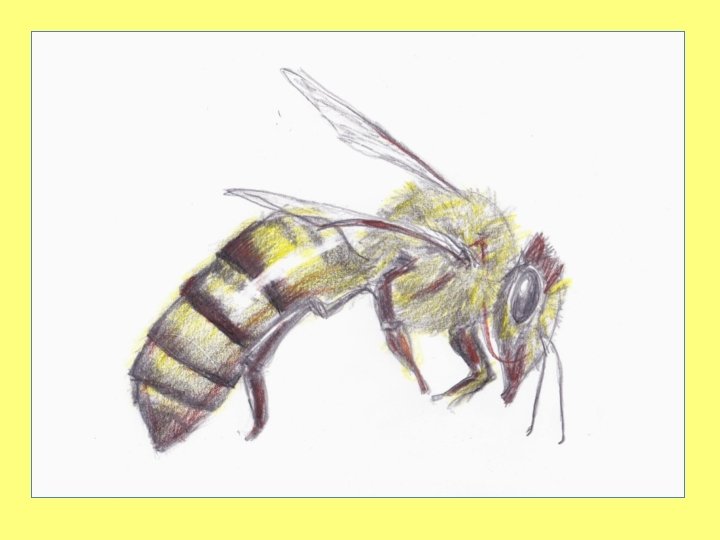
One more time Go over the whole drawing again, fine tuning the detail, making your darks as dark as you can and using a range of tone for the rest. Look for dark colours and shadows.

Using an eraser? At no time in this drawing should you need to do any rubbing out. If you make your first marks gently and follow the technique shown, then you shouldn’t need to because you draw over your mistakes. If you keep stopping to rub out it gets in the way of your drawing. Using your construction lines and an eraser may be mistakes, makes your drawing. However, come to life. useful at this stage for 2 things: 1. You can draw in highlights with it – that means spots or lines of light. 2. You can clean up construction lines and smudges around the drawing. The next picture shows you.

This could be called finished but there is one last touch……. .

Credits Bee photo: https: //image. shutterstock. com/imagephoto/bee-isolated-on-white-600 w-94154692. jpg Drawings and text: Keith Parkinson, Atelier Arts © HMDT Music 2020
- Slides: 15