Blank Disk Analysis ANSYS Workbench Mechanical simulations Vacuum

Blank Disk Analysis ANSYS Workbench Mechanical simulations Vacuum, Surfaces & Coatings Group Technology Department GARGIULO Julien 2

Disk Type 1 Thickness between 1 and 2 mm. Diamond part is 0. 75 mm tall. Vacuum, Surfaces & Coatings Group Technology Department GARGIULO Julien 3
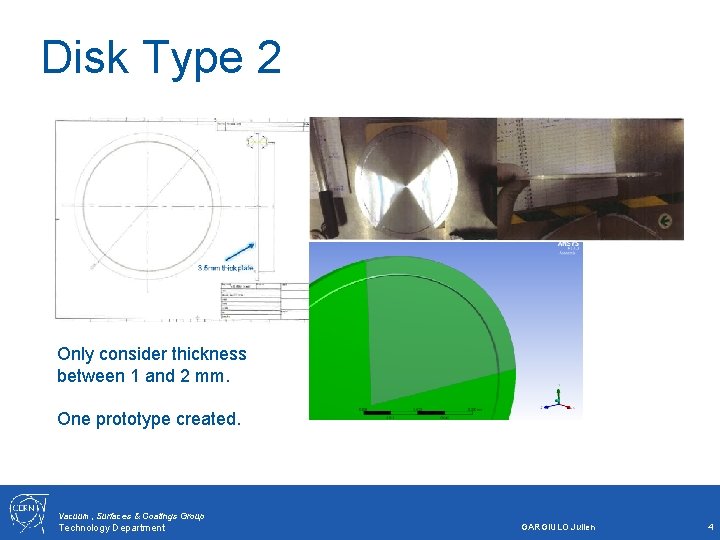
Disk Type 2 Only consider thickness between 1 and 2 mm. One prototype created. Vacuum, Surfaces & Coatings Group Technology Department GARGIULO Julien 4
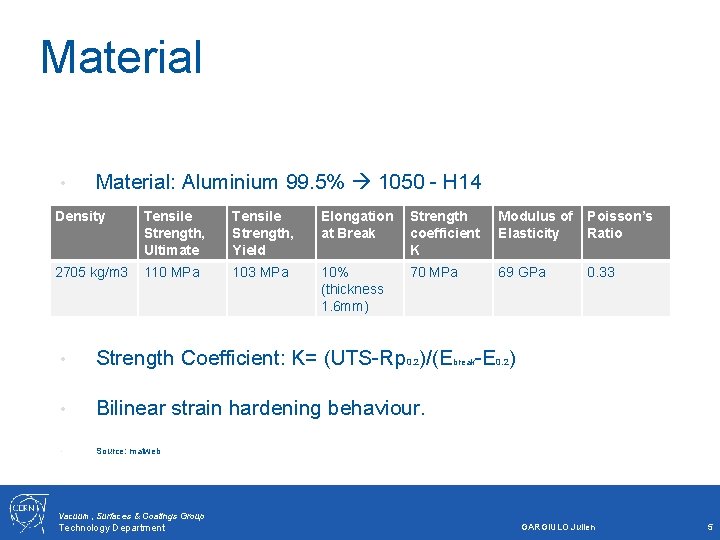
Material • Material: Aluminium 99. 5% 1050 - H 14 Density Tensile Strength, Ultimate Tensile Strength, Yield Elongation at Break Strength coefficient K Modulus of Elasticity Poisson’s Ratio 2705 kg/m 3 110 MPa 103 MPa 10% (thickness 1. 6 mm) 70 MPa 69 GPa 0. 33 • Strength Coefficient: K= (UTS-Rp 0. 2)/(Ebreak-E 0. 2) • Bilinear strain hardening behaviour. • Source: matweb Vacuum, Surfaces & Coatings Group Technology Department GARGIULO Julien 5
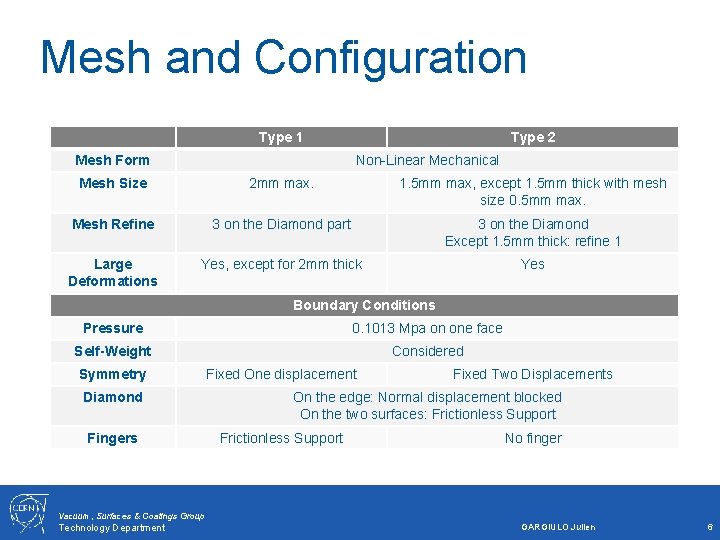
Mesh and Configuration Type 1 Mesh Form Type 2 Non-Linear Mechanical Mesh Size 2 mm max. 1. 5 mm max, except 1. 5 mm thick with mesh size 0. 5 mm max. Mesh Refine 3 on the Diamond part 3 on the Diamond Except 1. 5 mm thick: refine 1 Large Deformations Yes, except for 2 mm thick Yes Boundary Conditions Pressure 0. 1013 Mpa on one face Self-Weight Considered Symmetry Diamond Fingers Fixed One displacement Fixed Two Displacements On the edge: Normal displacement blocked On the two surfaces: Frictionless Support No finger Vacuum, Surfaces & Coatings Group Technology Department GARGIULO Julien 6
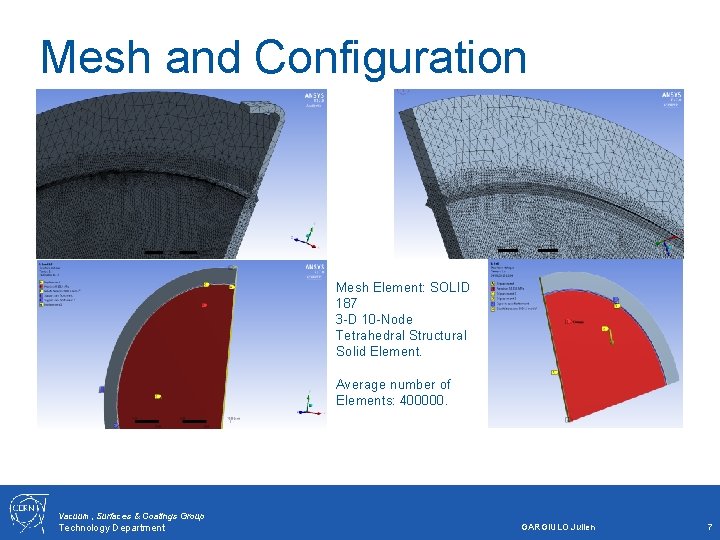
Mesh and Configuration Mesh Element: SOLID 187 3 -D 10 -Node Tetrahedral Structural Solid Element. Average number of Elements: 400000. Vacuum, Surfaces & Coatings Group Technology Department GARGIULO Julien 7
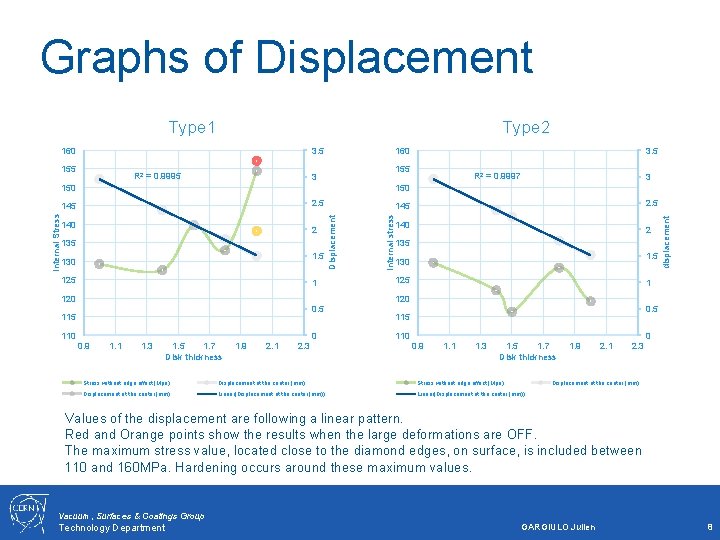
Graphs of Displacement Type 1 Type 2 160 3. 5 155 R 2 = 0. 9995 160 155 3 R 2 = 0. 9997 3 150 2. 5 2 135 1. 5 130 125 1 120 Internal stress 140 2. 5 145 Displacement 145 140 2 135 1. 5 130 125 displacement 150 Internal Stress 3. 5 1 120 0. 5 110 0 0. 9 1. 1 1. 3 1. 5 1. 7 Disk thickness 1. 9 2. 1 2. 3 0. 5 110 0 0. 9 1. 1 1. 3 1. 5 1. 7 Disk thickness Stress without edge effect (Mpa) Displacement at the center (mm) Linear(Displacement at the center (mm)) 1. 9 2. 1 2. 3 Displacement at the center (mm) Values of the displacement are following a linear pattern. Red and Orange points show the results when the large deformations are OFF. The maximum stress value, located close to the diamond edges, on surface, is included between 110 and 160 MPa. Hardening occurs around these maximum values. Vacuum, Surfaces & Coatings Group Technology Department GARGIULO Julien 8
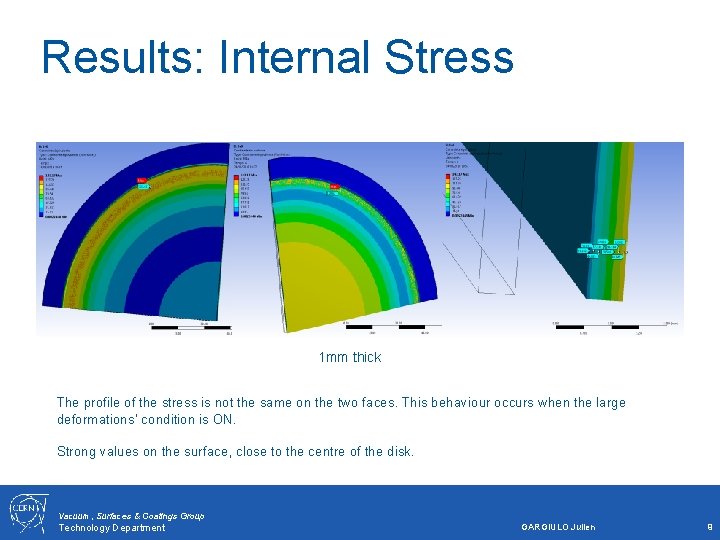
Results: Internal Stress 1 mm thick The profile of the stress is not the same on the two faces. This behaviour occurs when the large deformations’ condition is ON. Strong values on the surface, close to the centre of the disk. Vacuum, Surfaces & Coatings Group Technology Department GARGIULO Julien 9

Elastic and Plastic Strains Elastic and plastic strains 0. 014 0. 012 The elastic strain stays constant with the thickness of the disk. 0. 01 0. 008 The plastic strain goes decreasing when the thickness is increasing. 0. 006 0. 004 Strain 0. 002 0 1 1. 2 1. 4 1. 6 1. 8 2 Disk thickness [mm] Plastic Strain Type 2 Plastic Strain Type 1 Vacuum, Surfaces & Coatings Group Technology Department GARGIULO Julien 10
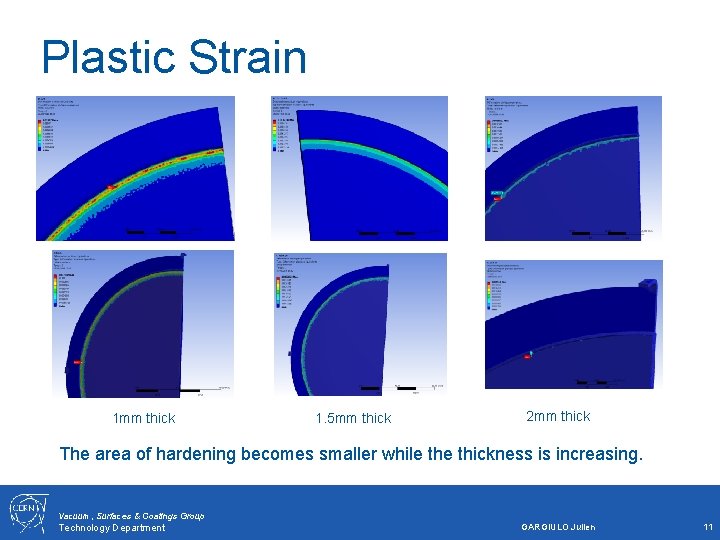
Plastic Strain 1 mm thick 1. 5 mm thick 2 mm thick The area of hardening becomes smaller while thickness is increasing. Vacuum, Surfaces & Coatings Group Technology Department GARGIULO Julien 11
Conclusions • Displacement: From 3 mm to 1. 5 mm at the centre for a disk thickness of 1 mm to 2 mm. • Plastic Strain: Strong for the 1 mm to 1. 4 mm thick: 2 to 6 times higher than elastic strain. Becomes negligible when thickness reaches 2 mm. Vacuum, Surfaces & Coatings Group Technology Department GARGIULO Julien 12

Thank you for your attention Vacuum, Surfaces & Coatings Group Technology Department GARGIULO Julien 13

- Slides: 14